Automated rules are used to optimize your Facebook ads based on selected metrics. Based on automated rules, Meta Ads monitors your ads and automatically performs specific actions, such as starting and stopping ads during a certain period or changing the campaign budget when certain metrics are reached.
In this article, I will show you how to set up automated rules in Meta Ads and discuss examples of their use.
Why use automated rules?
- Save time. It takes a lot of time to launch and optimize a large number of ad campaigns. Automated rules help speed up the process.
- Reduce costs. By quickly stopping ads when they become unprofitable, automated rules will save your advertising budget.
- Efficient scaling. Automated rules can also be used to increase the ad budget, for example, by allocating more ad dollars to the most effective ads.
What are the features of automated rules?
The main features are the ability to manage multiple active ads simultaneously, automated monitoring, and further actions with assets in Ads Manager.
Each automated rule consists of three parts:
- A condition that triggers the rule.
- An action to be performed when the rule is launched.
- An asset or an element (campaign, ad set) on which the action is performed.
There are several possible actions you can set, for example:
- Stop a poorly performing ad if it fails to reach a certain metric.
- Increase the budget when a certain number of people click on the ad.
- Increase the bid if the total daily cost is below a certain amount.
- Increase the budget based on return on advertising spend (ROAS).
- Disable the campaign for the weekend.
How to create an automated rule in Meta Ads
In this section, I will discuss the process of creating rules and setting conditions for them.
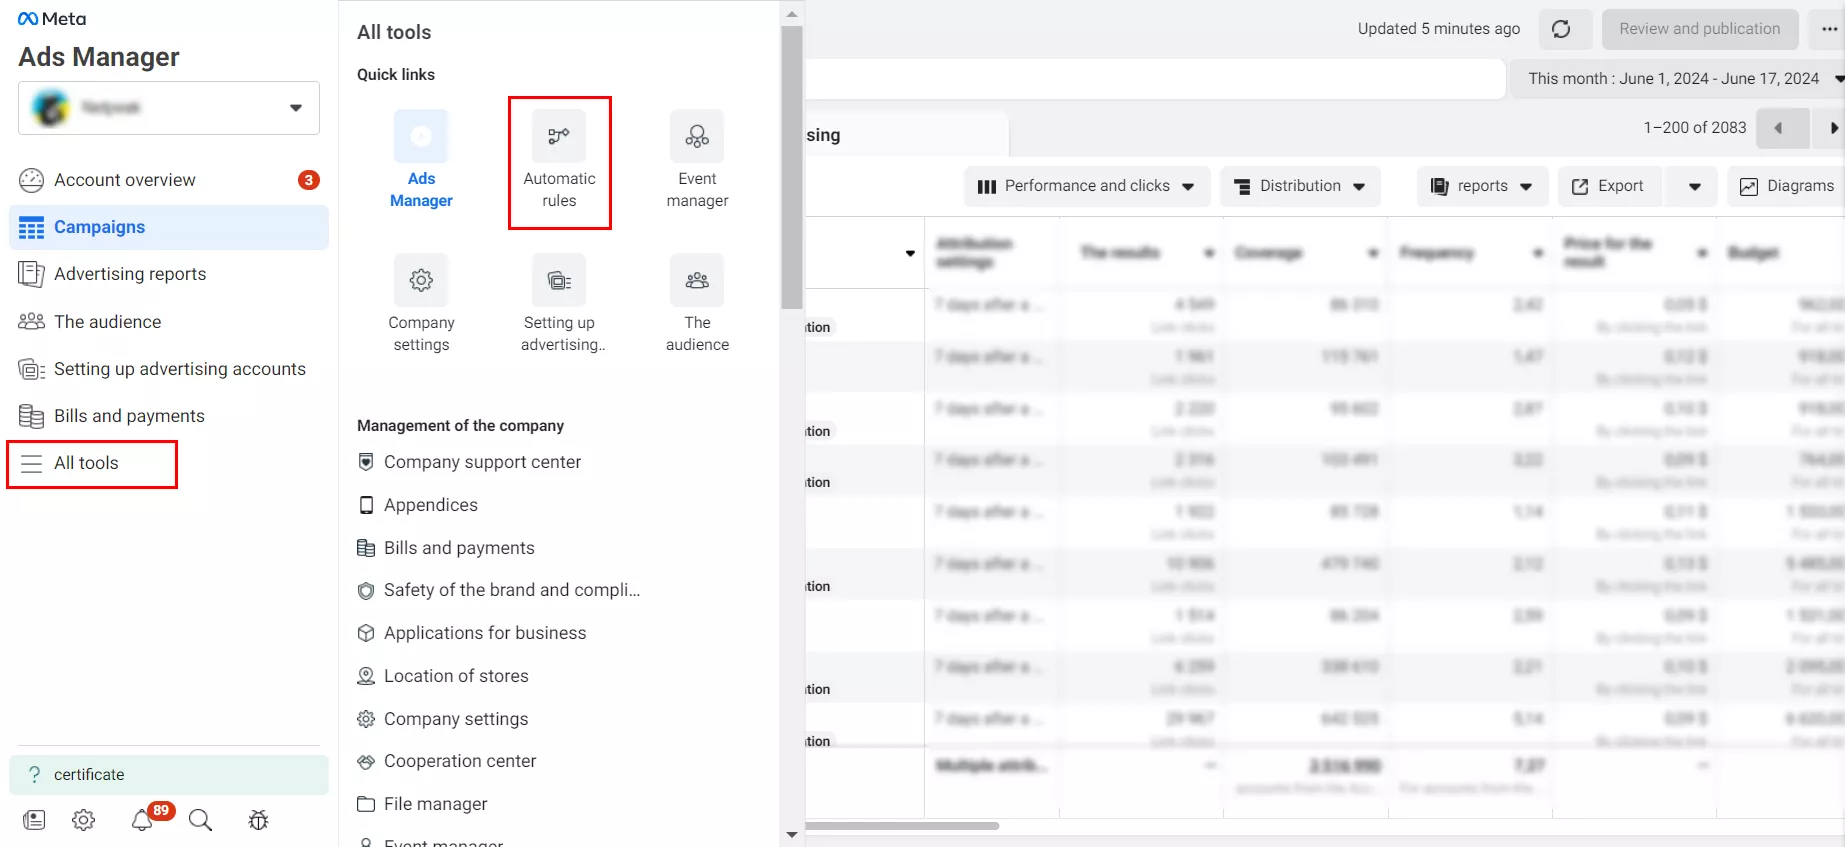
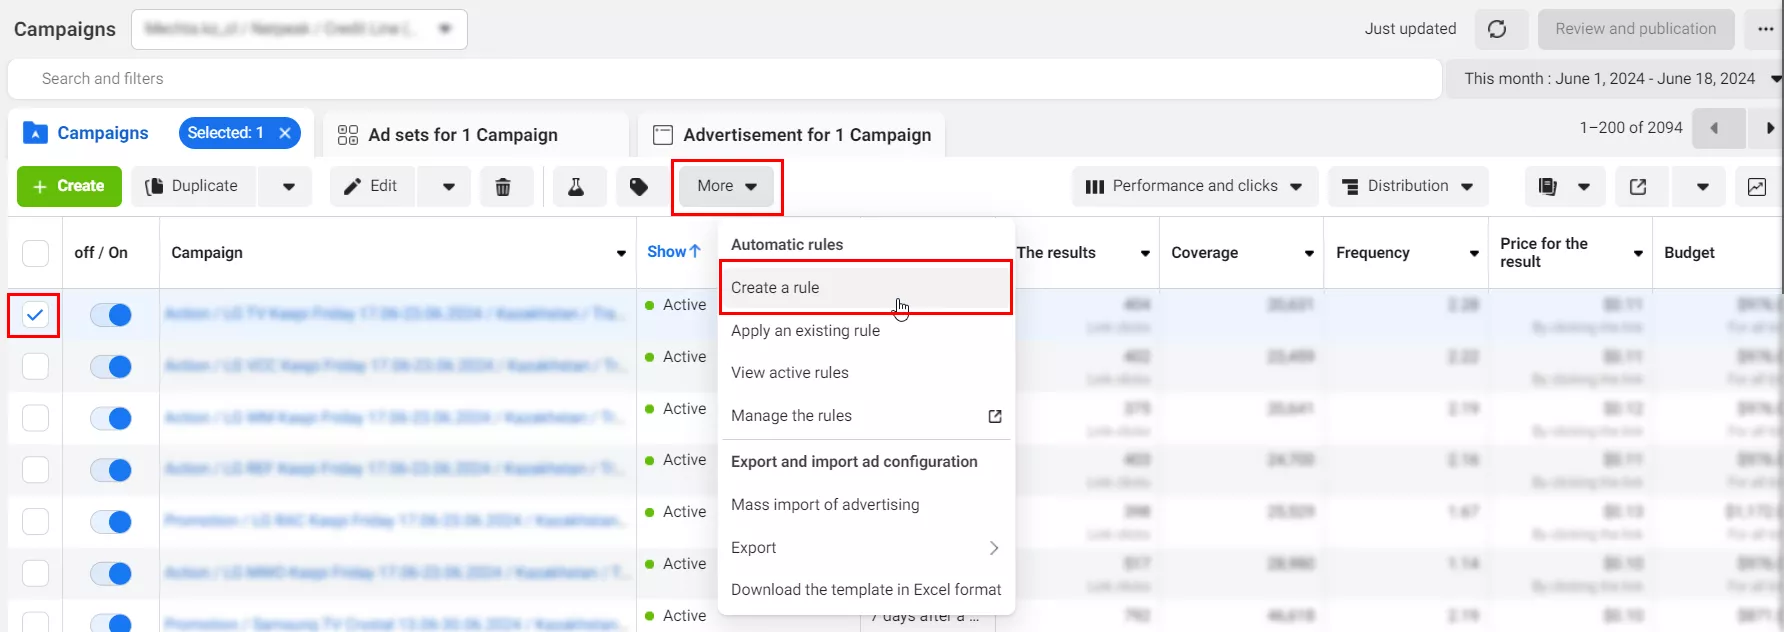
To create a rule, go to Facebook Ads Manager > All tools > Automatic rules.
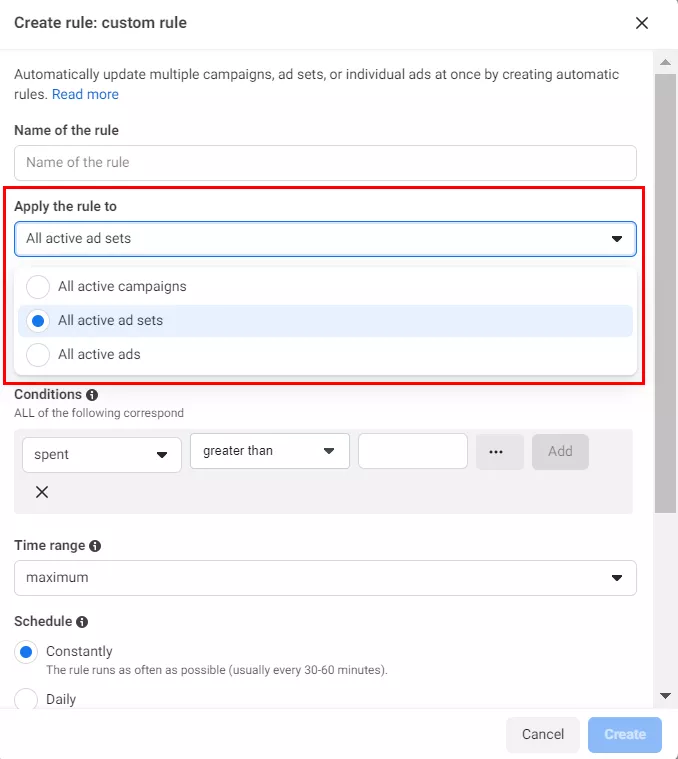
Next, select the asset to which you want to apply the rule. This can be All active campaigns, All active ad sets, or All active ads.
After defining the asset, select the action you want the rule to perform.
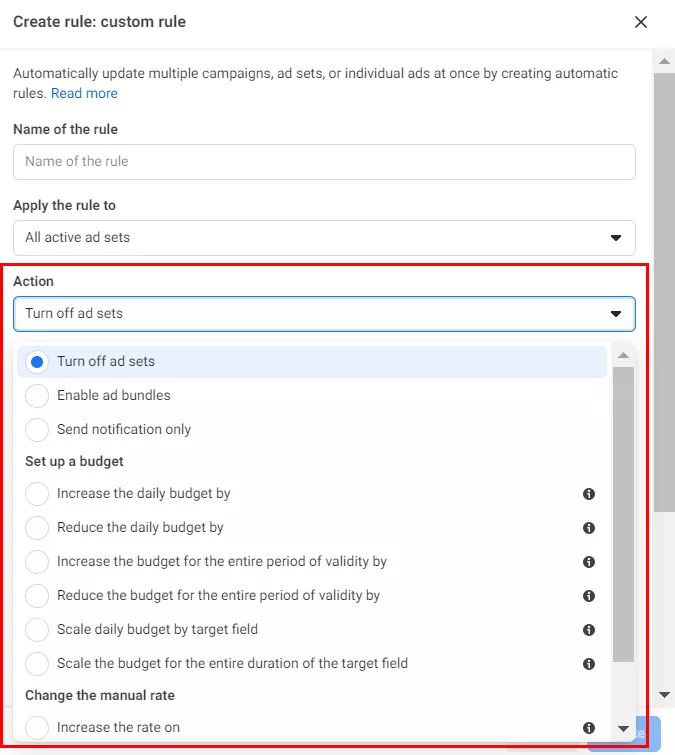
There are 11 actions to choose from, including three for campaigns and 8 for ad sets.
Actions for campaigns:
- Turn off ad sets
- Enable ad bundles
- Send notification only: send a notification to you or other users in the ad account when the rule changes the ad.
Actions for a set of ads:
- Increase the daily budget by
- Reduce the daily budget by
- Increase the budget for the entire period of validity by
- Reduce the budget for the entire period of validity by
- Increase the rate by
- Reduce the rate by
- Scale rate by target field - by a specific metric or indicator
- Scale daily budget by target field
The main idea behind budget scaling by goal field is that the campaign budget changes based on how effectively your goals are achieved. If the goal is to get conversions at a cost below $5, you can set a rule that increases the daily budget by 10% if the average cost per conversion falls below this threshold.
The next step is to define the rule’s conditions — specific indicators that will automatically trigger an action in the campaign when they are met or exceeded. You can use one or more conditions.

Let’s say you want to know when someone clicks on your ad and makes a purchase on your site for $5 to $10. When you create the rule, select the condition “Cost per Checkout Initiated”.
Note that if you set multiple conditions for a rule, the campaign, ad set, or ad must meet all of them to activate the rule. If you want the action to occur when just one of the conditions is met, you’ll need to create a separate rule for each condition.
Possible conditions include:
- Cost per Result or number of results
- Cost per Link Click (or number of clicks)
- Cost per App Install
- CPM (Cost per 1,000 Impressions)
There are also terms that require the installation of a Facebook Pixel on a website — a piece of code that tracks user actions after interacting with Facebook ads. These terms include:
- Cost per Add to Cart
- Cost per Checkout Initiated
- Cost per Purchase
- Cost per Lead
- Cost per Registration Completed
- Cost per Add of Payment Info
For a complete list of conditions, see the Meta Ads Help Center.
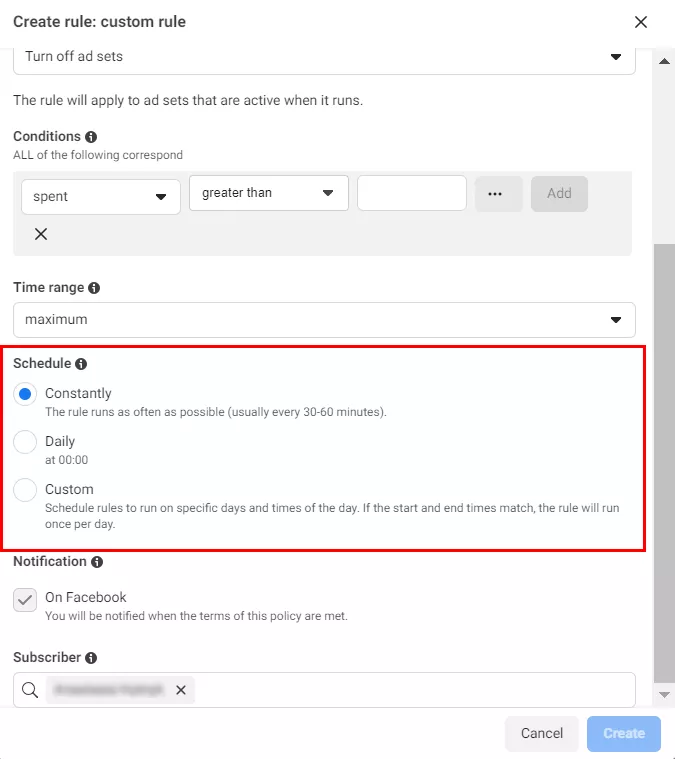
The final step before creating a rule is to select a schedule for execution. There are three main options: continuous, daily, and custom.
Finally, enter the name of the person to be notified when the rule conditions are met and click Create.
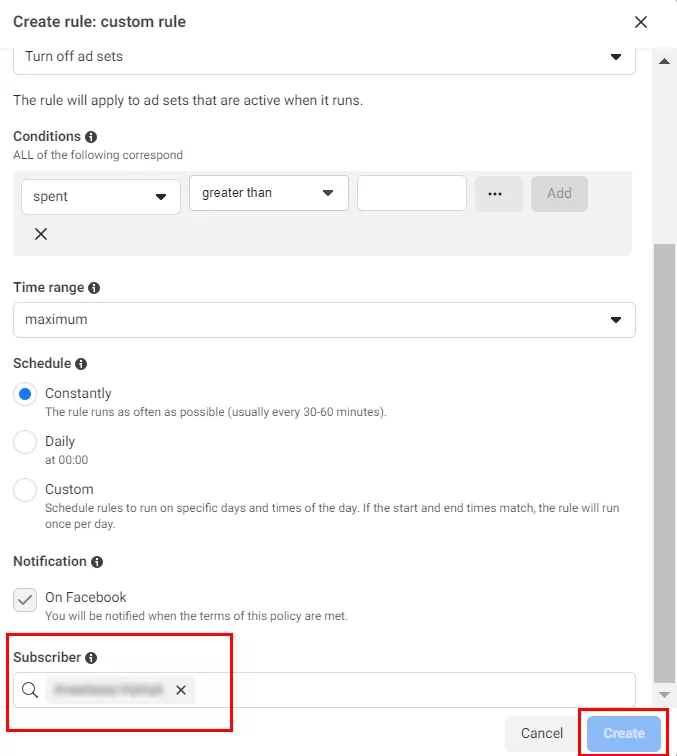
Congratulations! You have created your first automated rule.
Automated rule limitations
- There is a limit of 250 rules per advertiser account. All rules count, even inactive ones.
- A rule will only be associated with assets at the same level. For example, you can apply a rule to either three campaigns or three ad sets, but you cannot apply the same rule to both three campaigns and three ad sets. Instead, you must create one for campaigns and another for ad sets.
- Automatic rules cannot be applied to ads related to social issues, elections, or politics. To ensure election integrity, these types of ads must be created and edited by real people who have passed Facebook’s identity verification process.
Examples of how to use automated rules
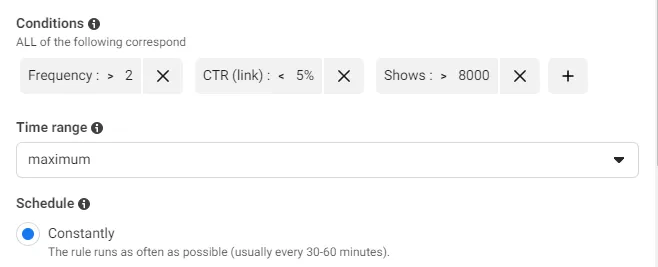
Stop ineffective ads
This rule can help you control your ad spend by tracking ads with a high frequency of ad impressions per user and a low number of clicks. This setting stops all ad sets that are served more than twice per unique user and have a CTR of less than 5%.
In this example, I also set a minimum of 8,000 impressions over time as an additional condition to consider deviations.
Next, set up the action. There are two options here: automatically pause the ad or Send notification only. If you choose the latter, you can manually pause or make changes to the ad when you get the notification.
Schedule ads
This is used to run ads during a specific time period, such as on sushi day. One automated rule will start showing ads at the beginning of the day, and another will end the ad at a certain time.
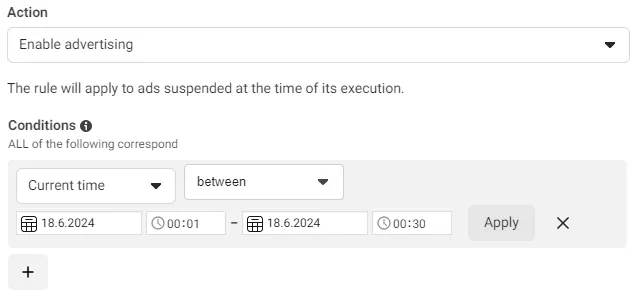
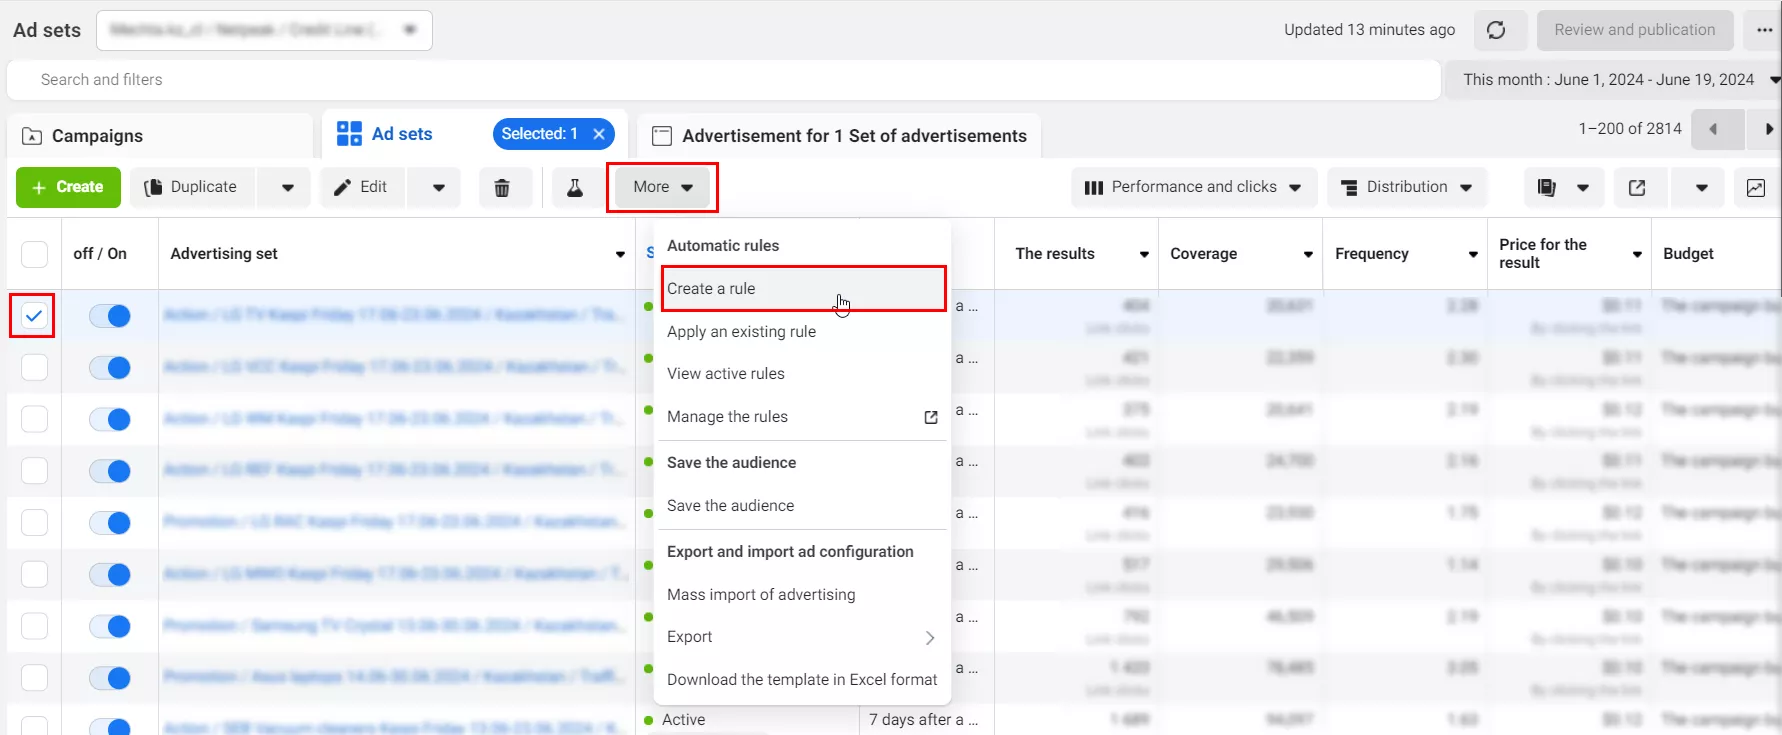
To create such a rule, go to Ads Manager > Ads > Automatic rules > Create a rule.

Select Enable advertising as the Action. In the Conditions section, select Current time between and then set June 18 between 00:01 and 00:30. This will ensure that ads are displayed during this time period.
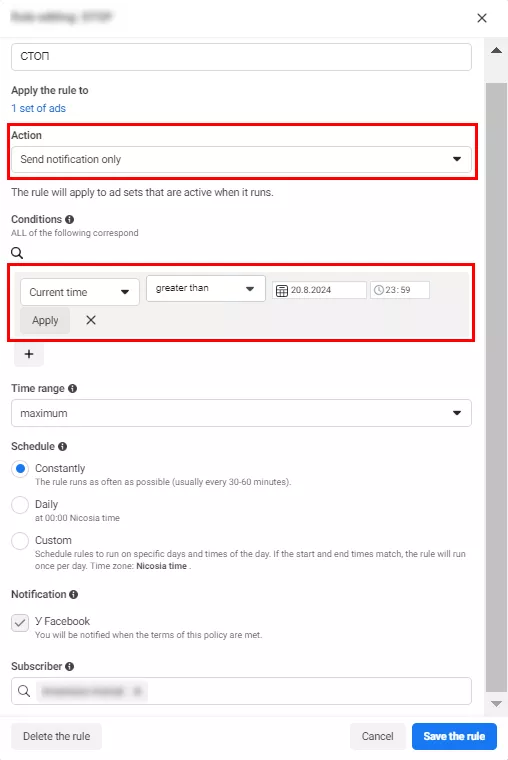
Next, go back to Ads Manager - Ads - Automatic rules - Create a rule.
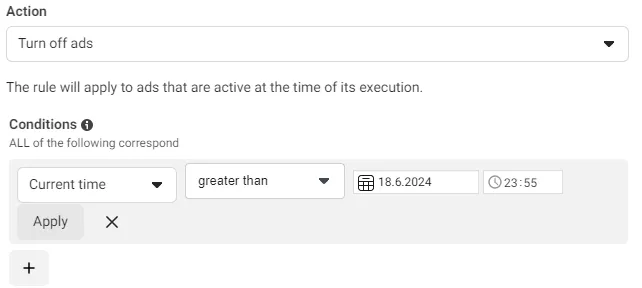
Select Turn off ads as the Action, and then set Conditions to Current time greater than June 18, 23:59. This will stop your ads from showing when the offer ends.
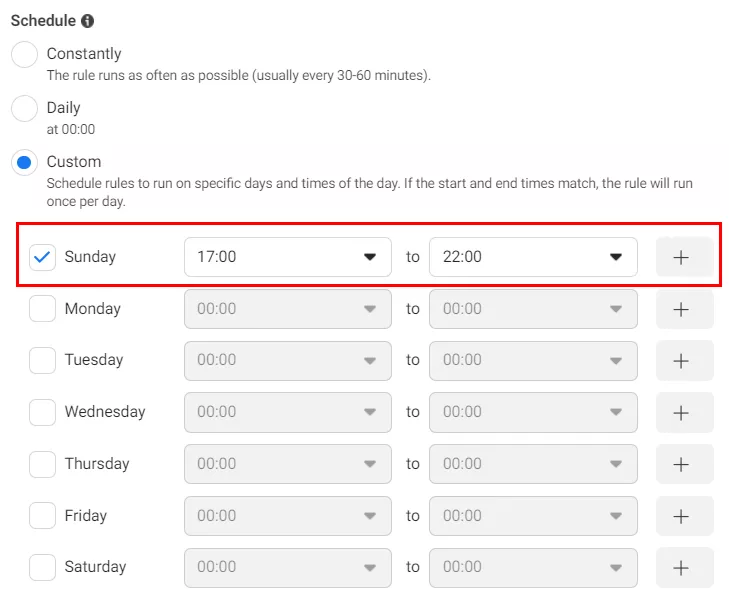
Adjust your budget based on the time of day
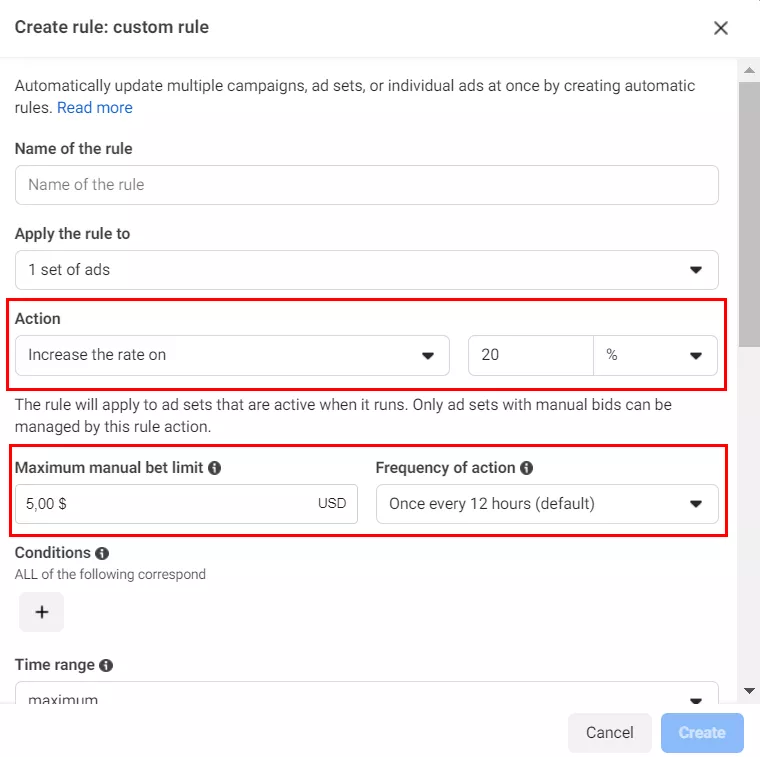
If your ads are more effective at a certain time of day, you can use automatic rules to increase your bid during that time. For example, if you know that a certain ad is most effective in the evening hours, you can create a rule to increase your bid by 20% every evening between 5:00 pm and 9:00 pm.
To do this, go to Ads Manager - Ads Manager - Ads - Automatic rules - Create a rule.
Select Adjust the rate manually > Increase the rate on as the action and enter the amount by which you want to increase the rate, which is 20%.
Next, in the Schedule section, select Custom and enter the time from 17:00 to 22:00.
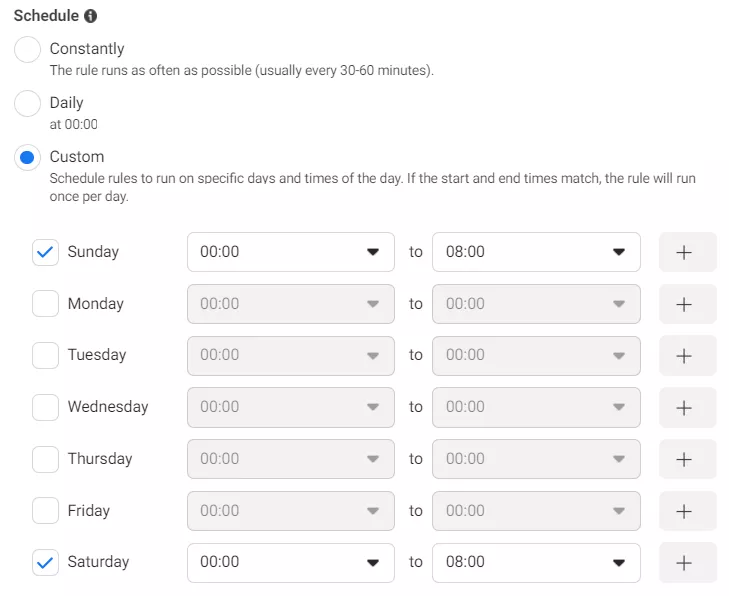
Set a budget based on the day of the week
If you know that your ad campaign performs worse on weekends, you can create an automatic rule to reduce your ad budget on those days.
To do this, go to Ads Manager > Ads Manager > Ads > Automatic rules > Create a rule and select Set budget > Reduce the daily budget by.

Next, set the percentage of budget reduction.

In the Schedule section, make sure Custom is selected and select Saturday and Sunday to apply the rule on those days.
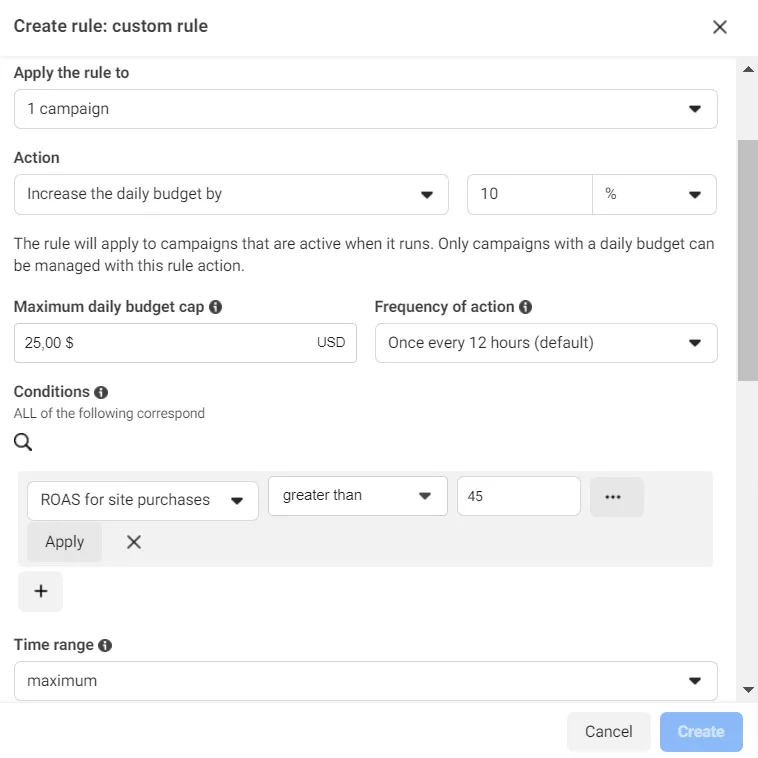
Increase budget based on ROAS
If a campaign delivers a higher ROAS than expected, you can set up a rule to automatically increase your budget.
To do this, go to Ads Manager - Automatic rules - Create a rule and select Set budget - Increase the daily budget by. Enter the amount in currency or percentage by which you would like to increase your daily budget. Next, select ROAS for site purchases and enter the desired amount.
Conclusions
- Automated rules are used in Meta Ads to monitor campaigns, ad groups, and individual ads and take pre-defined action when targeted metrics are reached.
- To create a rule, go to the Automatic Rules tab in the Facebook Ads Manager.
- Rules can be used to perform various actions, such as turning off ads, increasing or decreasing budgets, adjusting manual bids, or simply sending you a notification when a particular metric reaches a specified value.
- The conditions for rules include a change in cost per click or other targeted action, a certain frequency of impressions, and a certain budget limit.
- Using automated rules helps you reduce optimization time, lower ad costs, and scale your ads in a timely manner.

 1
1
 1
1
 0
0
Related Articles
Display Advertising Effectiveness Analysis: A Comprehensive Approach to Measuring Its Impact
In this article, I will explain why you shouldn’t underestimate display advertising and how to analyze its impact using Google Analytics 4
Generative Engine Optimization: What Businesses Get From Ranking in SearchGPT
Companies that master SearchGPT SEO and generative engine optimization will capture high-intent traffic from users seeking direct, authoritative answers
From Generic to Iconic: 100 Statistics on Amazon Marketing for Fashion Brands
While traditional fashion retailers were still figuring out e-commerce, one company quietly revolutionized how U.S. consumers shop for everything from workout gear to wedding dresses