Date X is getting closer – on July 1, 2023, Universal Analytics (UA) will stop processing new requests. In order to collect enough data by this date and ensure that the UA shutdown does not affect your work, you need to set up Google Analytics 4 (GA4). In this article, I will explain how to do this effortlessly with Google Tag Manager (GTM).
Please note that the UA tag should be kept active to save historical data. At the same time, set up GA4, which will start recording data once it is initiated.
Why GTM is better than GTAG
Google Tag Manager is a tag management system (TMS) that lets you update measurement codes and related code fragments, called tags, on your website or mobile app quickly and easily. Once the small segment of Tag Manager code is added to your project, you can conveniently deploy analytics and measurement tag configurations from a web-based user interface.
Previously, all tags had to be placed manually on the site's pages. This clogged up the code in general and sometimes even slowed down page load. A JavaScript framework can now be used to add Google tags directly to web pages. This framework is known as gtag.js.
Since Google Analytics and Google Ads are the only platforms that use GTAG, after installation, it will only be able to download tracking codes from these platforms. Whereas GTM supports a wide variety of tools, not only Google ones: Meta Pixel, Microsoft Ads, Hotjar, etc. You can add codes using tag templates; if you don't have a corresponding template, you can use custom HTML tags.
GTM has several advantages compared to GTAG:
- Easily installed
- Time-saving (no need to hire a programmer)
- Works with different tools, not only Google ones
- Better page loading speeds
Step-by-step Configuration Guide for GA4
Creating a GA4 property
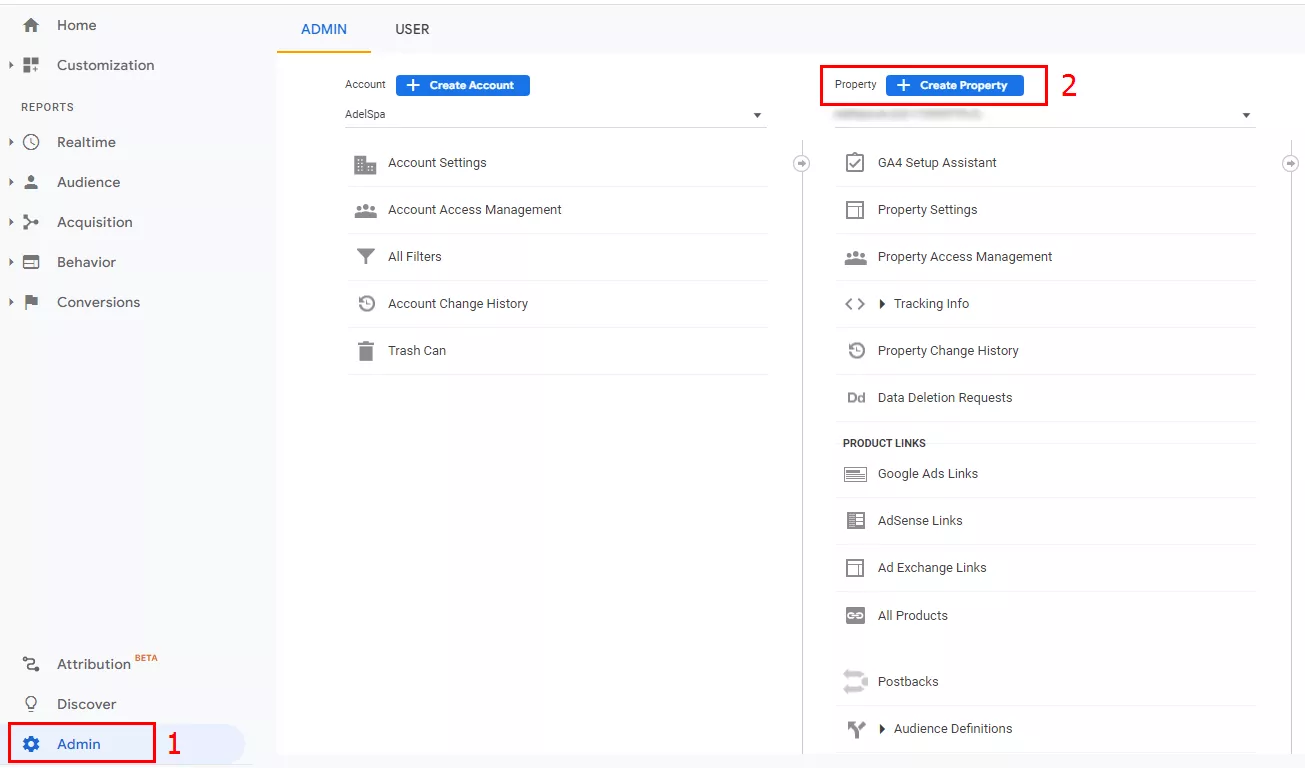
Log in to your Google Analytics account, go to Admin, and click Create Property.
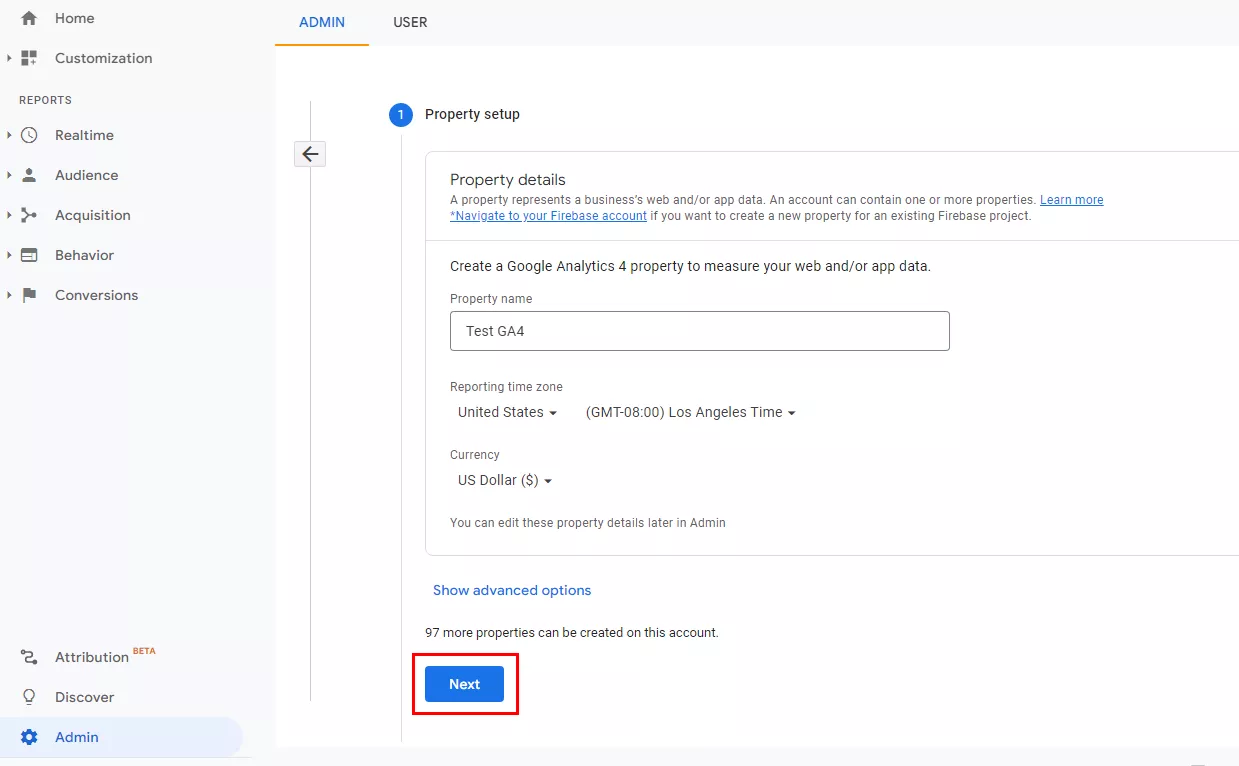
Enter a name for the property, and select the reporting time zone and currency. Click Next.
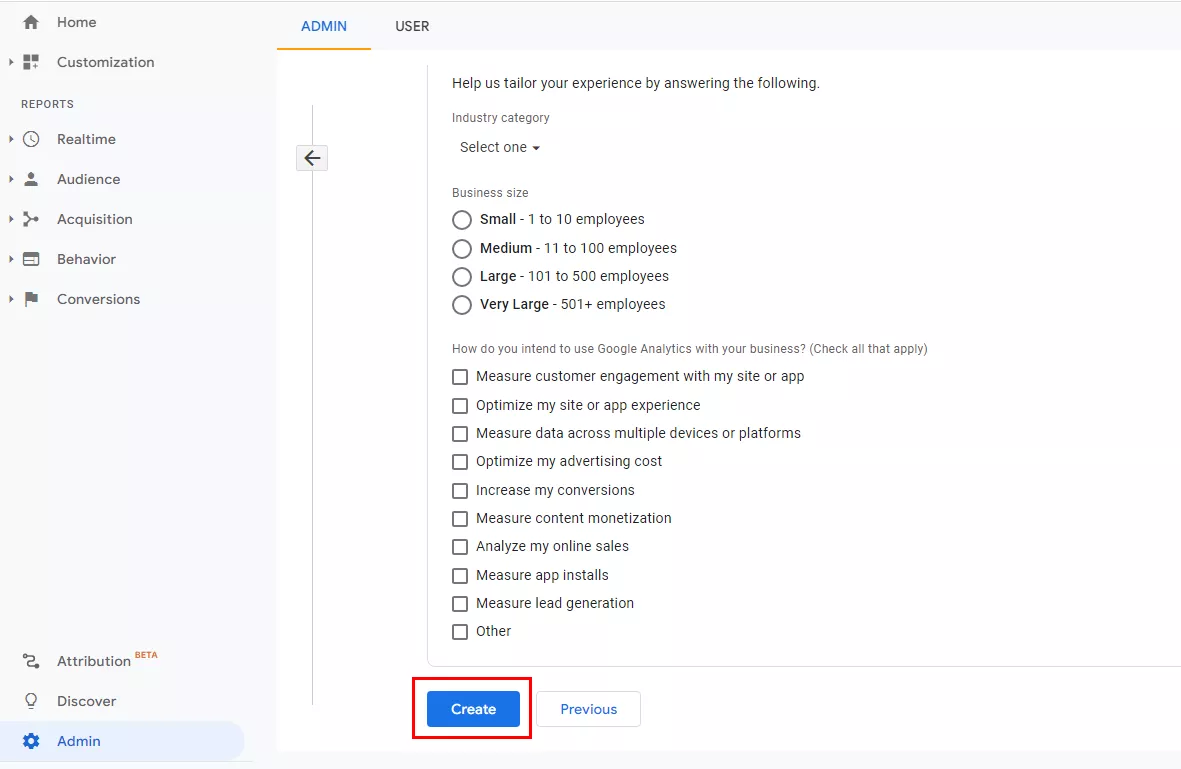
You can skip adding additional information about your company and simply click Create. This does not affect the account settings.
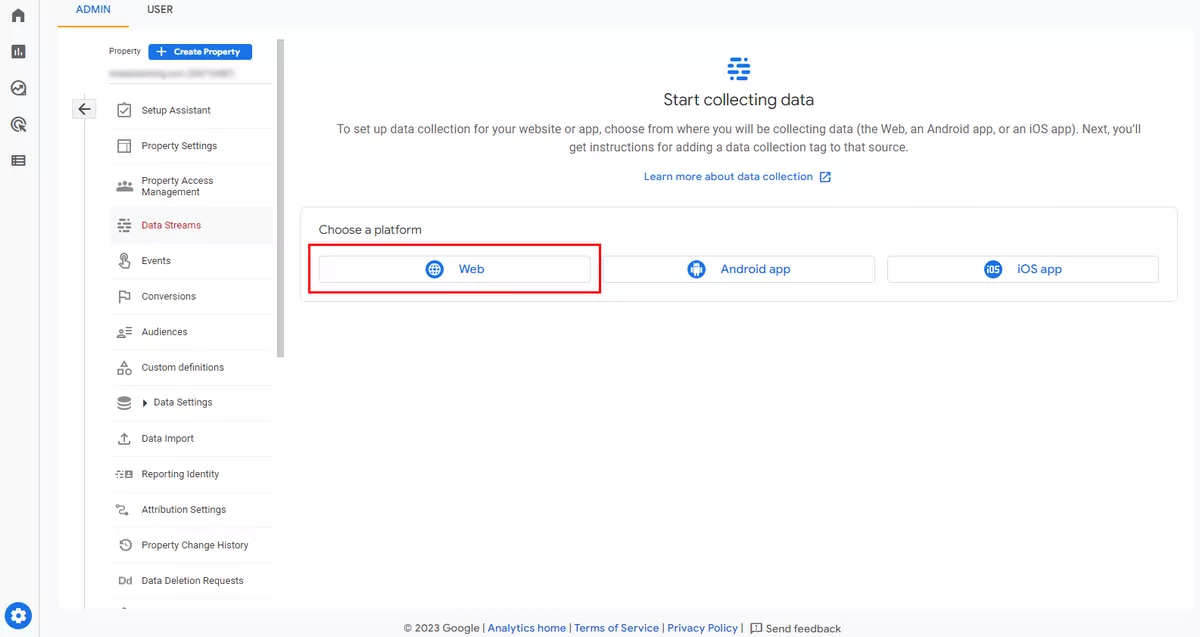
Setting up the data stream
The next step is to create a data stream that will send events from the website or application to the new GA4 property. In this example, Web (for website) is selected. If needed, you can later create additional streams for Android or iOS apps to receive data from the apps.
Enter the website URL and stream name. Be sure to enable enhanced settings. This ensures that all important interactions taking place on your website will be tracked in the appropriate analytics property. Click Create stream.

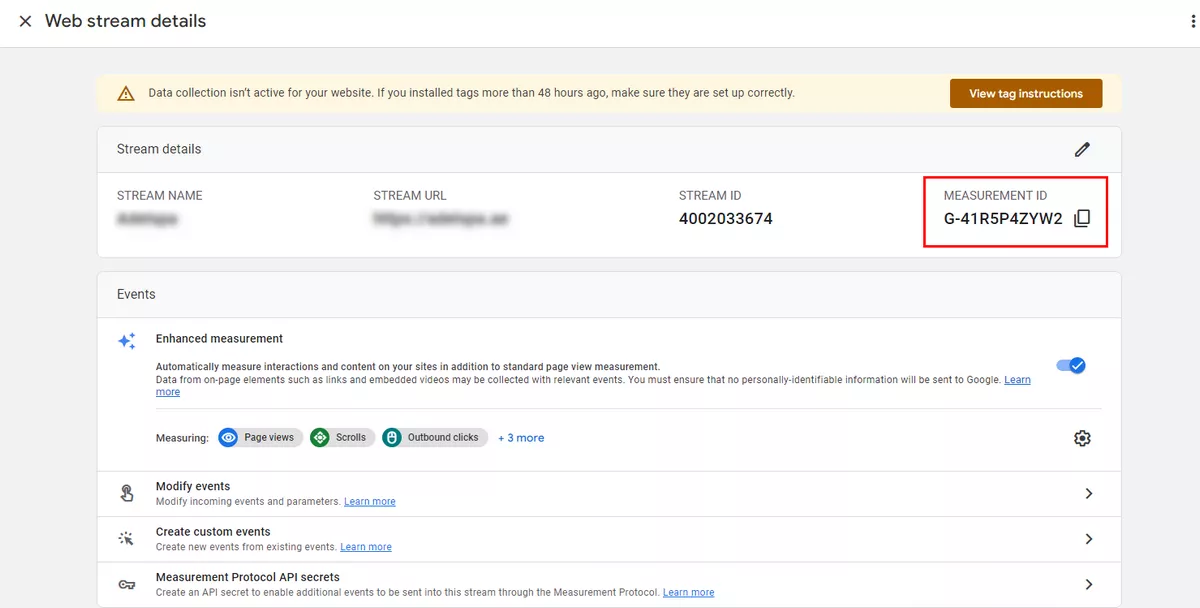
Measurement ID
After that, you will see the measurement ID. Copy this ID, and you will later paste it into a tag in Google Tag Manager. This is explained in more detail below.
Creating Google Analytics 4 tags in Google Tag Manager
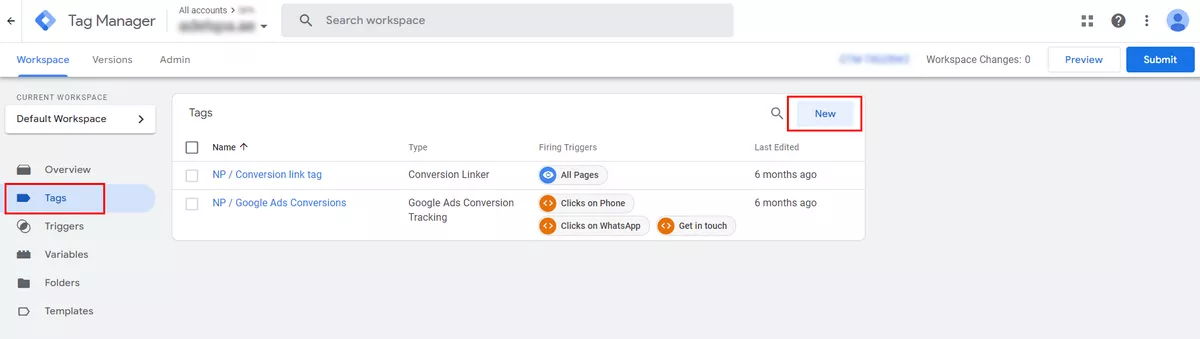
In your Google Tag Manager account, click Tags → New.
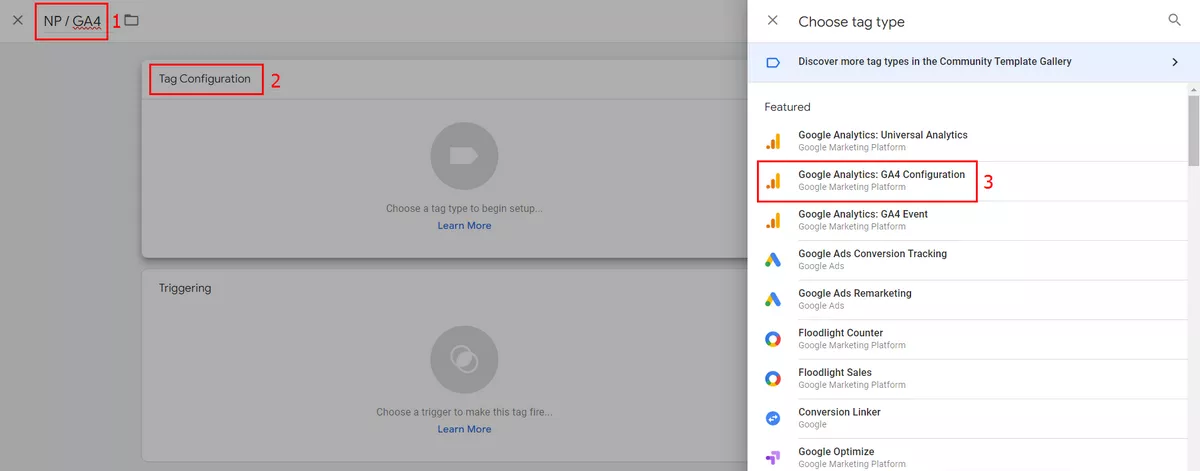
Enter a name for the tag at the top, and select Google Analytics: GA4 Configuration in the Tag Configuration box.
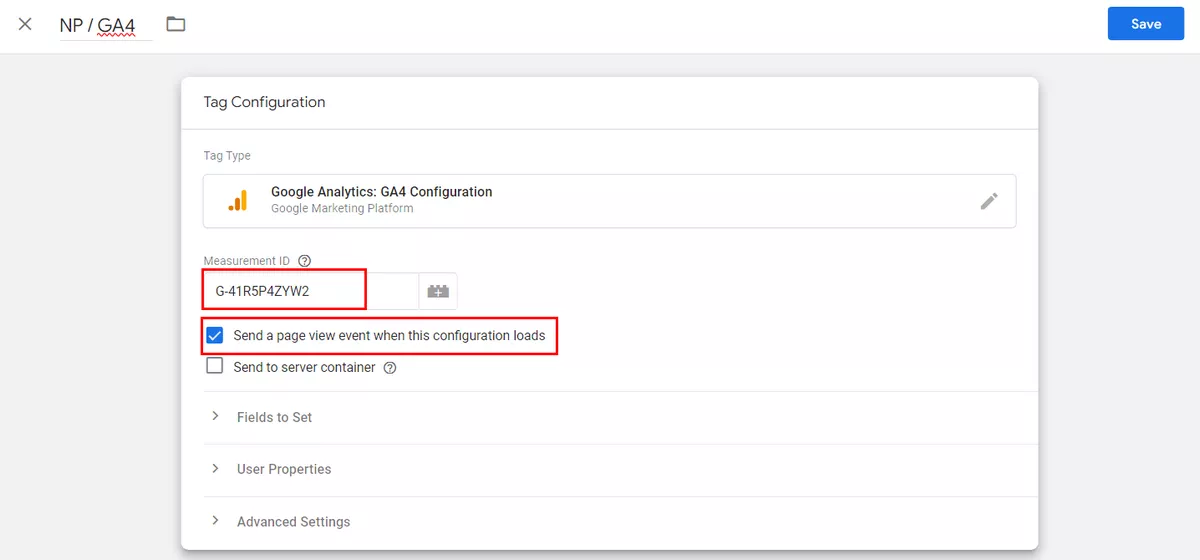
Remember the Measurement ID that you copied earlier when you first set up the data stream? Paste this ID into the appropriate field. Also, make sure that the checkbox next to Send a page view event when this configuration loads is checked so that you can automatically track views for each page of the site.
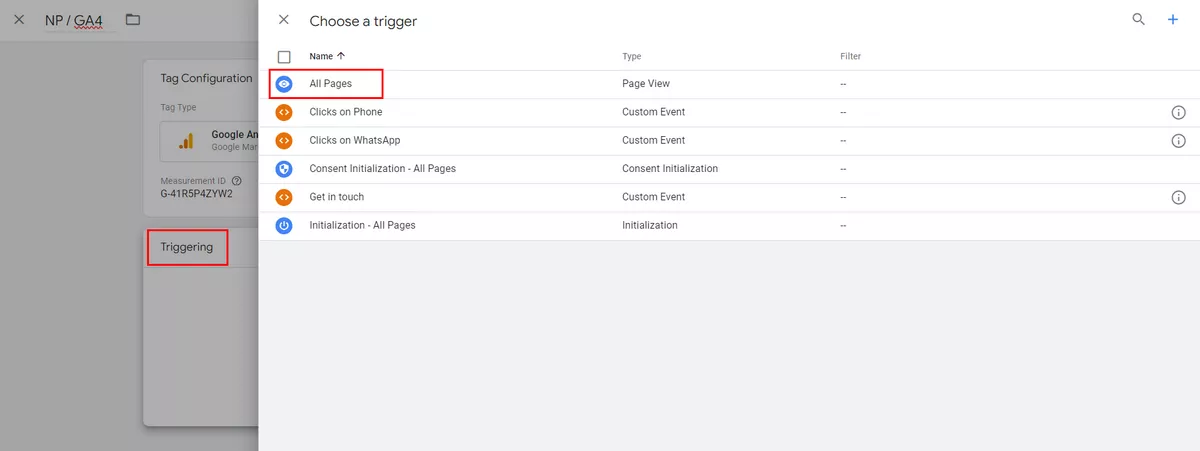
Then, click Triggering and use the Initialization – All Pages trigger. Save the tag configuration.
Google Tag Manager preview mode
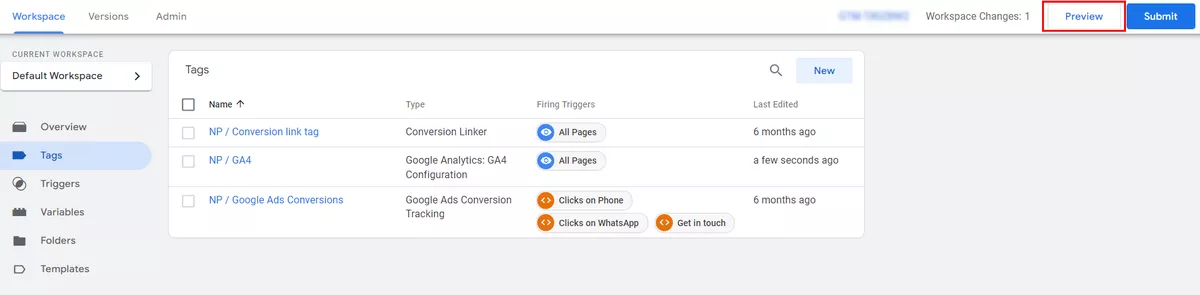
Use GTM preview mode to check whether your new tag functions as expected. Click Preview in the upper right corner to test your changes.
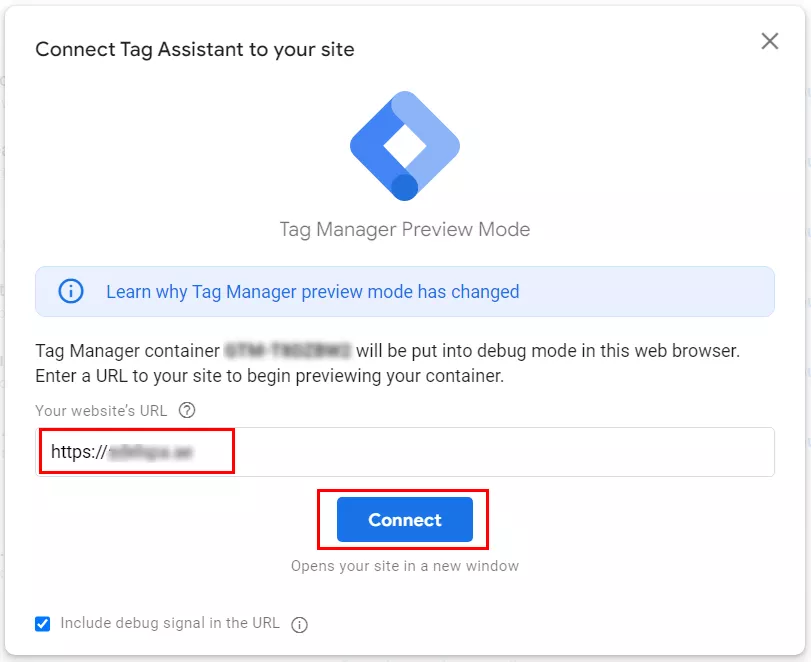
Enter the URL of your website and click Connect. The website will open in another tab.
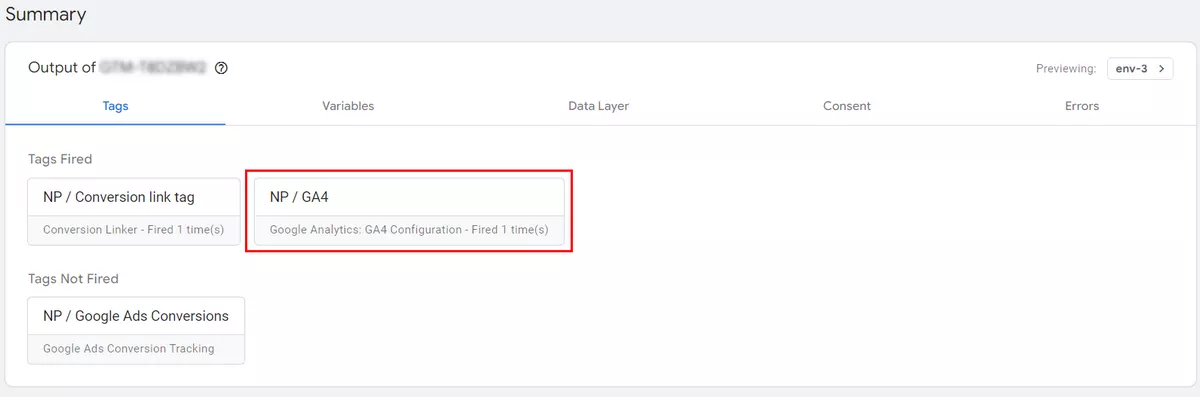
Your new tag should now be activated.
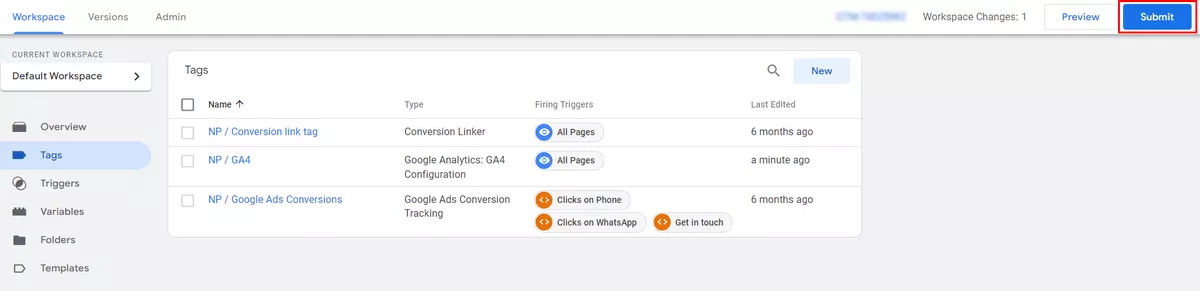
Once you are satisfied, you can exit the preview mode and publish all your changes. To do so, click Submit in the upper right corner.
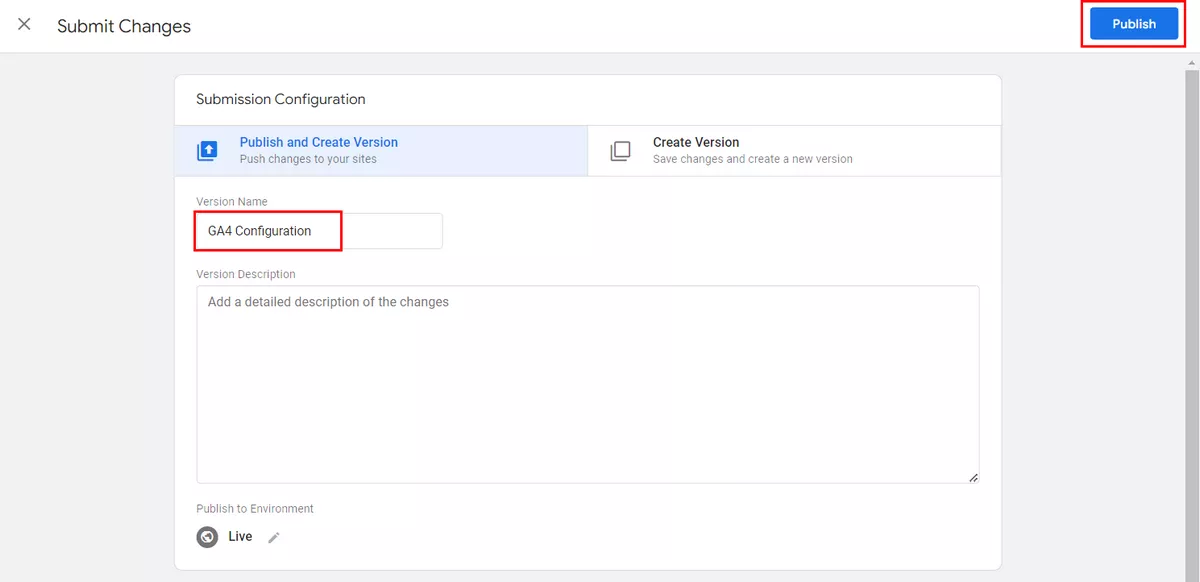
When the Submit Changes window appears, you can fill in the Version Name and Version Description fields. This is optional, but if you want, you can describe the exact changes you made. Finally, click Publish.
GA4 property check
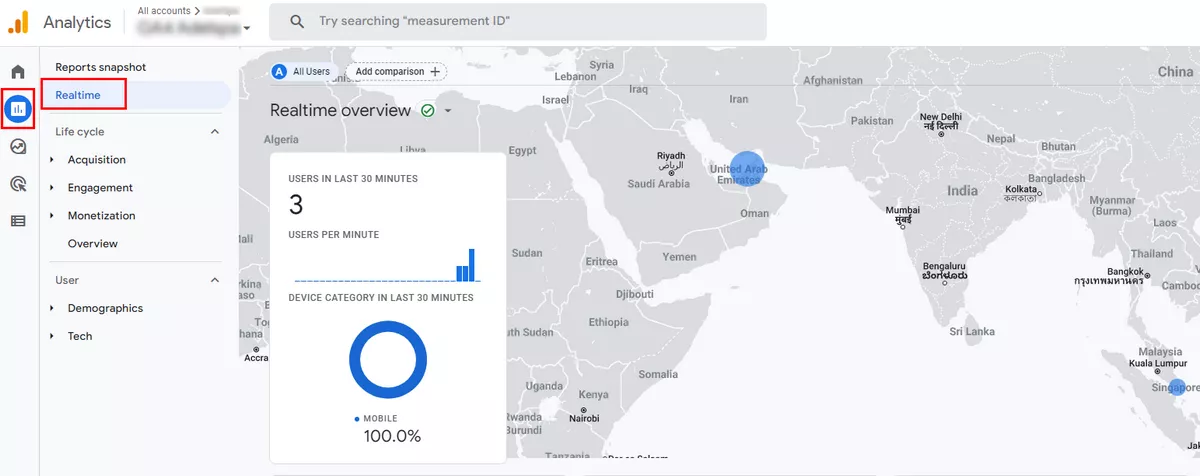
After you publish the changes in GTM, go to your new GA4 property and start the Realtime report to view live traffic data. If you can see the traffic data, everything is set up properly. Sometimes it takes 5-10 minutes after publishing for the traffic to start appearing.
Read also
Advice and final thoughts
You have now configured GA4 with Google Tag Manager. What are the next crucial steps?
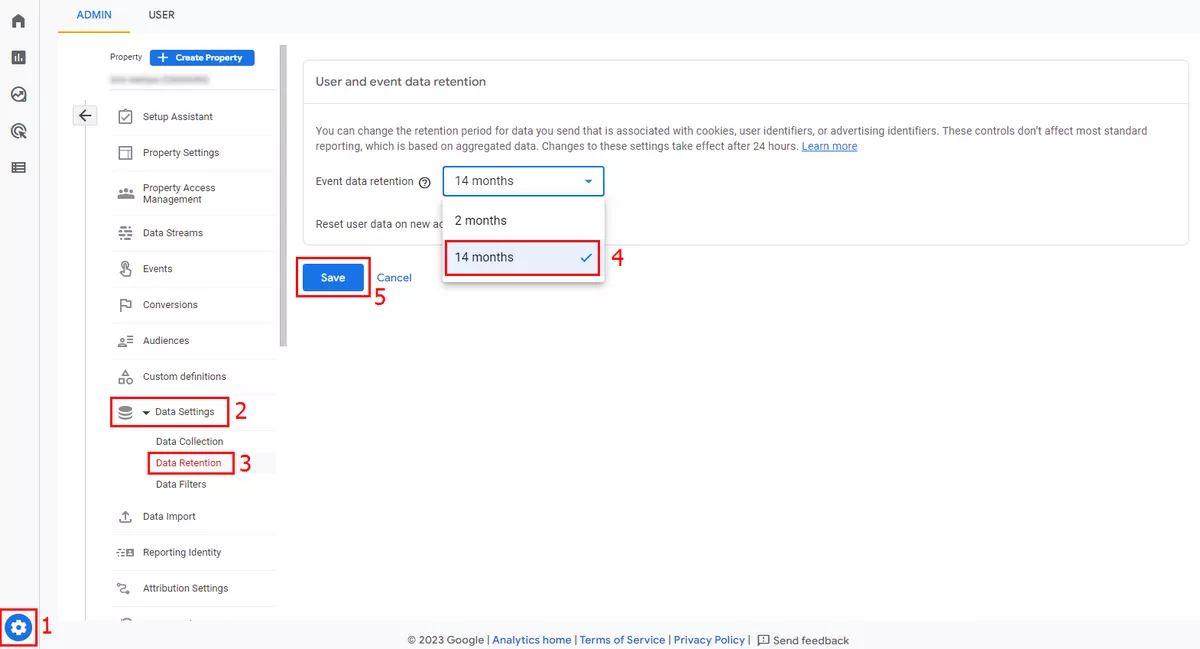
1. Update the data retention period to 14 months.
The default data retention period for GA4 is two months, which means that all data older than two months will be deleted. Update this setting to the longest possible period of 14 months: Admin → Data Settings in the Property menu → Data Retention → select “14 mos.” → Save.
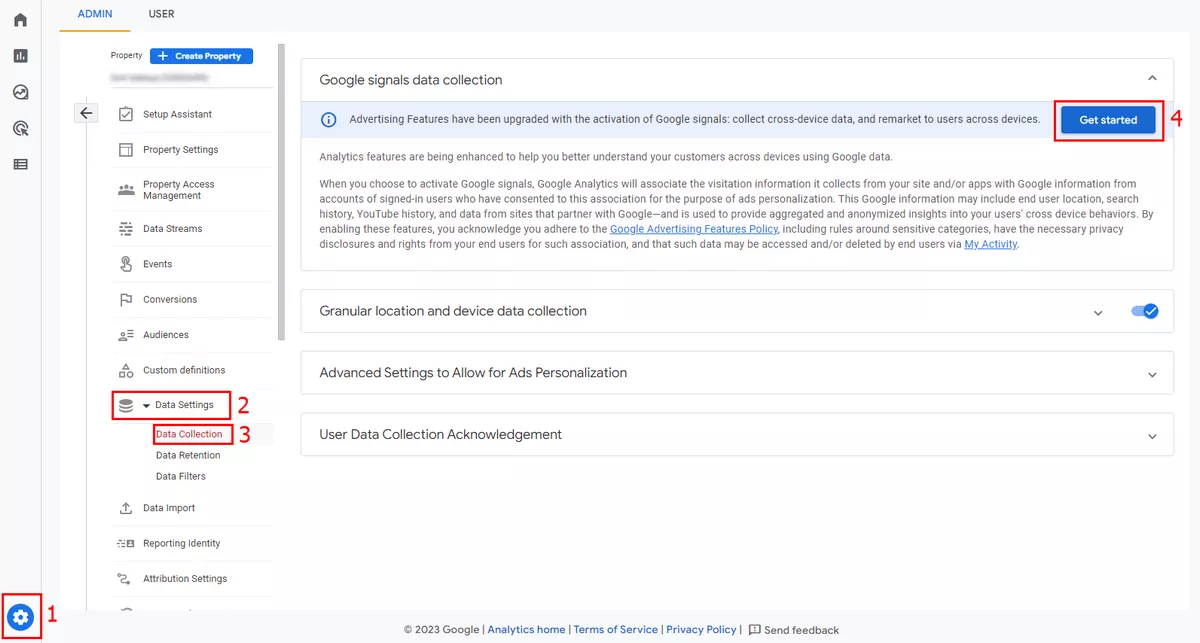
2. Enable data collection by Google Signals.
This step will allow you to better analyze the behavior of your customers on different devices based on Google data.
How to enable: Admin → Data Settings in the Property menu → Data Collection → Get started.
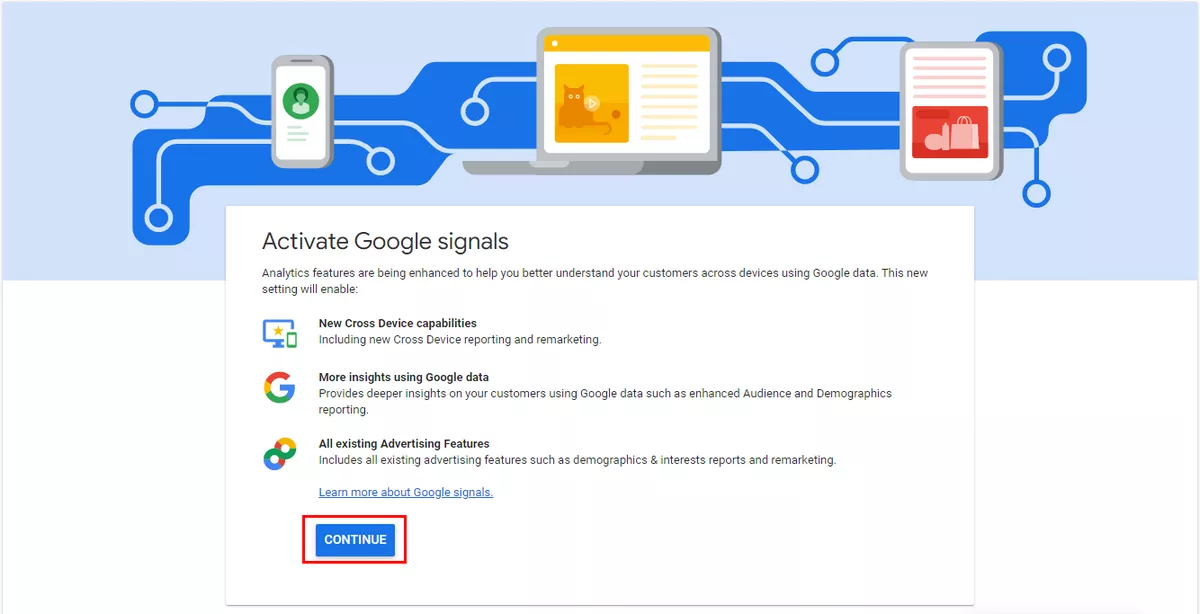
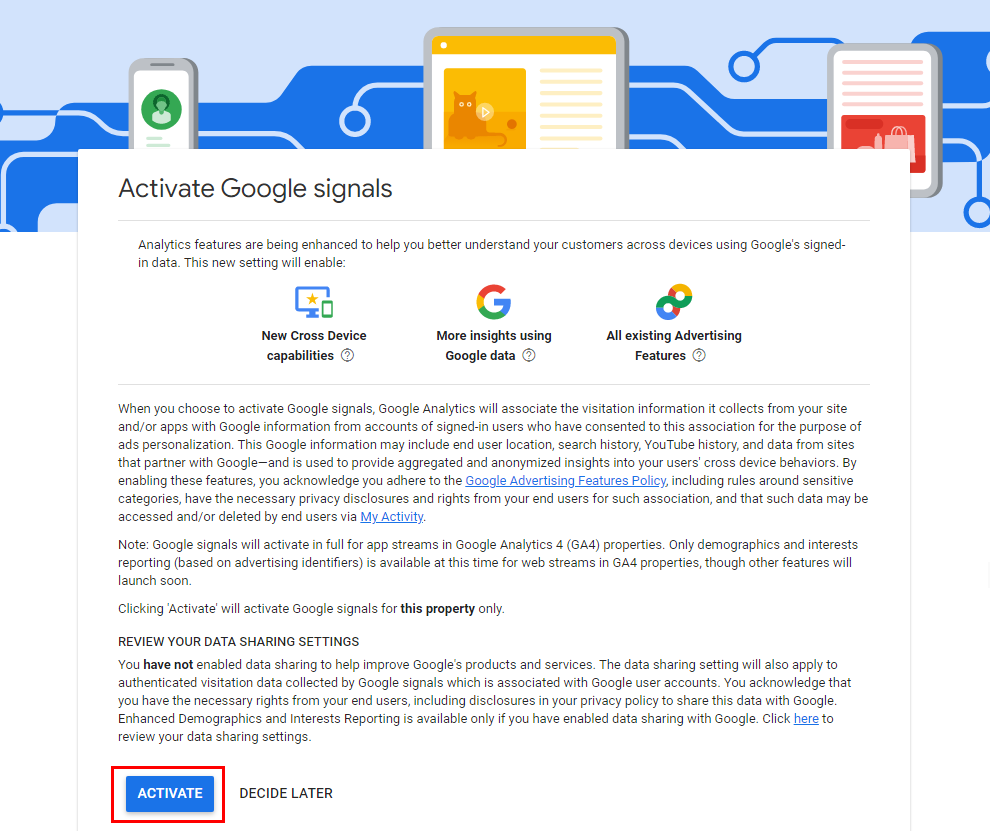
Continue and activate.
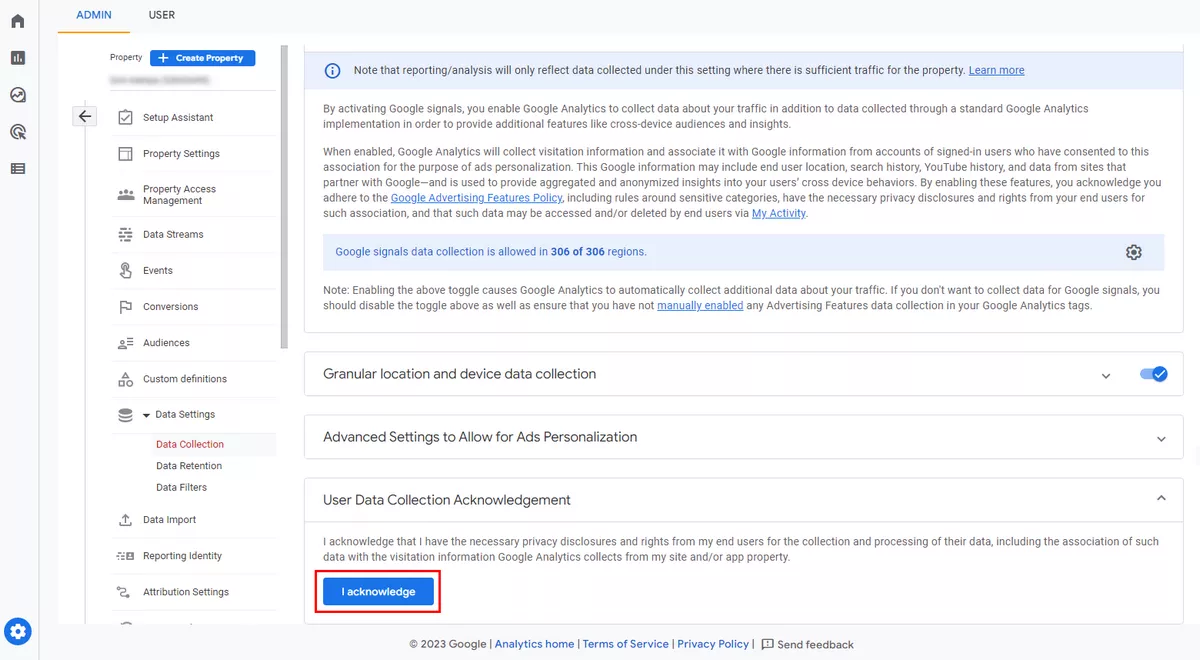
3. Acknowledge user data collection.
In the same window where you enabled Google Signals, click I acknowledge at the bottom.
We recommend excluding all internal traffic sources from GA4 measurements to get a better understanding of how customers actually interact with your website.
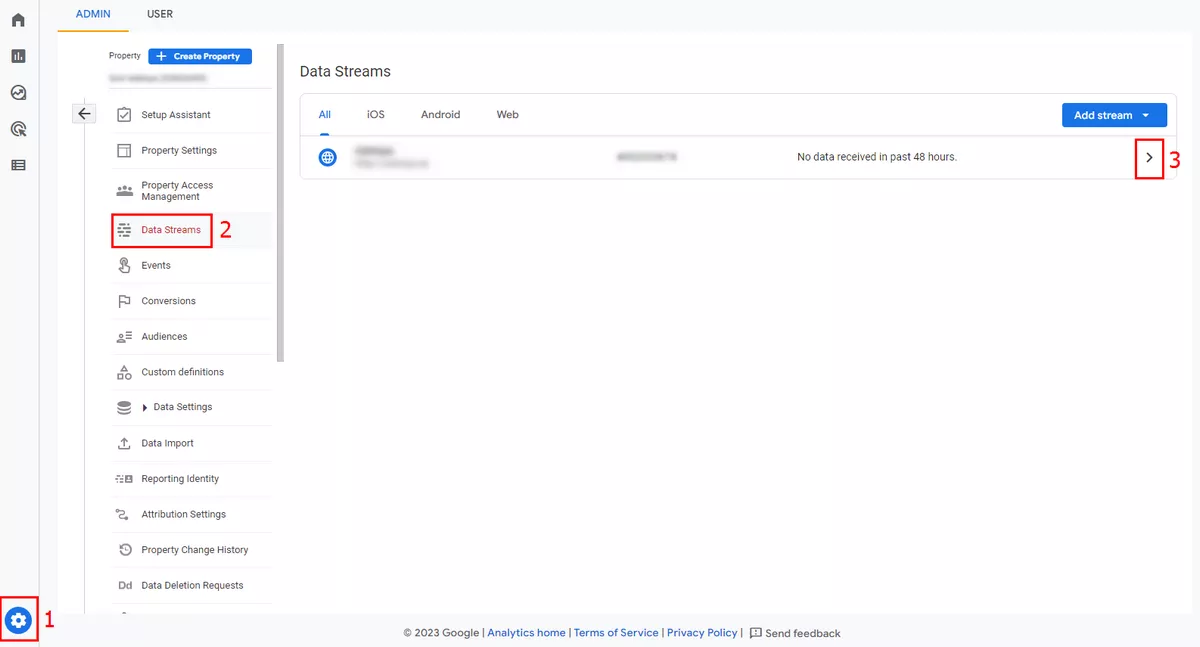
How to add: Admin → Data Streams in the Property menu → select the data stream you’ve created earlier.

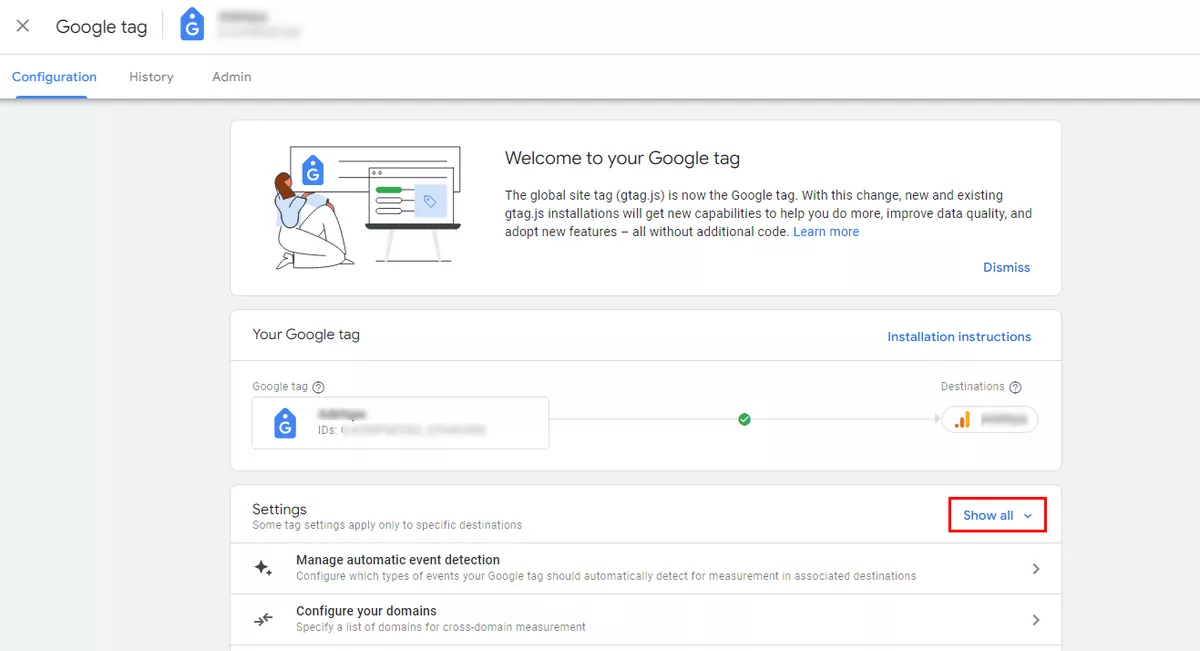
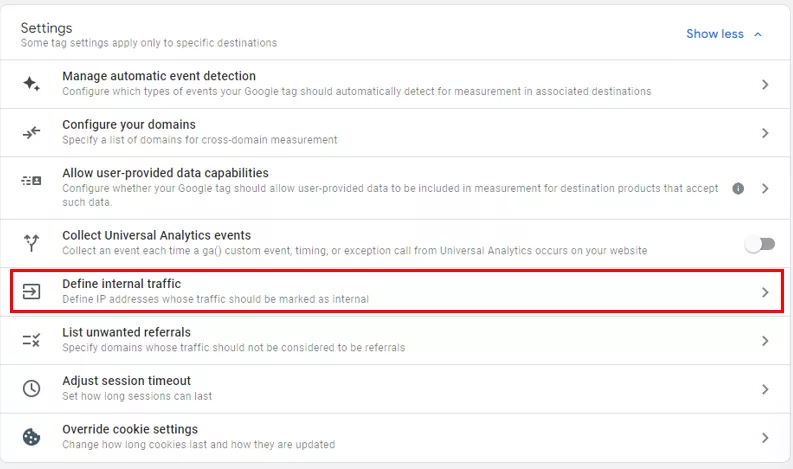
Create an internal traffic rule.

Enter the name for the rule, leave the traffic_type as it is set (internal), select the Match type (IP address equals is selected here), enter your IP address, and click Create.
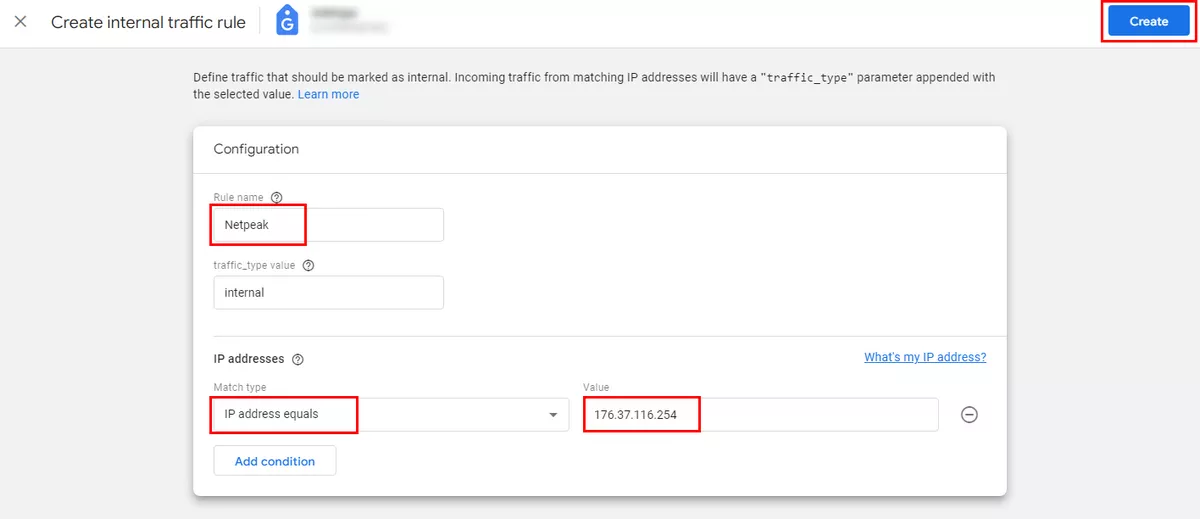
Please note that you can add several conditions or IP addresses to one rule, up to a maximum of 10 conditions.
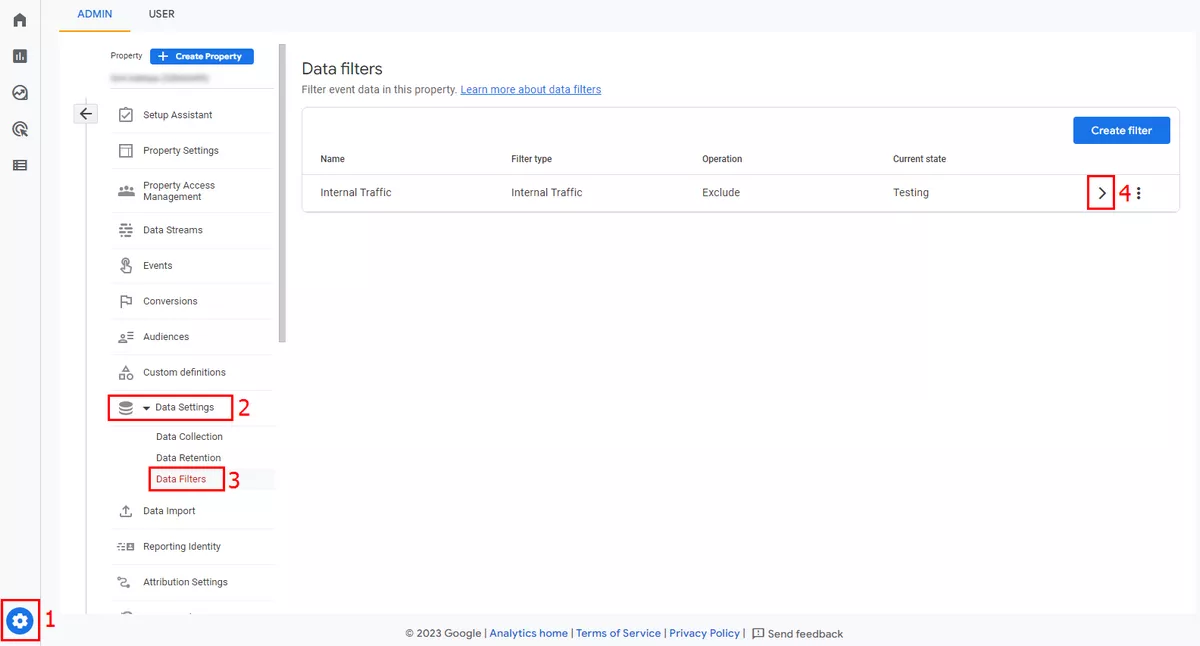
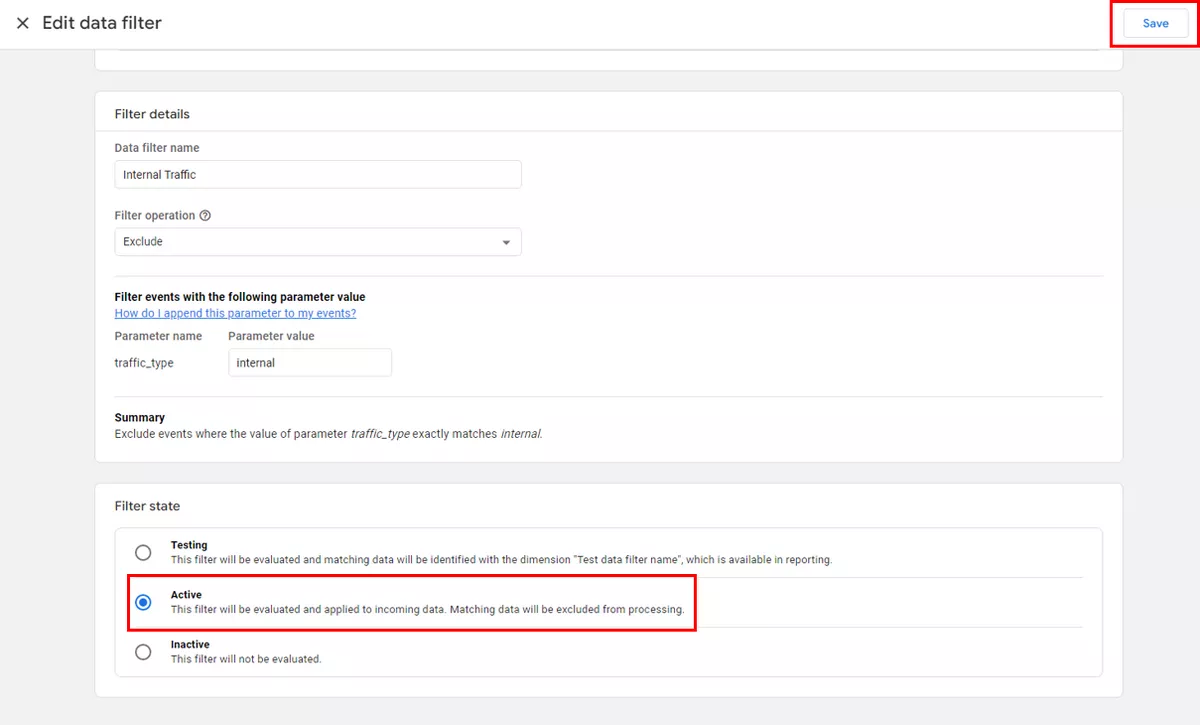
5. Switch GA4 internal traffic out of the testing state.
By default, internal and development traffic filters are in a testing state. To change this, go to the Data Filters page and change the filter status to active. Therefore, any incoming traffic that matches the IP address to which your filter is set will be excluded; this traffic will not be collected in your GA4 property.
Here is a step-by-step guide:
By setting up analytics with GTM, you can transfer data from your website or mobile app to both Universal Analytics and Google Analytics 4. The sooner you switch to GA4, the better; the goal is to have enough data collected to prevent disruption to your work after UA is discontinued in July 2023.
The next thing to do is to set up e-commerce, goals, and conversions in your new GA4 property. However, do not stop the data transfer to UA immediately after setting up GA4. Instead, continue to use both tools simultaneously. That way, you can compare similar metrics between UA and GA4 and make sure that you are collecting the right information for your business.

 4
4
 2
2
 2
2
Recommended theme posts
Related Articles
Display Advertising Effectiveness Analysis: A Comprehensive Approach to Measuring Its Impact
In this article, I will explain why you shouldn’t underestimate display advertising and how to analyze its impact using Google Analytics 4
Generative Engine Optimization: What Businesses Get From Ranking in SearchGPT
Companies that master SearchGPT SEO and generative engine optimization will capture high-intent traffic from users seeking direct, authoritative answers
From Generic to Iconic: 100 Statistics on Amazon Marketing for Fashion Brands
While traditional fashion retailers were still figuring out e-commerce, one company quietly revolutionized how U.S. consumers shop for everything from workout gear to wedding dresses