Access to Key Elements of Facebook Business Manager: Why and How to Provide It
When working with Facebook Ads Manager, you often need to involve other people, such as colleagues or external contractors, in managing your ads. You may also need to add other ad accounts to your account.
Facebook Business Manager has features that make it easy for you to do so, especially useful if you want to give access to a partner company or outsourcing agency. Let me show you how to do it.
Business Manager: Why and how to set it up?
If you want to hire contractors to promote your product or service on Facebook, you must set up Business Manager (BM). This will allow you to easily manage all account elements and open access to others.
BM is a kind of hub where everything is stored, including an ad account (Ads Manager) for easy creation and management of Facebook and Instagram ad campaigns. It also contains a page, a catalog, and a dataset.
Business Manager allows you to set up and manage multiple advertising accounts simultaneously, making it an advanced tool for effectively managing your company’s advertising accounts. It integrates the features of Facebook with those of advertising accounts, such as audience settings, statistics, and reports.
Important. Ads Manager requires you to grant separate access to each item. This makes it very different from, for example, Google Ads.
Once you have access to the main elements of BM, you can:
- View statistics for the added business site.
- Set up multiple datasets (pixels) to track conversions.
- Create a product catalog for your Facebook Shop.
- Distribute advertising campaigns into groups with the ability to customize each one.
- Implement two-factor authentication to better protect your pages from hackers.
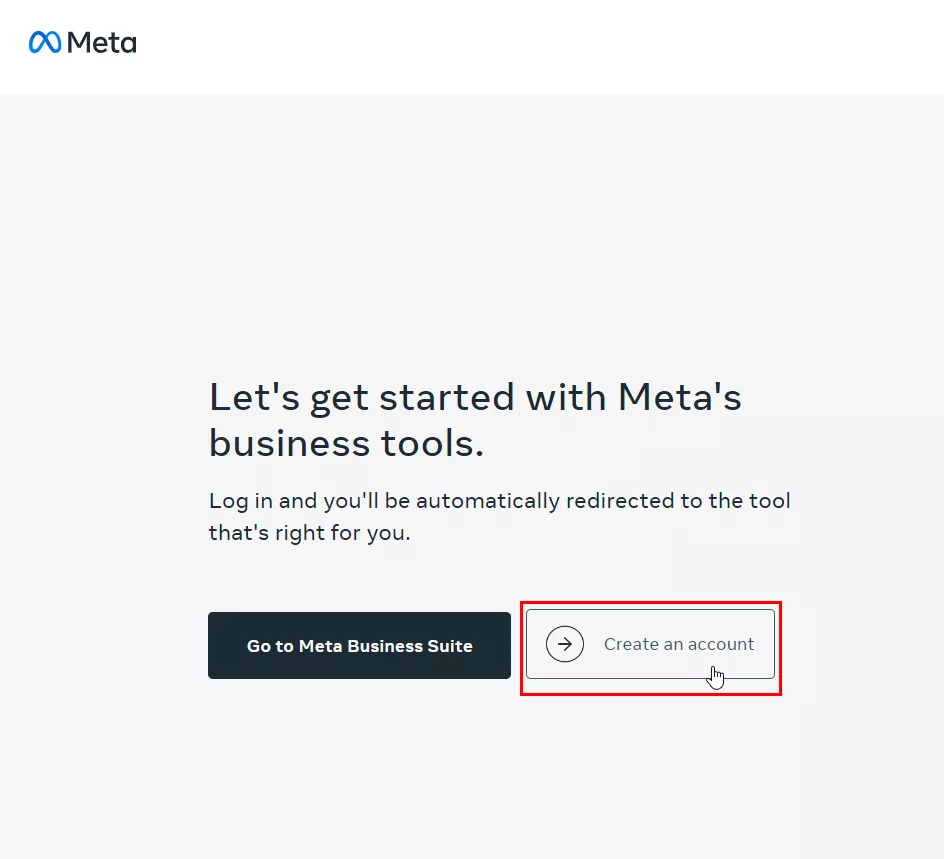
If you do not have a Business Manager account, you can create one by following the instructions.
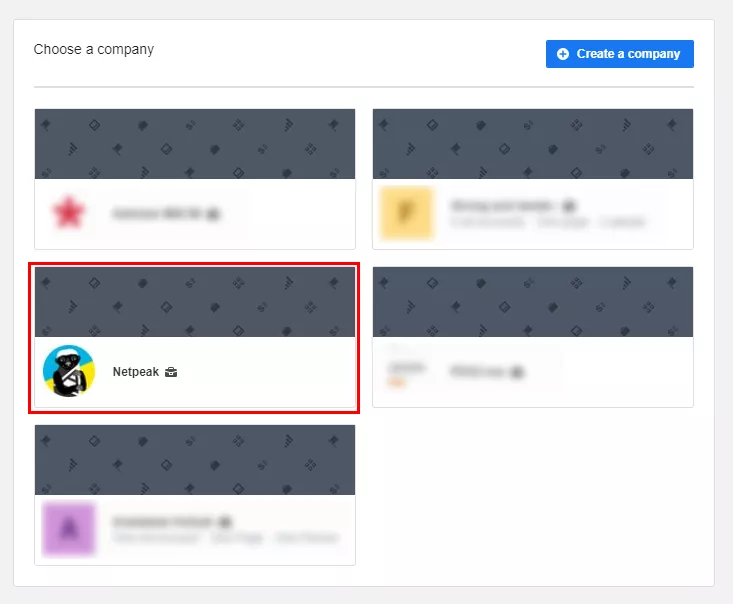
If you already have an account on this platform, follow the link to select the Business Manager that fits your project.
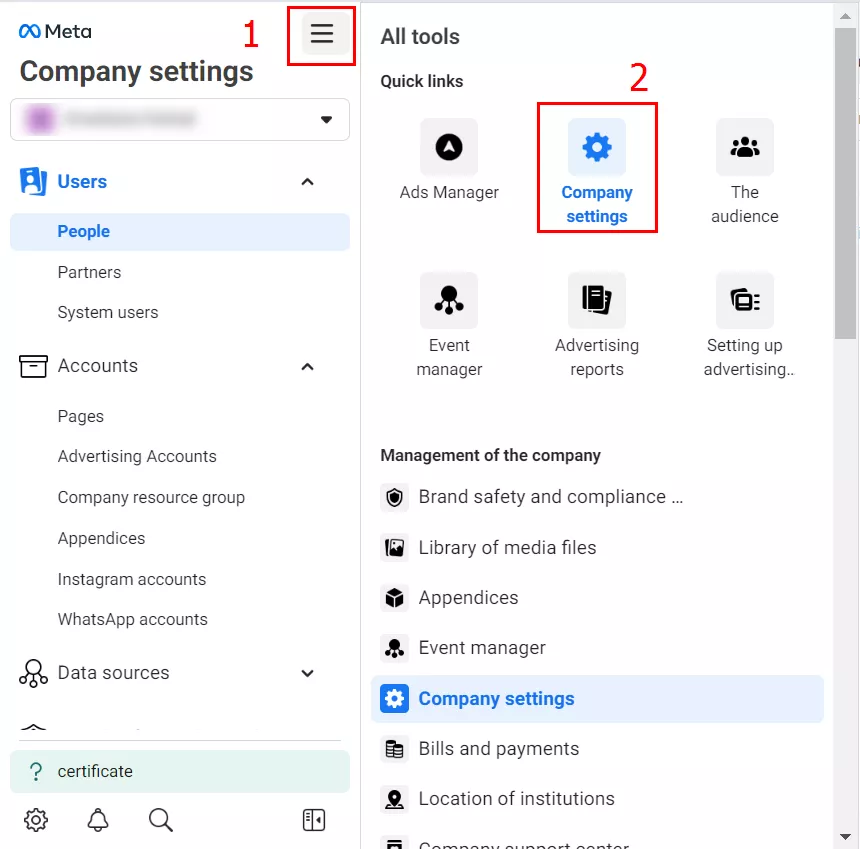
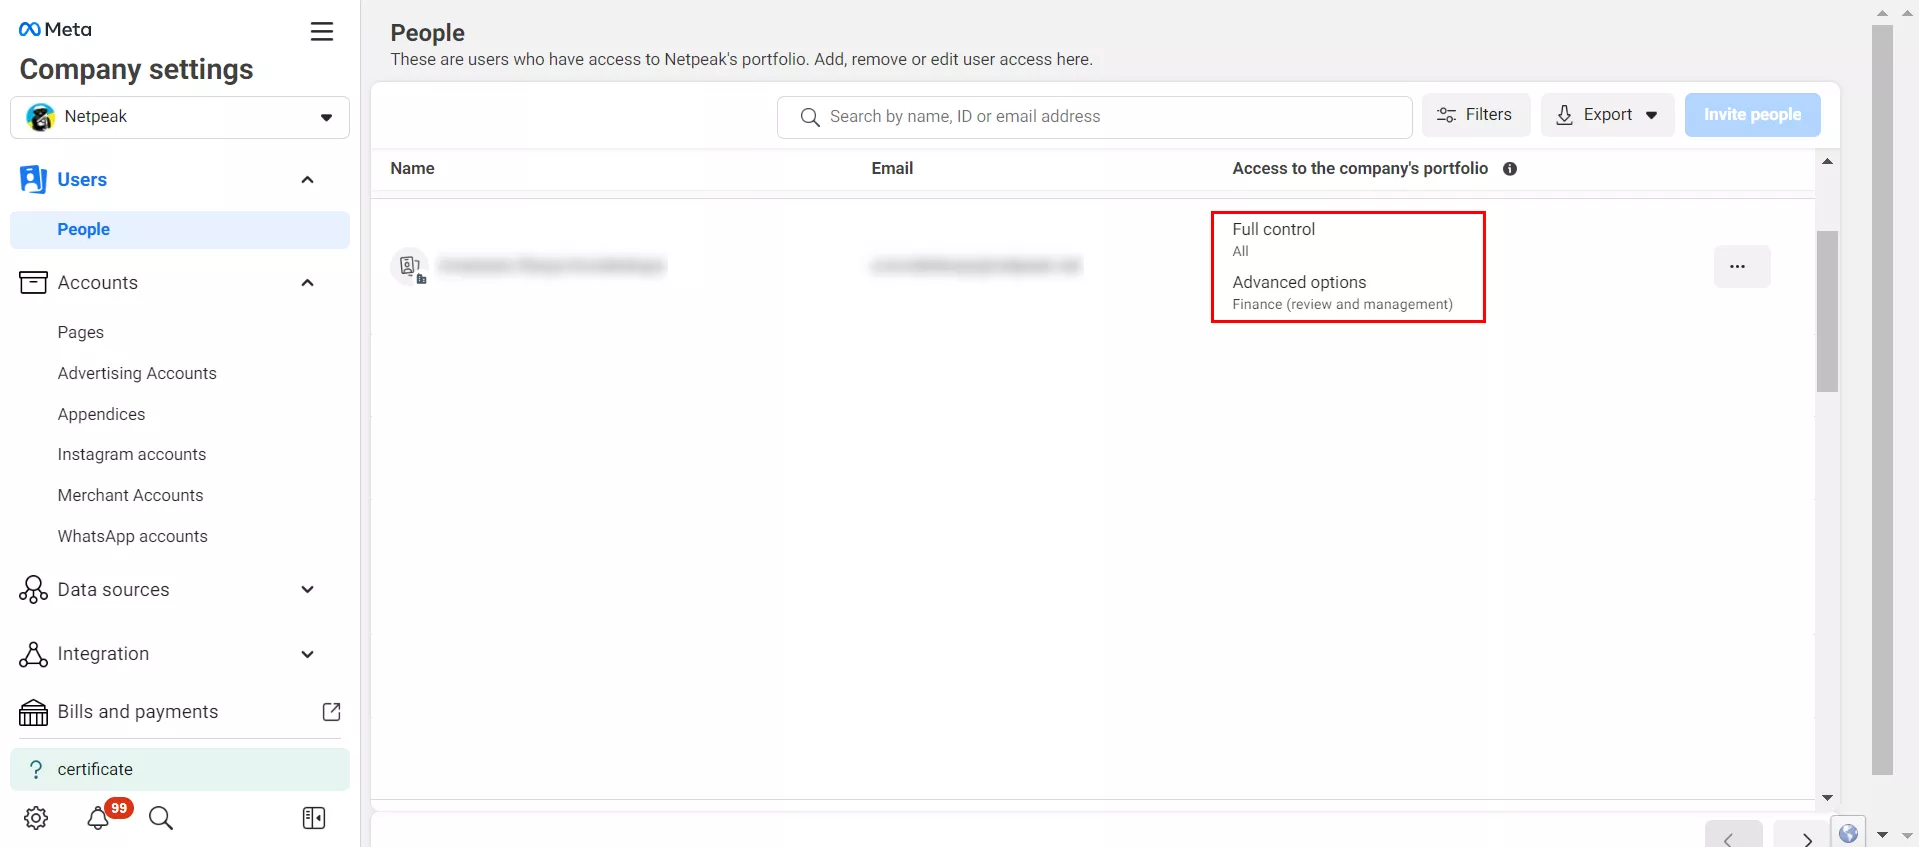
To see your access to your advertising account, go to the Business Manager settings and click Company settings.
If your account has Full control administrator access, you can edit settings, user access, accounts, and tools.
Check out our glossary for key online advertising definitions to enhance your marketing knowledge!
Step 1. How to grant access to an ad account
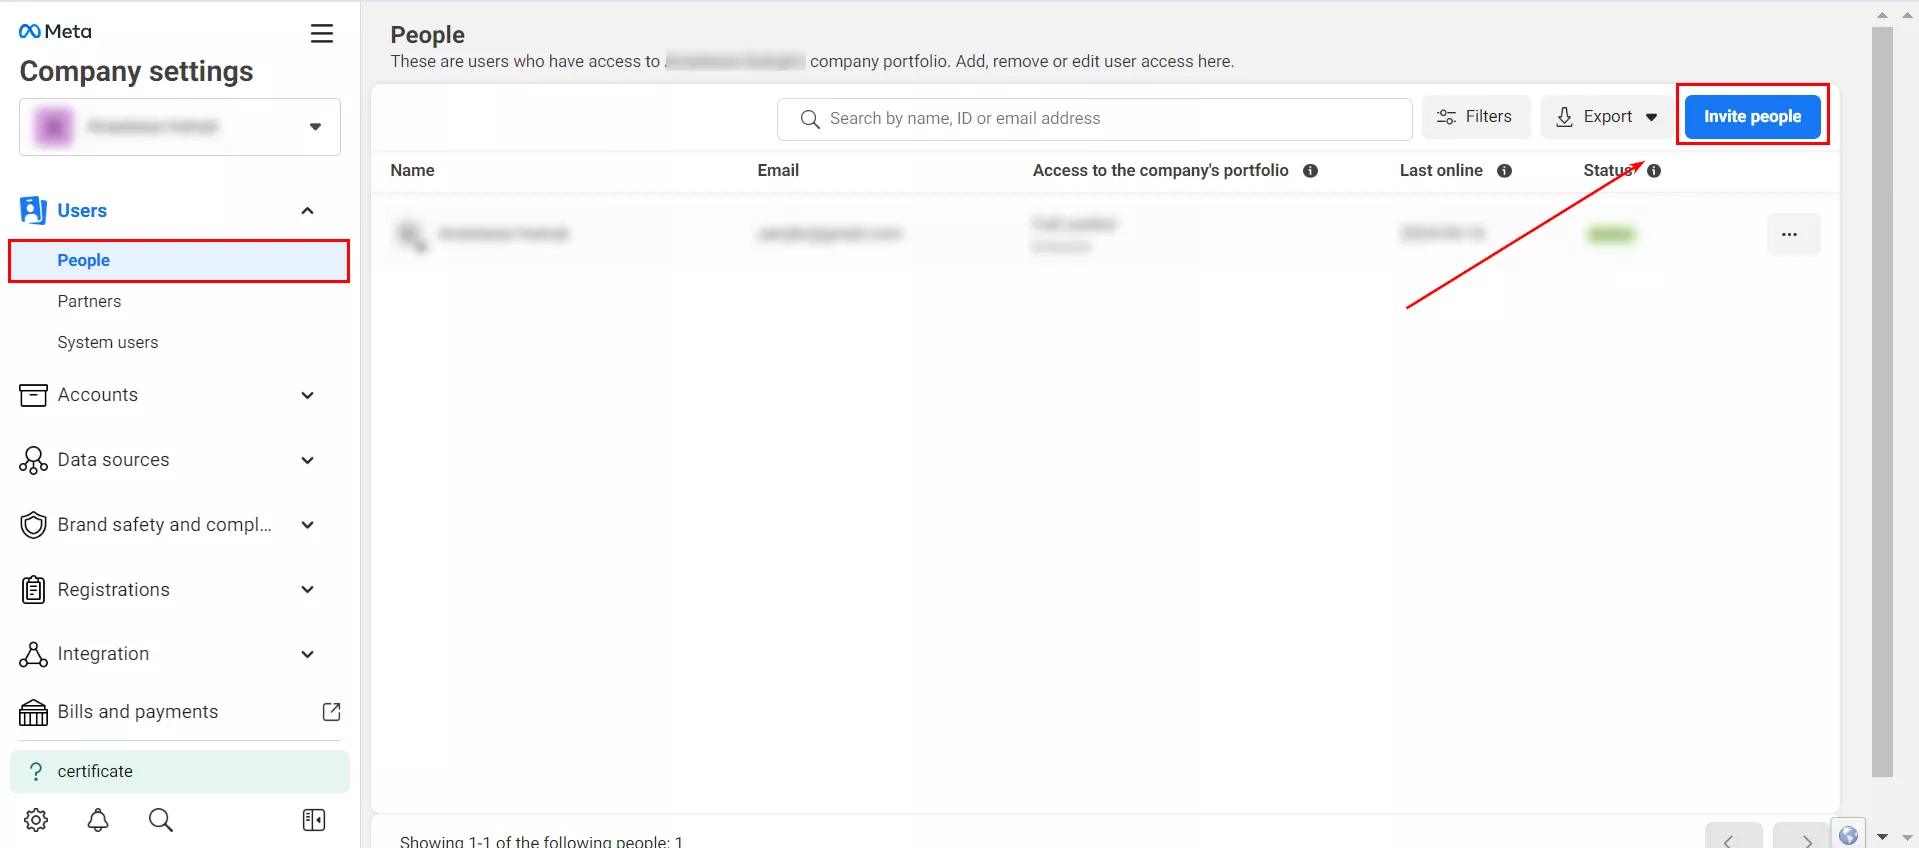
If you need to grant access to an employee of your company, go to Users and click People > Invite people.
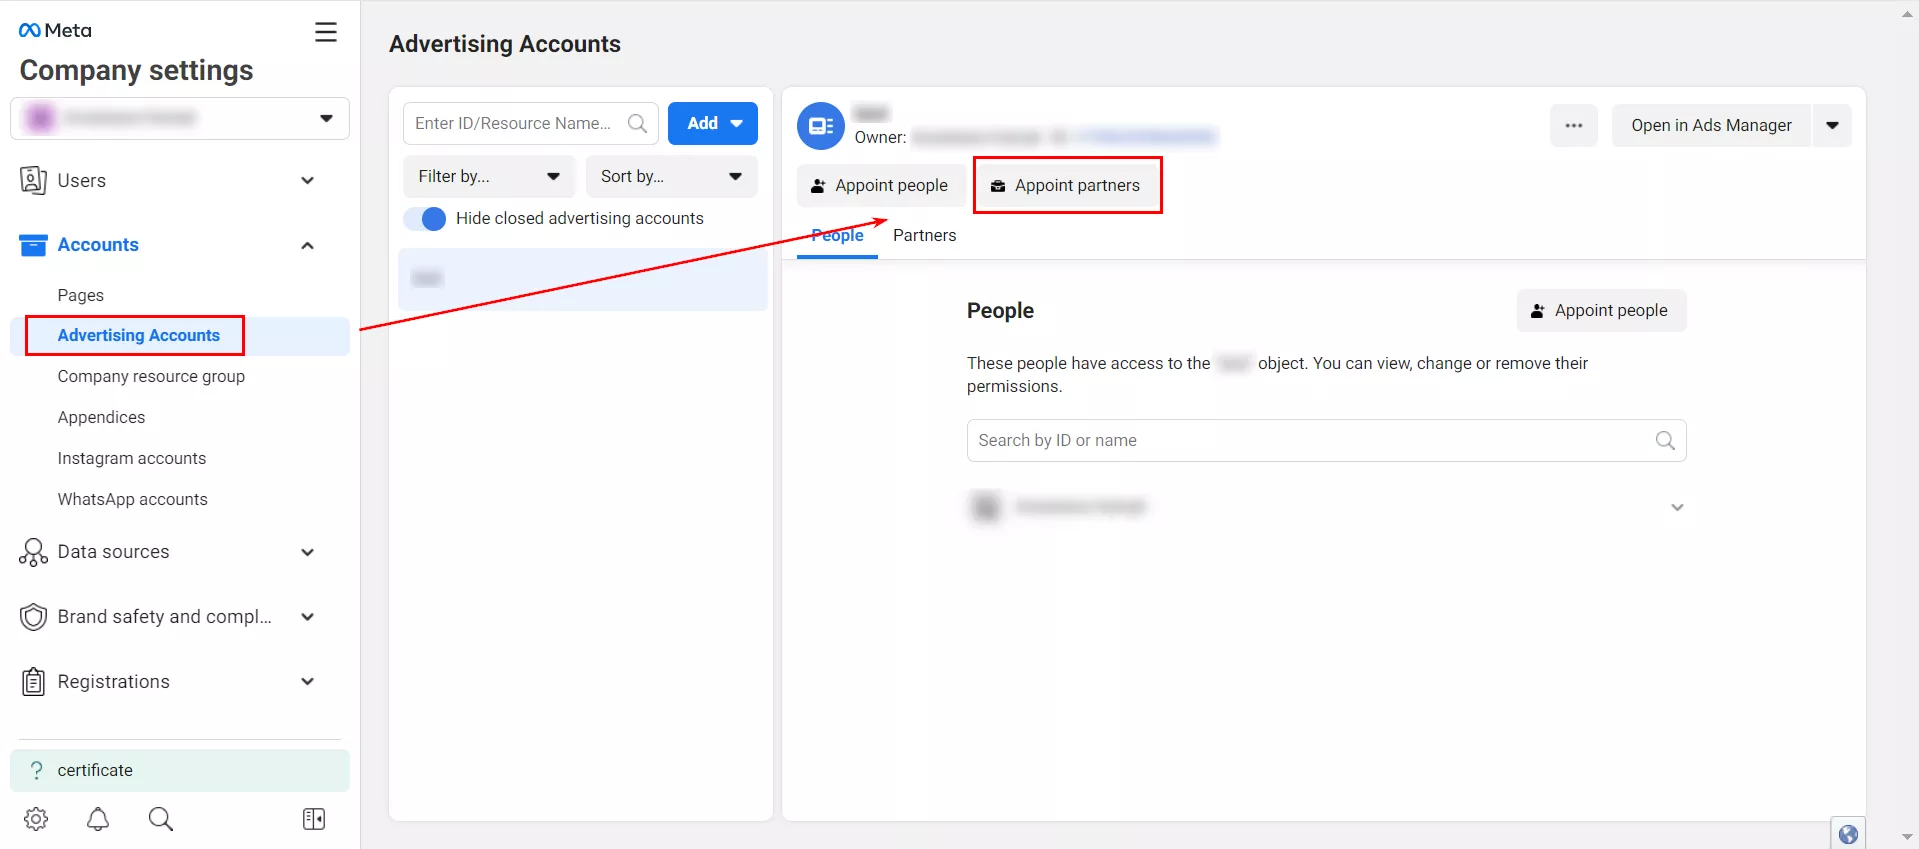
If you need to grant access to a partner company, go to Advertising Accounts and click Appoint partners.
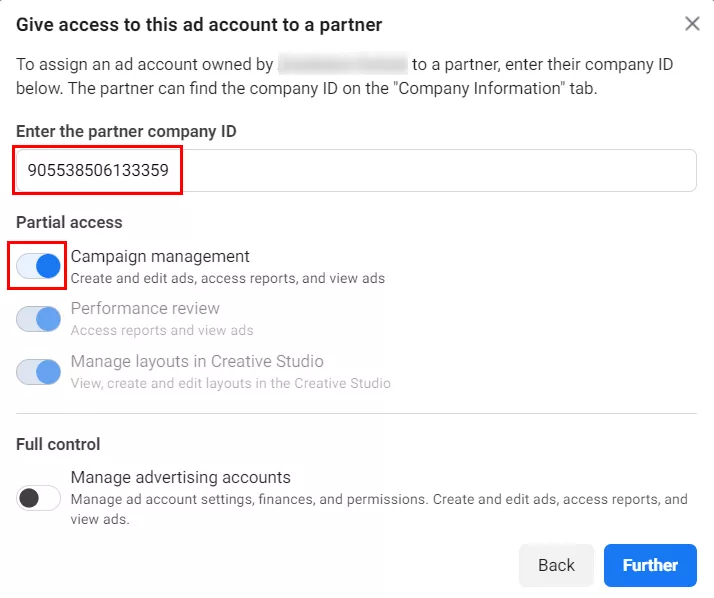
Select the Company ID assignment method.
Next, you’ll need to add a partner. For example, let’s take the Netpeak Group Company ID 905538506133359 and assign Campaign management. This will allow the partner, i.e., your contractor, to manage campaigns and generate and view reports.
Step 2. How to share a Facebook page
A Facebook page is where brands and businesses publish posts for their audience.
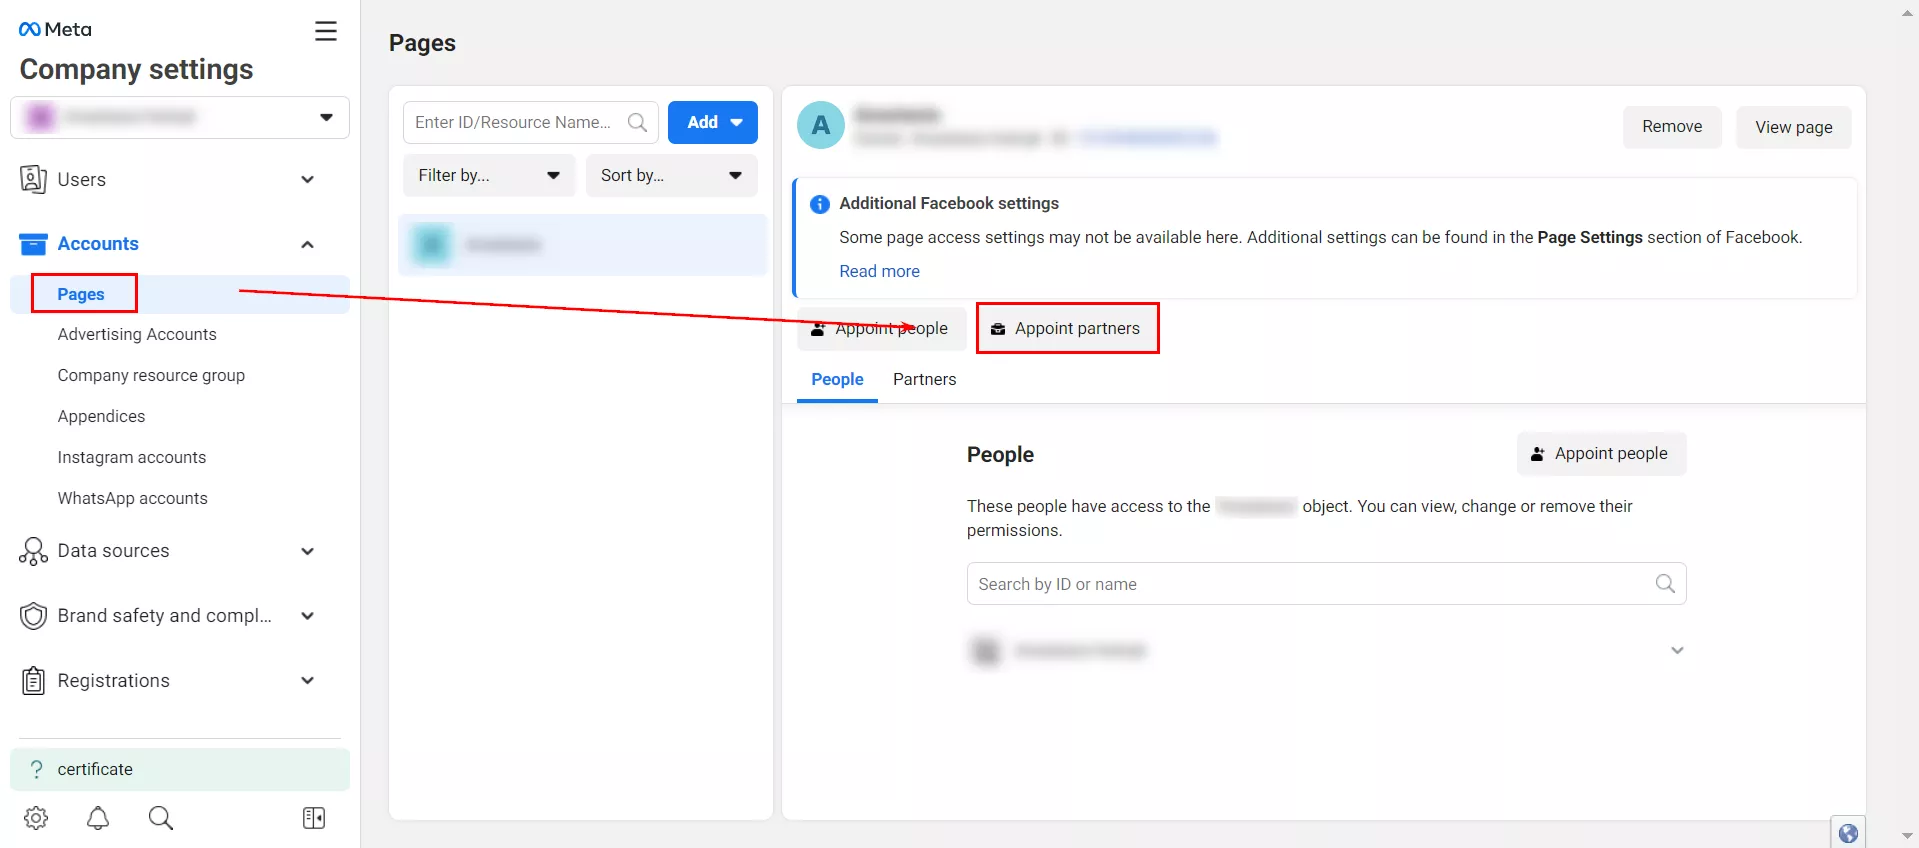
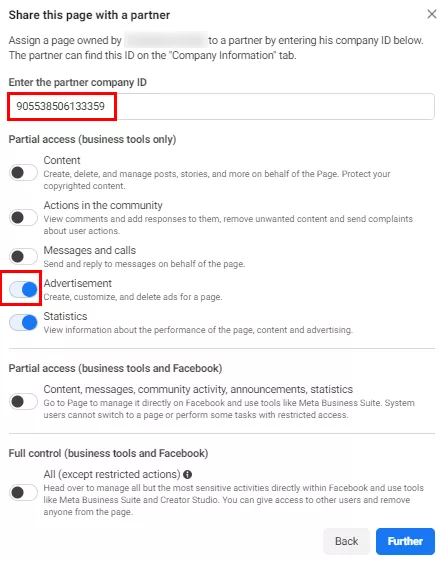
Go to Pages and click Appoint partners.
Select the Company ID assignment method.
Add the partner company ID and check the box next to Advertisement. This will allow the partner to create, customize, and delete ads for the page, as well as view information about the results of the content.
For example, the Netpeak Group ID is 905538506133359.
Step 3. How to share a catalog
A catalog is a container that contains information about a range of products, such as images, prices, descriptions, etc.
The catalogs are sometimes created by the partner companies instead of the client. However, after the cooperation is over, it is impossible to transfer full ownership of the catalog to the client.
Tip. Create your own catalog in your Business Manager. You don’t even have to customize this tool, it’s done by specialists. And its availability will make it easier to work with a partner company in the future.
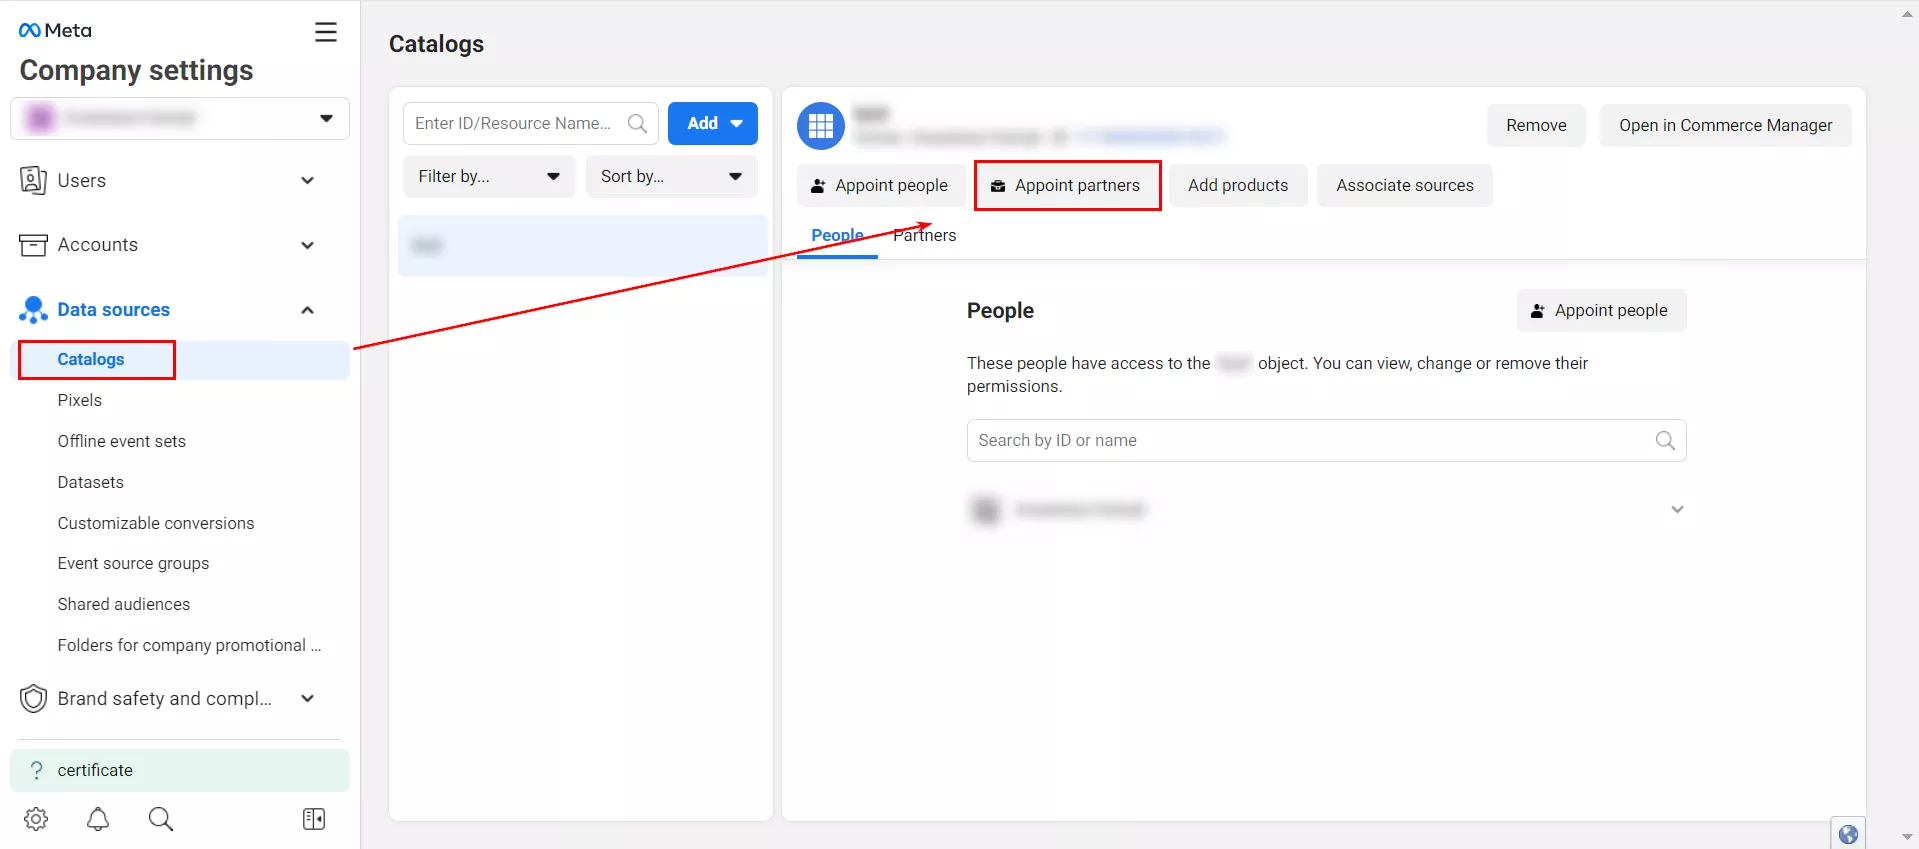
Go to Catalogs and click the Appoint partners button.
Select Company ID as an assignment method.
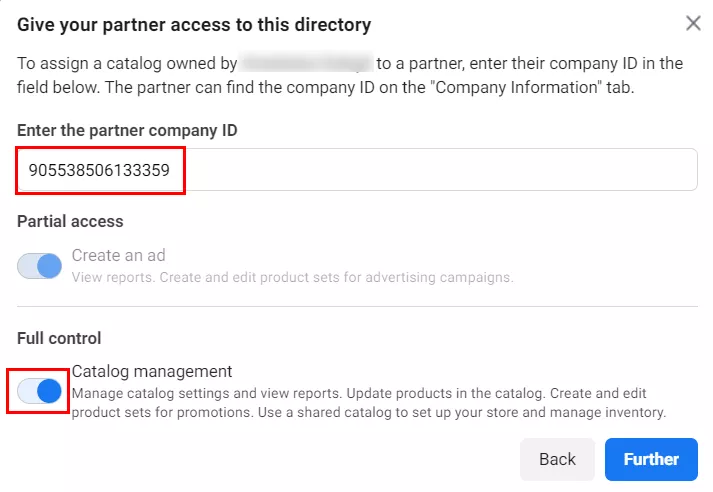
Add the partner company ID, such as the Netpeak Group company ID 905538506133359, and select the checkbox next to Catalog management.
Step 4. How to share a dataset (pixel)
The procedure is similar to creating a catalog.
Tip. Create a dataset (pixel) yourself in your Business Manager. This tool does not need to be customized — just create it and make your work easier in the future.
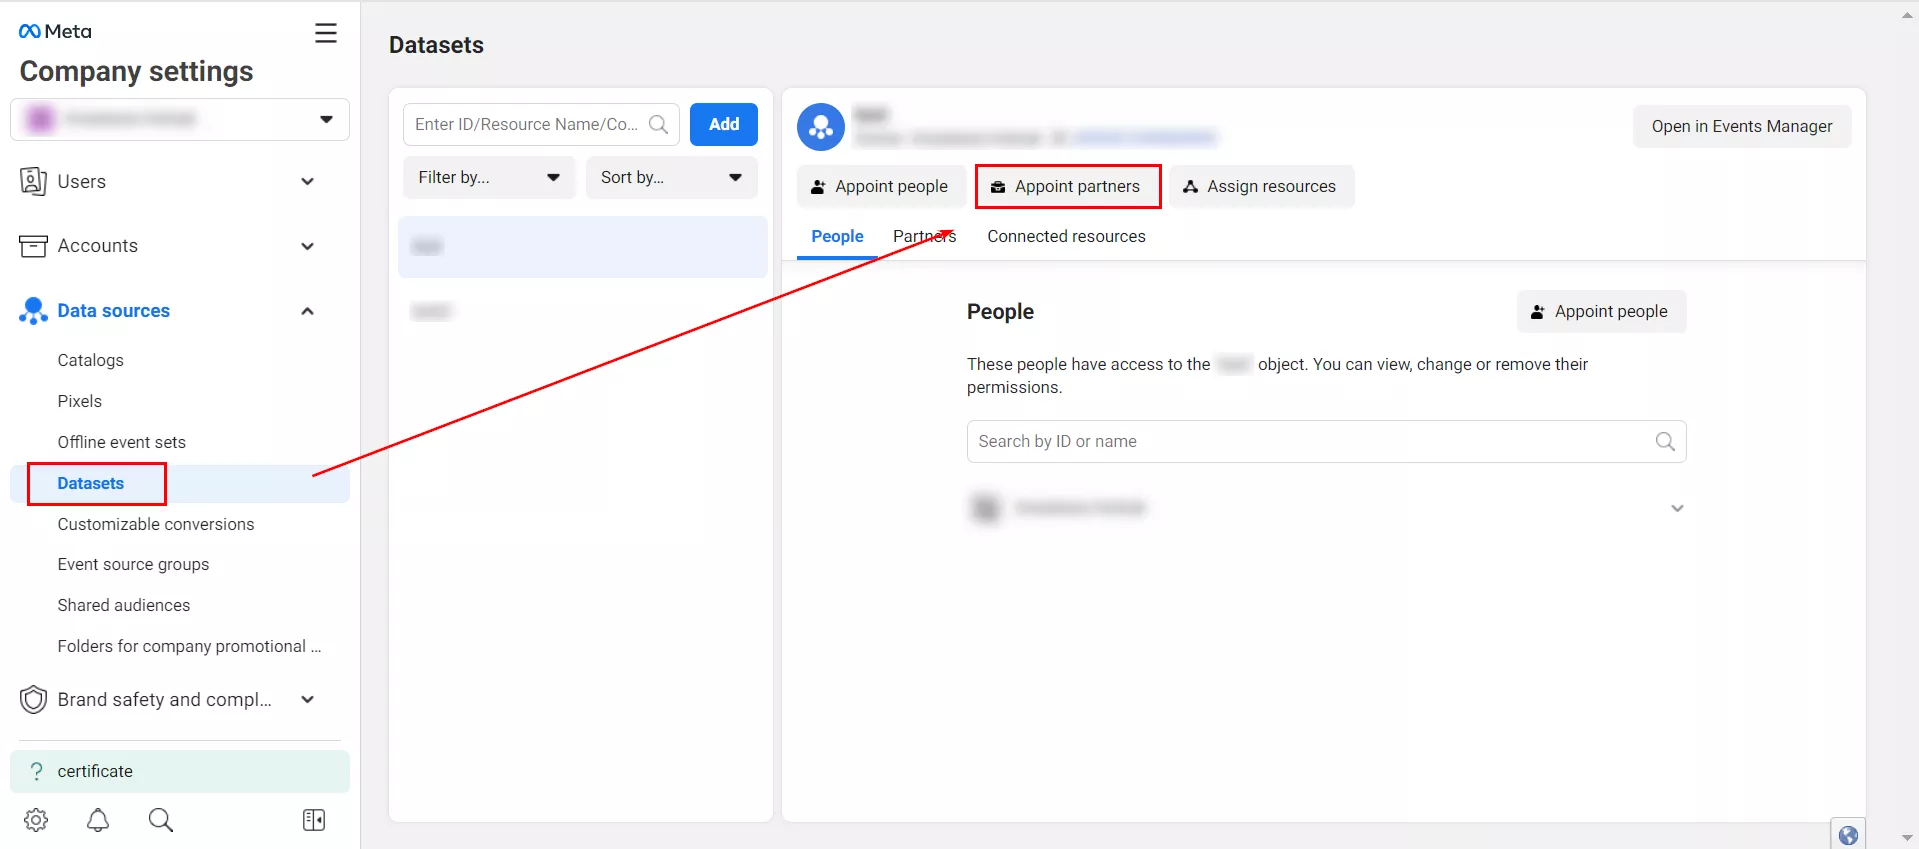
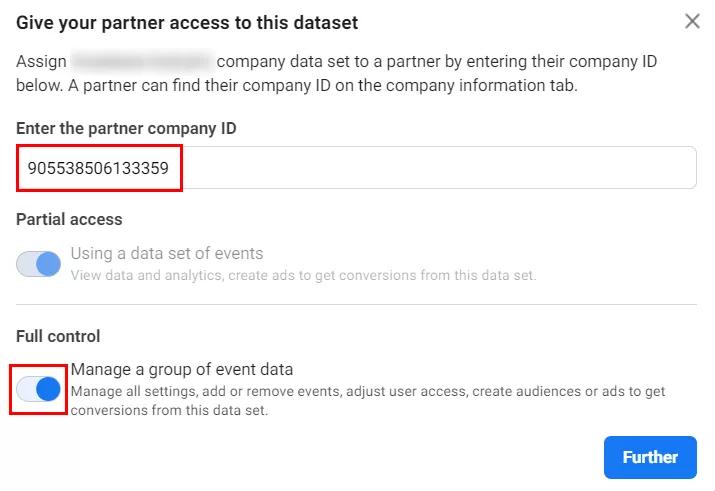
Go to Datasets and click Appoint partners.
Add a partner (use 905538506133359 for the Netpeak Group ID).
Select Manage a group of event data.
Conclusions
Facebook Business Manager is a free service that allows you to combine and manage different advertising accounts and business pages in a single interface.
Before granting access to a partner, you need to create and set up a few basic elements:
- An account
- A page
- A catalog for e-commerce projects
- A data set (pixel)
The user you add will immediately have access to your advertising account according to their assigned role.
Related Articles
Display Advertising Effectiveness Analysis: A Comprehensive Approach to Measuring Its Impact
In this article, I will explain why you shouldn’t underestimate display advertising and how to analyze its impact using Google Analytics 4
Generative Engine Optimization: What Businesses Get From Ranking in SearchGPT
Companies that master SearchGPT SEO and generative engine optimization will capture high-intent traffic from users seeking direct, authoritative answers
From Generic to Iconic: 100 Statistics on Amazon Marketing for Fashion Brands
While traditional fashion retailers were still figuring out e-commerce, one company quietly revolutionized how U.S. consumers shop for everything from workout gear to wedding dresses

