Nowadays, data is a key resource for strategic decision-making, and constant monitoring of web analytics is becoming a necessity for various business areas.
In this article, I will explain the step-by-step setup of automatic email reports in GA4 and the benefits of doing so. This will allow you to save time and analyze important metrics efficiently.
Benefits of scheduling reports
1. Convenient and time-saving
To perform analysis manually, you need to frequently log in to the analytics dashboard and configure report parameters. However, if you opt for automation, reports can be sent directly to your email inbox according to your preferred schedule. This allows you to keep your focus on evaluating data instead of managing processes.
2. Regular updates
There is no need to manually check the dashboard. This is especially useful for business owners and executives who want to receive up-to-date information in a timely manner.
3. Easy to compare and monitor
It is easier to compare the dynamics of key metrics in scheduled reports. This is useful for analysts and marketers who aim to identify trends and changes in user behavior. Automatically delivered reports are usually in a convenient format for viewing and analysis.
Check out our glossary for key online advertising definitions to enhance your marketing knowledge!
Set up automatic report delivery
Step 1: Sign in to Google Analytics 4.
In your GA4 account, select the website for which you want to set up this feature.
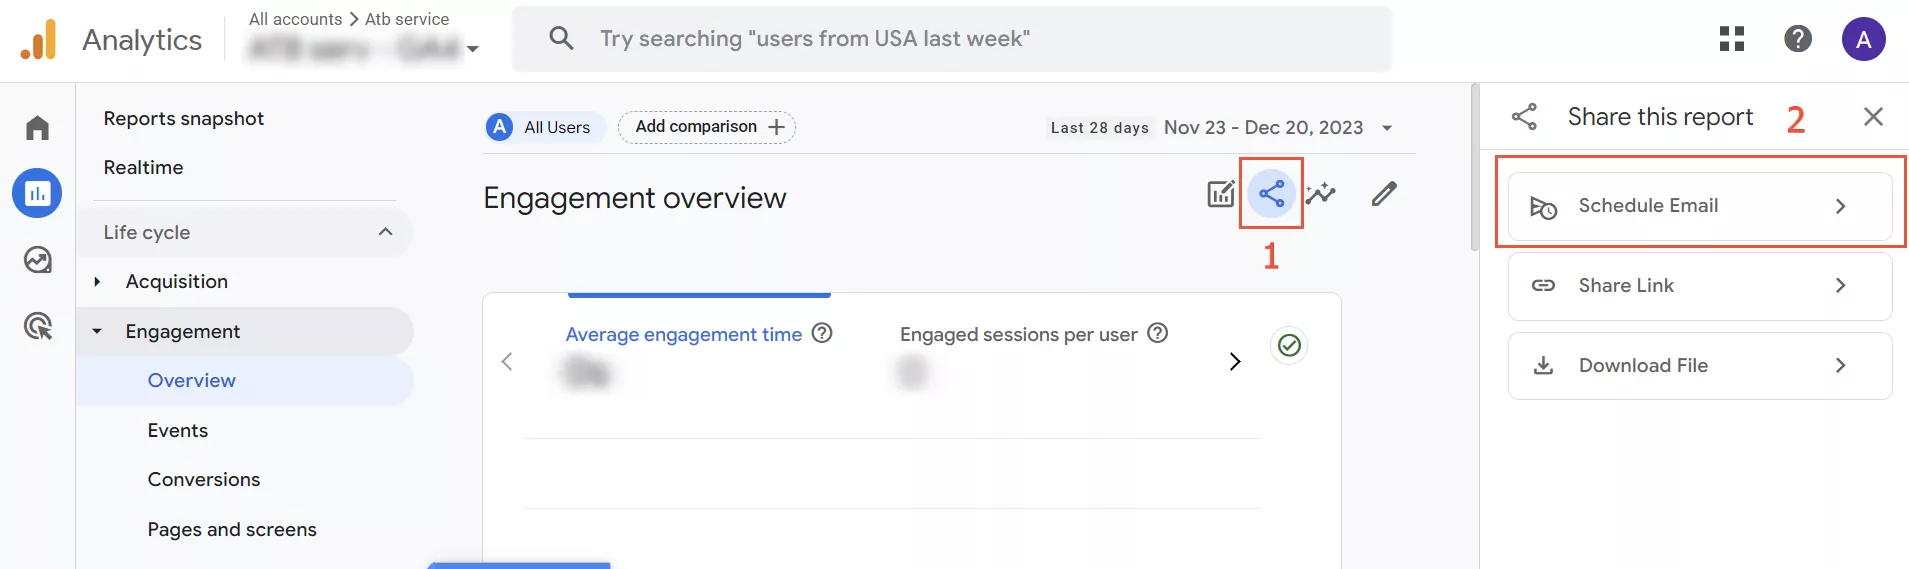
Step 2: Locate the Schedule Email option.
In the Reports section, go to the Schedule Email option. It is located in the admin section and allows you to set the timing and parameters of the automated emails.
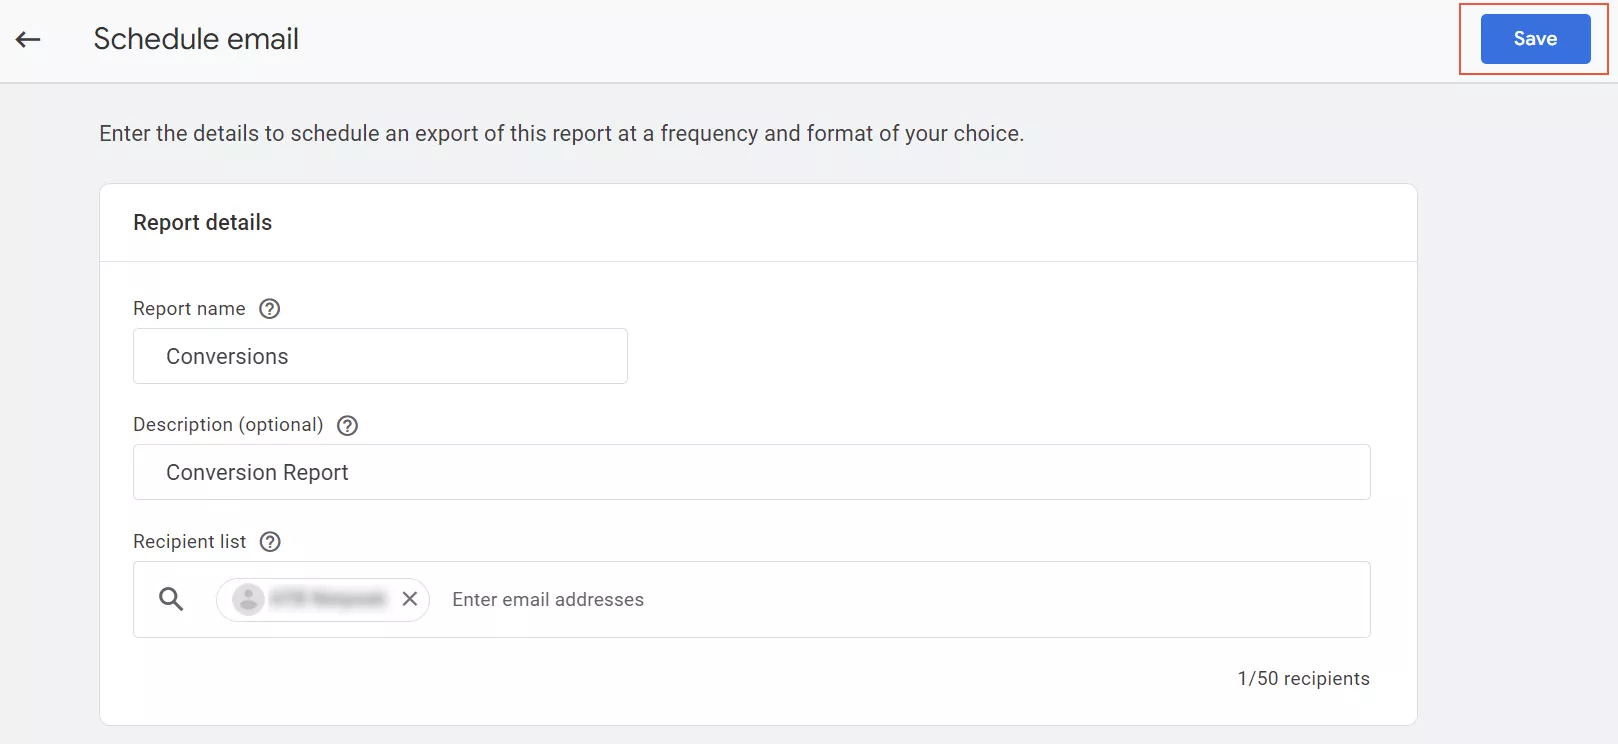
Step 3: Configure sending options.
Select the report you need and configure the criteria for sending it: set the frequency, format, and other important indicators. Don’t forget to save your changes.
- Report name. This will be displayed in the subject line and must be unique to your GA4 resource.
- Description (optional). You can add an explanation to the report. This feature is especially useful when sending emails to a large number of people.
- Recipient list. You can add up to 50 email addresses to the email list.
- Choose date. Select the date you want to receive the first email.
- Active for. Select the time period during which you want to send this report.
- Language. Select the preferred language for the document.
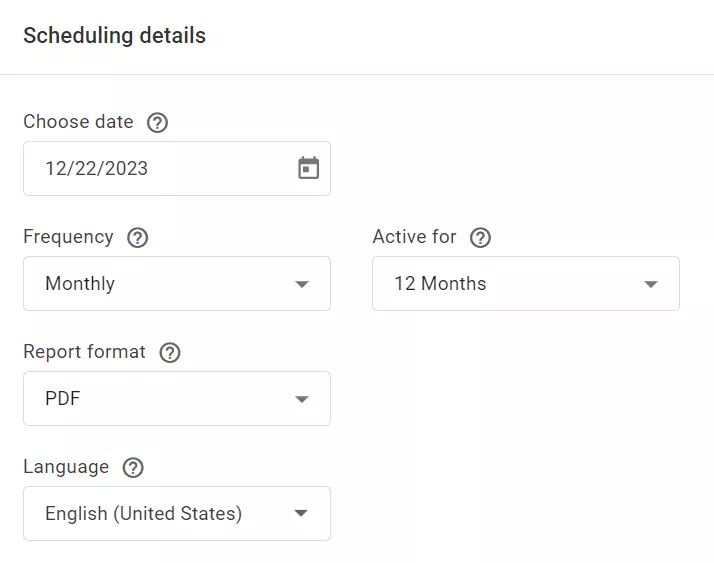
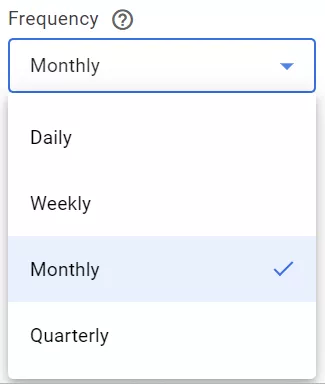
- Frequency. Specify how often you want to receive the email. You can schedule it to be sent daily, weekly, monthly, or quarterly.
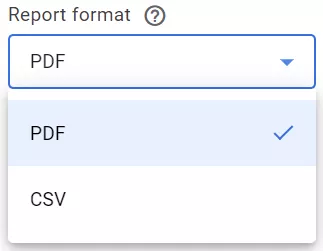
- Report format. You can choose to receive the report in .pdf or .csv format. The document will be sent as an attachment to the email.
Once saved, you can review the configuration in the Admin section.

Review the report
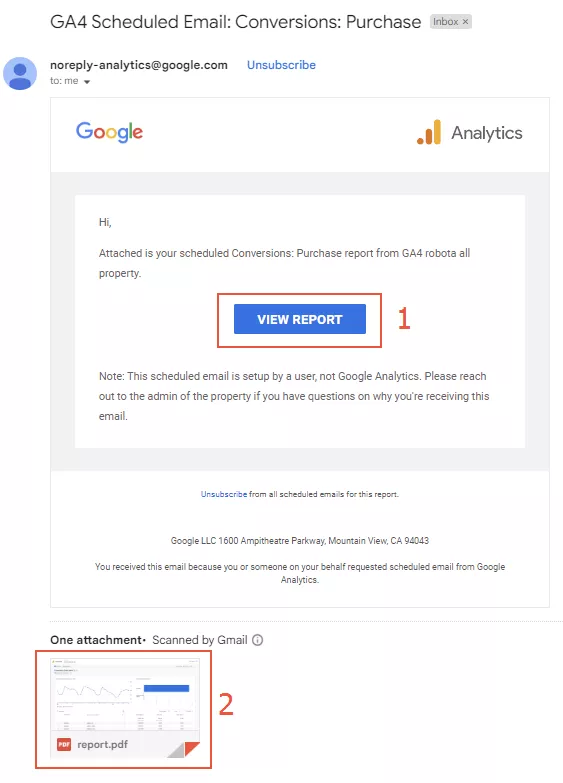
Once you have received the email, make sure that the data is displayed correctly. Open the attached PDF file (2), and check if the report you received meets your expectations.
The email also includes a View Report button (1) for quick access to this report in your GA dashboard.
Statuses
Each report has a status that indicates its current state:
- Active – sent as scheduled.
- Scheduled – created and will become active after the specified date.
- Expired – the report’s active period has expired.
- No recipient – there are no valid email recipients in the settings.
- Report removed – the report associated with the scheduled email has been deleted.
- Report invalid – there are problems with the metrics or channel groups. For example, the report used a specific metric that has been deleted.
- Creator invalid – the author of the report no longer has access to the resource.
Read how to create and interpret an attribution model comparison report in GA4.
Conclusions
Scheduling email reports in GA4 is a strategic step that will help you run your business efficiently. There are several benefits to scheduling reports. Not only are they convenient and time-saving, but scheduled reports also allow for easy comparison and monitoring. You will get regular updates without any extra effort.
You can set up automatic report delivery in just three simple steps:
- Sign in to your GA4 account.
- Find the Schedule Email option.
- Configure the sending parameters.
Once you have automated reports up and running, be sure to review the content and status of the received reports. There are several possible statuses, such as Active, Scheduled, Expired, No recipient, Report removed, Report invalid, and Creator invalid, and each indicate a different issue.

 1
1
 1
1
 0
0
Related Articles
How to Set Up Consent Mode in GA4 on Your Website with Google Tag Manager
Let's explore how to properly integrate consent mode in GA4, configure it for effective data collection, and at the same time comply with GDPR and other legal regulations
Display Advertising Effectiveness Analysis: A Comprehensive Approach to Measuring Its Impact
In this article, I will explain why you shouldn’t underestimate display advertising and how to analyze its impact using Google Analytics 4
Generative Engine Optimization: What Businesses Get From Ranking in SearchGPT
Companies that master SearchGPT SEO and generative engine optimization will capture high-intent traffic from users seeking direct, authoritative answers