Being able to work with Google Tag Manager (GTM) is a must-have skill for every digital marketer. GTM saves marketers valuable time that would otherwise be spent writing technical requirements and waiting for developers to implement them.
The first GTM skill you need to learn is how to set up button click tracking. This article provides a five-step plan to help you implement it correctly.
Setting up click tracking
Before you start, an important note: the click itself cannot be considered a primary website goal. This means you cannot build a marketing strategy around it or allocate further budget based on it. However, it can serve as a supplementary factor when analyzing user behavior on the website and working towards the main goal (purchase or form submission).
Step 1. Enable the built-in variables.
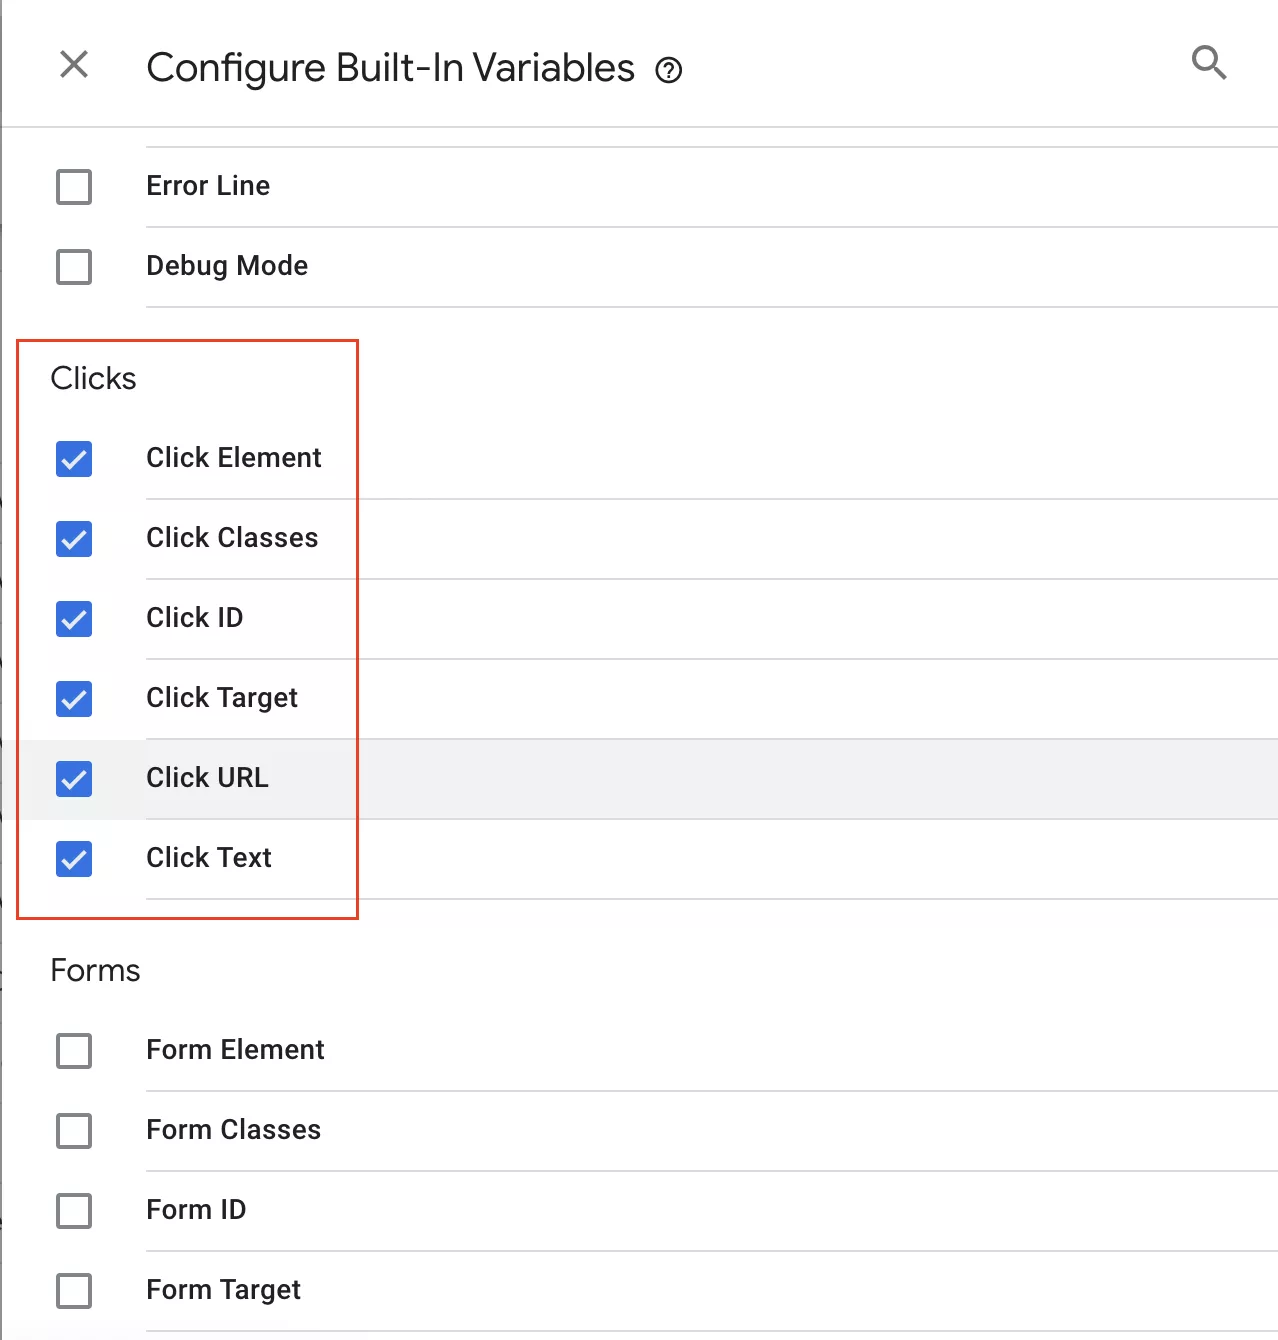
Before tracking clicks on any button, enable the built-in variables for Clicks. This allows you to select the correct trigger conditions later and is also useful when setting up tags.
Built-in variables are already available in the system and do not require additional configuration. They are created automatically and cannot be changed.
To configure them, go to the Variables section and click Configure. In the window that opens, check the boxes next to all the variables in the Clicks section.
Step 2. Create a help trigger.
A trigger is a condition that causes a tag to activate. At least one trigger is required for a tag to fire.
In the GTM container, there are two types of triggers for tracking clicks: All Elements and Just Links.
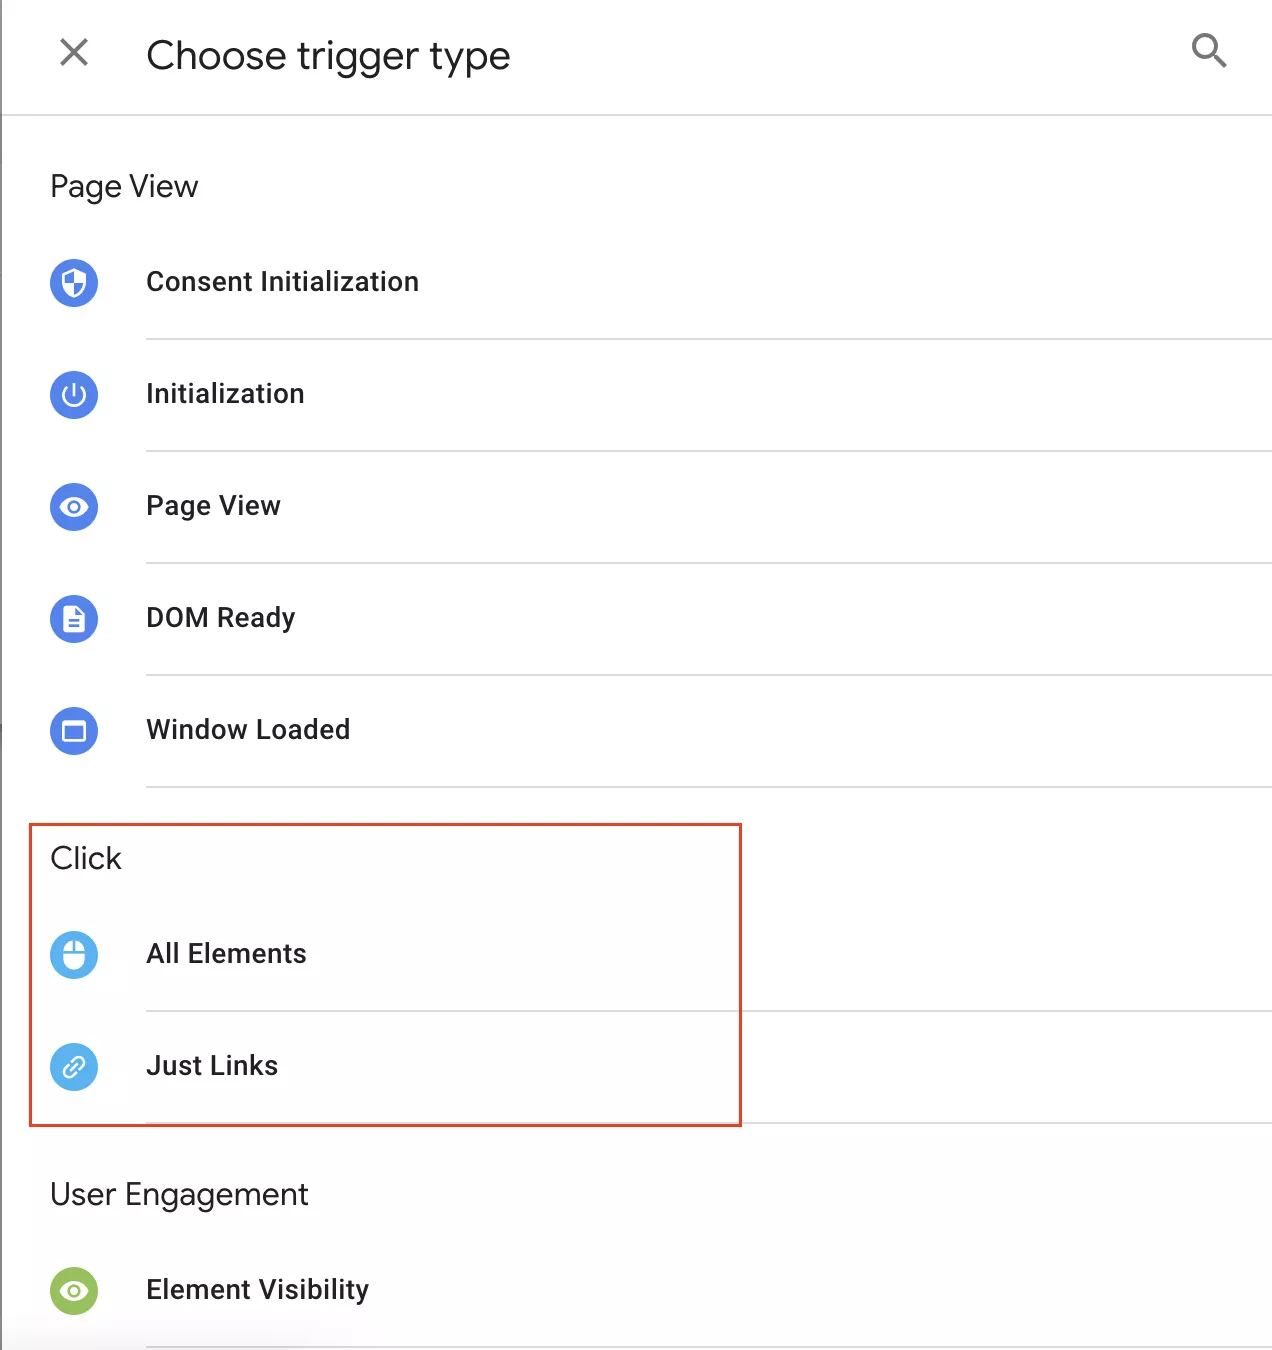
The All Elements trigger tracks clicks on any element, while the Just Links trigger only tracks clicks on links.
See the next section for more information on creating both tags.
To set up button click tracking, you need to know its unique identifier.
Step 3: Assign a unique identifier to the button.
A unique identifier allows you to distinguish a specific button from other elements on the page.
The main types of identifiers are:
- ID
- Class
- Name
How to get an ID:
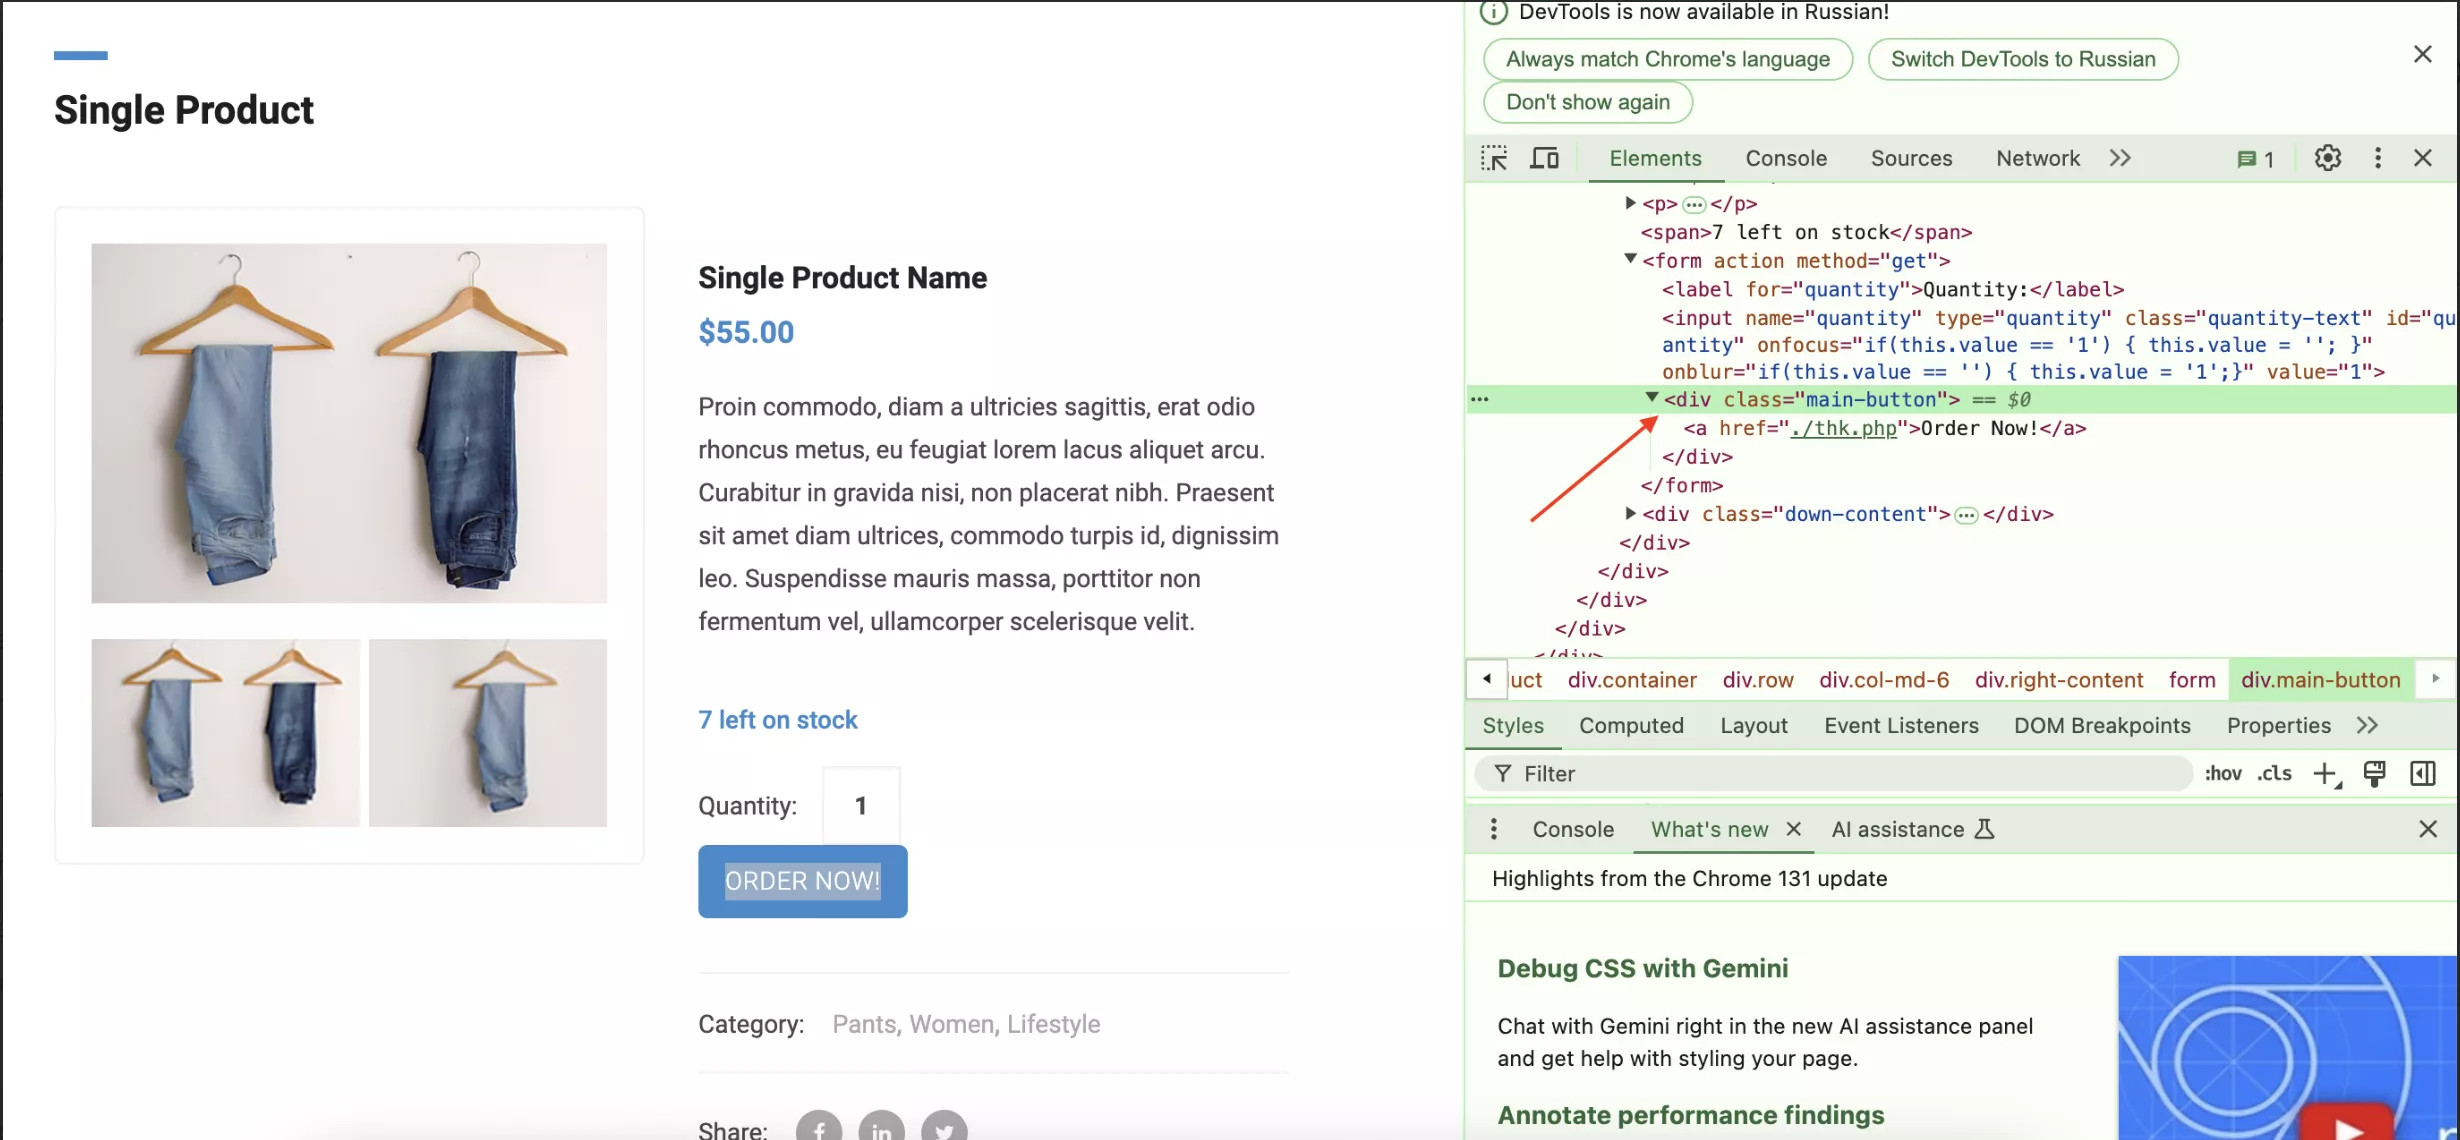
- Open the webpage containing the button you want to track.
- Right-click on the button and select "View code" or "Inspect code," depending on your operating system and browser type.
- The website code will appear, and the element that characterizes the button will be highlighted. Left-click on the button you want to track. The highlighted line in the page code is the unique identifier for your button.
Another way to identify a unique button on a website is to use the "Click — All Elements" trigger. This trigger serves as an aid, but it is not required to configure the tag.
To enable the trigger:
- Go to the Triggers section and create a Click — All Elements trigger. Select All Clicks as the trigger condition because it is important to record all clicks and determine the unique identifier of the button you are tracking.
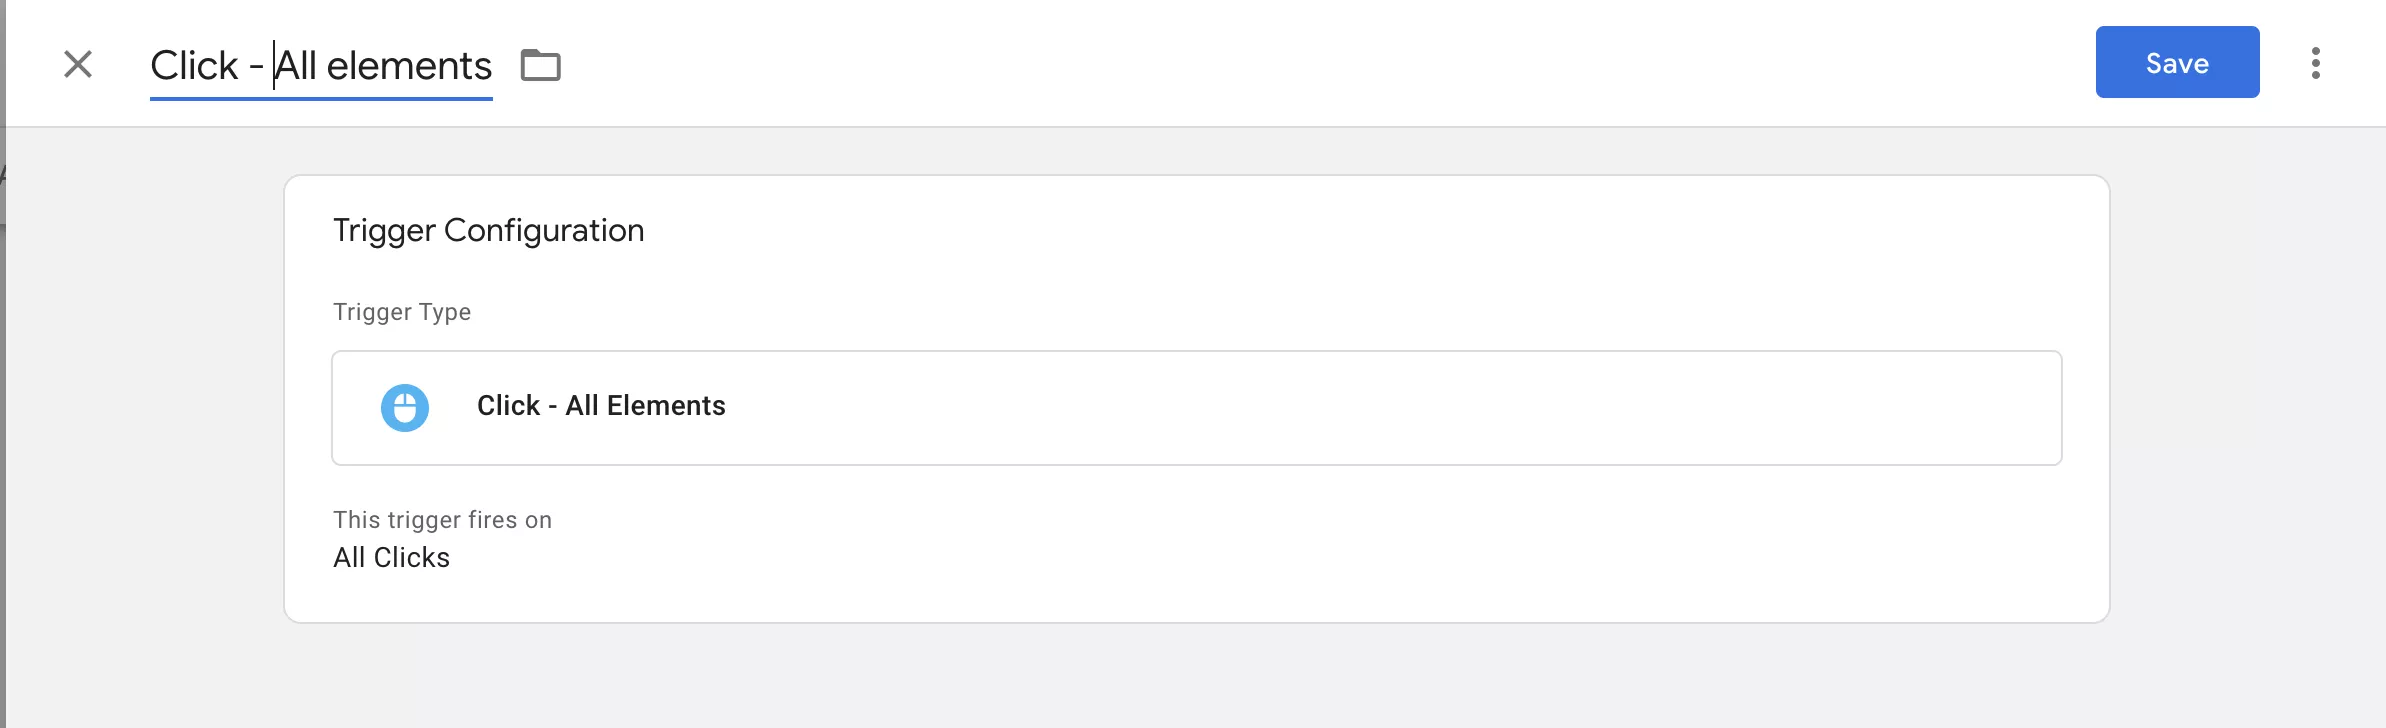
- Save the trigger and activate preview mode.
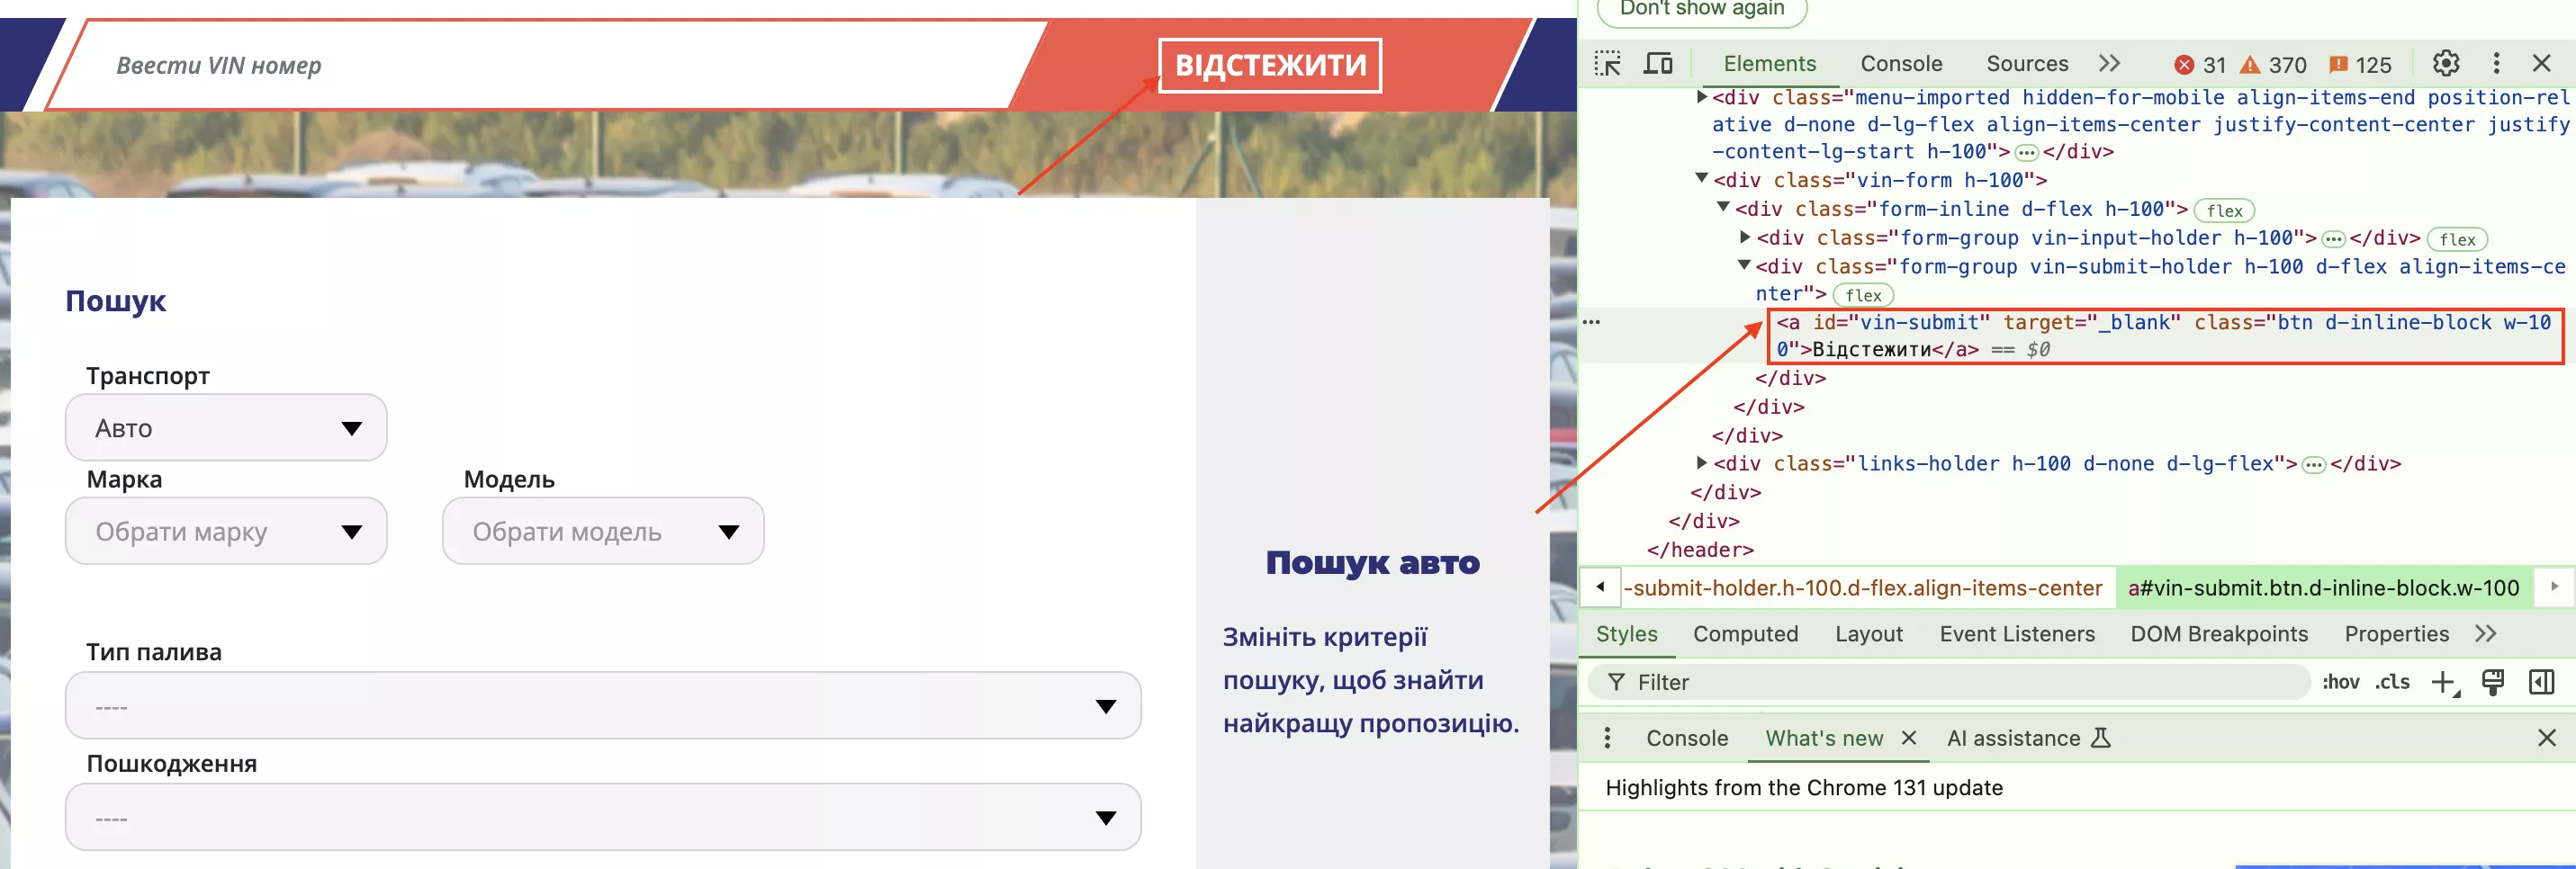
- Go to the website and click on the button you want to track. Review the values of the variables that were activated in the first step. In the left sidebar, click on Event Scale, then click on Click, and finally click on the Variables tab. You will see the values that the variables have taken here.
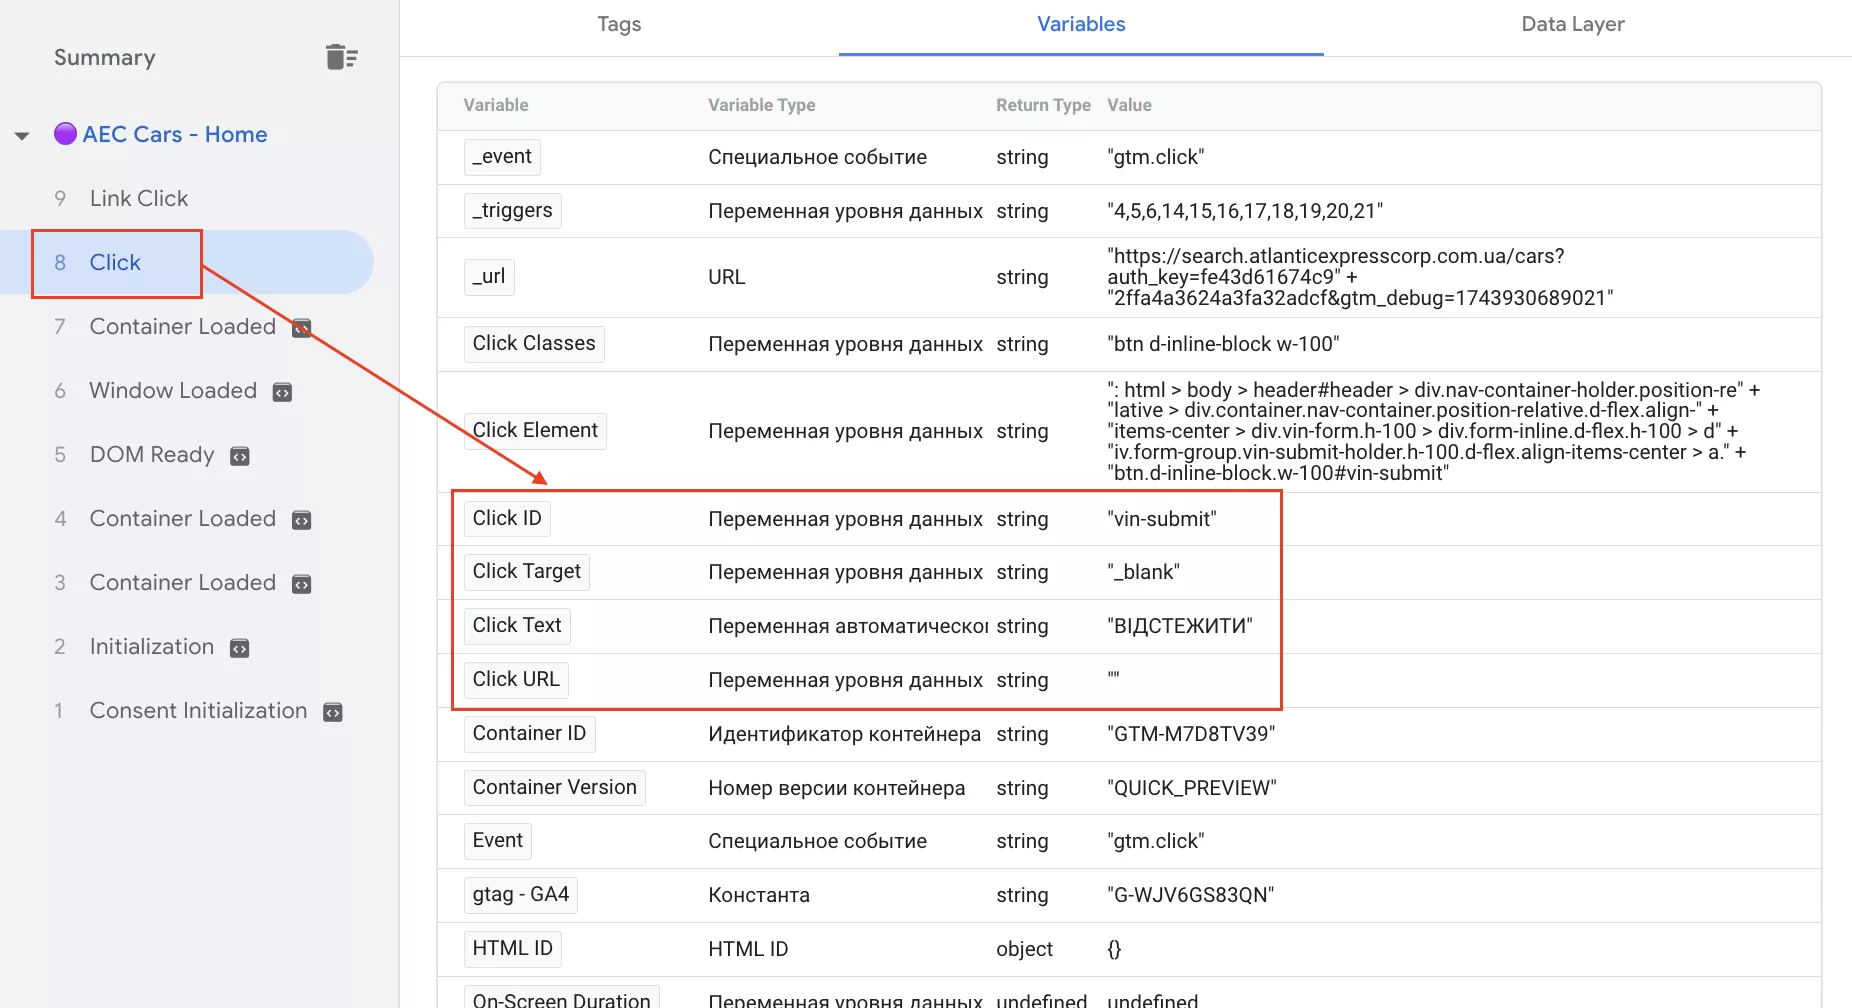
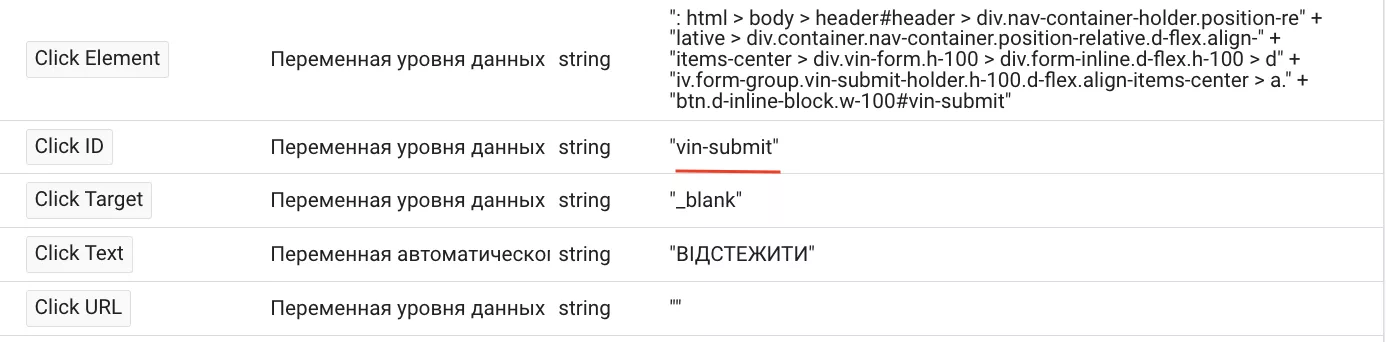
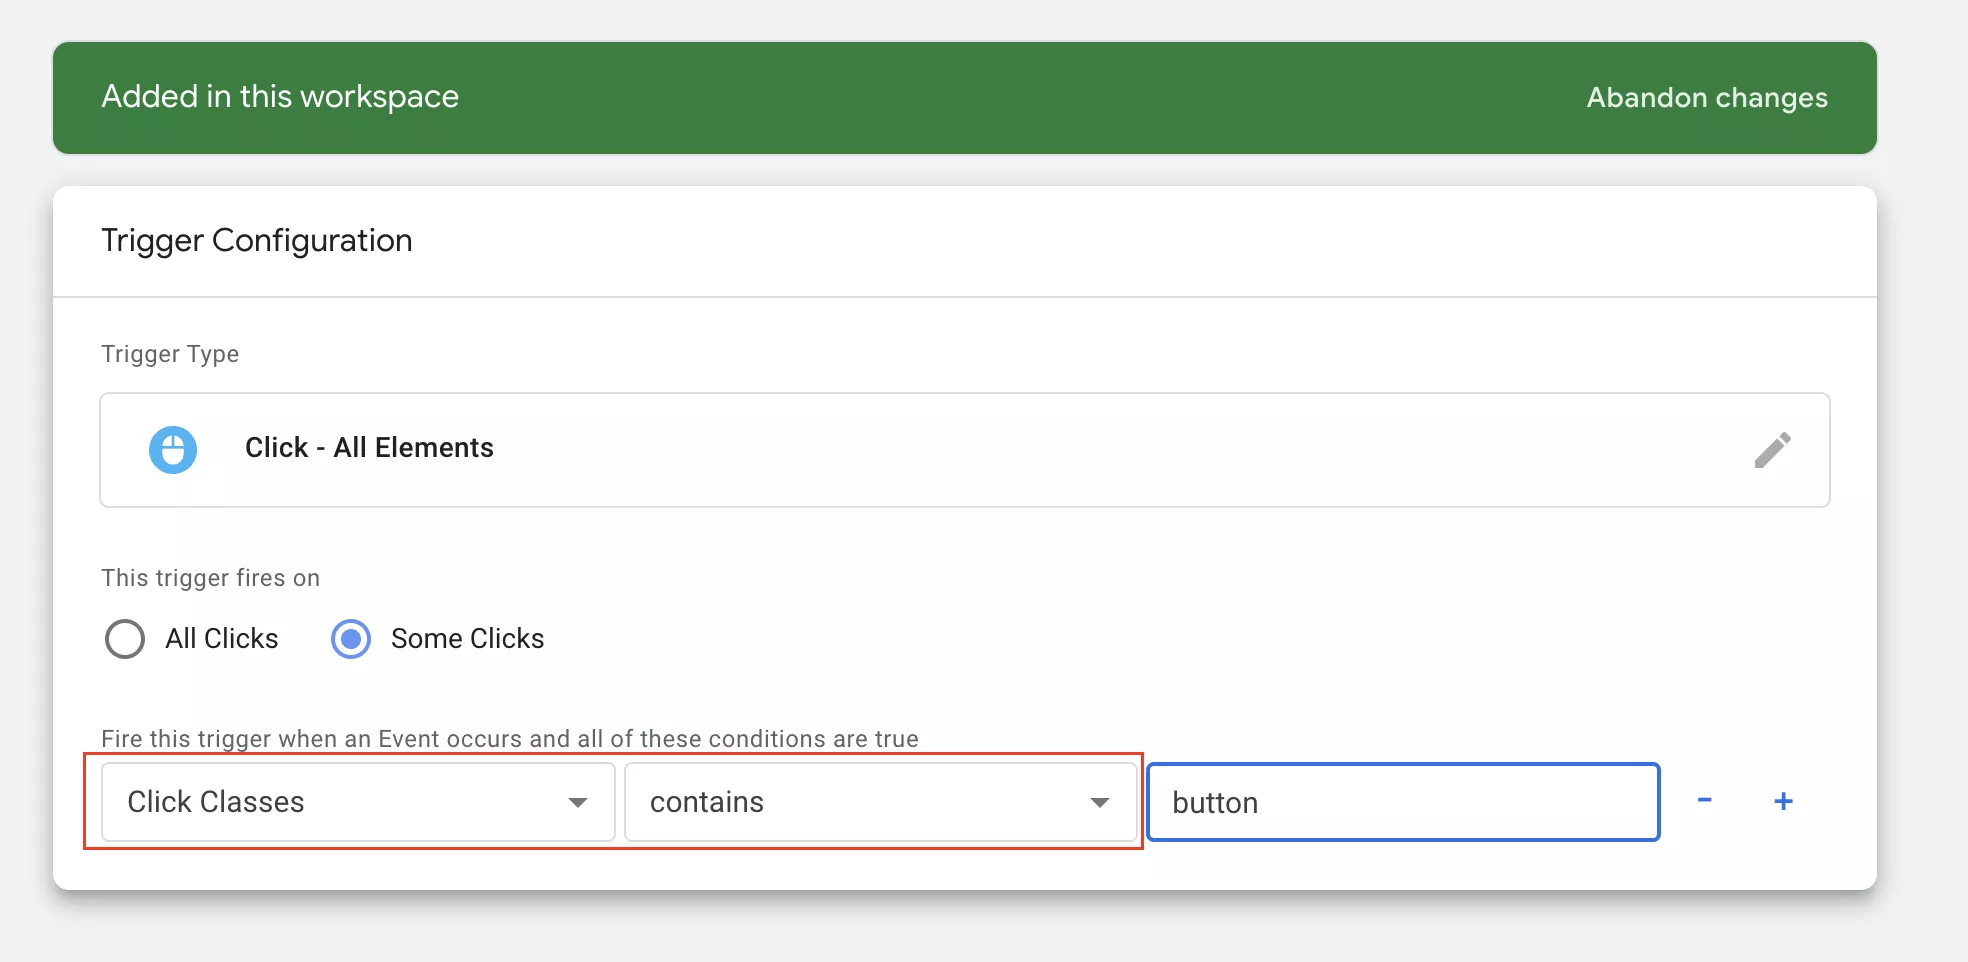
The button has two identifiers: a Click ID and a Click Class. This information is needed when configuring additional trigger activation conditions.
Note: When copying a variable value from preview mode, only select the value and do not include the quotation marks, as they are not part of the identifier.
How to determine a unique identifier
The steps are as follows:
- If the element has an ID, you can use Click ID as the trigger activation condition and select contains.
- If the element has a class, the trigger activation condition is Click Classes > equals/contains.
- If none of these elements are present, select Click Element > matches CSS Selector.
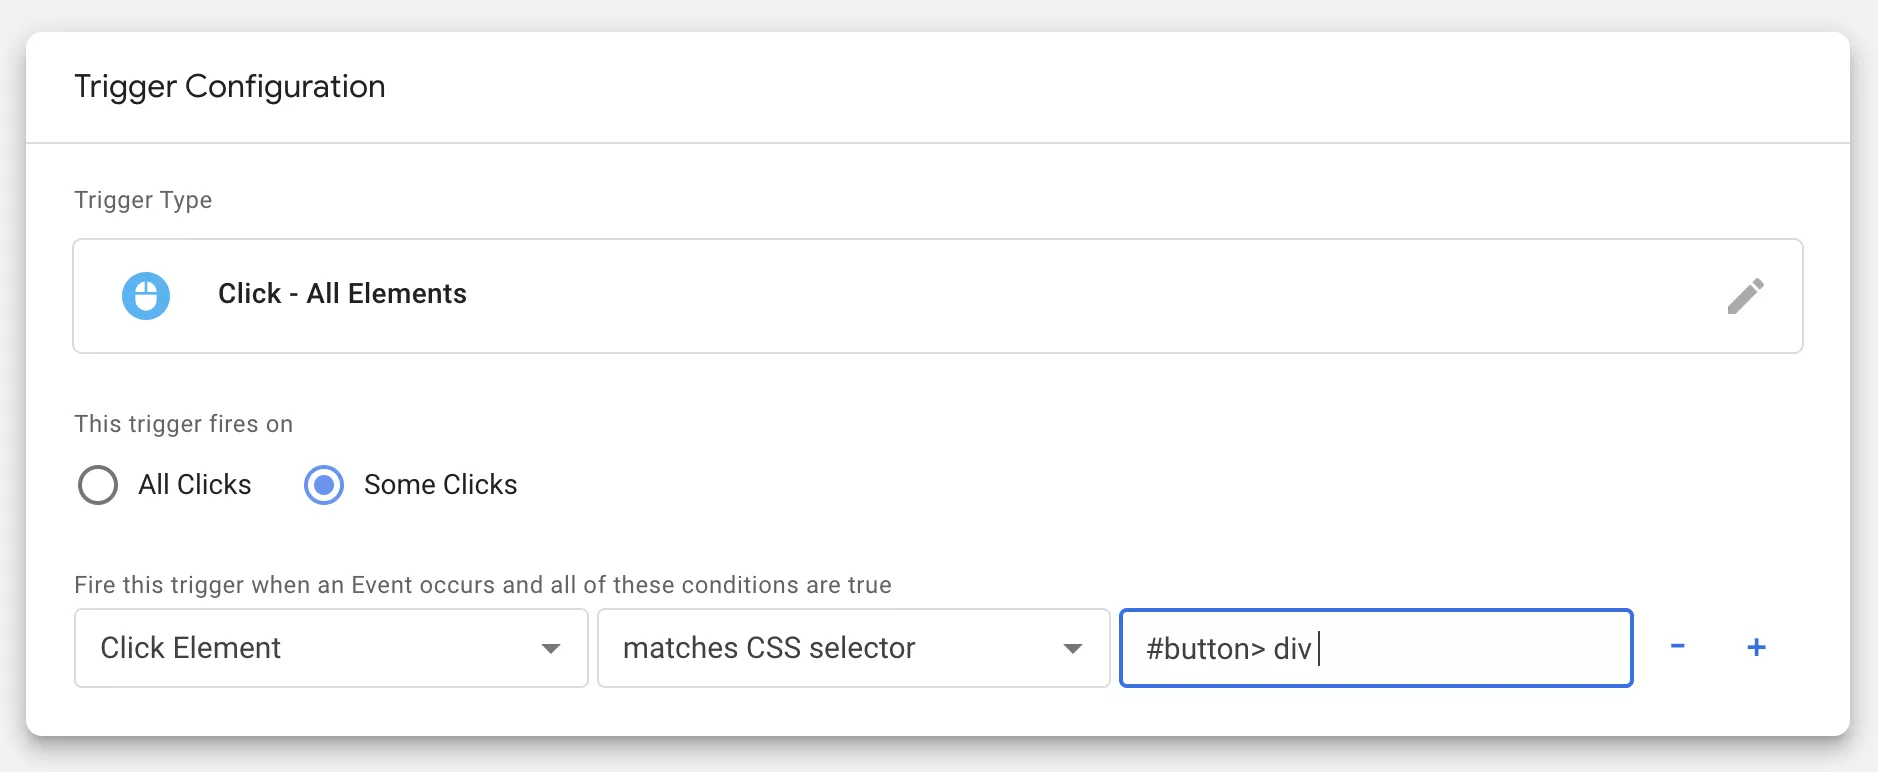
Since this option requires an in-depth knowledge of CSS selectors, it will not be covered in this article.
I do not recommend selecting Click Text as the identifier because it does not distinguish the uniqueness of the button that needs to be tracked. This option may not work in the following cases:
- The website has multiple languages.
- The site is constantly changing.
- Other pages on the site have buttons with the same name.
Step 4: Set up the trigger and create a tag for it.
To do this:
- Go to Triggers in the container.
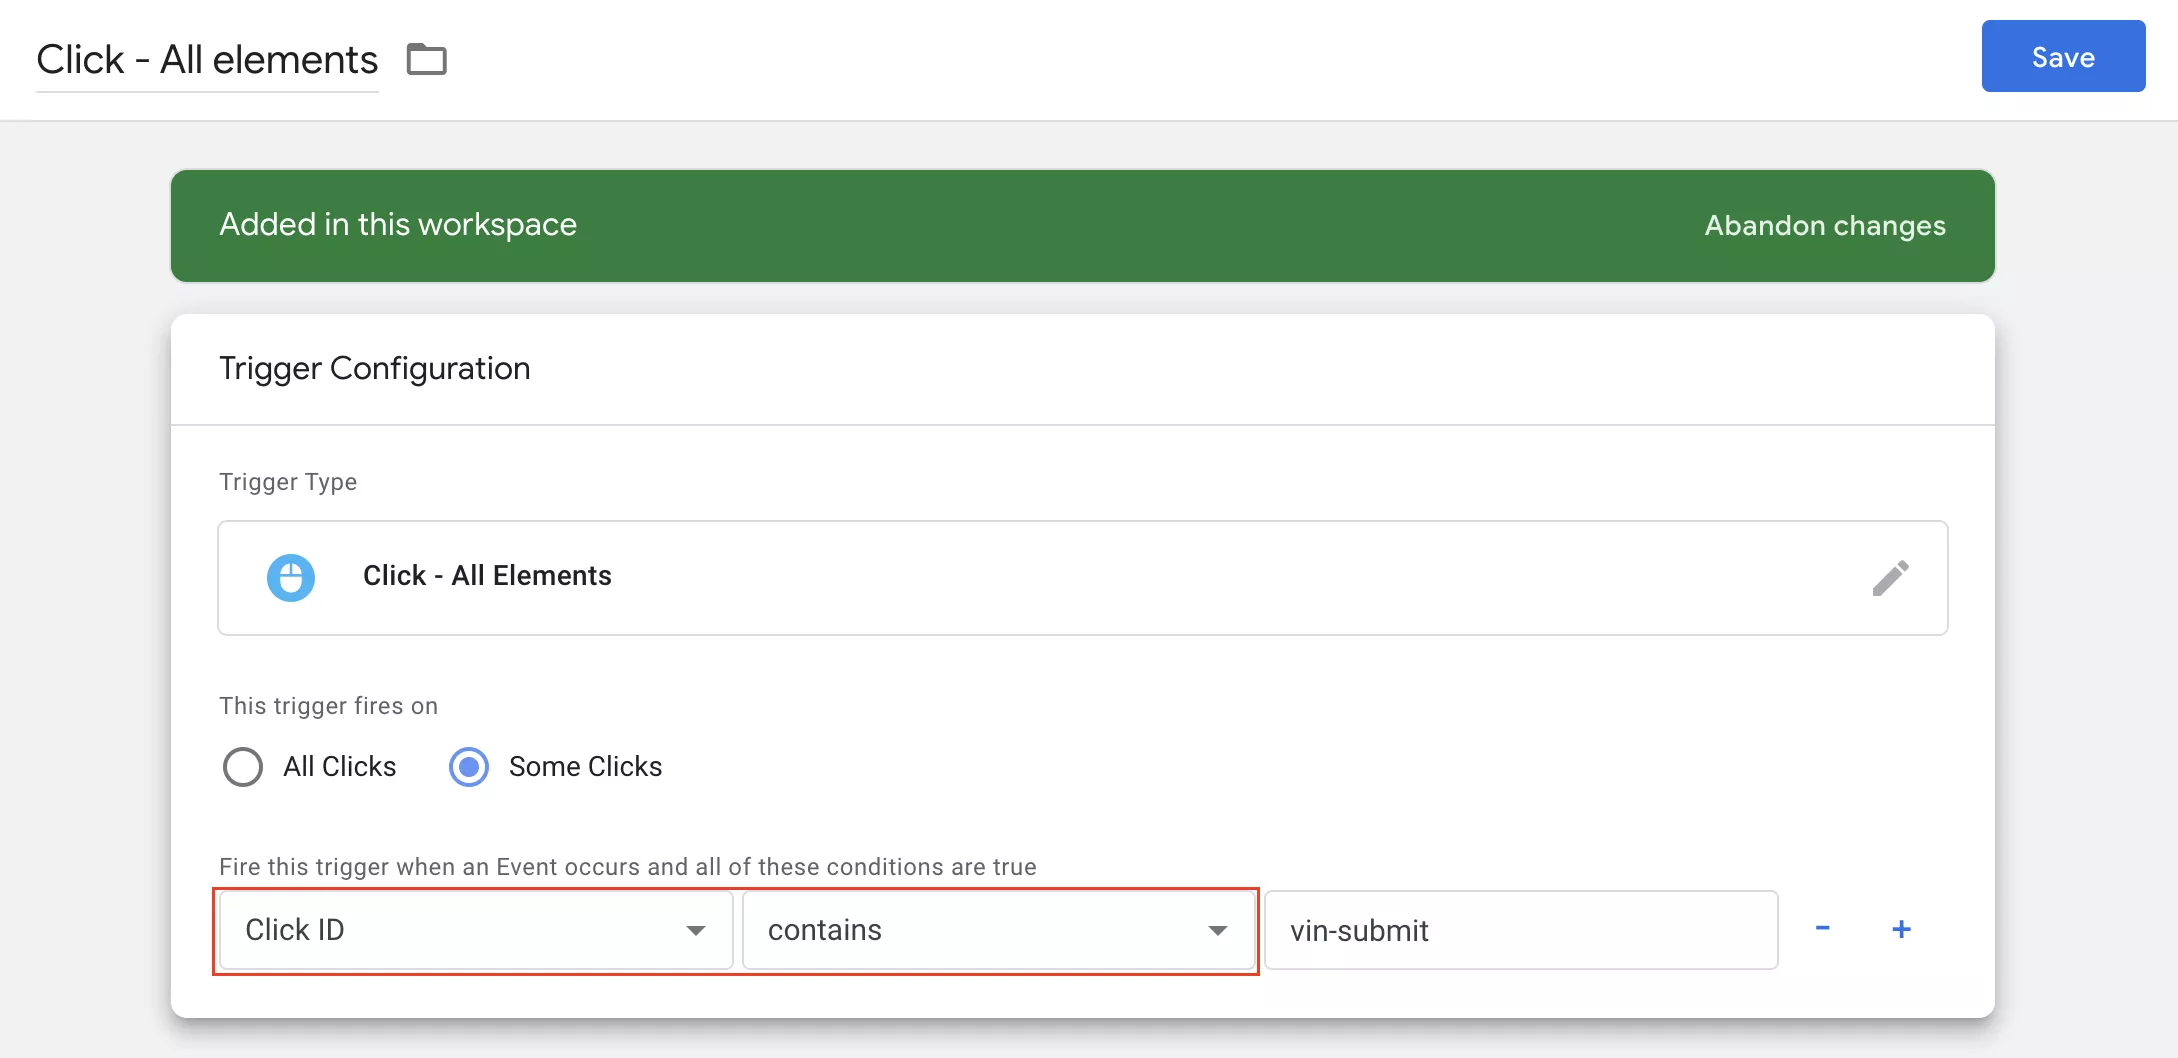
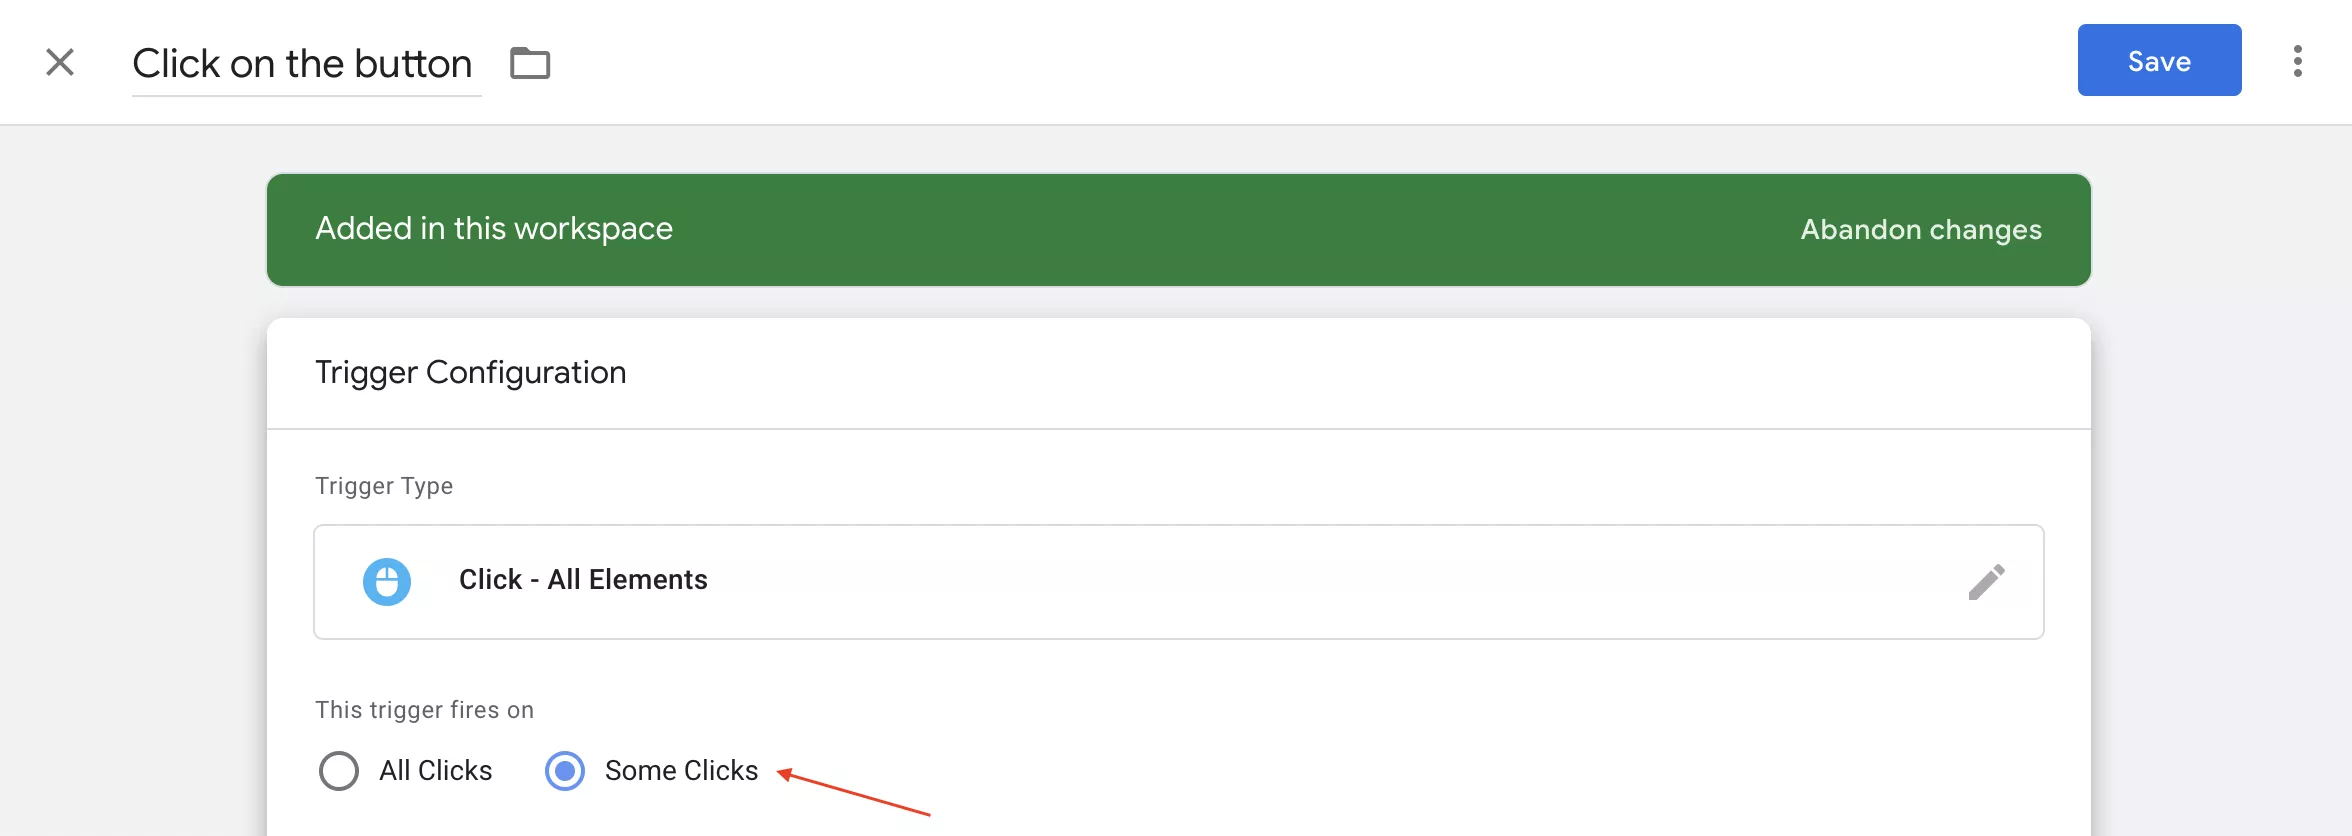
- Click Create and name the trigger Click — All elements. In the section named This trigger fires on, select Some clicks.
- In the field to select additional trigger activation conditions, select Click ID, contains, and finally, vin-submit.
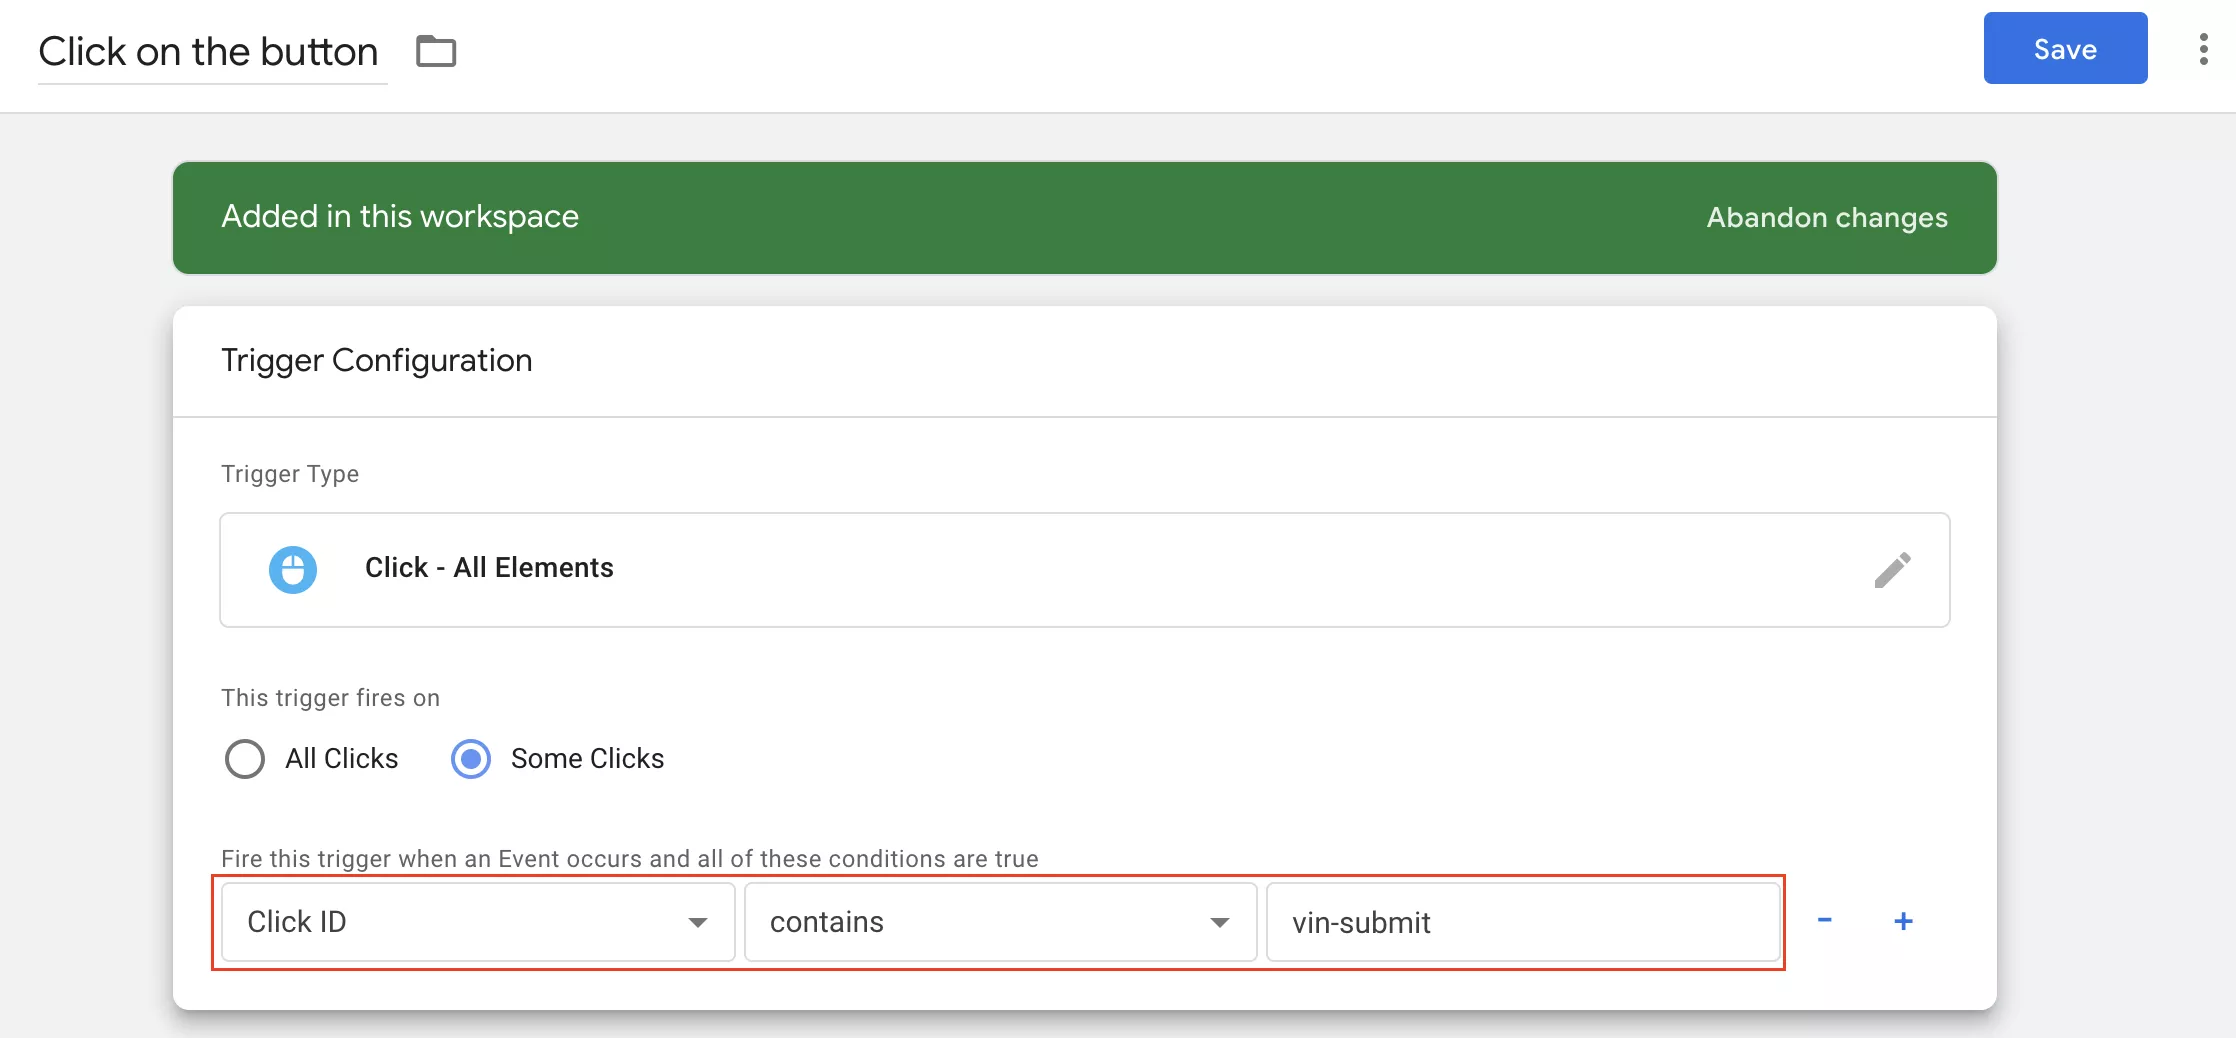
- Save your settings, and then proceed to the Tags section.
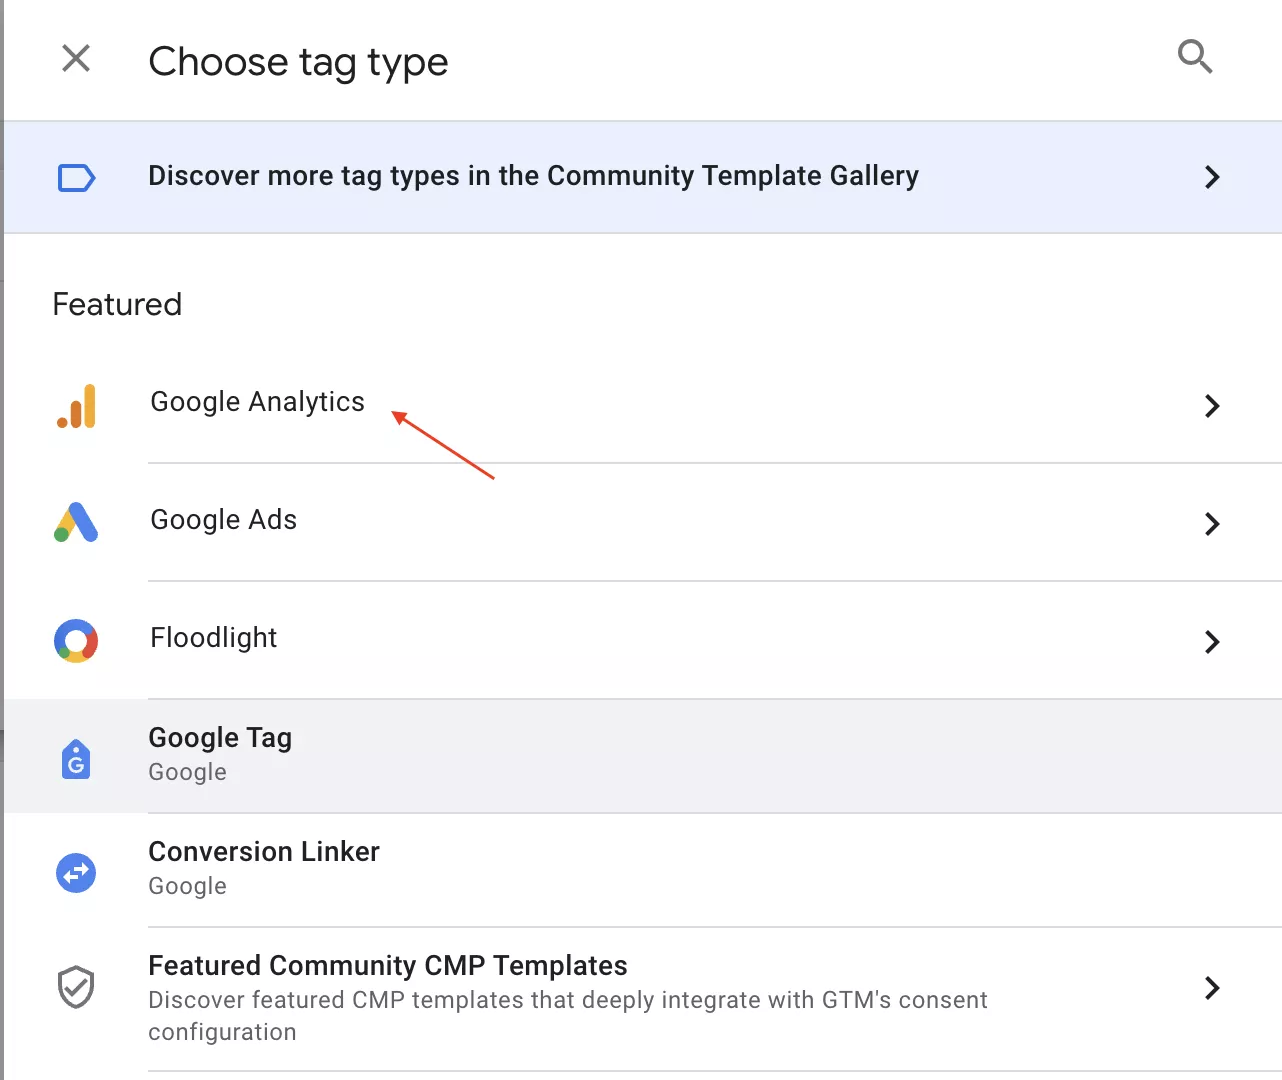
- Click New in the upper right corner.
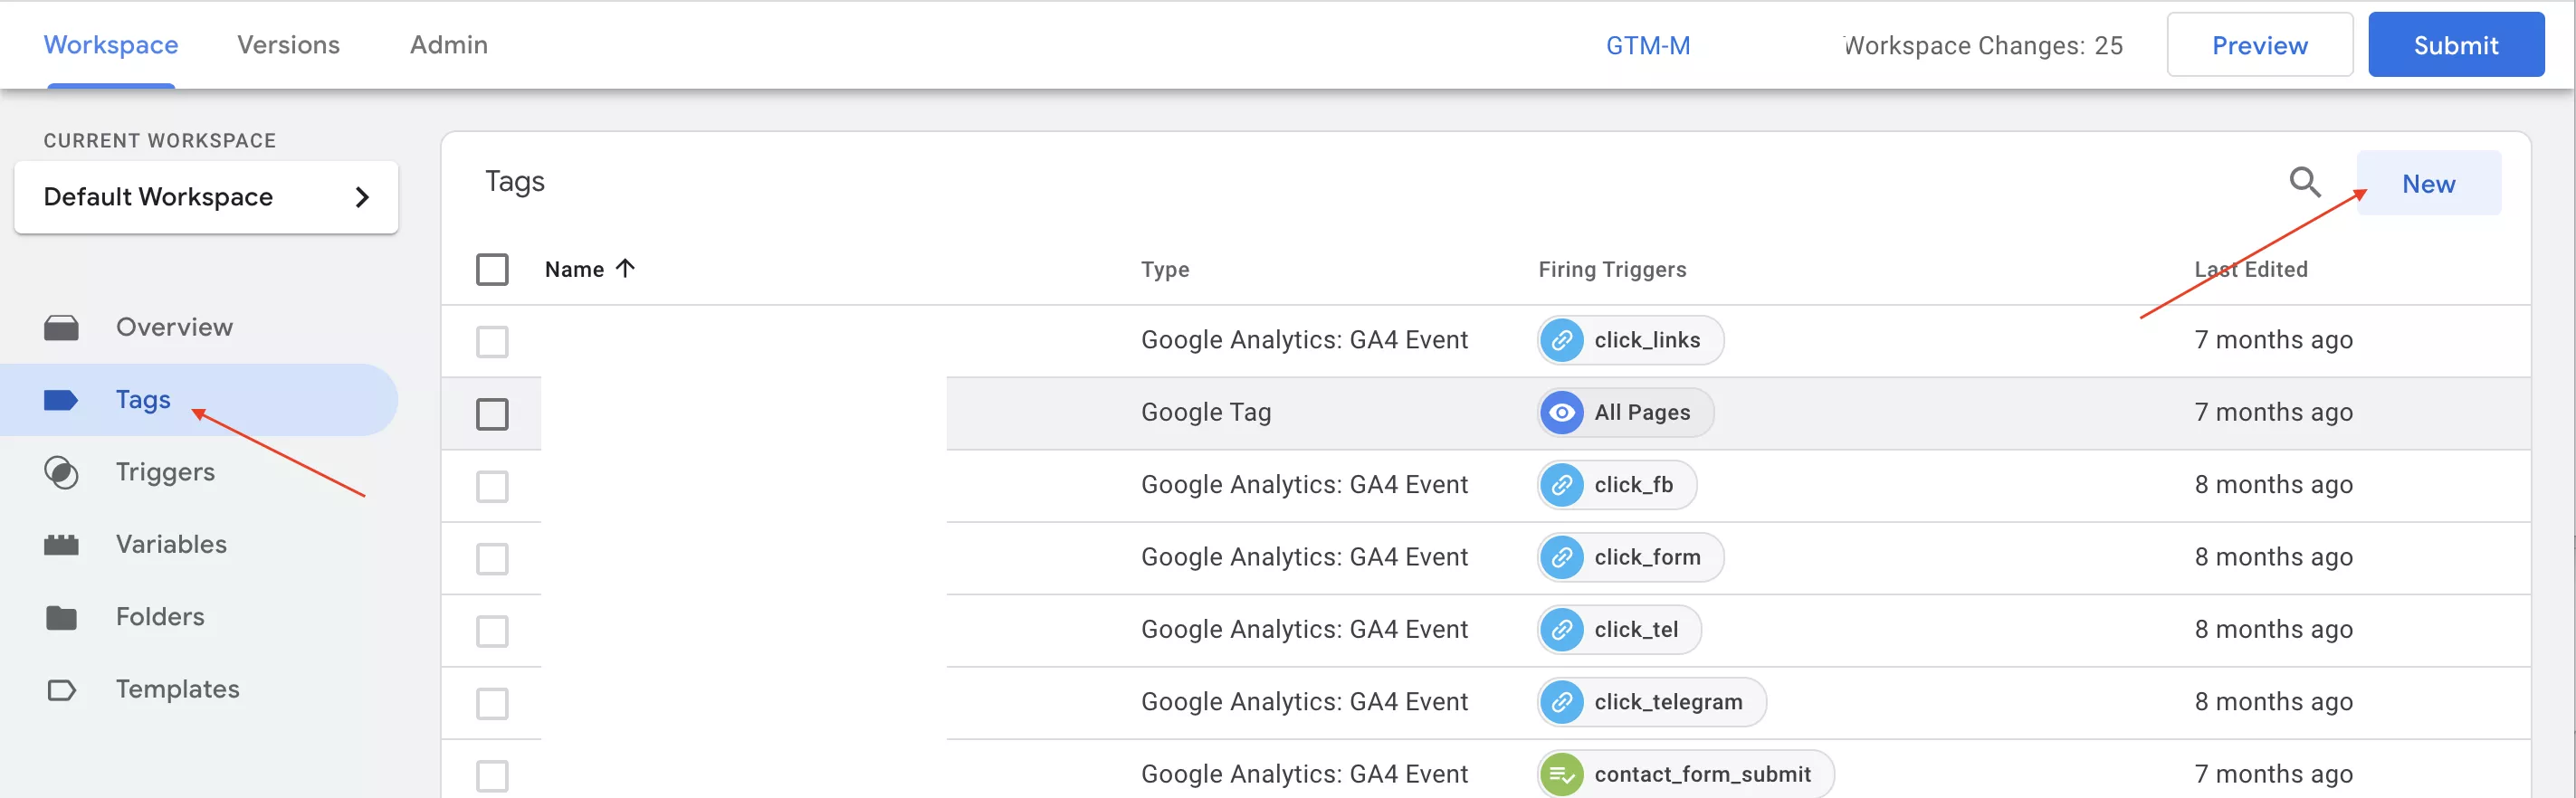
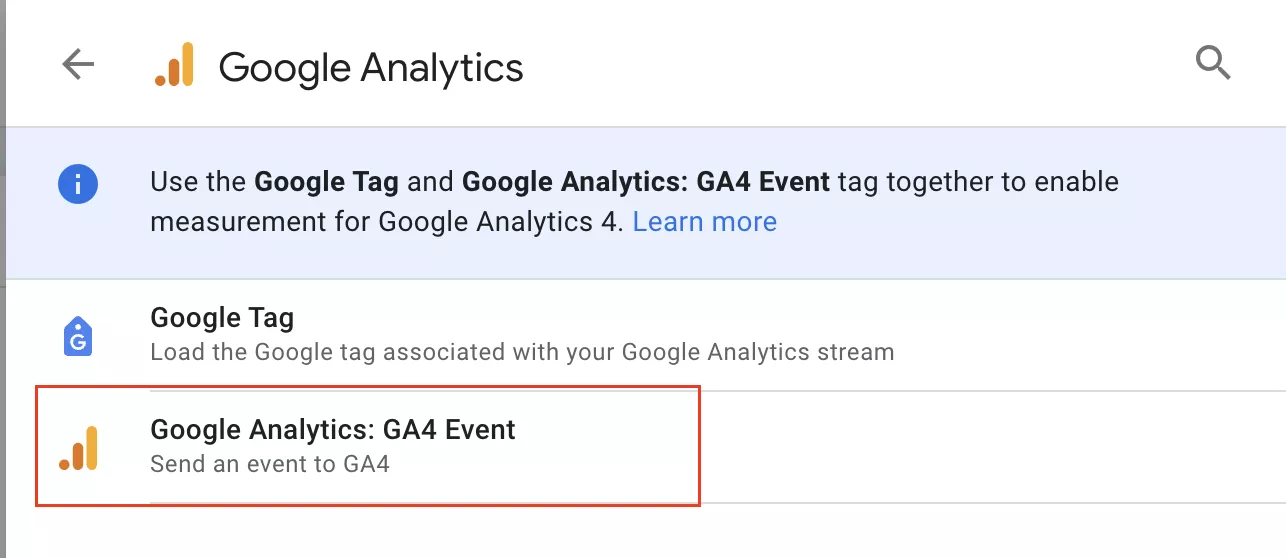
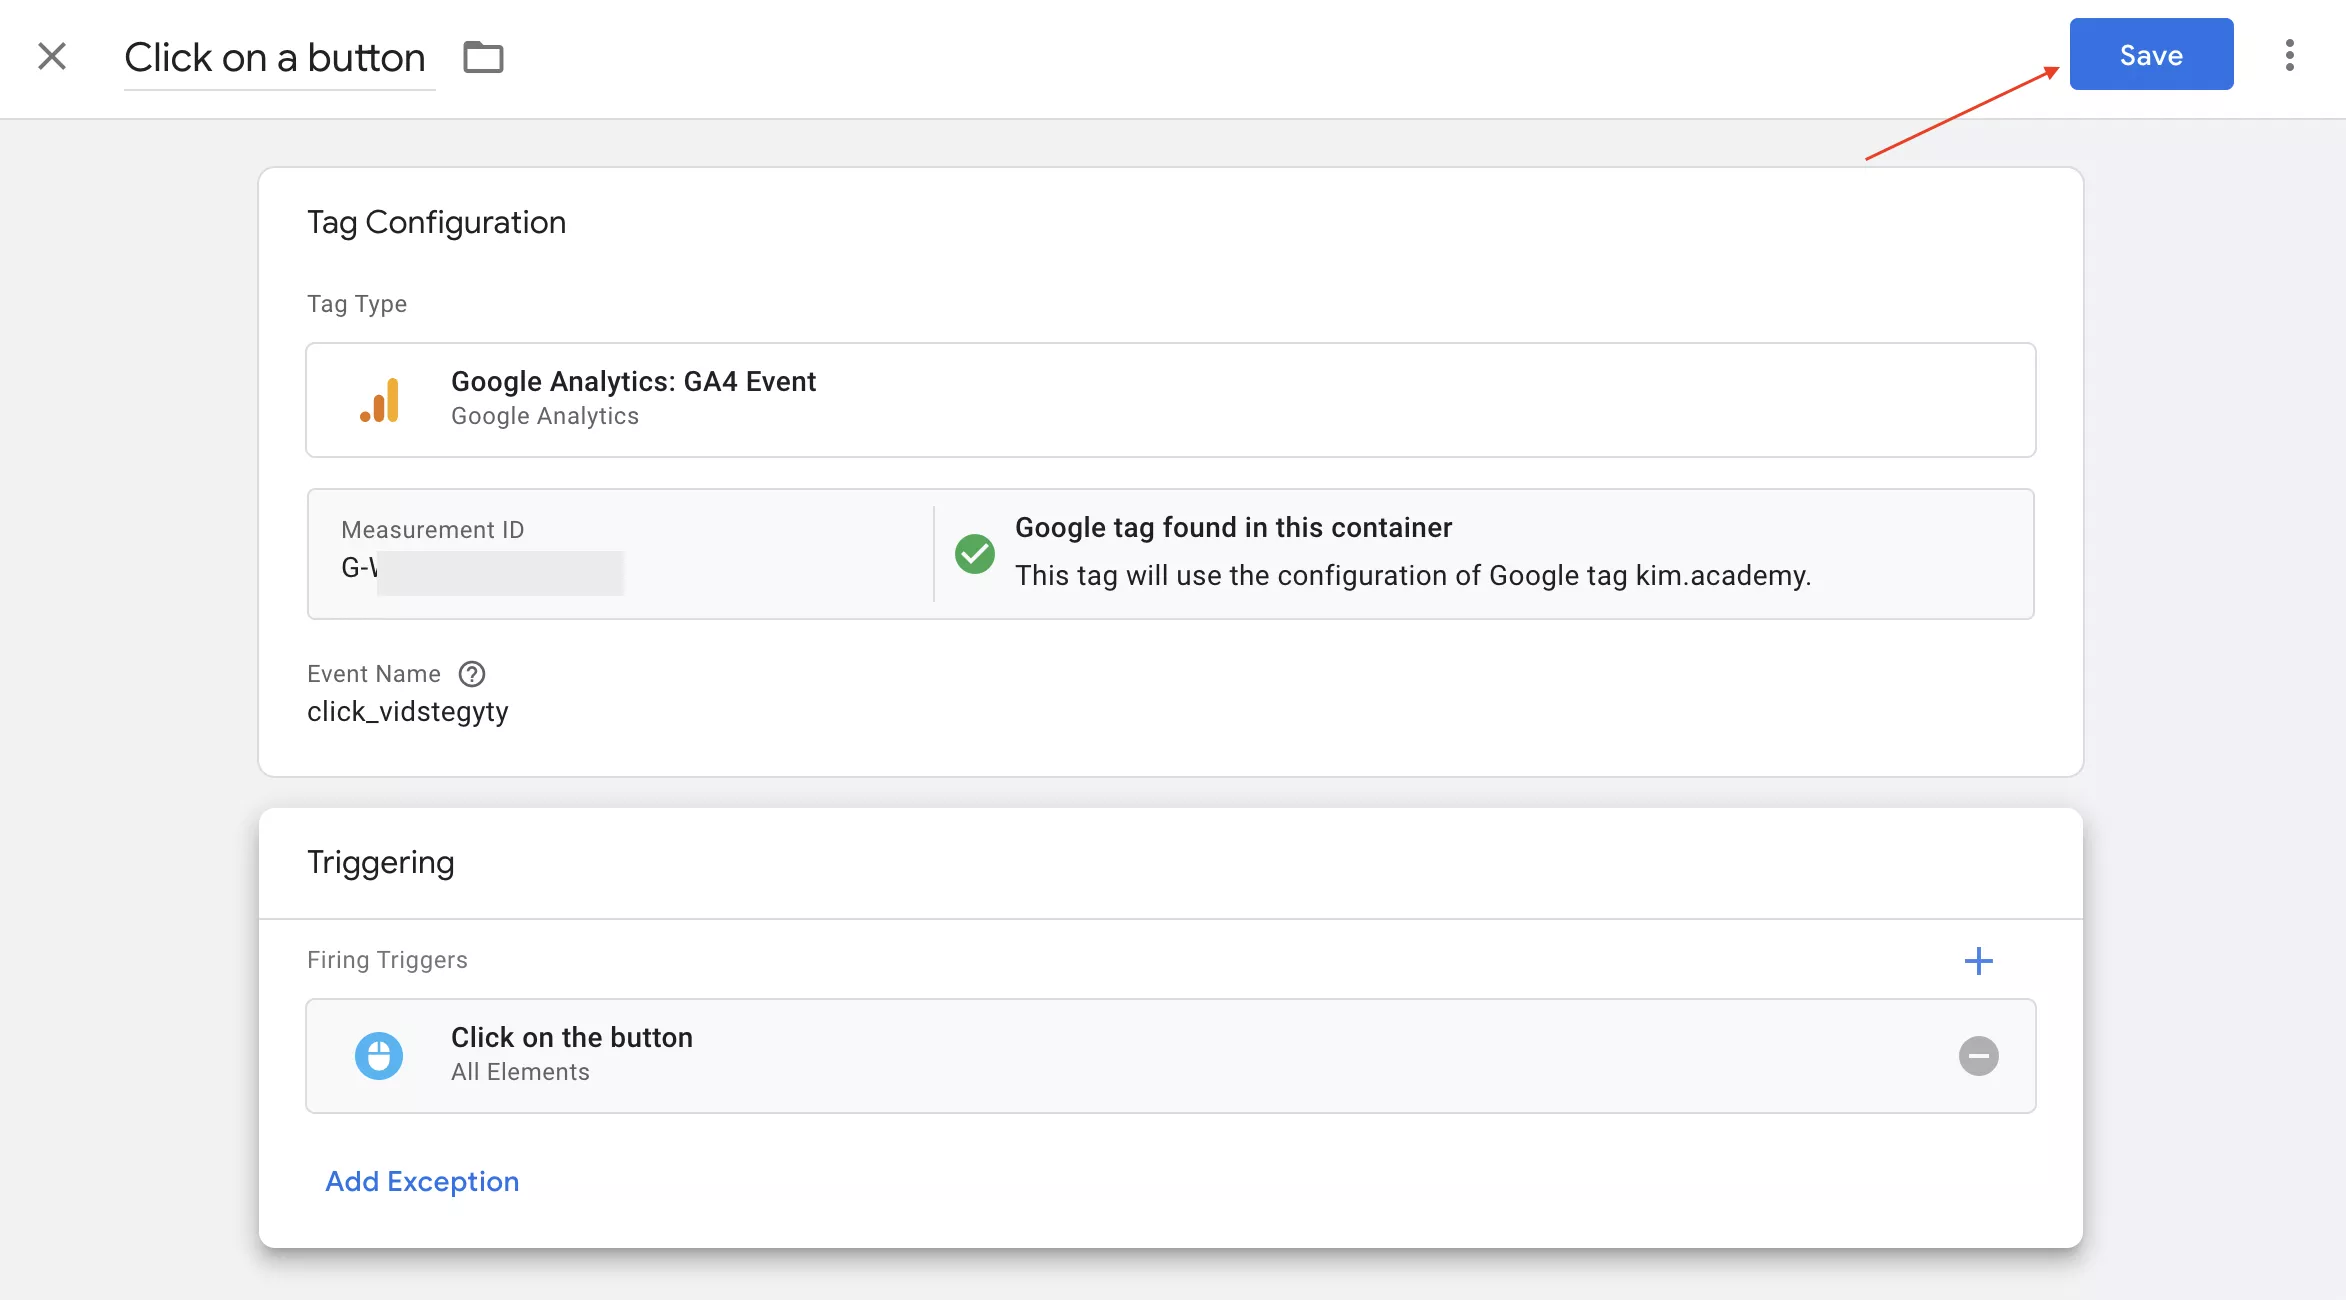
- Select the GA4 Event tag type.
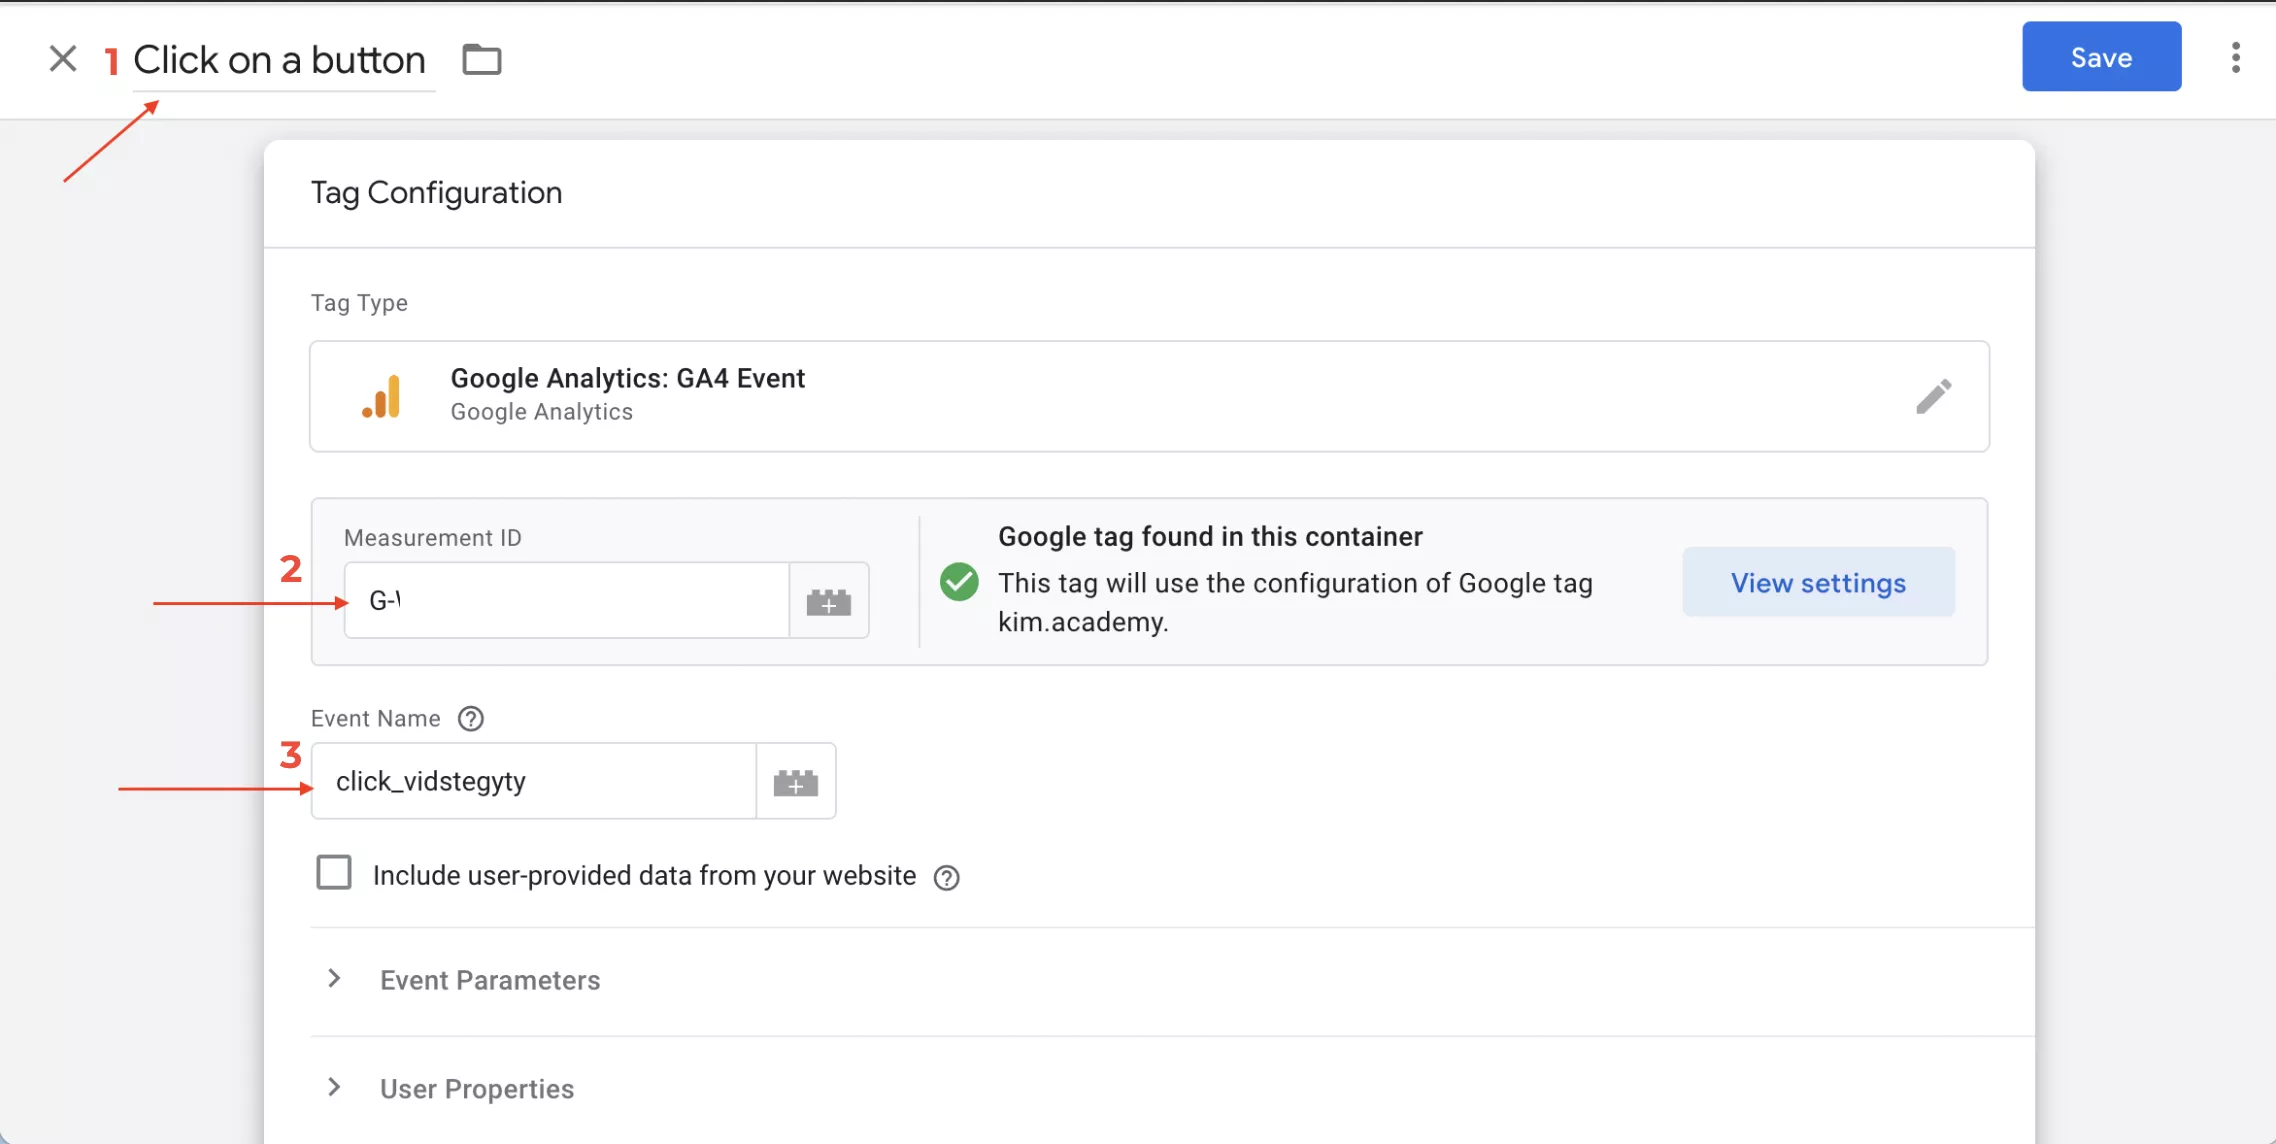
Go to the tag settings and do the following:
- Change its name.
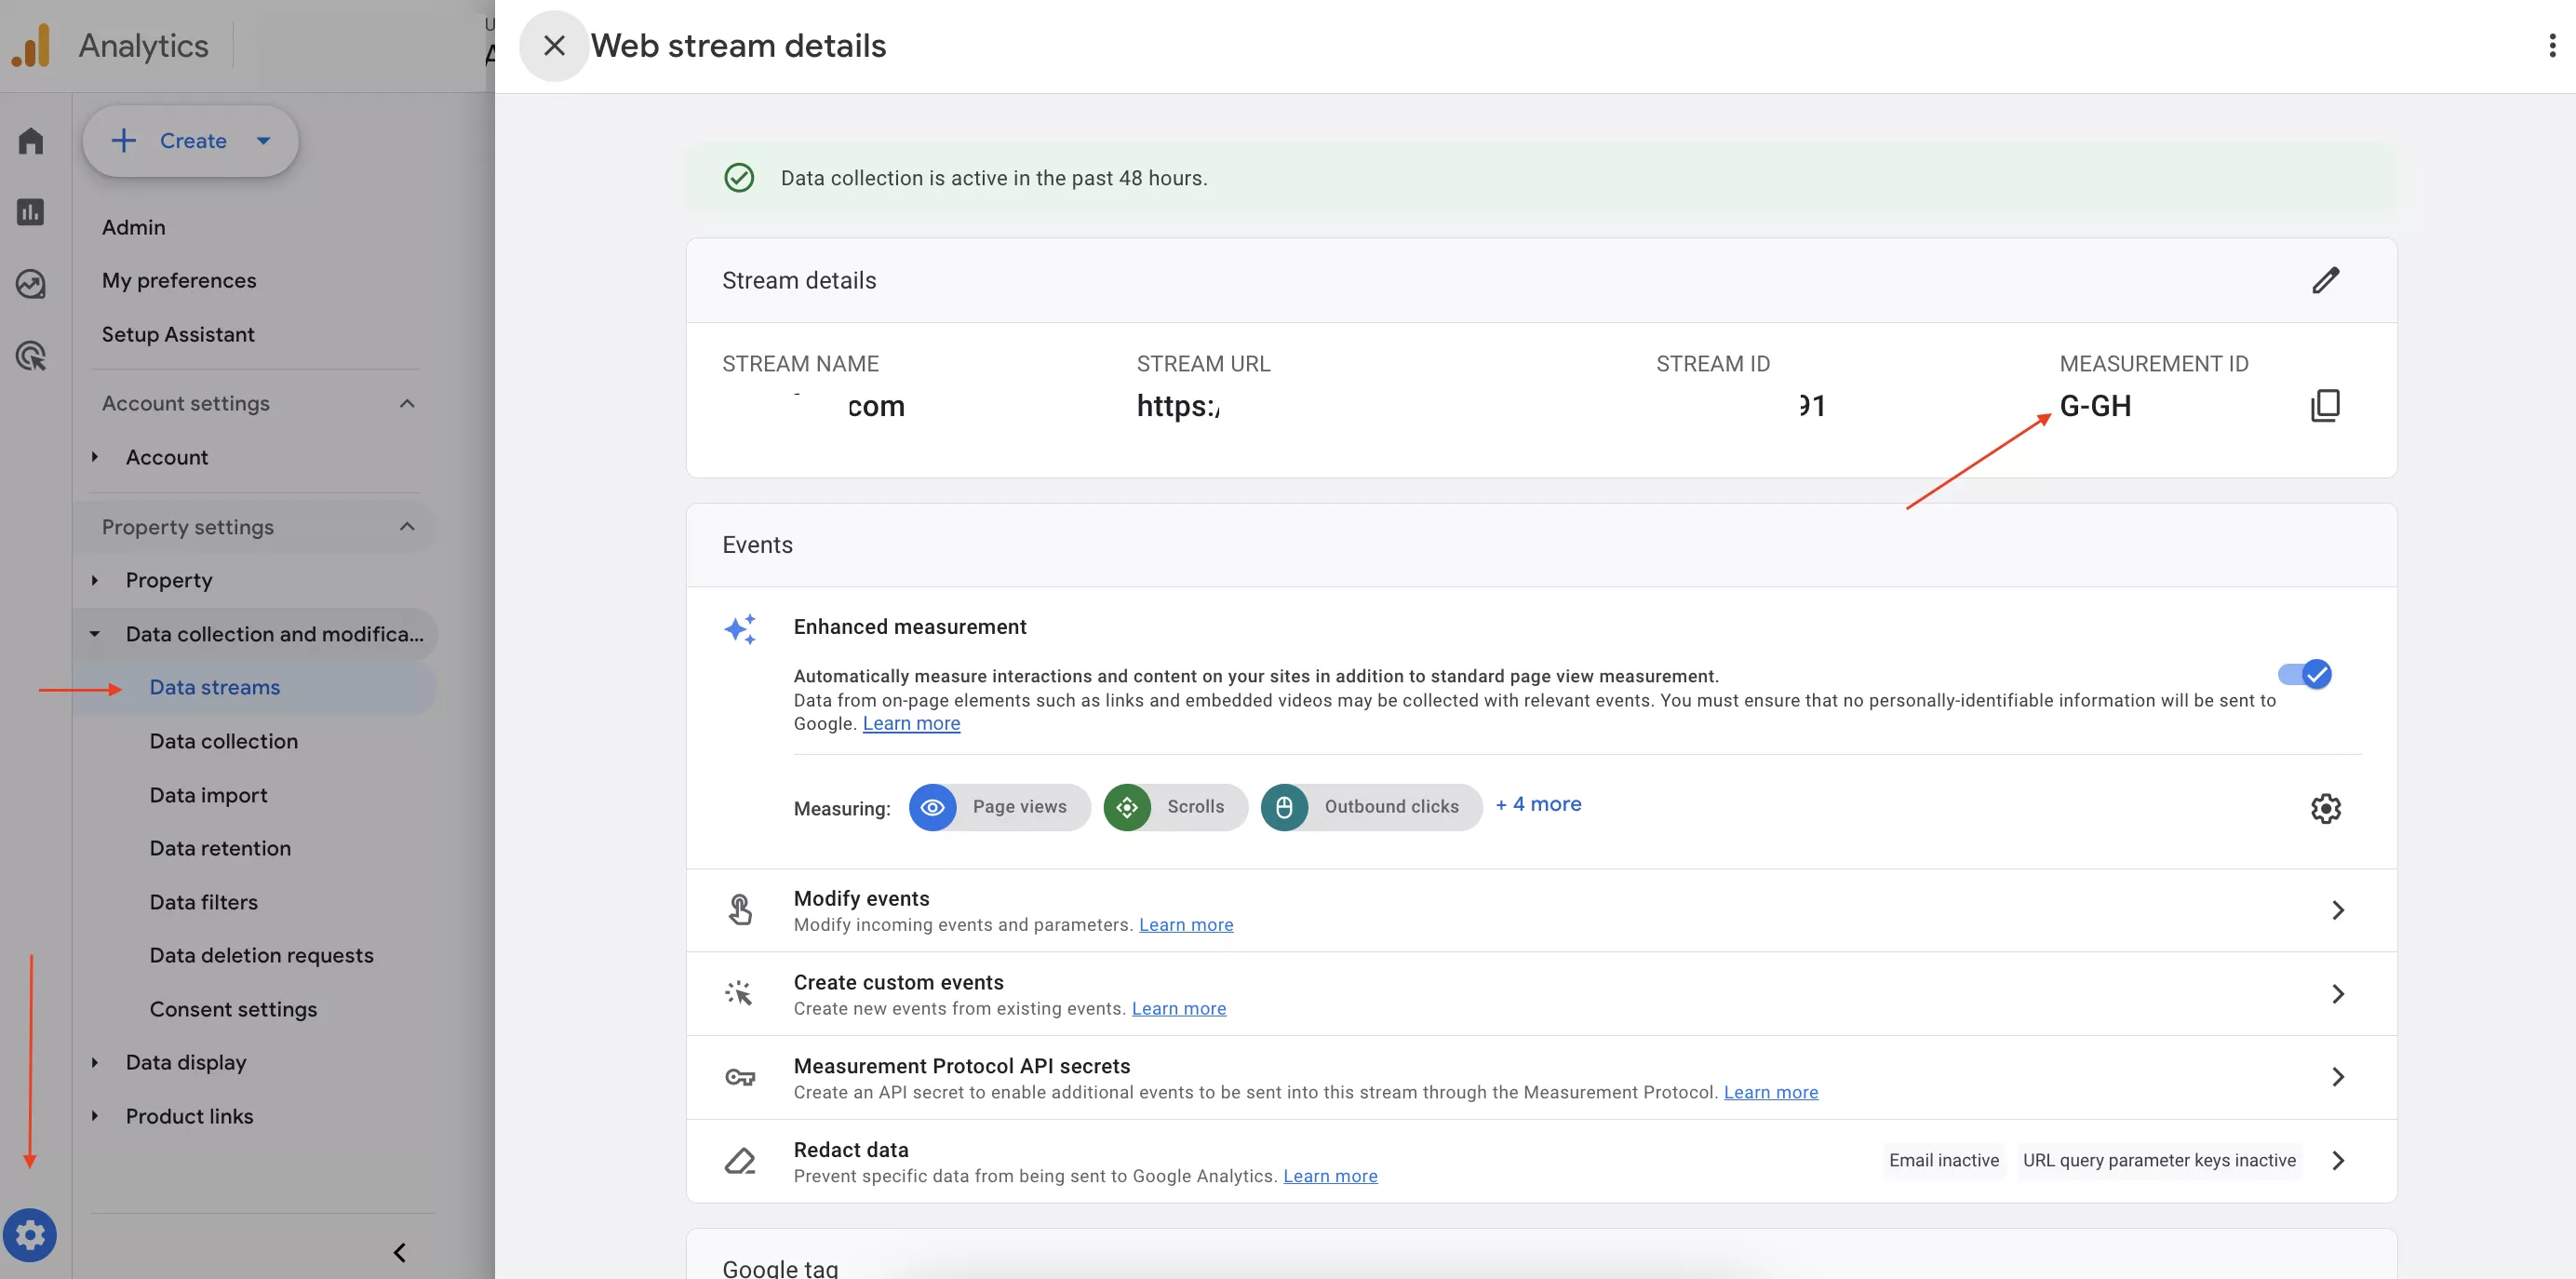
- Add a metric ID. This is the analytics ID that is set on the website and already configured in your GTM container.
- Add an event name. Note that the event name will appear in the "Events" section of your GA4 resource.
When naming a new event, follow these rules:
- Event names are case sensitive (e.g., my_event and My_Event refer to different events).
- Event names can include words and letters in English and other languages.
- Do not use reserved prefixes or event names. For more information, see Google Help.
- Event names must start with a letter and can include only letters, numbers, and underscores. Do not use spaces.
To avoid data inconsistencies when uploading to other resources, I recommend using only English.
- Select the Click on the button trigger configured at the beginning of Step 4 as the activation trigger. Then, click Save.
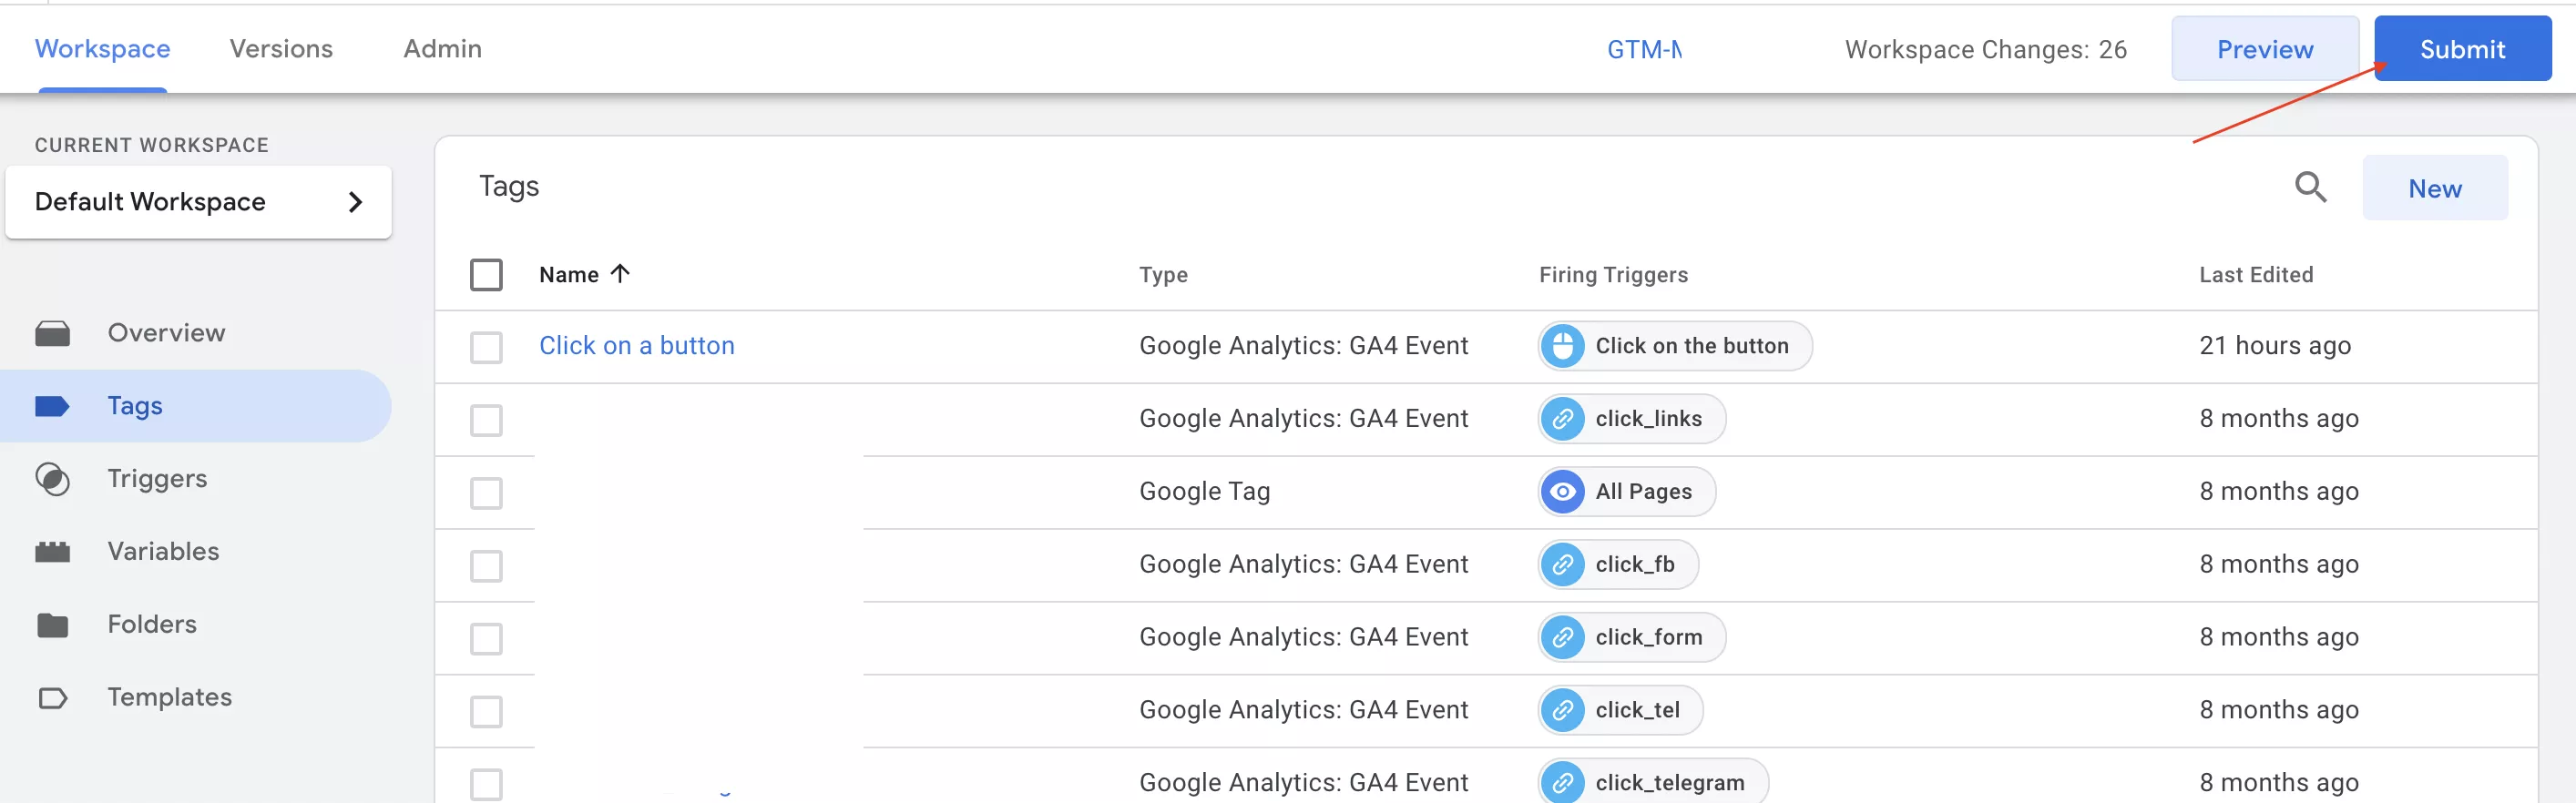
Step 5: Check the settings.
To do this:
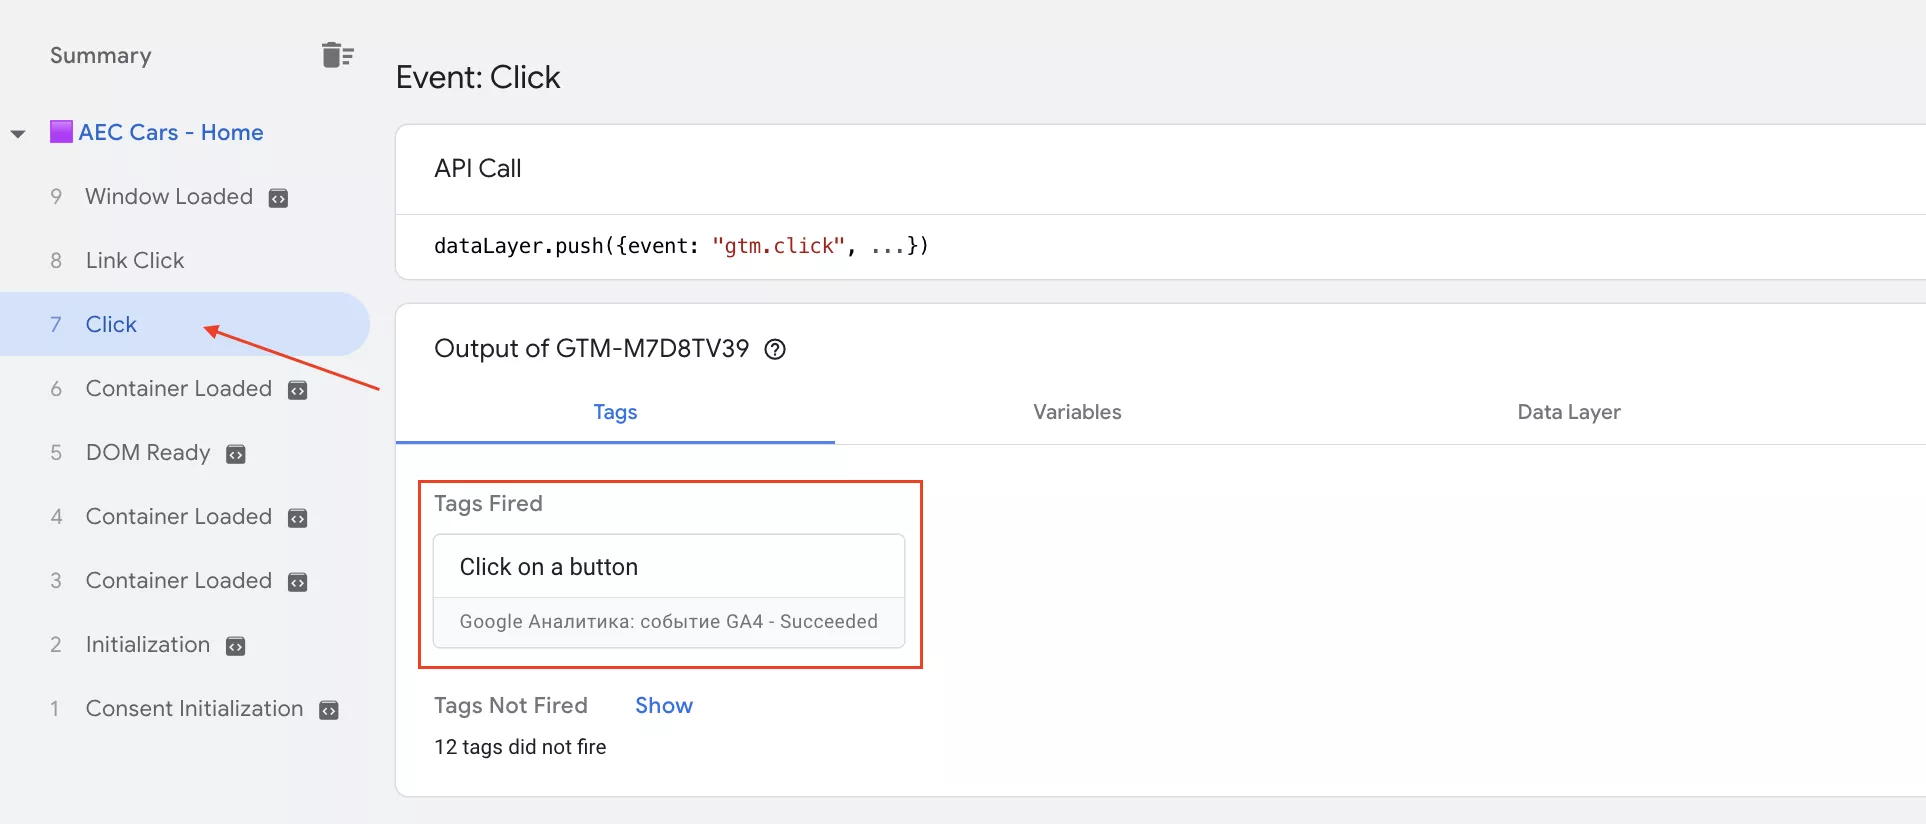
- Activate preview mode.
- On the website that opens in preview mode, click the button you set up for tracking.
- Then, return to the event timeline and select the Click event.
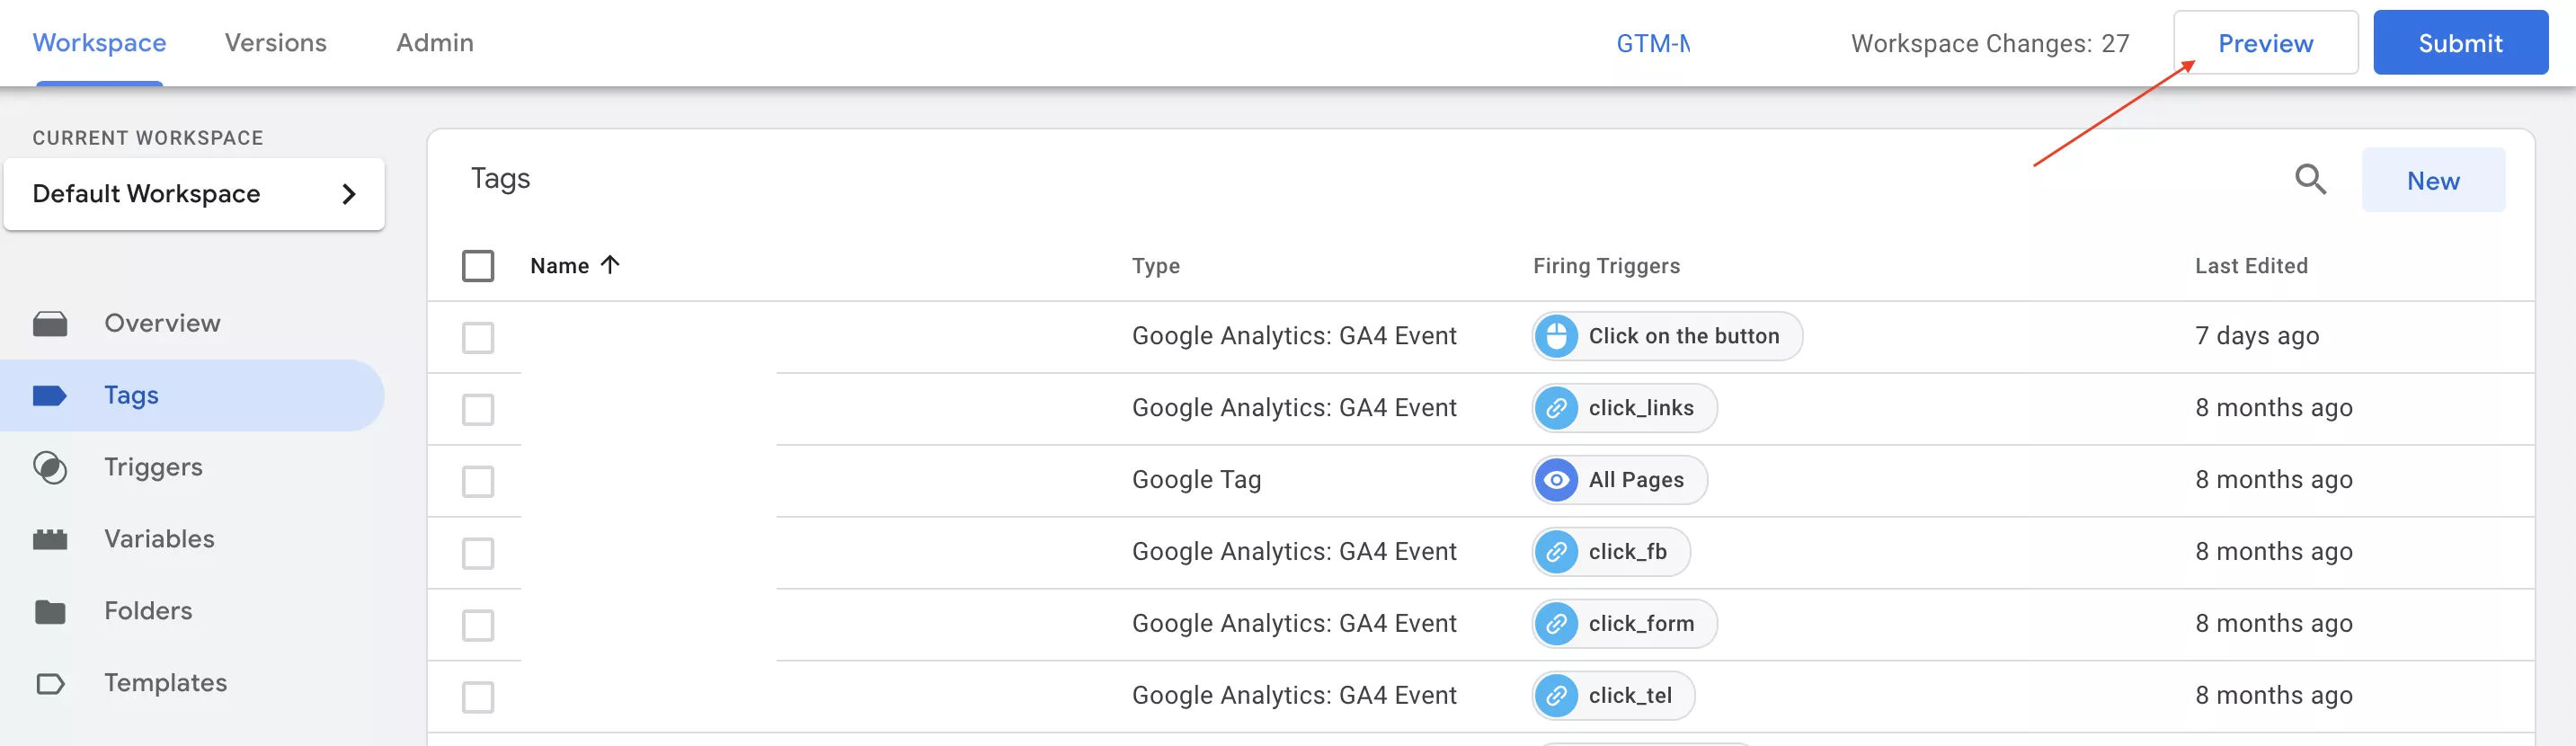
- If the tag appears to be activated in the Tags section, you have set everything up correctly.
- You can now publish the container. Click Submit to publish all changes.
Tracking a button click with a link
Consider a scenario in which you need to track a button click with a link.
- Return to the help trigger that you created in the second step.
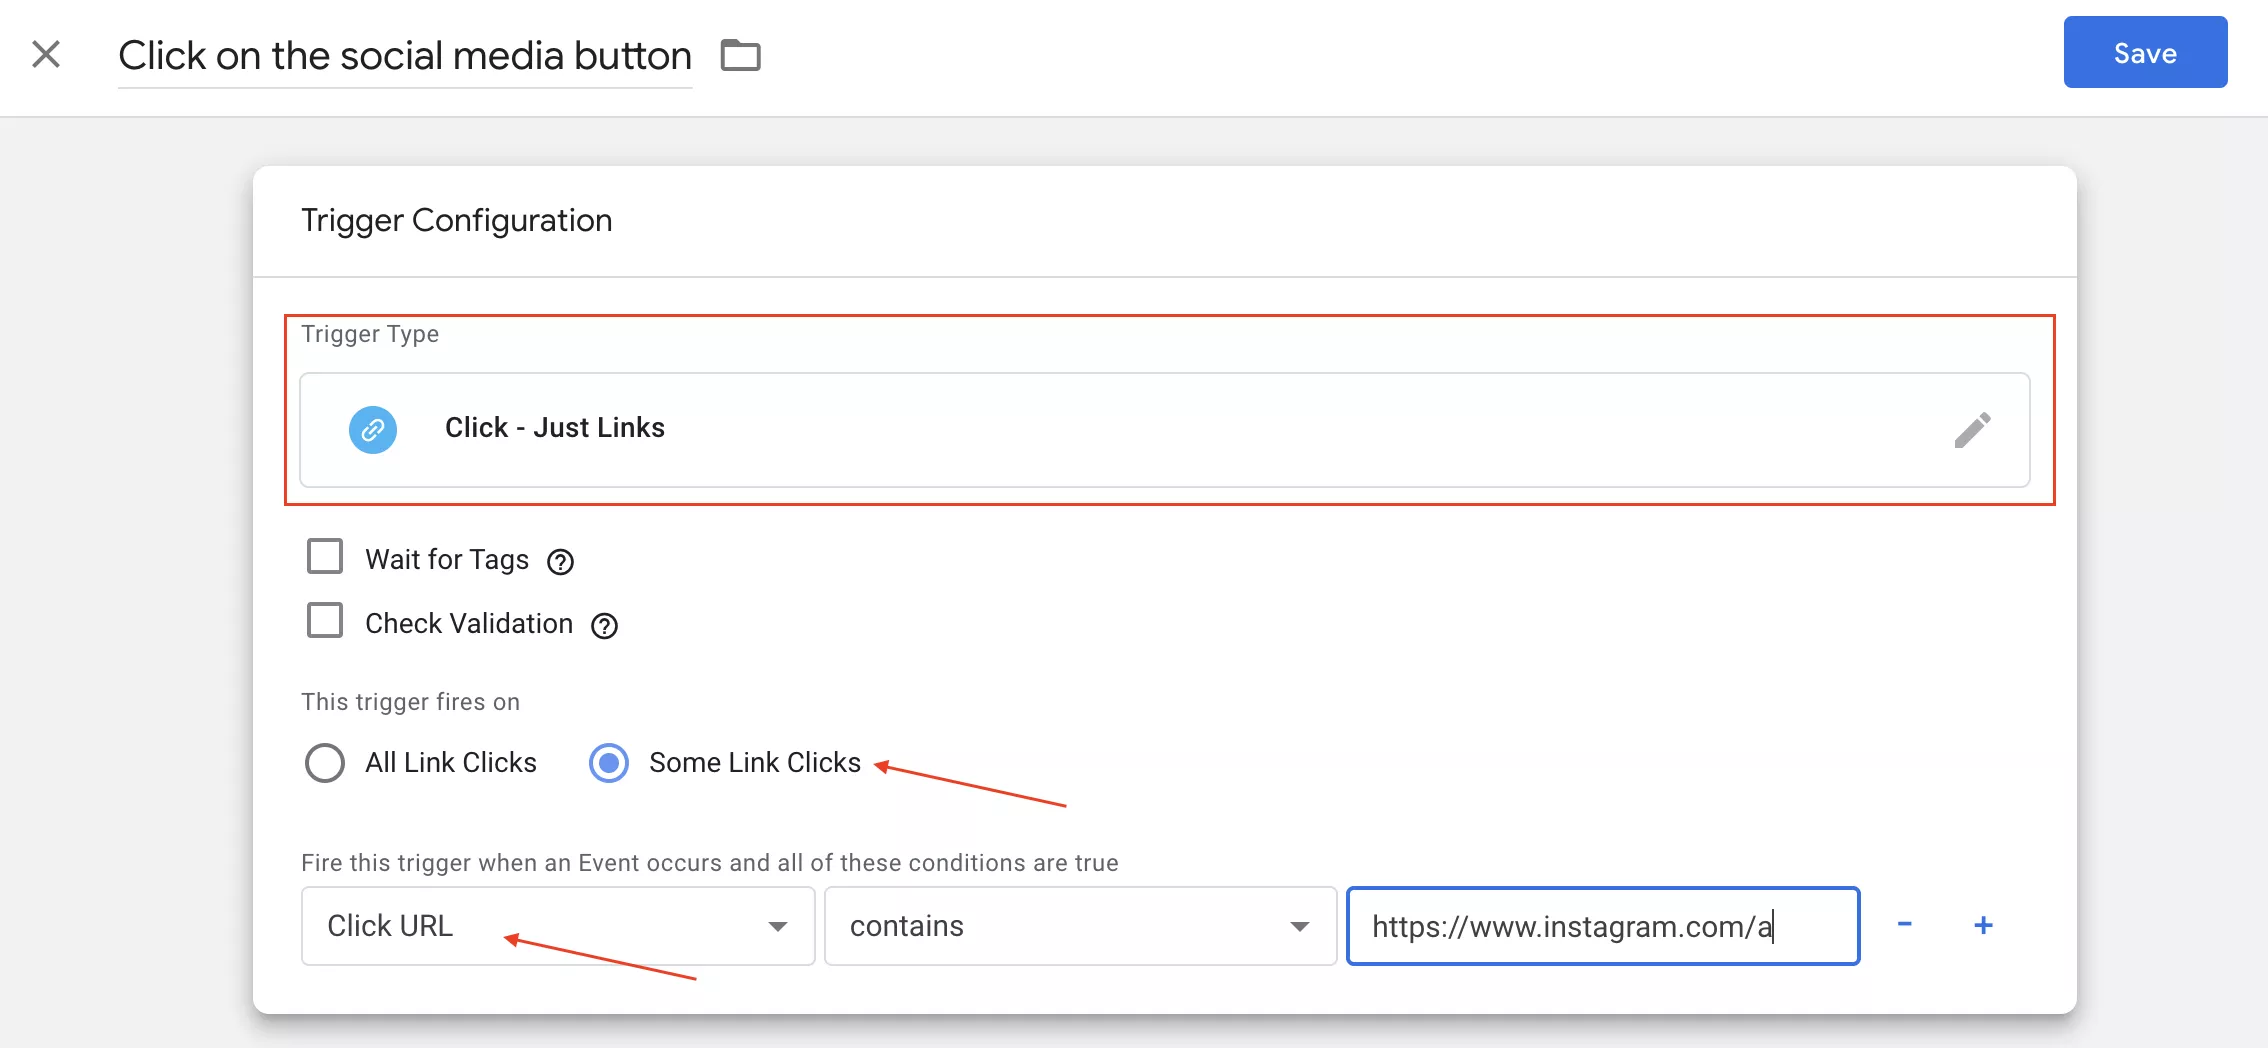
- Enable preview mode and click on the button, for example, a link to a social network profile.
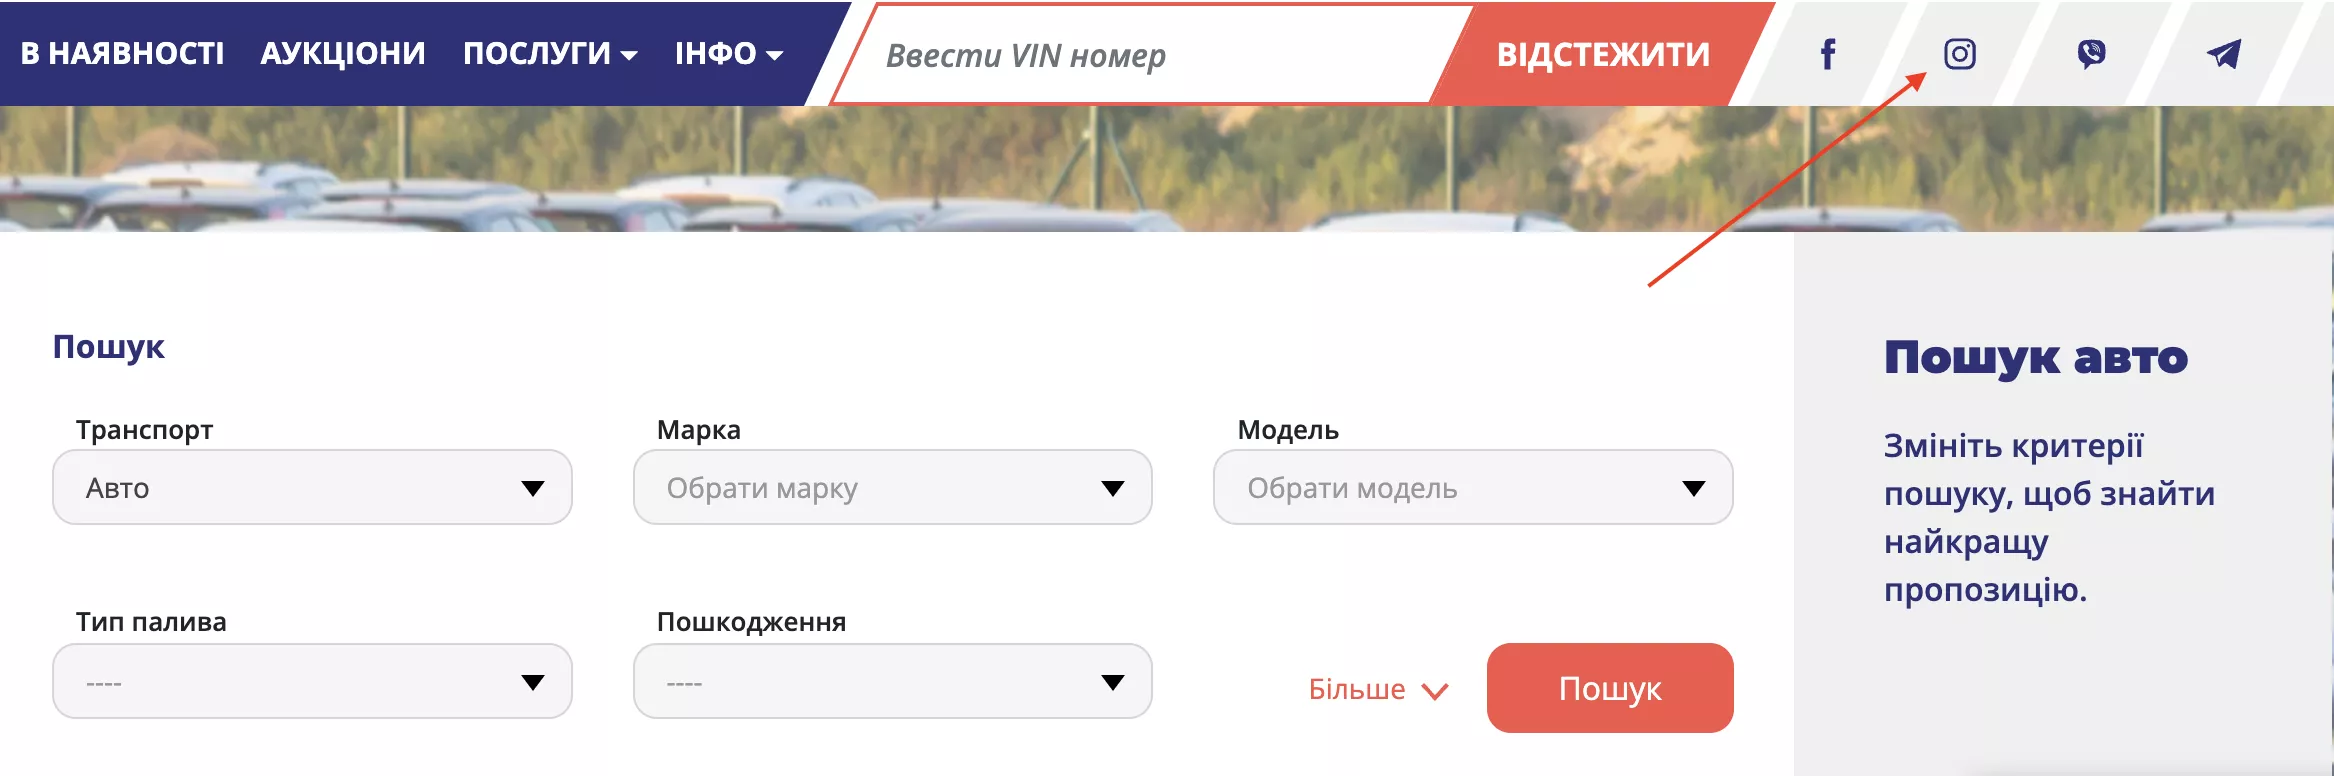
- Go to the event scale and activate the Link Click option. Find the Click URL variable and note its value. Use this as the trigger activation condition.

Setting up the Link Click trigger involves the same steps as the previous trigger type. The difference is that in the Trigger Type field, you select Click — Just Links and set Click URL > Contains > URL as the trigger activation condition.
Then proceed to “Step 4: Creating a Tag.” Select the newly created Link Click as the trigger. Next, proceed to Step 5 and check the settings in preview mode. If everything works correctly, publish the container.
Conclusions
Having Google Tag Manager skills will enable you to set up event tracking on your own, without involving developers. This can be done through a few simple steps:
- Enable the built-in Clicks type variables.
- Create a help trigger.
- Assign a unique ID to the button.
- Set up a trigger with the button's ID and create a tag with the same name.
- Check the settings in preview mode.
- Finally, publish the GTM container.
If you want to make sure your event tracking supports effective ad campaigns, let our PPC experts handle the setup — explore our PPC services and get started today.

 2
2
 0
0
 2
2
Related Articles
How to Set Up Consent Mode in GA4 on Your Website with Google Tag Manager
Let's explore how to properly integrate consent mode in GA4, configure it for effective data collection, and at the same time comply with GDPR and other legal regulations
Display Advertising Effectiveness Analysis: A Comprehensive Approach to Measuring Its Impact
In this article, I will explain why you shouldn’t underestimate display advertising and how to analyze its impact using Google Analytics 4
Generative Engine Optimization: What Businesses Get From Ranking in SearchGPT
Companies that master SearchGPT SEO and generative engine optimization will capture high-intent traffic from users seeking direct, authoritative answers