How to Set Up Google Analytics 4 on Shopify: A Step-by-Step Guide with Three Different Methods
Shopify is one of the most famous and accessible ecommerce platforms. It allows you to quickly create an online store without any special programming knowledge.
Just like any other website, Shopify needs analytics to track user activity as users interact with the website and make purchases. And this analytics will soon be provided by Google Analytics 4. So let's talk about how you can integrate Google Analytics 4 with Shopify to start collecting data on
Web analytics underpins conversion optimization. What will CRO get you? Find out with Netpeak's calculator.

Method 1: Manual configuration with gtag
The first method involves configuring analytics manually. To begin, you need to create a Google Analytics 4 Tracking ID.
- Sign in to your GA4 account.
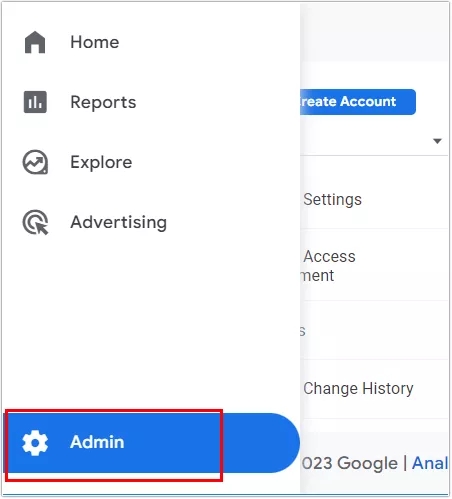
- Click on Admin in the bottom right panel.
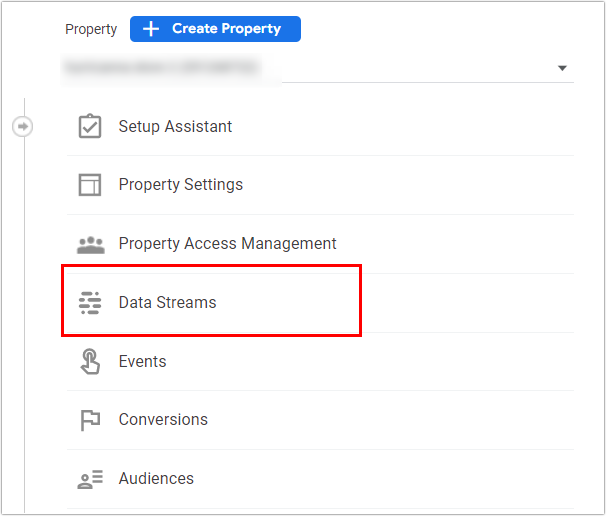
- In the Property column, click Data Streams.
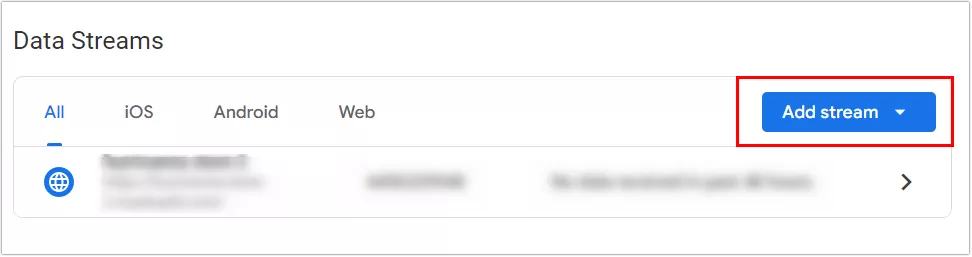
- Click Add stream.
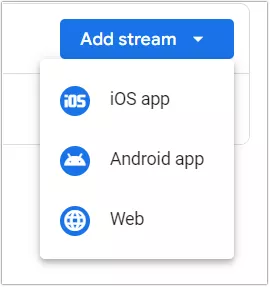
- After you press Add stream, you will be prompted to choose the iOS app, Android app, or Web. Select Web.
- To complete the stream setup, enter your website URL and a stream name.
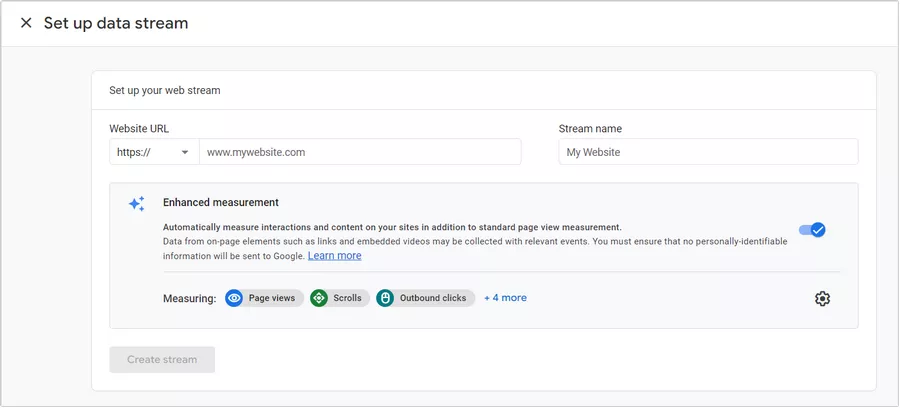
- After the stream is successfully set up, a dialog box opens with the data you entered.
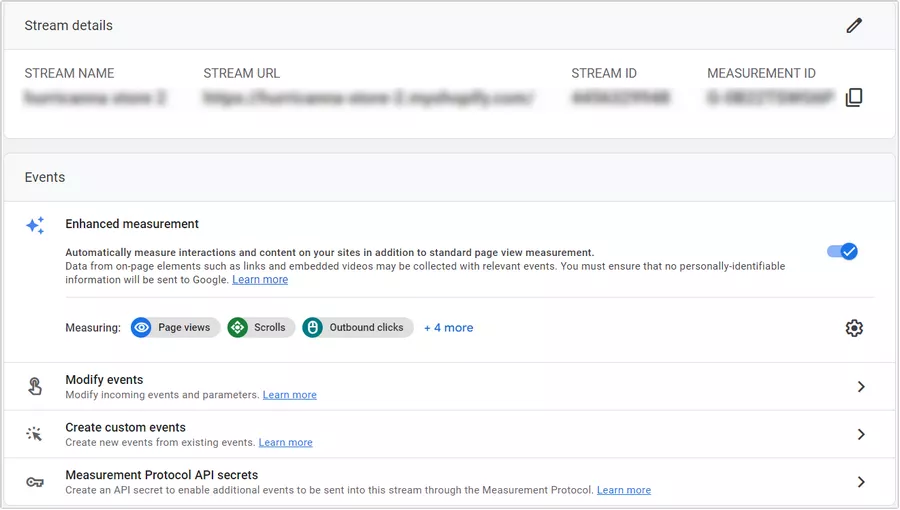
Your code is ready. Now you need to add it to the Shopify website code.
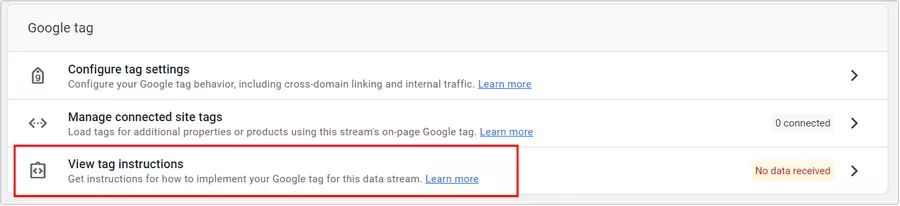
- Scroll down below and you'll see the Google tag menu. Click View tag instructions to choose a suitable way to set the GA4 tag code in Shopify.
- You will see a dialog box with the option to install the code using the platform or manually. Go to the Install manually tab.
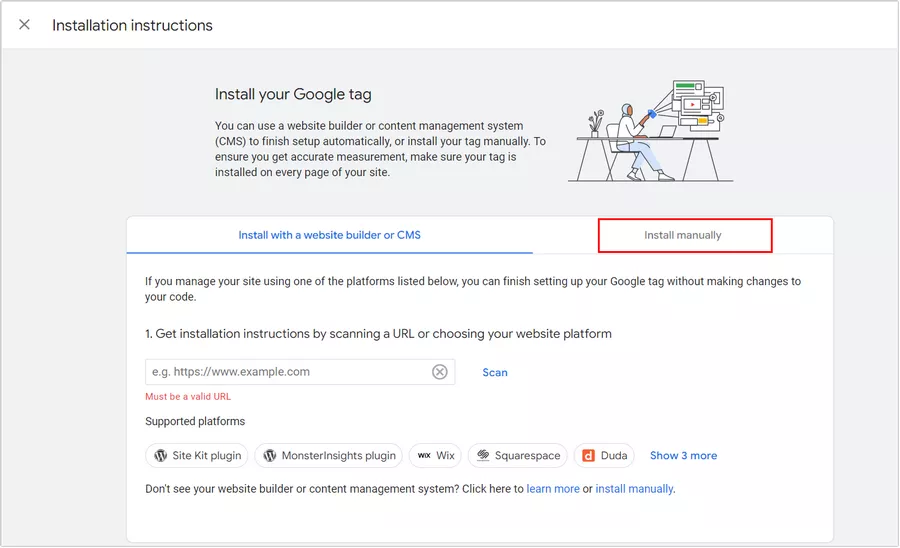
- Copy the code by clicking the clipboard button on the right. Then, go to your Shopify account.

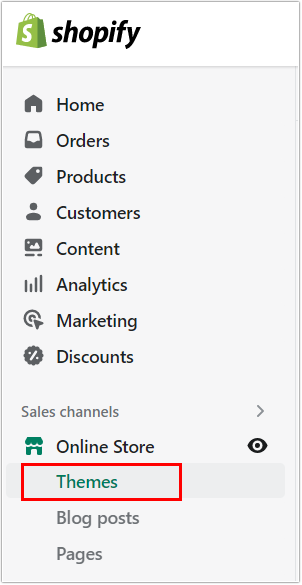
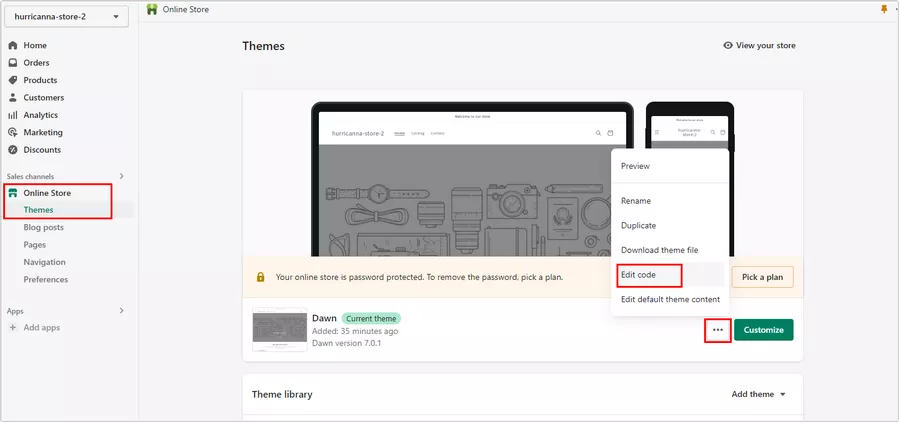
From the menu on the left, select Online Store> Themes.
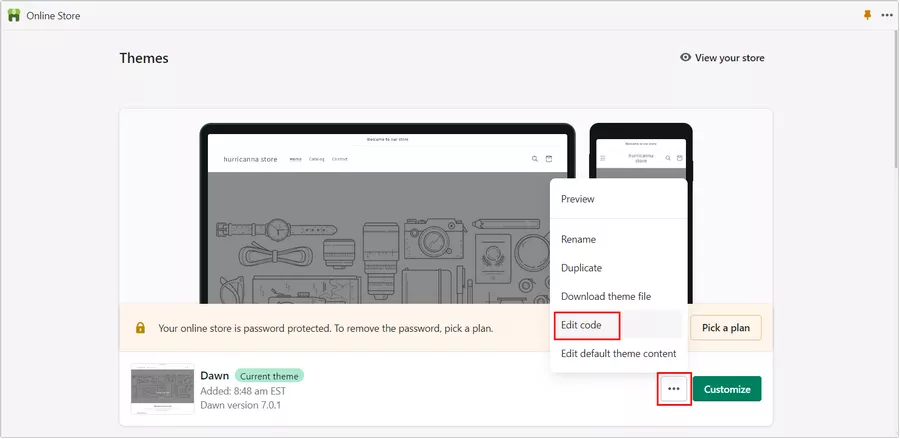
- You will see a menu to customize the store theme. Click the three dots menu to the left of Customize and select Edit code.
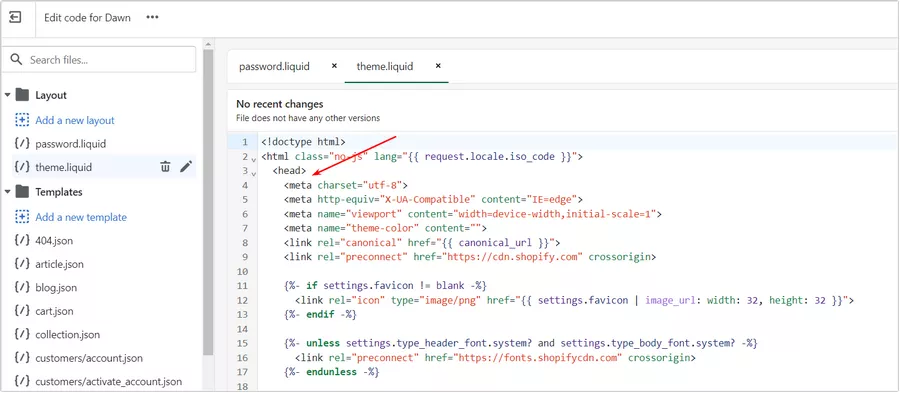
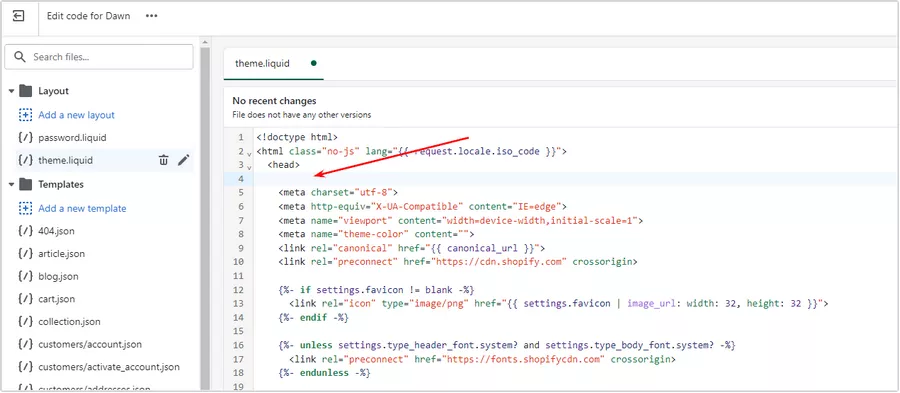
- Now insert the code right after the <head> tab. This is what it looks like before installing the GA4 code.
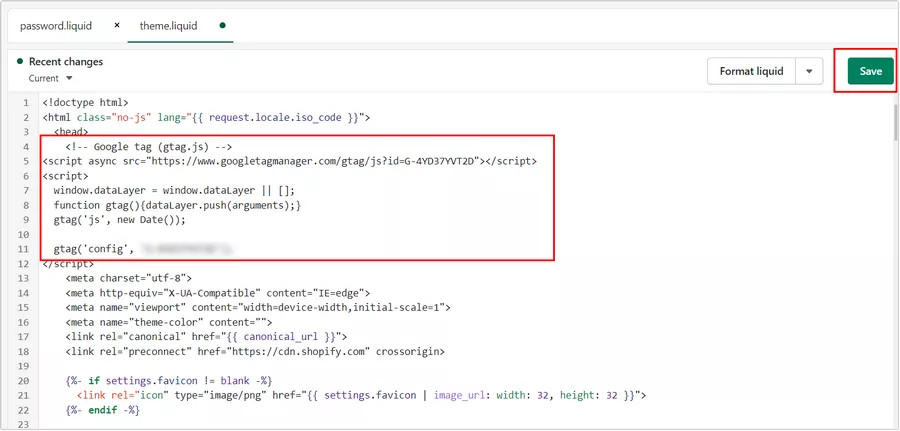
And this is what it looks like after. Click Save to save the changes.
Now go to Google Analytics 4 to make sure you've done everything right and that the data is being transferred correctly:
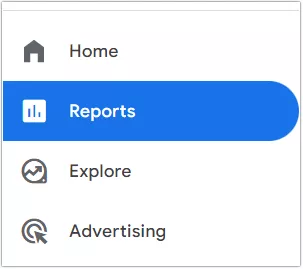
- Left side menu > Reports.
Choose Realtimefrom the suggested reports. 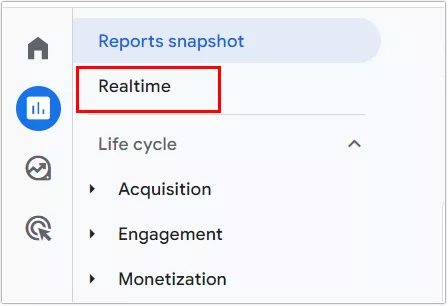
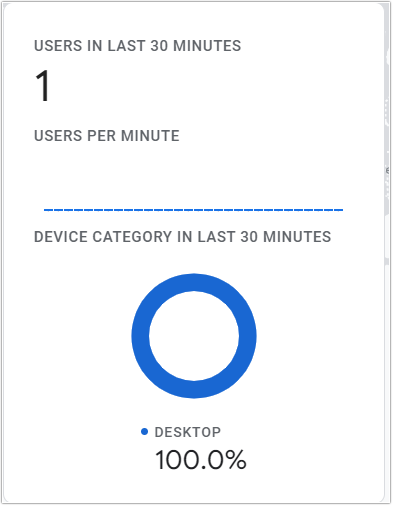
- The Realtime report shows that the analytics service is recording website visits. This means that the code is installed correctly. If it is not set up correctly, you would see a zero here.
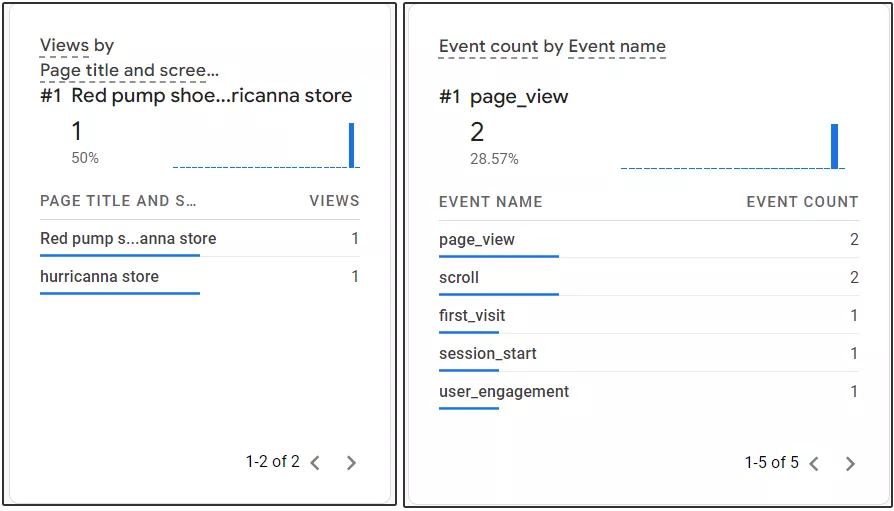
- As you visit different website pages, you will see that the report changes the number of pages viewed and events performed according to your actions on the website. Great! This is a sign that everything is up and running.
Now you need to set up ecommerce events to be able to track purchases and their data.
Shopify ecommerce setup
- First, you need to install an additional code on the purchase confirmation page. This is to track transactions in GA4.
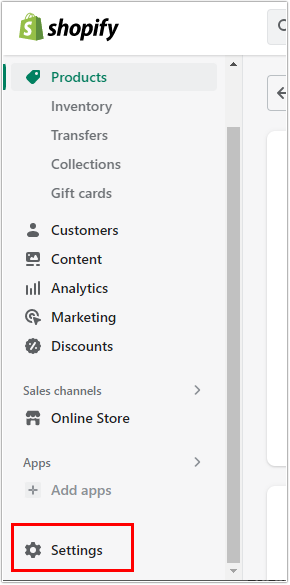
Return to your Shopify account and go to Settings.
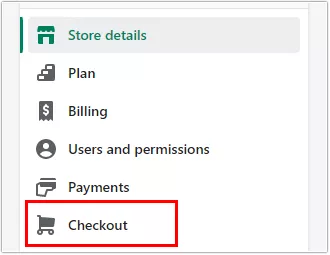
- And then click Checkout.
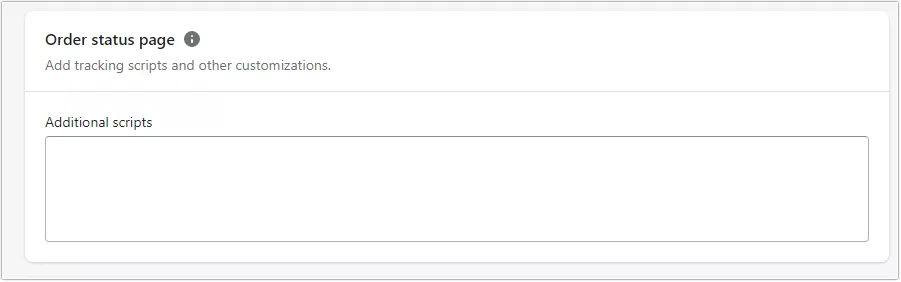
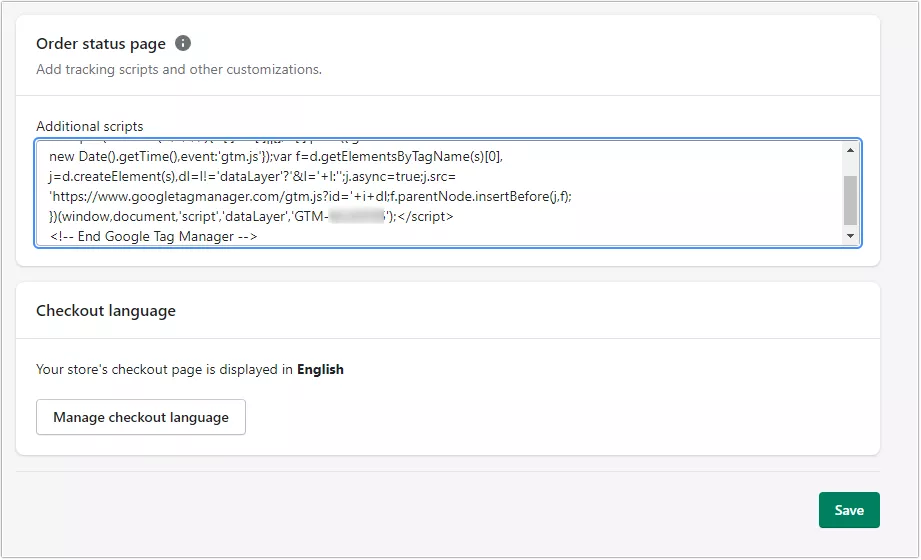
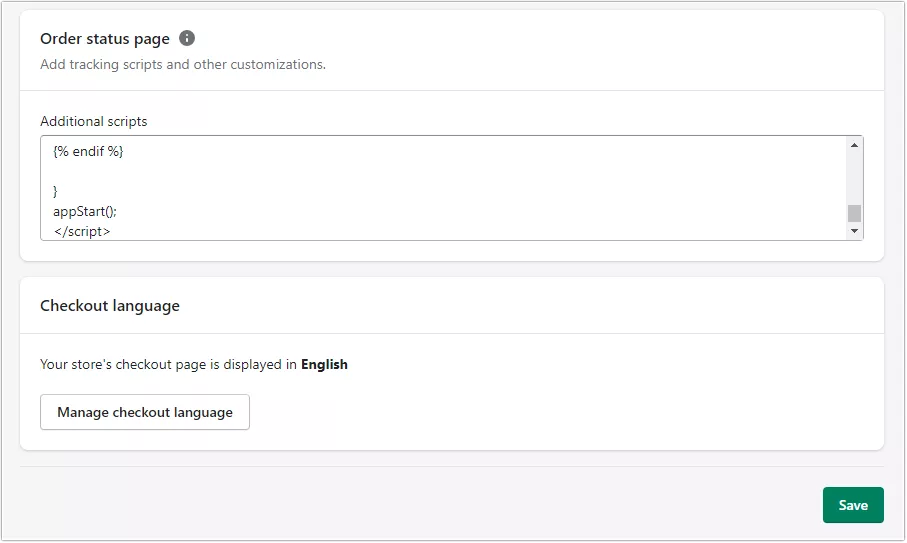
- Scroll down to the Order status page. Here you can insert an additional code into the order confirmation page.
- Next, you need to add a purchase event tracking code in GA4. It will pass the order details to GA4, including the total order value, transaction number, currency, taxes, shipping, and more.
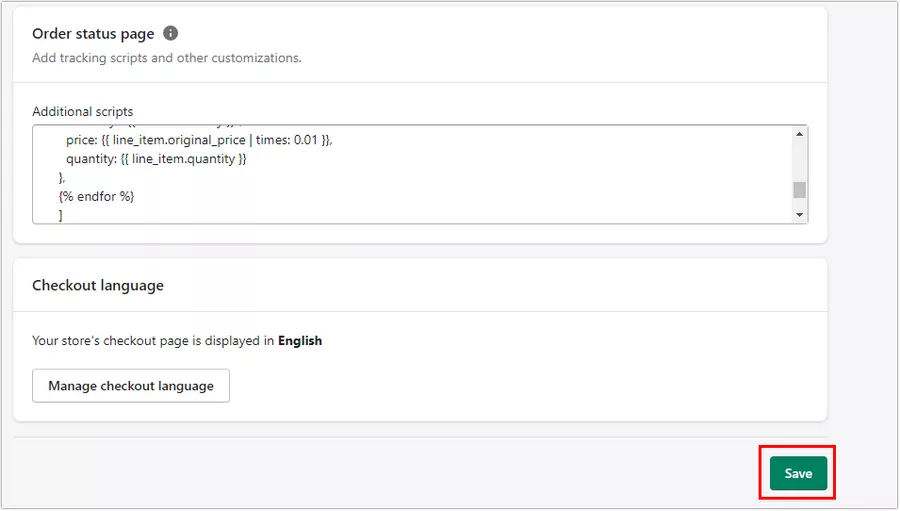
<!-- Global site tag (gtag.js) — Google Analytics -->

<script async src="https://www.googletagmanager.com/gtag/js?id=G-EXAMPLE"></script>

<script>

  window.dataLayer = window.dataLayer || [];

  function gtag(){dataLayer.push(arguments);}

  gtag('js', new Date());

  gtag('config', 'G-EXAMPLE');

{% if first_time_accessed %}

gtag("event", "purchase", {

    transaction_id: "{{ order.order_number }}",

    value: {{ total_price | times: 0.01 }},

    tax: {{ tax_price | times: 0.01 }},

    shipping: {{ shipping_price | times: 0.01 }},

    currency: "{{ order.currency }}",

    items: [

     {% for line_item in line_items %}

     {

      item_id: "{{ line_item.product_id }}",

      item_name: "{{ line_item.title | remove: "'" | remove: '"' }}",

      currency: "{{ order.currency }}",

      price: {{ line_item.original_price | times: 0.01 }},

      quantity: {{ line_item.quantity }}

    },

    {% endfor %}

    ]

});

{% endif %}

</script>
- Please note that you need to insert the GA4 code, not the text highlighted in red. You will find it in the details of the web stream created at the beginning.

- Add the code and click Save.
Checking the setup
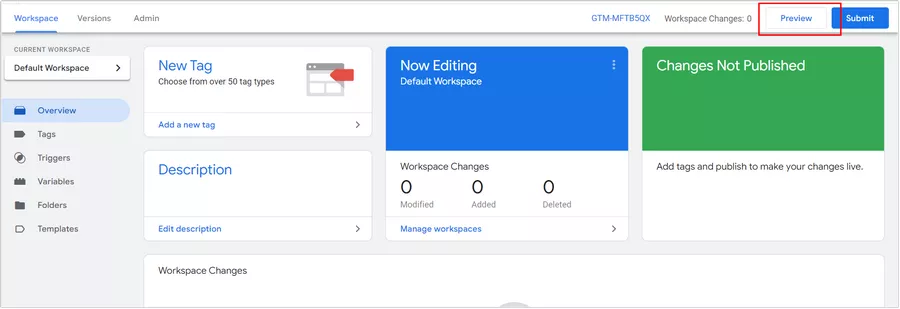
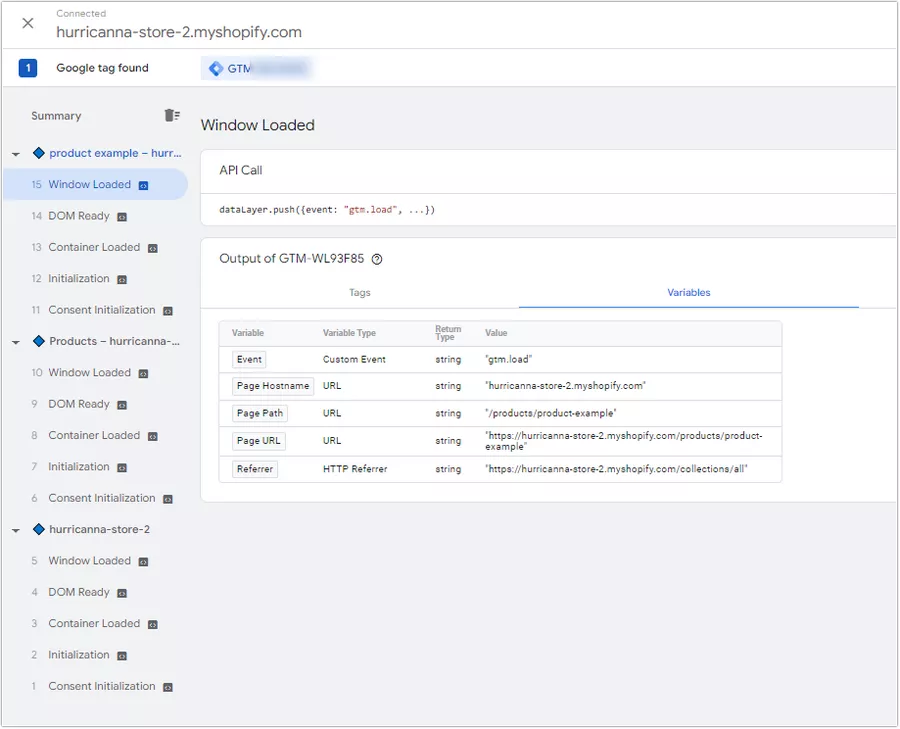
To test the transfer of order details, use the Preview feature from Google Tag Manager.
Go to your account and click Preview.
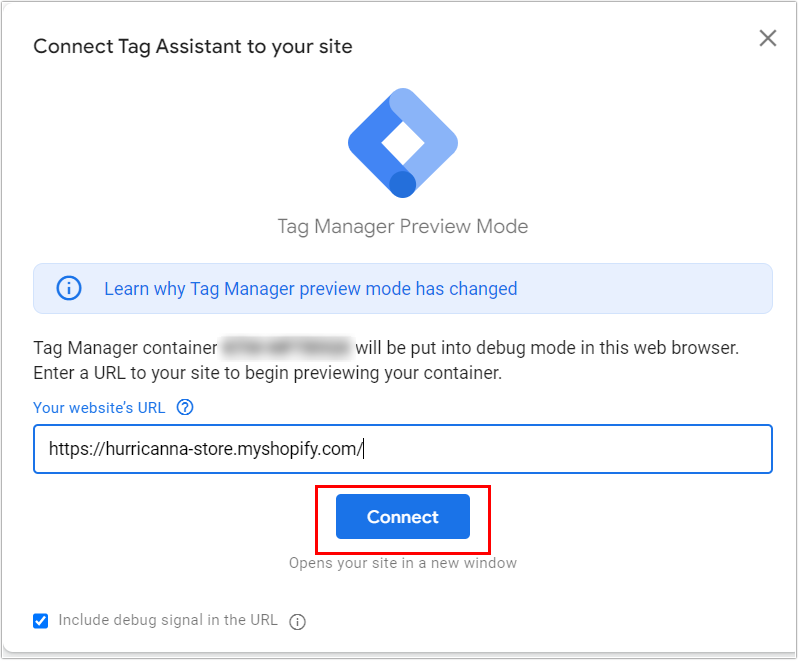
Enter your website and click Connect.
Go through the entire customer journey and complete the order.
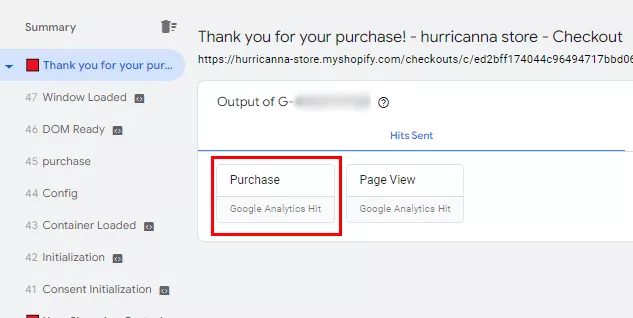
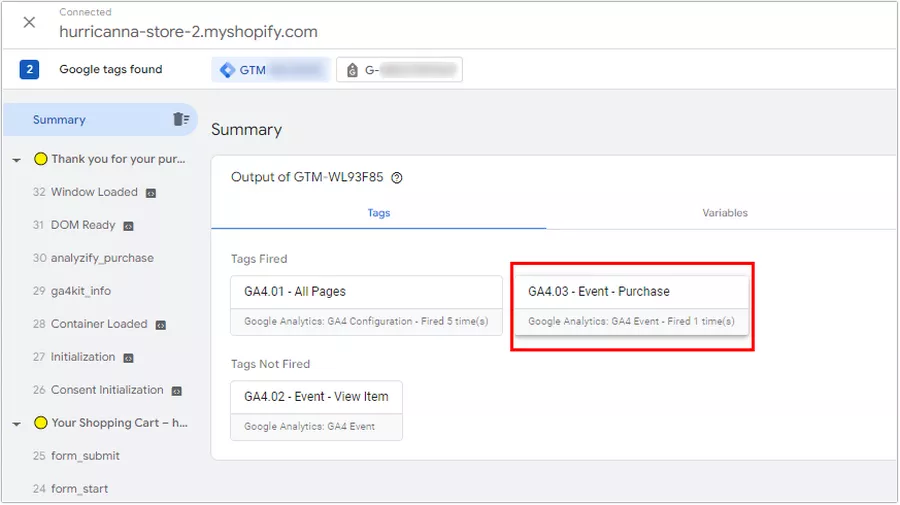
After a successful purchase, return to the preview tab. On the Thank you for your purchase page, you should see that the purchase tag has been transferred to Google Analytics 4.
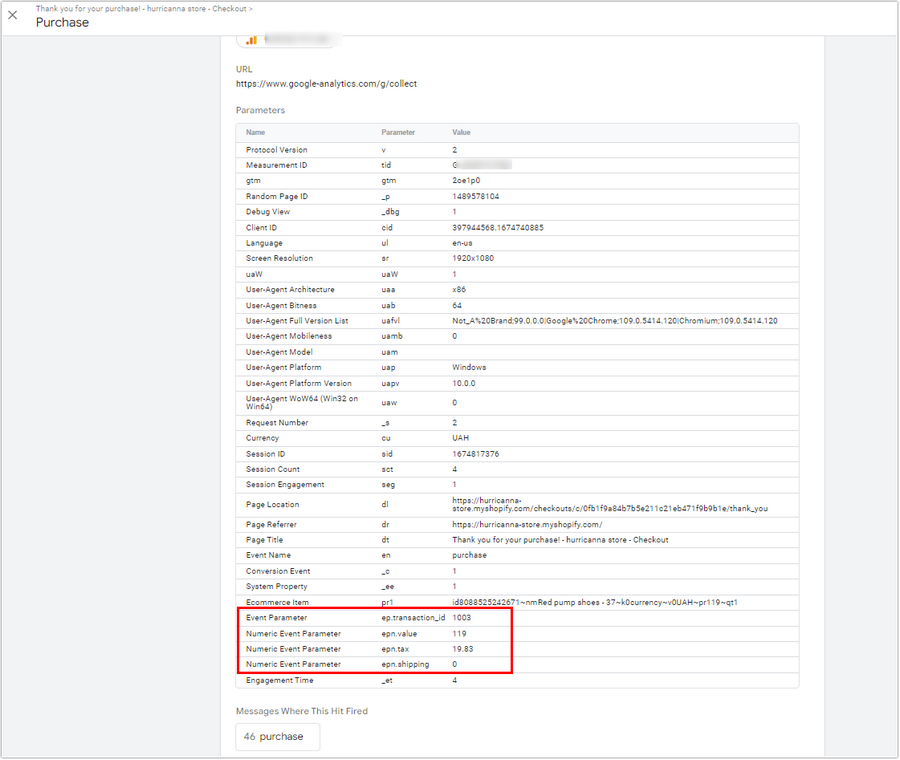
Open to see which data was transferred to the analytics. The tag contains information about the transaction ID, value, tax, currency, product, and more.
Next, go to Google Analytics 4 and make sure that the analytics sees the transaction.
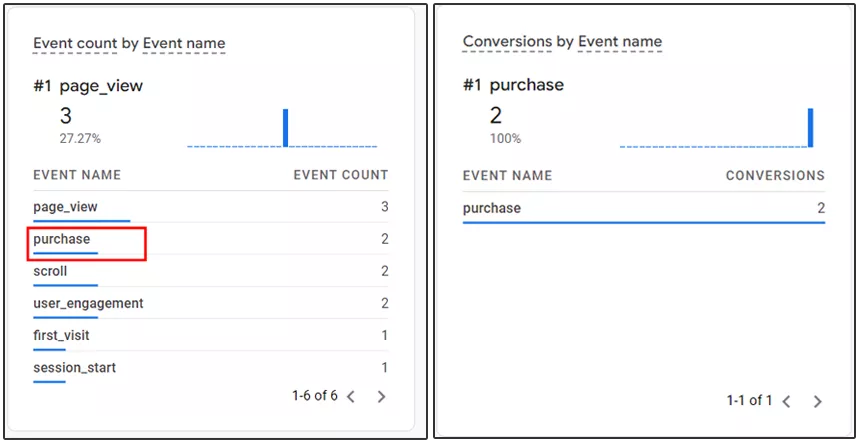
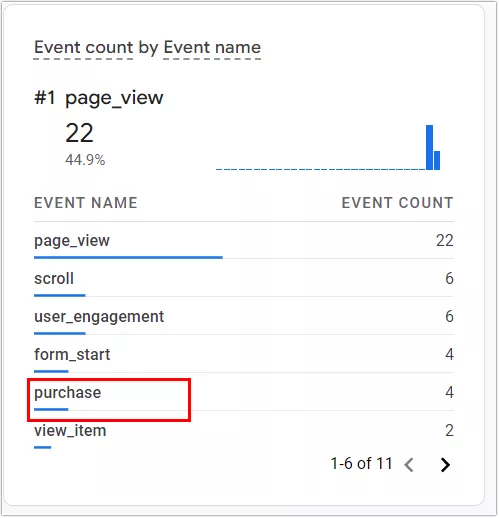
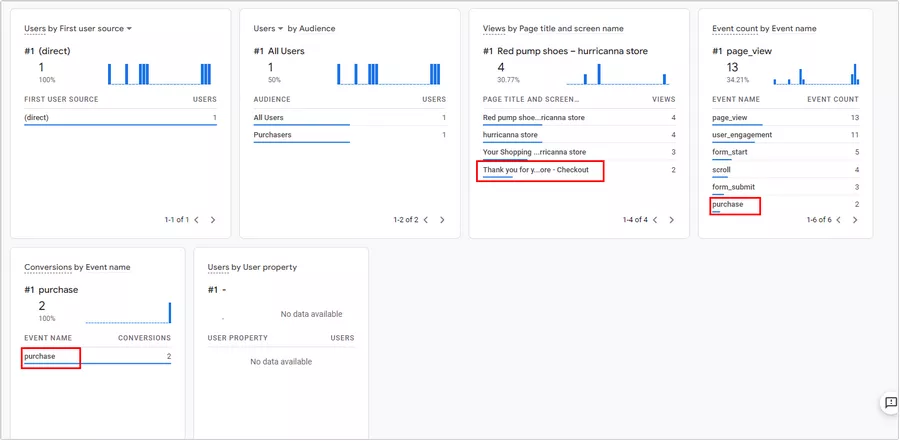
Go to the Realtime report as you did before. If everything is ok, your purchase will be displayed in both events and conversions.
Congratulations! You've done a great job and successfully set up Google Analytics and ecommerce in Shopify.
Method 2: Shopify native integration
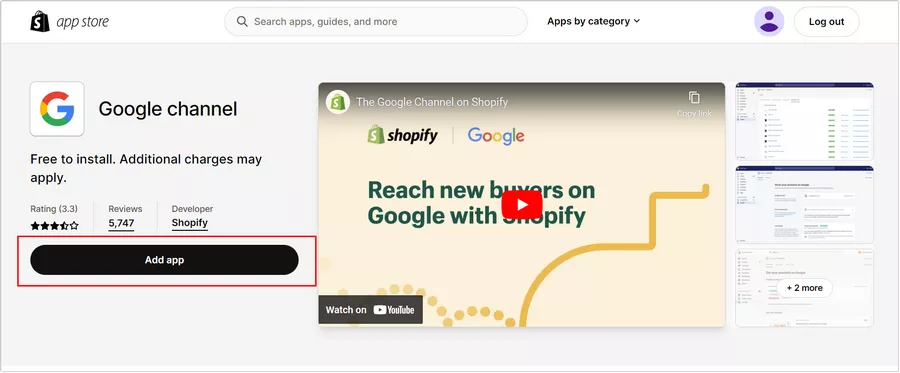
Here is a second method to integrate GA4 to your Shopify. First, add the Google Channel app to your Shopify account.
Go to https://apps.shopify.com/google and click Add app.
Go to your Shopify account.
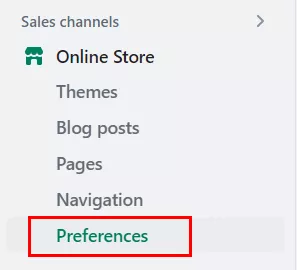
In the sidebar, click Online Store and select Settings from the drop-down menu.
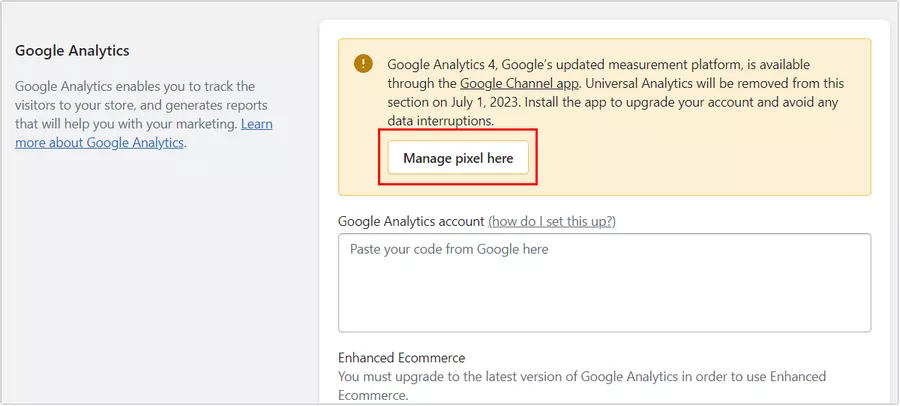
Go to your Google Analytics account. Click Manage pixel here.
Connect the program to the Google account that contains your Analytics property.
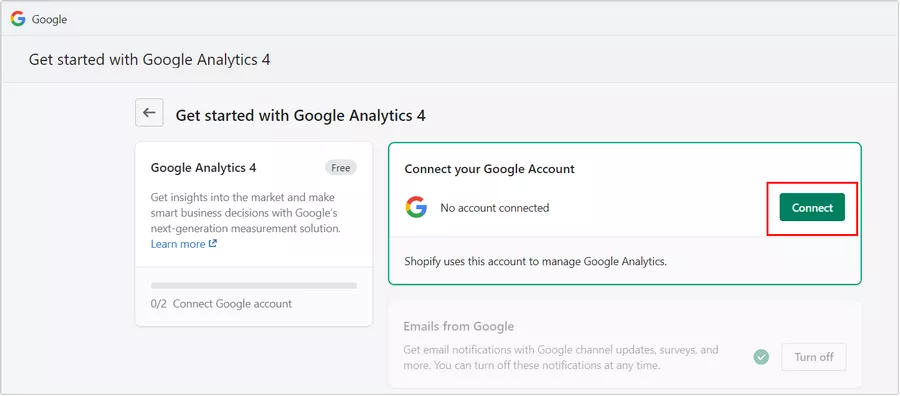
Select your Google Tag ID from the drop-down list and click Connect a Google Analytics property.
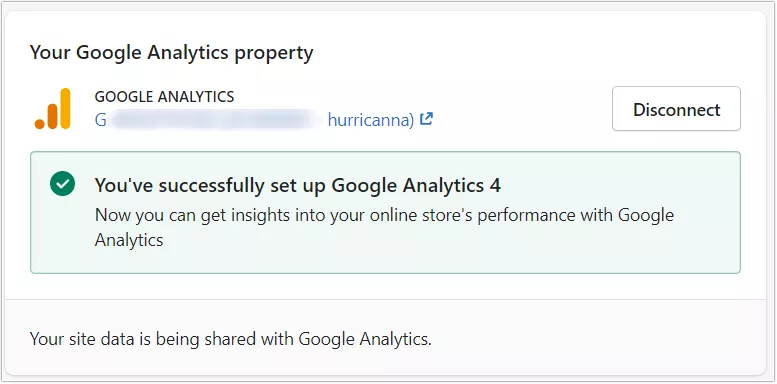
After you receive a notification that the Google Analytics property has been successfully connected, go to Analytics to check the transfer of transactions.
Switch to the Realtime report mode, make a test transaction, and ensure that the purchase was successfully tracked.
Method 3: Setting up Google Analytics 4 in Shopify with Google Tag Manager
A data layer is one of the most convenient ways to track and analyze data. Usually, when setting up ecommerce on regular websites, a data layer code is installed. It allows you to collect data about purchases and pass it to Google Tag Manager.
Shopify does not have data layers and variables that Google Tag Manager can see. Therefore, it is worth providing a block of data layers code that can receive purchase data from the Thank you for your purchase page and pass it to GTM.
How to install Google Tag Manager on Shopify
- Sign in to your Google Tag Manager account and click on the GTM code in the bar at the top of the page.
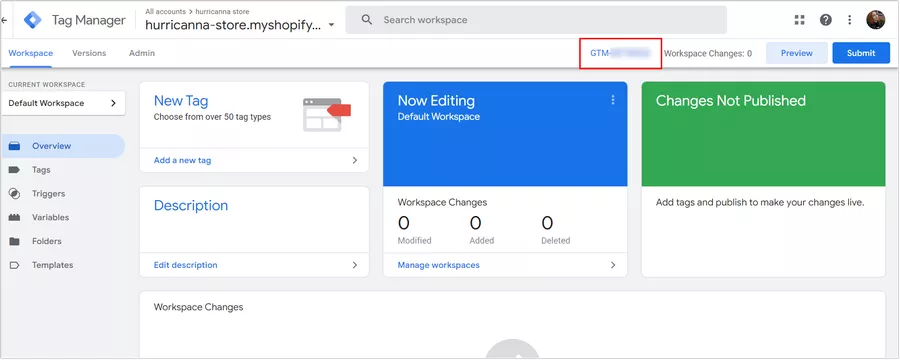
- Copy the following code.
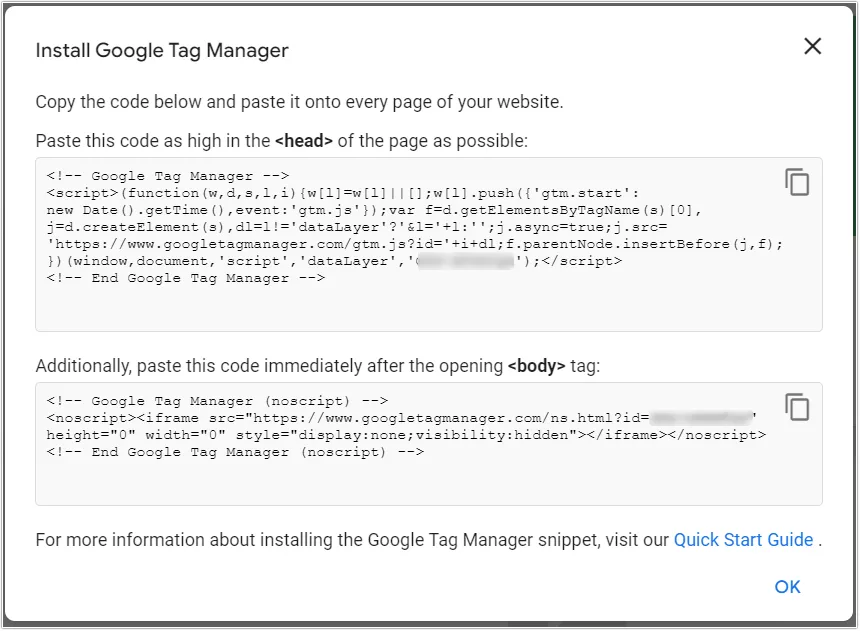
- Go to Shopify and open the code editor the way I described above: Online Store > Themes > Edit code.
- Set the code after the opening <head> tag and click Save.
- The next step is to install the same code on the Thank you for your purchase page. Go to Settings > Checkout and scroll down to the Order status page field. Add the same code here and click Save.
Now check if the code is installed correctly using the GTM preview mode.
Log in to your GTM account, click Preview, and enter the address of your website page. Go to different pages and ensure that they are all displayed correctly in the preview.
Data layer code for Shopify
- Copy the code below from Analyzify.
{% comment %} Purchase data layer v2.1 — part of «Shopify GA4 Kit» by Analyzify

Visit https://analyzify.app/shopify-google-analytics/ga4 for complete tutorial

{% endcomment %}

{% assign template_name = template.name %}

<script type="text/javascript">

window.dataLayer = window.dataLayer || [];

window.appStart = function(){

  window.allPageHandle = function(){

    window.dataLayer.push({

      event: "ga4kit_info",

      contentGroup: "{{ template_name }}",

      {% if customer %}

      userType: "member",

      customer: {

        id: "{{- checkout.customer.id | json -}}",

        lastOrder: "{{- customer.last_order.created_at | date: '%B %d, %Y %I:%M%p' -}}",

        orderCount: "{{- checkout.customer.orders_count | json -}}",

        totalSpent: "{{- checkout.customer.total_spent | times: 0.01 | json -}}",

        tags: {{- checkout.customer.tags | json -}}

      }

      {% else %}

        userType: "visitor",

      {% endif %}

    });

  };

  allPageHandle();

{% if first_time_accessed and post_purchase_page_accessed != true %}

  var shippingPrice = "{{shipping_price | money_without_currency }}".replace(",", ".");

  var totalPrice = "{{checkout.total_price | money_without_currency }}".replace(",", ".");

  var taxPrice = "{{tax_price | money_without_currency }}".replace(",", ".");

  var orderItemsName = [];

  var orderItemsId = [];

  var orderItemsCategory = [];

  var orderItemsBrand = [];

  var orderItemsType = [];

  var orderItemsPrice = [];

  var orderItemsSku = [];

  var orderItemsvariantId = [];

  var orderItemsQuantity = [];

  var orderItemsvariantTitle = [];

  var totalQuantity = 0;

  {% for line_item in checkout.line_items %}

      orderItemsName.push("{{ line_item.product.title | remove: "'" | remove: '"'}}");

      orderItemsId.push("{{ line_item.product_id }}");

      orderItemsPrice.push("{{ line_item.price | times: 0.01 }}");

      orderItemsSku.push("{{ line_item.sku | remove: "'" | remove: '"' }}");

      orderItemsQuantity.push("{{ line_item.quantity }}");

      orderItemsvariantId.push("{{ line_item.variant_id }}");

      orderItemsvariantTitle.push("{{ line_item.variant.title }}");

      orderItemsCategory.push("{{ line_item.product.collections.last.title | remove: "'" | remove: '"' }}");

      orderItemsBrand.push("{{ line_item.vendor | remove: "'" | remove: '"' }}");

      orderItemsType.push("{{ line_item.product.type | remove: "'" | remove: '"' }}");

      totalQuantity += {{ line_item.quantity }};

  {% endfor %}

  window.dataLayer.push({

      page_type: "purchase",

      event: "analyzify_purchase",

      currency: "{{ shop.currency }}",

      totalValue: totalPrice,

      totalValueStatic: totalPrice,

      currencyRate: window.Shopify.currency.rate,

      shipping: shippingPrice,

      tax: taxPrice,

      payment_type: "{{order.transactions[0].gateway}}",

      {% if order.name %}

      transaction_id: "{{order.name | remove: "'" | remove: '"'}}",

      {% else %}

      transaction_id: "{{checkout.id | remove: "'" | remove: '"'}}",

      {% endif %}

      productName: orderItemsName,

      productId: orderItemsId,

      productBrand: orderItemsBrand,

      productCategory: orderItemsCategory,

      productVariantId: orderItemsvariantId,

      productVariantTitle: orderItemsvariantTitle,

      productSku: orderItemsSku,

      productType: orderItemsSku,

      productPrice: orderItemsPrice,

      productQuantity: orderItemsQuantity,

  });

{% endif %}

}

appStart();

</script>
- Go back to the dialog box where you've just installed the second GTM code. To get there, go to Settings > Checkout and scroll down to the Order status page field. Add this code right after the GTM code and save the changes.
- After that, you need to set up all the variables and tags in GTM. For your convenience, I'm sharing with you a file that is also provided by Analyzify. It will simplify the setup a lot.
Download the file below to your computer:
https://analyzify.app/ga4-kit/shopify-ga4-gtm.json
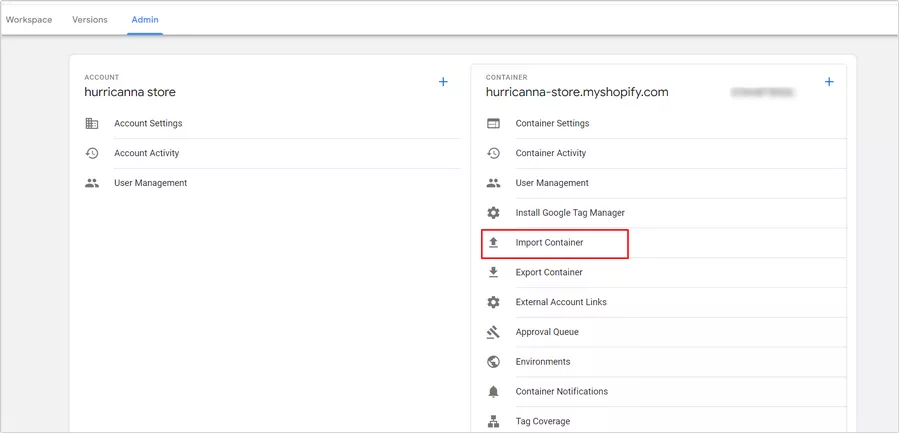
- Next, go to the Administrator tab in GTM and click Import Container.
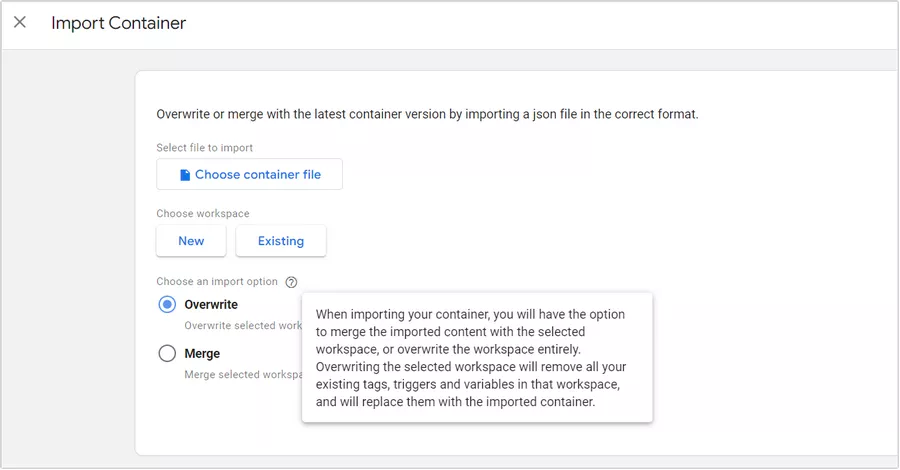
- Click Choose container file and add the file. Choose Overwrite if you don't have any existing tag, and Merge if you do have tags and want to keep them.
- As you may have noticed, among the imported variables, there is one that requires the GA4 code. To do this, find the ***UpdateMe*** GA4 Measurement ID (G-) variable and paste the GA4 code from Google Analytics 4 Web Stream Details. Save the variable.

It's time to check the changes again!
Open the preview in GTM. Make a test purchase and return to the preview tab. You’ll see that the purchase tag has been triggered.
For your changes to be displayed in the Analytics, publish them by clicking Submit in the menu above.

Finally, you need to check whether the purchase data is being transferred to GA4.
Go to the Realtime report to ensure that the completed transaction is displayed in Google Analytics 4.
Setup recommendations
While setup seems straightforward, there are a few things to keep in mind to ensure integration is done smoothly.
- When copy-pasting the code during the setup process, make sure you add it correctly and with no extra elements. If you are unsure but don't want to double-check, delete the pasted code and add it again.
- Make sure that the GA4 code is inserted as high as possible in the Shopify code and right after the opening <head> tag. It is sometimes incorrectly placed between the lines of other code or in the middle of the website. This can affect how data from the website is imported into Analytics.
- To minimize risk, you can create a backup of your Shopify website code to quickly restore the original code in case of an error. Go to Online Store > Themes > Actions and click Duplicate to make a copy of the code.
- Check again to see if the code has the correct Google Analytics ID. One common error is that the code is taken from the analytics of another project and you don't immediately notice the issue.
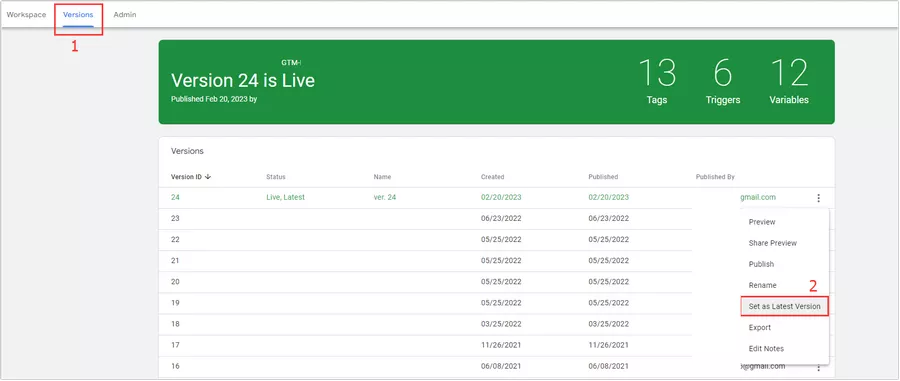
- You can also revert to a previous version of GTM and undo any changes you've made. To do this, go to the Versions menu, select the desired version, and click Set as Latest Version.
Conclusions
It is crucial to set up GA4 for your Shopify online store: it will give you important data on user behavior and purchases. There are a few different methods to integrate Shopify to your GA4.
To set up Google Analytics 4 in Shopify manually:
- Create a Google Analytics 4 account tracking ID.
- Add it to the Shopify website code.
- Check the code's operation with the Realtime report in GA4.
- Paste the ecommerce code on the Shopify website.
- Make a test transaction and check its import to GA4.
To set up Google Analytics 4 in Shopify via native integration:
- Add the Google Channel app to your Shopify account.
- Connect your Google account and GA4 property in your Shopify account.
- Make a test transaction and check its import to GA4.
To set up Google Analytics 4 in Shopify with GTM:
- Install GTM on your Shopify website.
- Check if the code is installed correctly using the preview from GTM
- Install the data layer code for Shopify.
- Ensure the code is working through GTM.
- Make a test transaction and check its import to GA4.
FAQ
Can I set up Google Analytics 4 on Shopify?
Yes, you can set up Google Analytics 4 on Shopify and track user behavior and purchases on your online store.
How do I add Google GA4 to Shopify?
To add Google GA4 to Shopify, you can either use Shopify native integration or do it manually with the gtag or GTM code. These methods are explained in detail above.
How do I set up GA4 eCommerce tracking on Shopify?
Most integration methods, including the Shopify native integration, will immediately track purchases made on the website. Therefore, after a successful integration, you will immediately see the statistics on purchases in your Google Analytics 4 account.

 9
9
 2
2
 5
5
Recommended theme posts
Related Articles
Display Advertising Effectiveness Analysis: A Comprehensive Approach to Measuring Its Impact
In this article, I will explain why you shouldn’t underestimate display advertising and how to analyze its impact using Google Analytics 4
Generative Engine Optimization: What Businesses Get From Ranking in SearchGPT
Companies that master SearchGPT SEO and generative engine optimization will capture high-intent traffic from users seeking direct, authoritative answers
From Generic to Iconic: 100 Statistics on Amazon Marketing for Fashion Brands
While traditional fashion retailers were still figuring out e-commerce, one company quietly revolutionized how U.S. consumers shop for everything from workout gear to wedding dresses