How to collect contacts for email newsletters and cold calls using Google Earth
Hi, I'm Anton Liakhovskyi, a digital marketer at Zarely. We work with multiple paid traffic channels, working directly with companies and ballet schools (often remotely). To continually grow our business, we need to constantly update our database with new contacts. In this post, I'll tell you how to collect contact information, whether it's for beauty salons, car dealerships, dance studios, pet stores, and so on.
Take note:
- This article describes a method to extract contact data, namely, the name of the point, phone number, address, and website.
- We will use Google Earth.
- Data transfer and formula work will be done in Google Tables, so a Google account is a must.
How and what to search for in Google Earth?
First, let's define the queries, starting with dental clinics as an example.
Queries: dental clinic, dental care
Region: USA, Nebraska, and South Dakota.
If, in your case, you need to find places within the same city, that's easy. The challenge here is to find the city and make a query.
If, on the other hand, you are interested in contacts in the whole country or in several countries, the task gets bigger: to find as many contacts as possible, you have to manually search all the cities. Whether this is doable is up to you, as it depends on the person's specialty.
In this example, I searched within the largest cities in the states of Nebraska and South Dakota.
Here's a step-by-step guide.
First, we identify the metropolitan areas and zoom in.
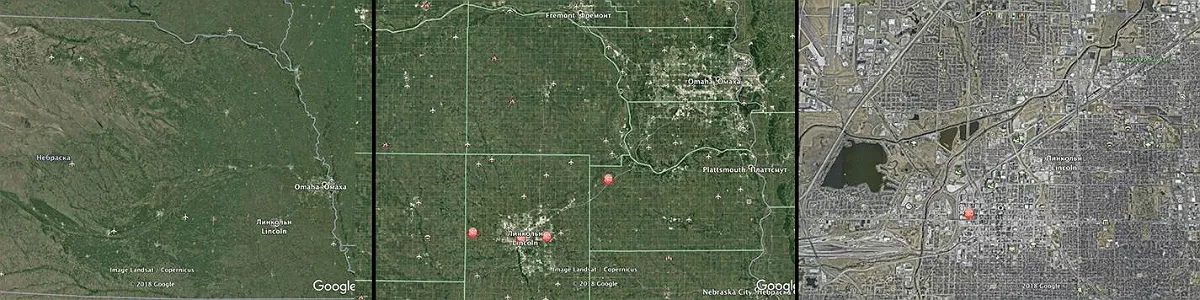
Then, we specify the search.
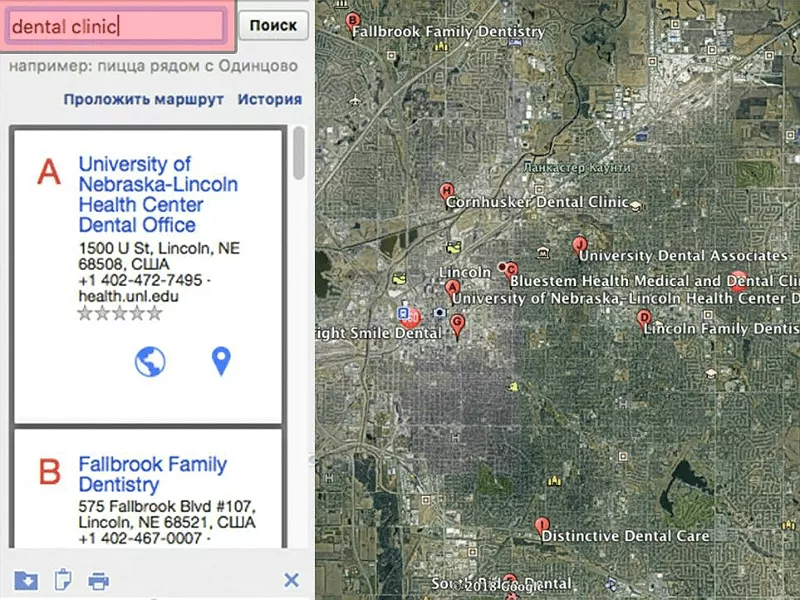
How to collect data?
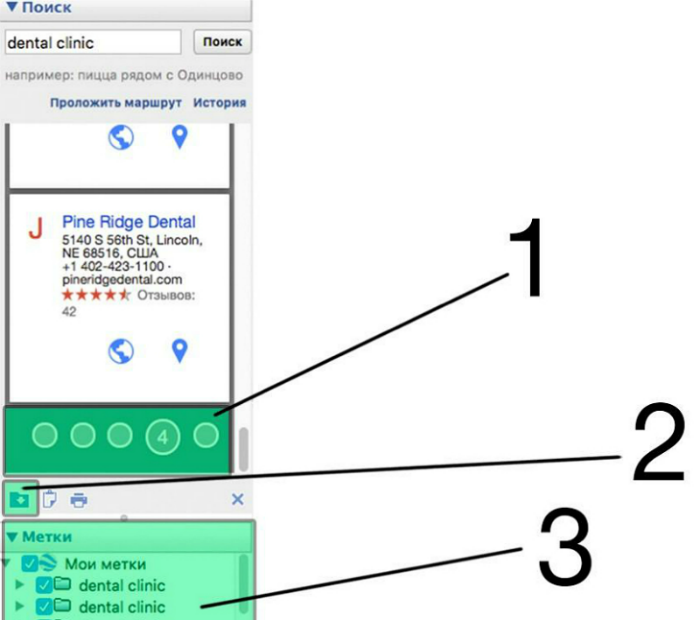
After the first query, the field under "Search" shows the results found (name, address, phone number, and website) — this is what we need to export to the table. Next, after the search results of found entities, there are icons indicating some kind of pages (new search in the same place).
Save the first list. Click the save icon (#2 in the figure) to save it in a separate folder (#3). Click on the circle below the list (#1) to save it in a new folder (#2):
Repeat these steps until you run out of topics on the map (in the Google Maps database) or until the search results no longer match the query or target.
Once the list is generated, the next step is to export it to a spreadsheet and extract the information.
Save the KML file:
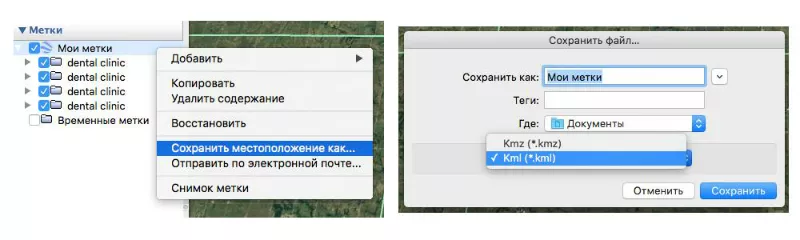
Right-click on My tags > Save location as... Save as a .kml file.
How to export to Google Spreadsheets?
The resulting .kml file needs to be converted into a format that the spreadsheet understands: CSV.
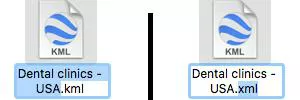
First, change the file extension from .kml to .xml. To do this, simply rename the file:
Now, we need to convert the .xml file to a .csv format that Google Tables can understand.
There are many free converters on the web for this purpose. I used Conversion Tools.
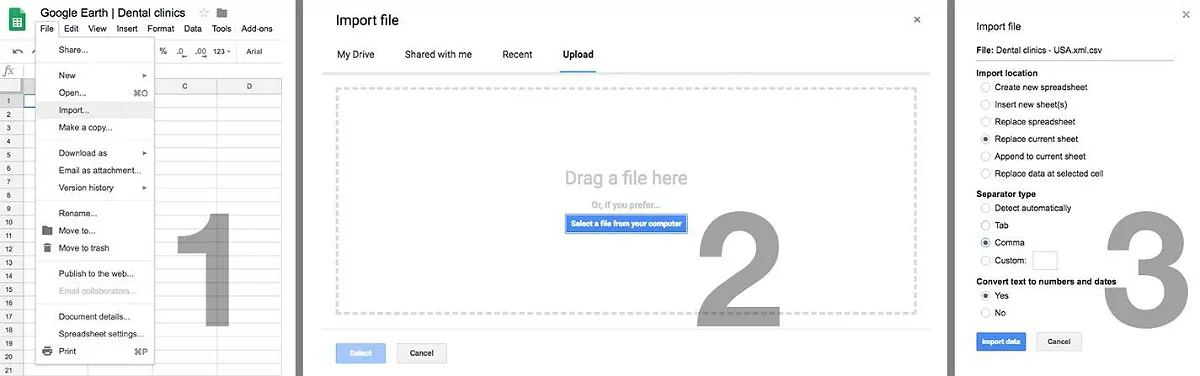
Once the .csv file is ready, import it into the table with the settings:
How to extract data from a file?
If you have used Conversion Tools, delete the first columns that contain unnecessary information, namely columns A-S.
After deleting, the first column will be Name, then Address, and so on.
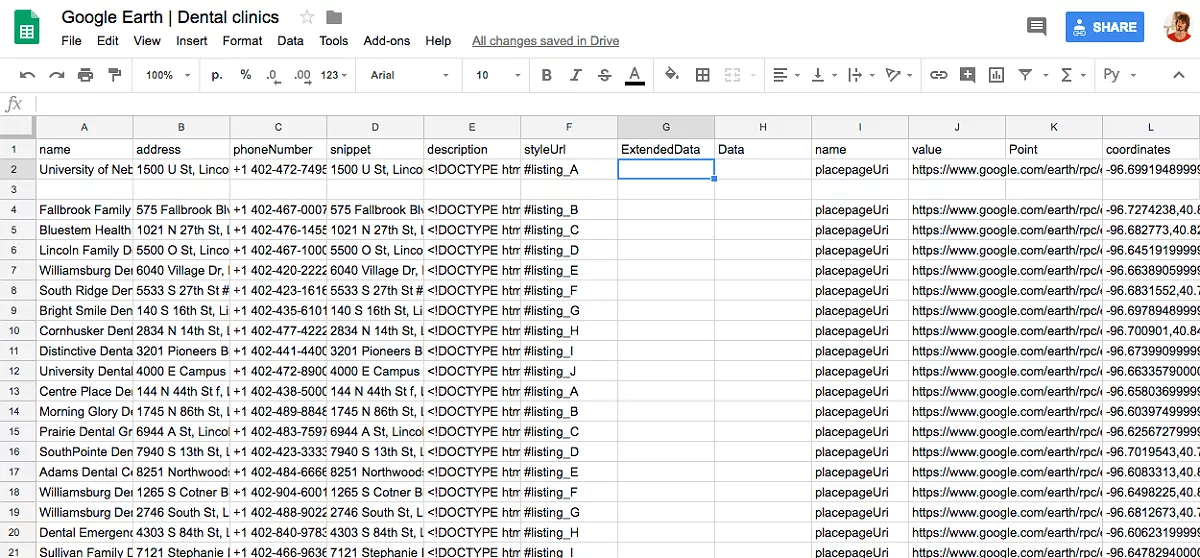
As a result, the workspace in Google Sheets looks like this after cleaning up unnecessary columns:
Create a new tab, and enter the website in row A1 and the following formula in A2, replacing the sheet name in the example with your own:
=MID(parser!E2;FIND("q=";parser!E2)+2;FIND("/&";parser!E2)-FIND("q=";parser!E2)-1)
- parser!E2 is the name of the source sheet with the imported CSV table;
- E2 is a column in the source table named "description".
If the first value after entering the formula is #VALUE!, don't worry. Most likely, the reason is that the site was not found in the first row of the array, and there were only phone numbers, company names, or other information. Just extend the formula by the number of rows in the original data array.
The sites are done. If you want, you can create additional columns with phone number, company name, coordinates (Coordinates column in the original table), and address by simply copying from the original table.
How to collect email addresses?
Now that you have a list of websites, you can use free tools to collect contact email addresses by domain.
To extract domains from the Website column we created, enter this formula in the adjacent column against cell A2:
=IF(ISERROR(FIND("//www.";A2));MID(A2;FIND(":";A2;4)+3;FIND("/";A2;9)-FIND(":";A2;4)-3);MID(A2;FIND(":";A2;4)+7;FIND("/";A2;9)-FIND(":";A2;4)-7))
If done correctly, the table will look like this:
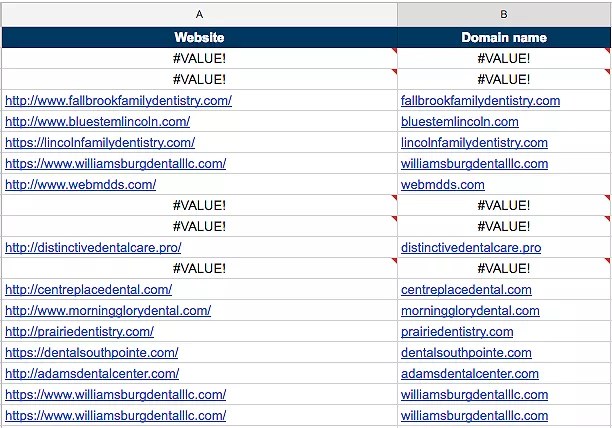
Then filter, leaving only cells with values, and put them into a program for scanning contacts with the content of the specified domain name (hunter, leadmine).
Another option is to go to each site separately and enter the contact email address(es) in the table.
And that’s it, you’re done. You can now send your commercial offer or promo codes for a holiday promotion, inform your readers about the release of a new product on the market, make special offers, or invite users to place a bulk order.
Any questions? Feel free to contact me personally or leave a comment.
The opinion of the authors of guest posts may differ from the position of the editorial staff and specialists of the Netpeak Agency.
The opinion of the authors of guest posts may not coincide with the position of the editorial staff and specialists of the Netpeak Agency.

 4
4
 2
2
 2
2
Related Articles
Display Advertising Effectiveness Analysis: A Comprehensive Approach to Measuring Its Impact
In this article, I will explain why you shouldn’t underestimate display advertising and how to analyze its impact using Google Analytics 4
Generative Engine Optimization: What Businesses Get From Ranking in SearchGPT
Companies that master SearchGPT SEO and generative engine optimization will capture high-intent traffic from users seeking direct, authoritative answers
From Generic to Iconic: 100 Statistics on Amazon Marketing for Fashion Brands
While traditional fashion retailers were still figuring out e-commerce, one company quietly revolutionized how U.S. consumers shop for everything from workout gear to wedding dresses