Setting Up Image Customization for Facebook Dynamic Ads: A Step-by-Step Guide
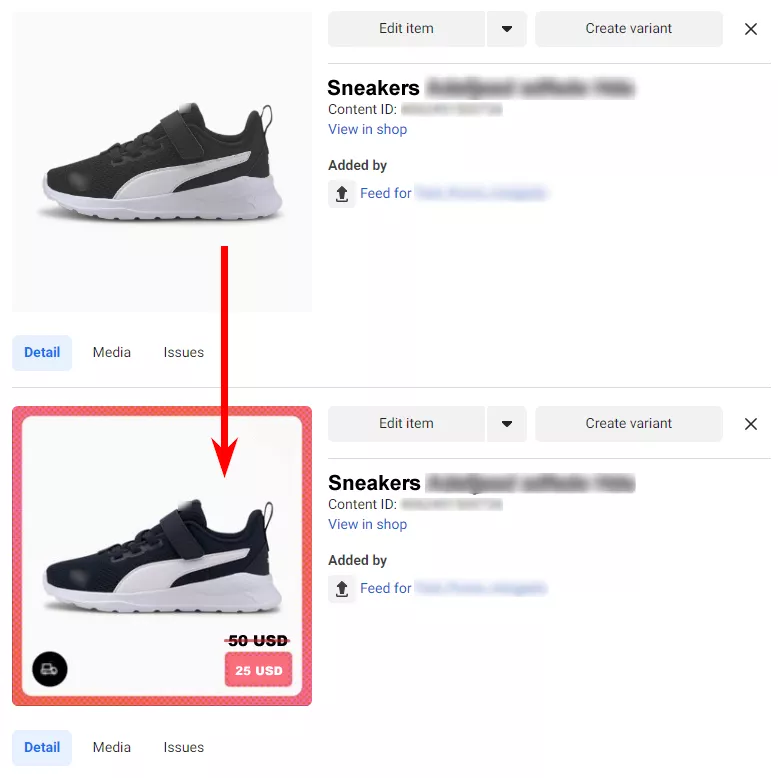
Want your Facebook Dynamic Ads to stand out from the competition? Image customization in the product feed is the answer. Essentially, it allows you to add product offers to catalog images. In this article, I will share the algorithm for setting up image customization and show how it works in practice.
How does the customization service work?
Let’s briefly discuss the principle of image customization using the Mergado service.
- Upload to the service feed with products for Facebook dynamic ads (input).
- Specify the necessary settings.
- Export the feed with customized images (output).
Algorithm of image customization setup
To illustrate how image customization is set up, let’s customize feed images for Facebook advertising campaigns of an online clothing store in Ukraine.
Step 1: Create and customize the project.
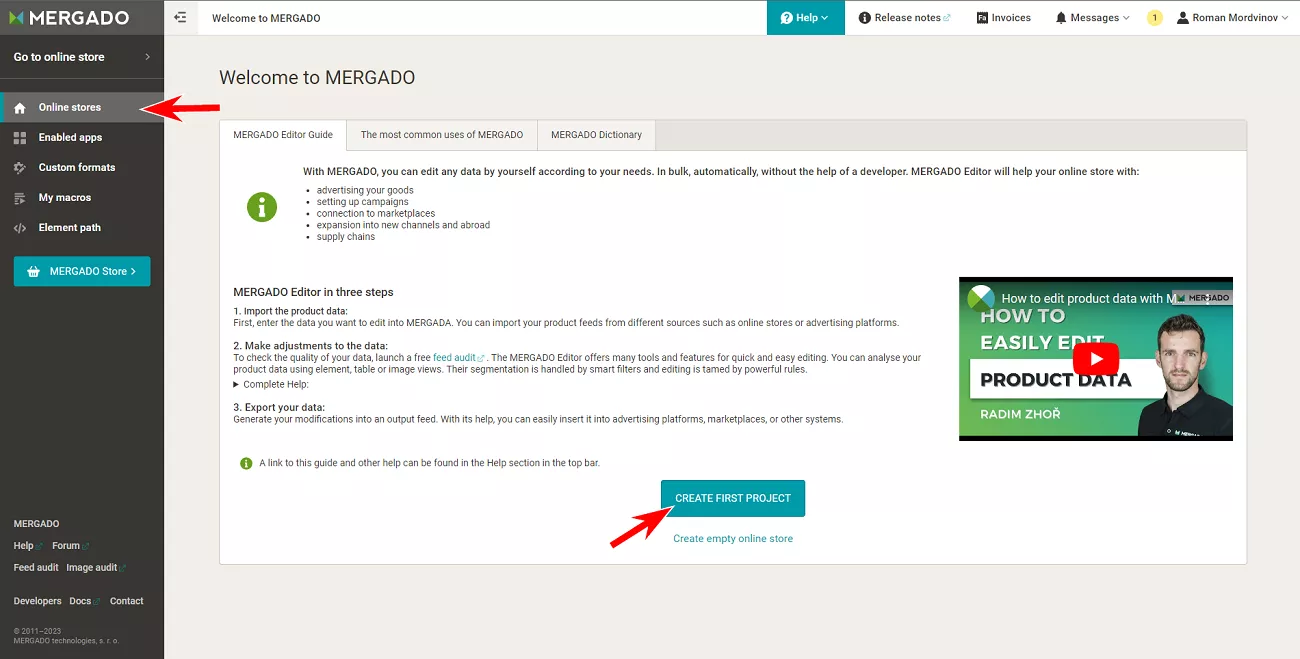
- Register an account on mergado.com.
- Go to the admin panel and click the Create first project button on the Online stores tab to create a project.
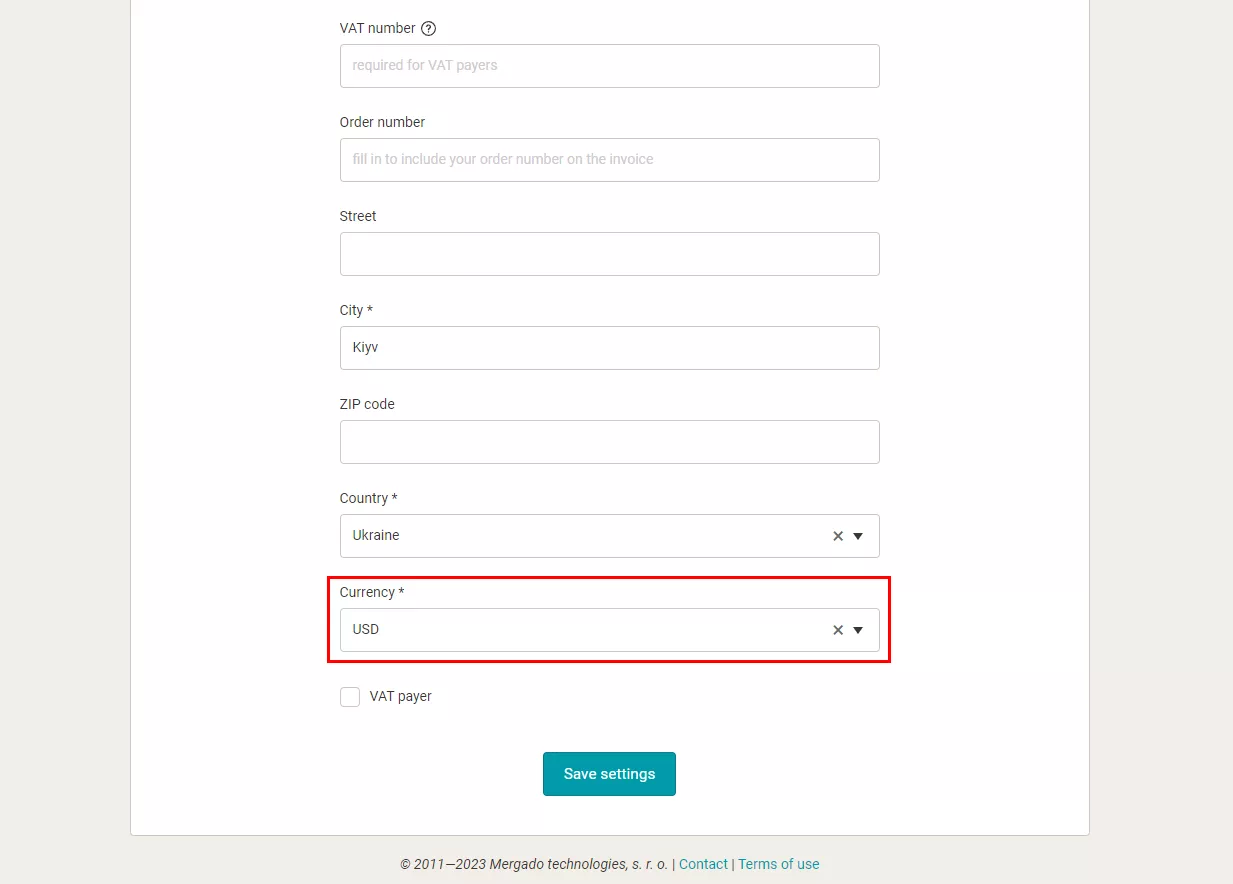
After creating an account, check that the payment currency is selected in the account settings. This is important for adding internal applications correctly, and it can be changed later.
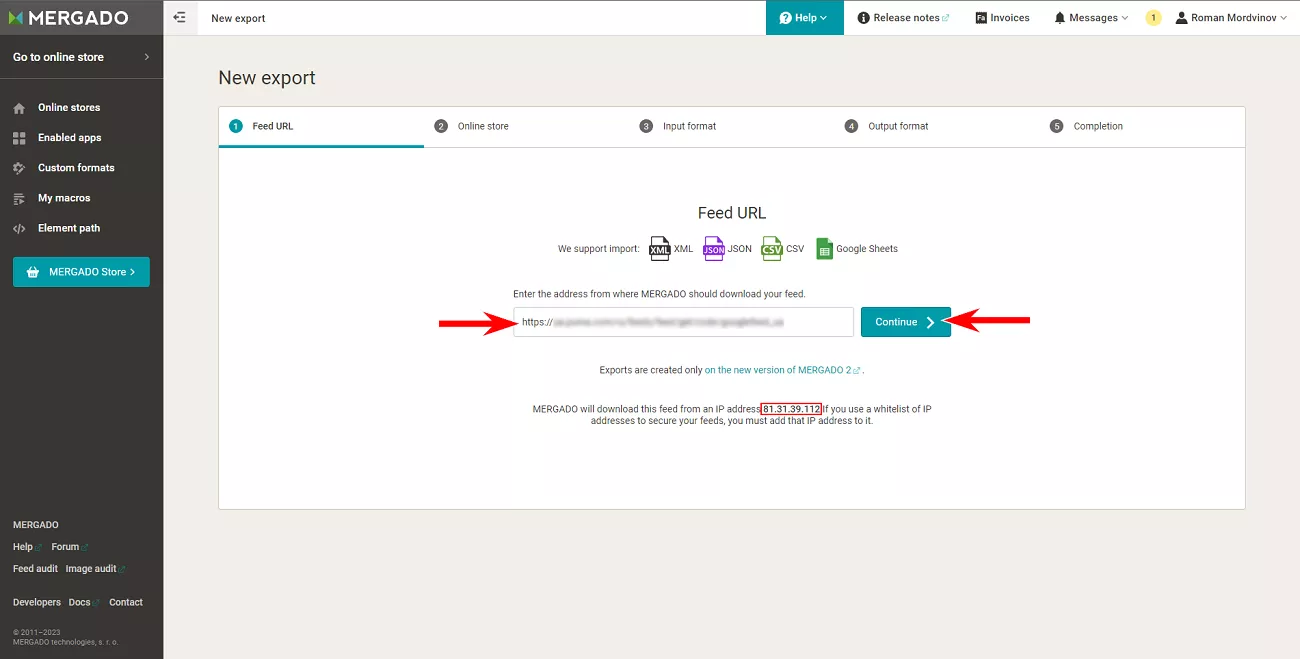
- Add a link to the feed and click Continue.
The service will download the feed from the IP address specified at the bottom of the page. If access to the feed is restricted and is only possible through a whitelist, you will need to add the Mergado IP address to the whitelist in advance.
- Name the project. For convenience, use the address of the online store whose feed you’re customizing.
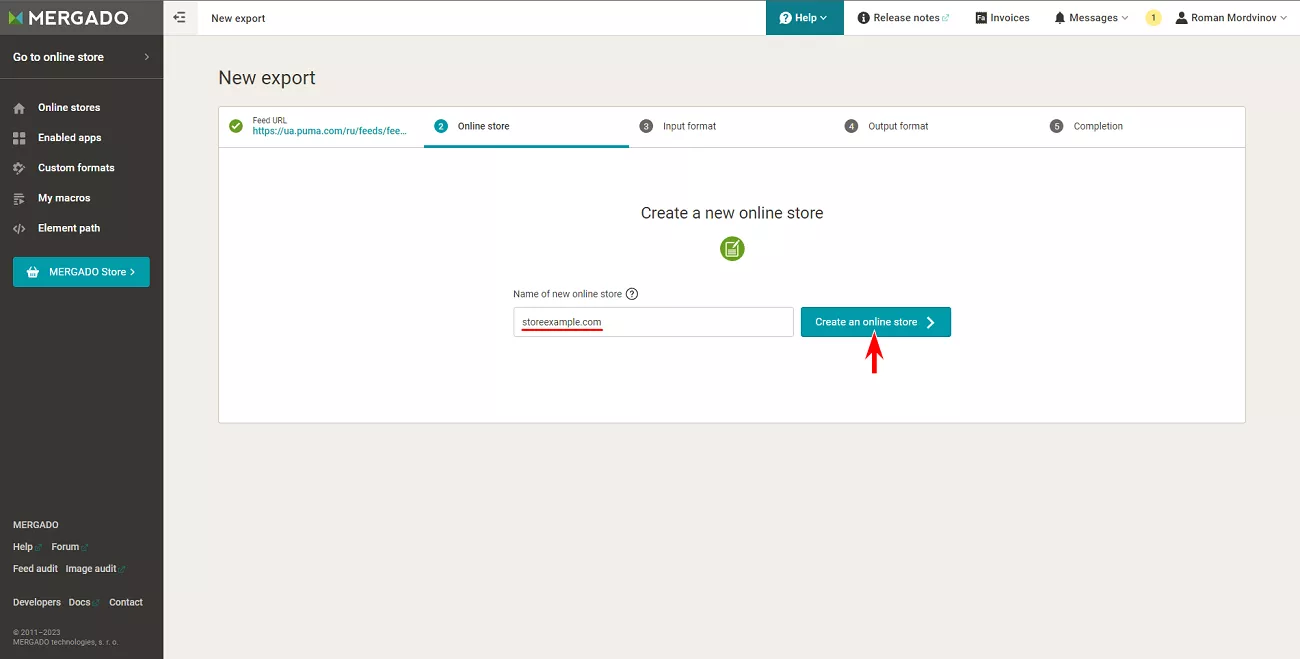
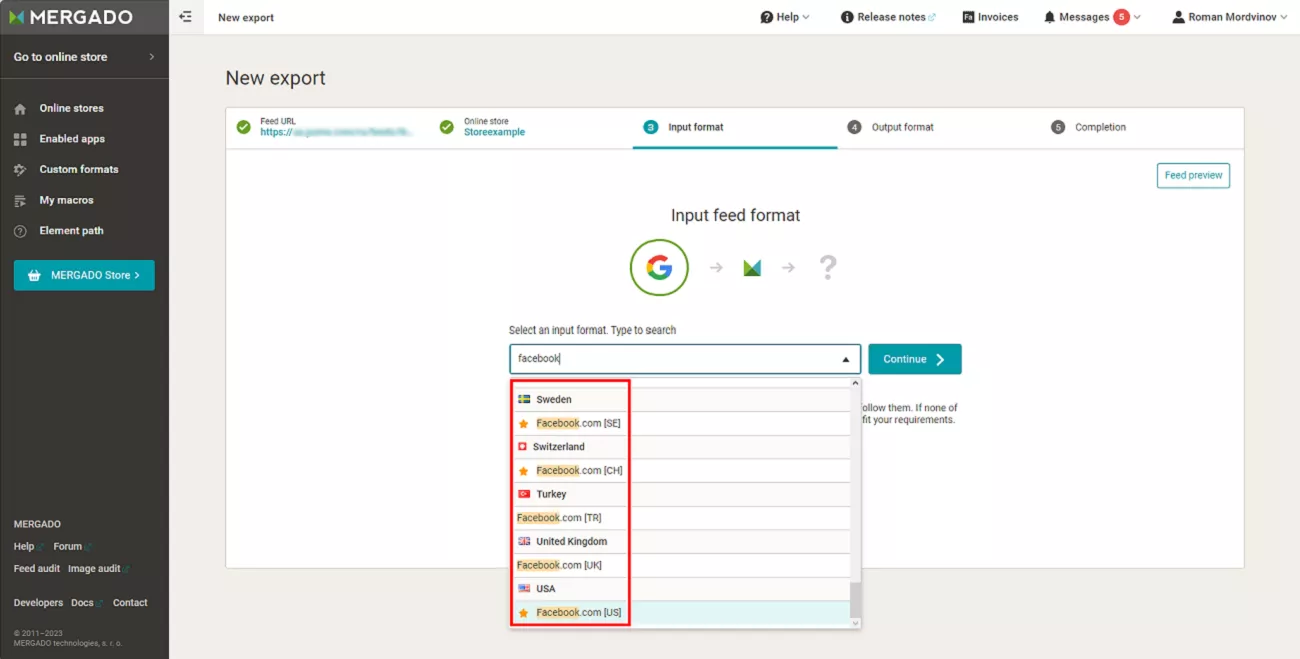
- Specify the format of the feed. The service offers a list of presets with different ad platforms and countries. In this example, the product feed is created for Facebook, so I’ve selected this format. The country is not important.
Stick to one file format. If Facebook.com [US] is selected for import and Facebook.com CSV [US] is selected for export, the system will not recognize the items.
- Click Continue.
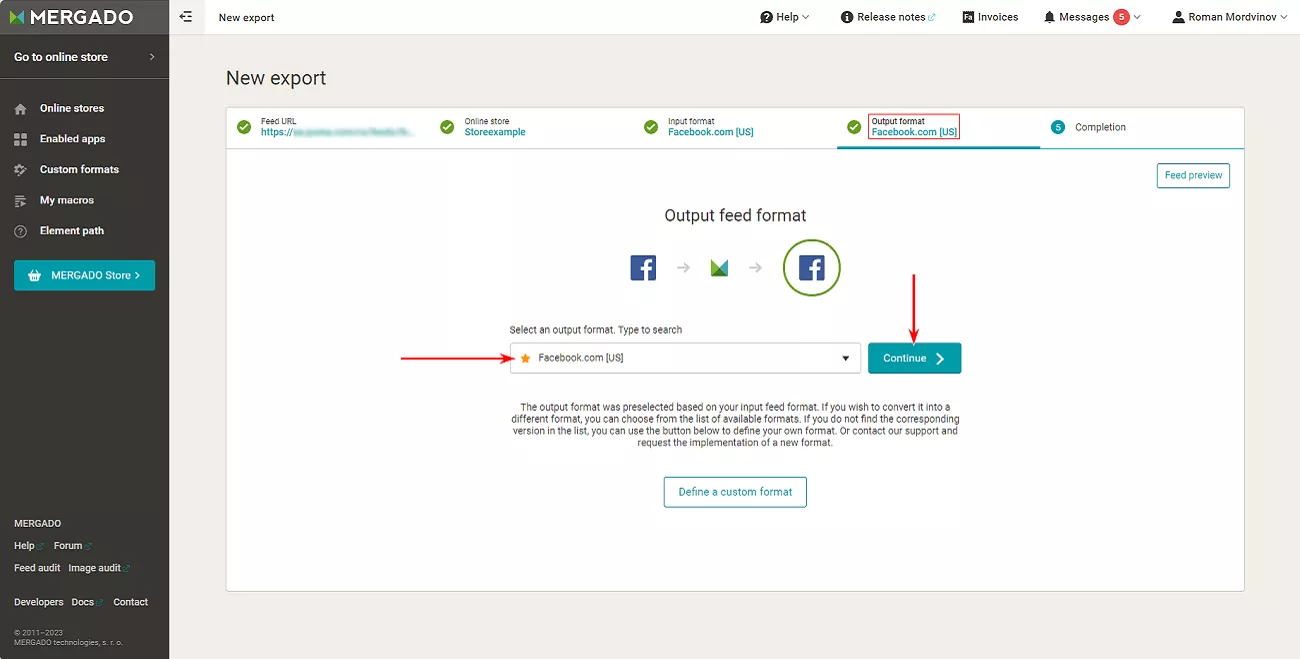
- Next, the service will ask you to specify the feed format to export. Again, select the format for Facebook. Click Continue.
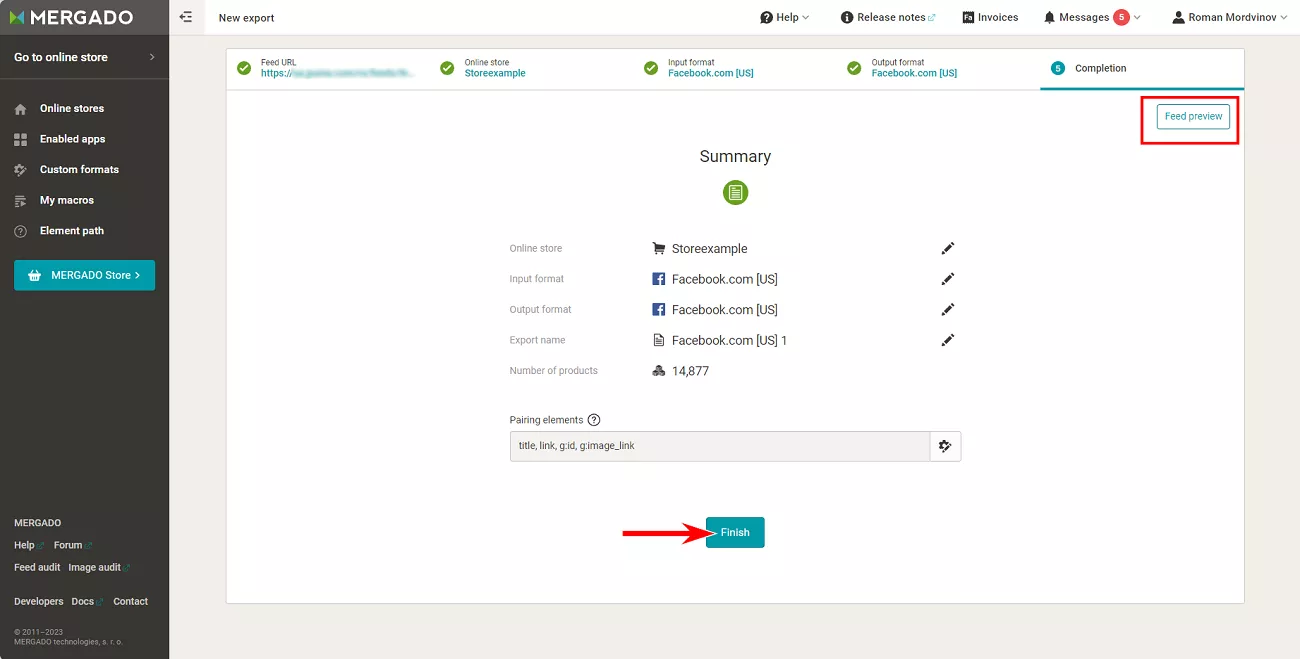
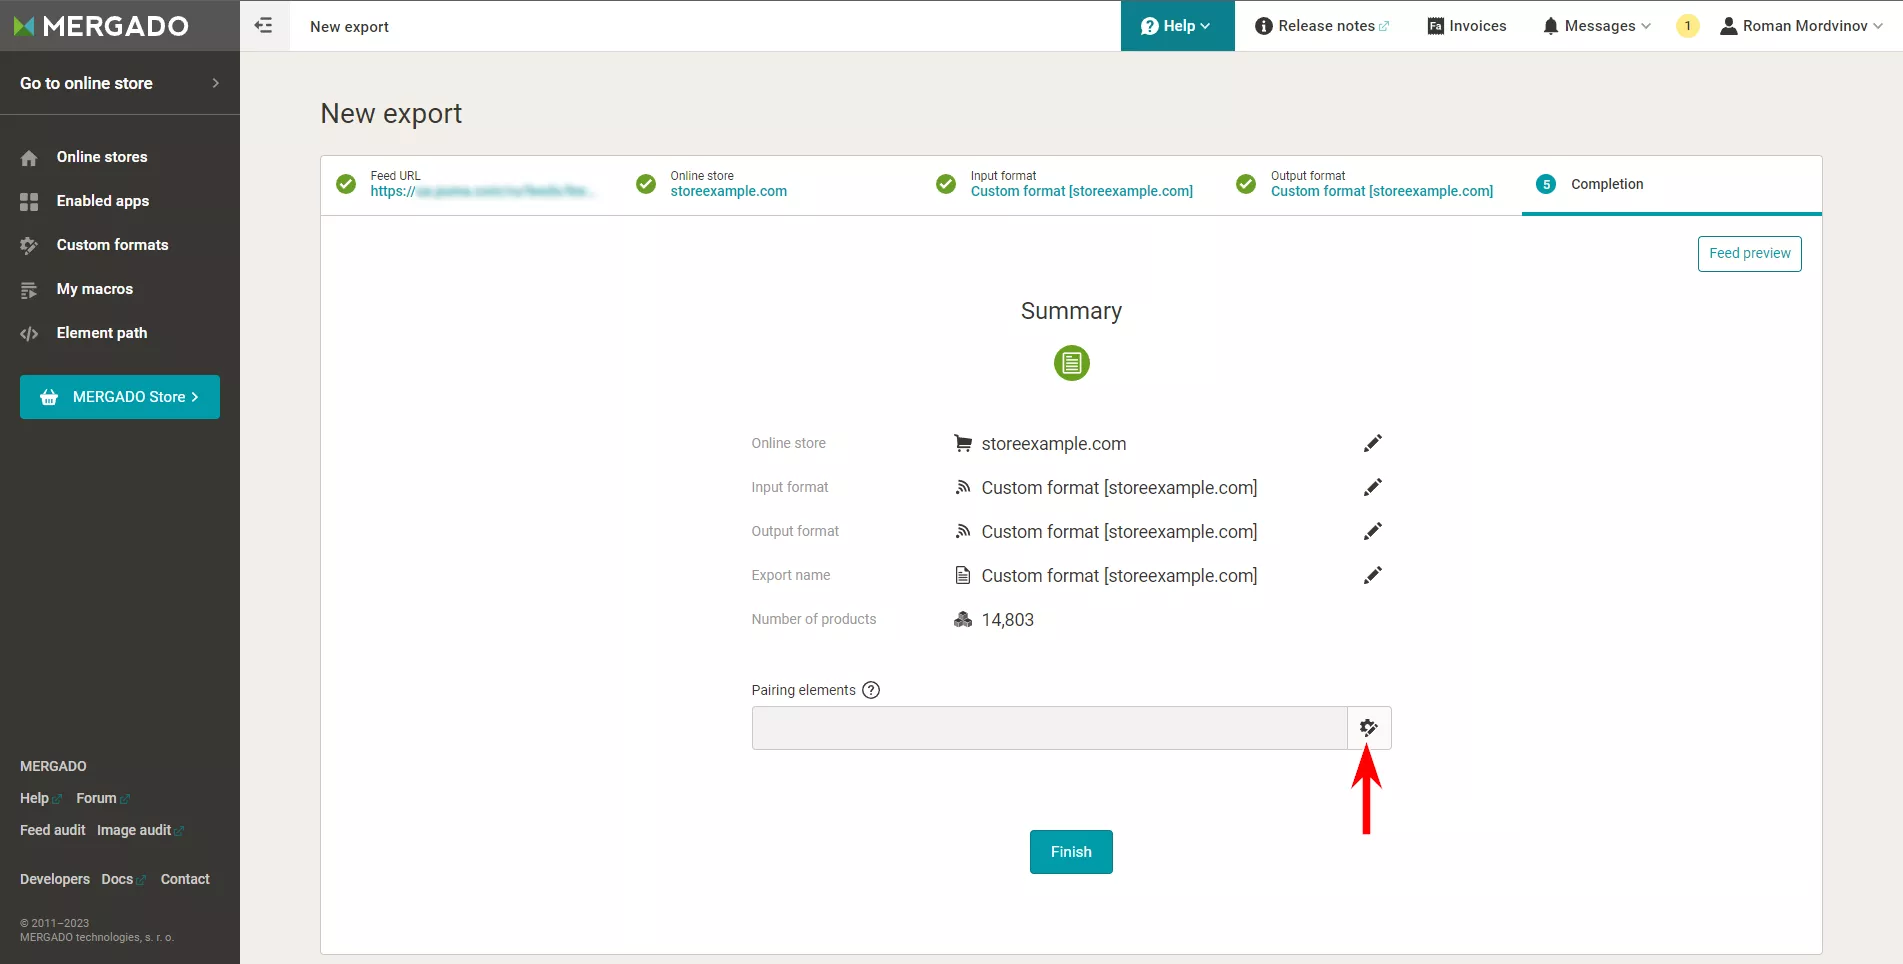
- The service will then display a summary page. At this point, you can make changes and preview the feed. If you don't need to make any changes to your feed, click Finish to start the import.
- The duration of the process depends on the size of the feed. When the import is complete, click Continue to MERGADO.
- Next, you will see an overview page containing the information. It is worth checking the Products page in the left menu to ensure it shows the products from the feed and everything is done correctly.
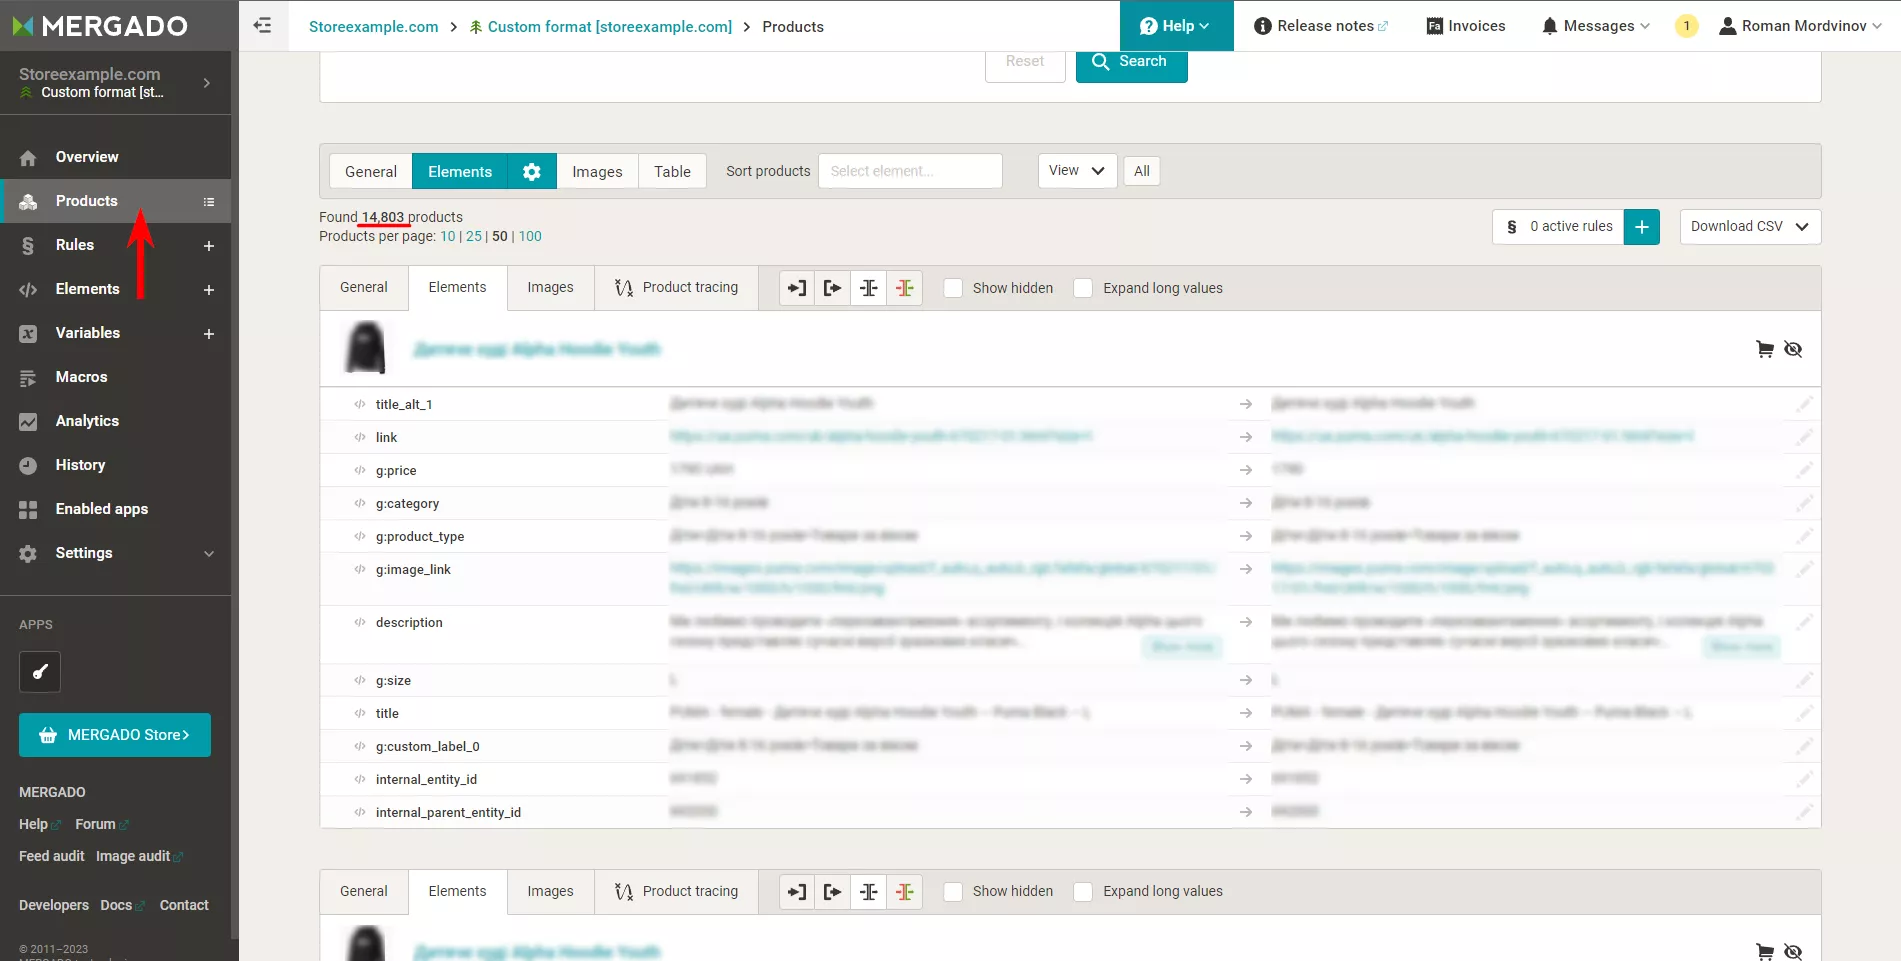
Go to Products > Elements to compare imported and exported feed elements. If certain required elements are not displayed, go to the Elements page in the left menu to modify the display.
How to use the feed for other purposes
To use your Facebook feed on other advertising platforms, you must set the appropriate export format. For instance, set it to Google Merchants for Google Ads. There is also an option to specify and define a custom format.
Another feature to be aware of is Pairing elements, which help prevent exporting duplicates to the feed. When selecting preset formats like Facebook or Google, they are set automatically, but when creating a custom format, the service asks you to specify them manually.
- Click the gear button to the right to customize the pairing elements.
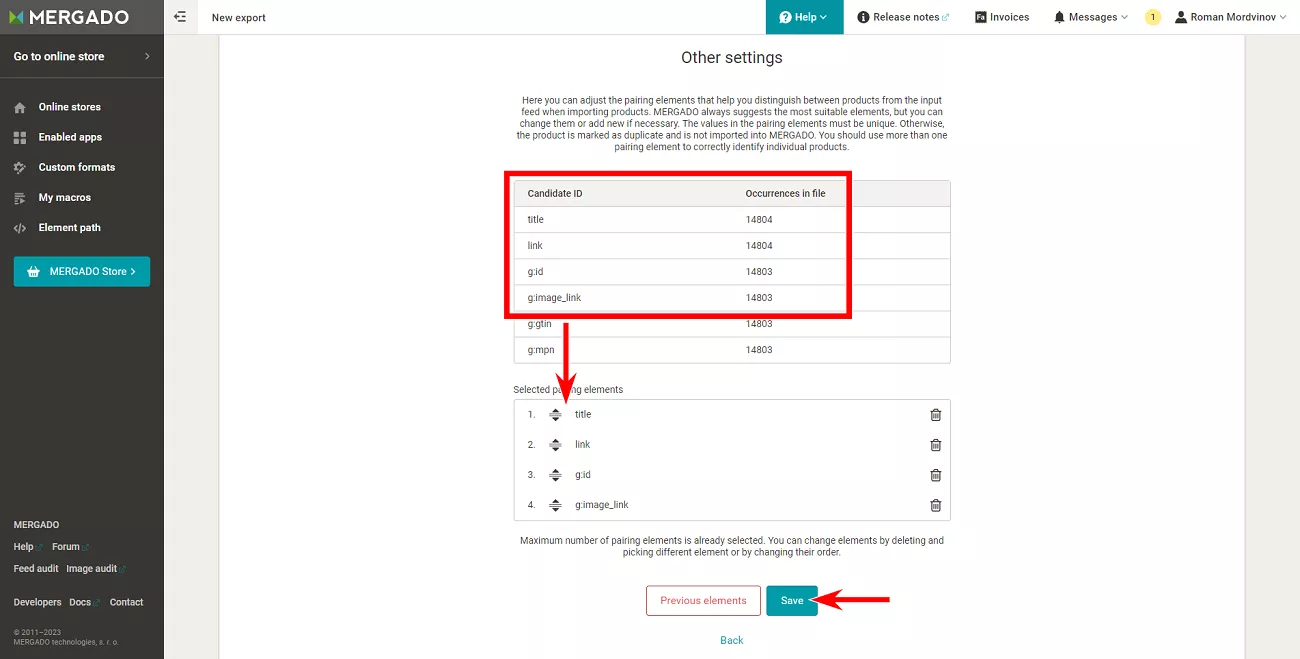
- Next, you will see a selection window where you should specify the elements that will help you distinguish between products. It is important to choose elements that are not repeated.
- The service also offers its own recommendations. You can trust it and just choose the first four elements from the list (enter them manually).
- Click Save.
Step 2: Add an application to customize images.
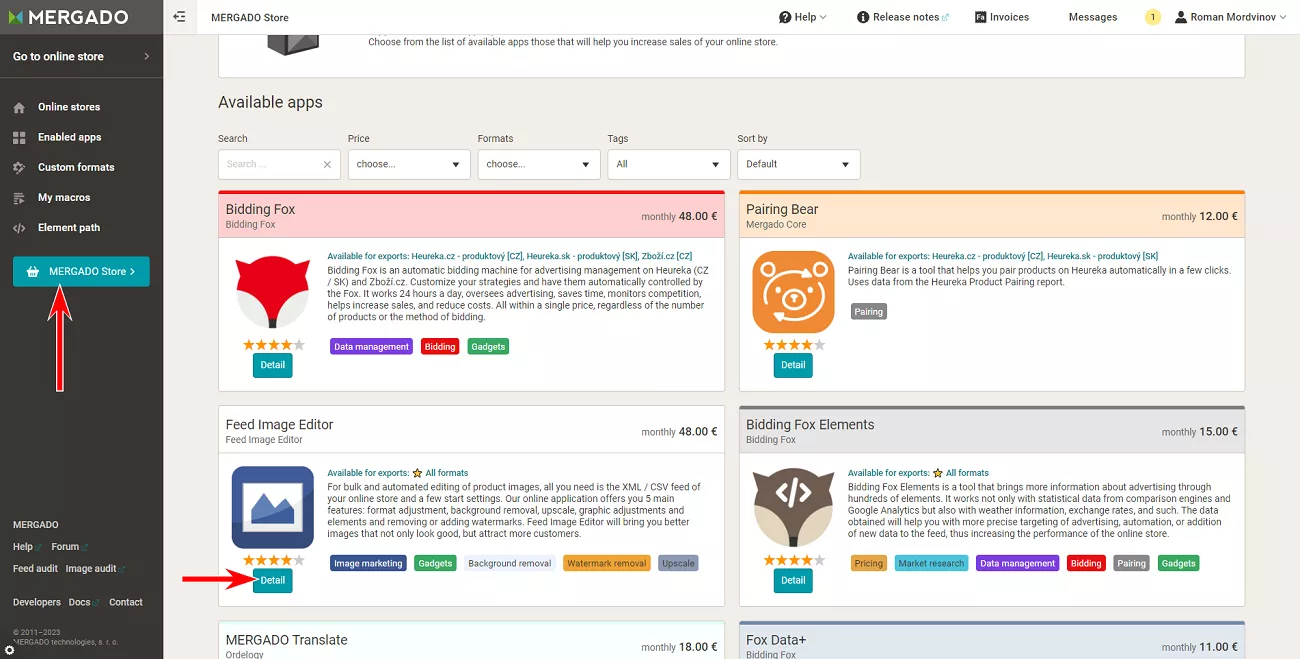
In this example, I use the Feed Image Editor (FIE) app from Mergado's internal store to customize images. You must pay for it, but the app offers a 30-day trial period.
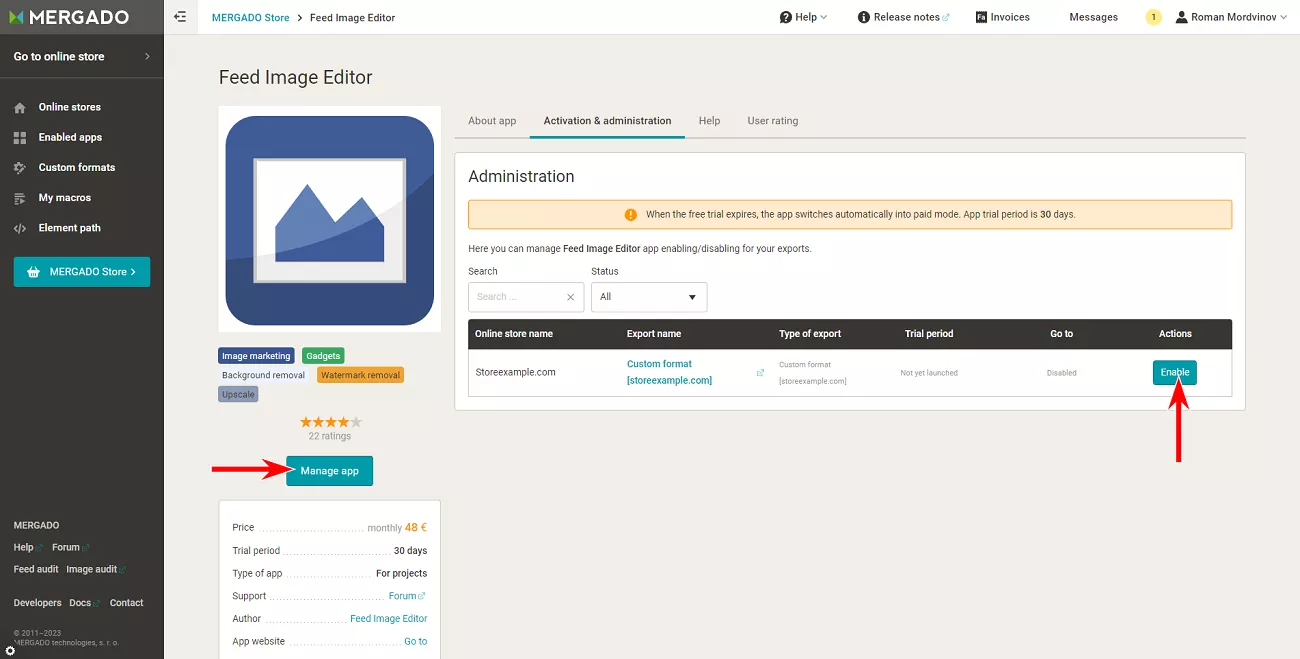
- Go to the internal store and click the MERGADO Store button to connect.
- Then click Manage app > Enable to activate the app in the project line.
- Next, return to the Project page and click on the FIE icon in the left menu.
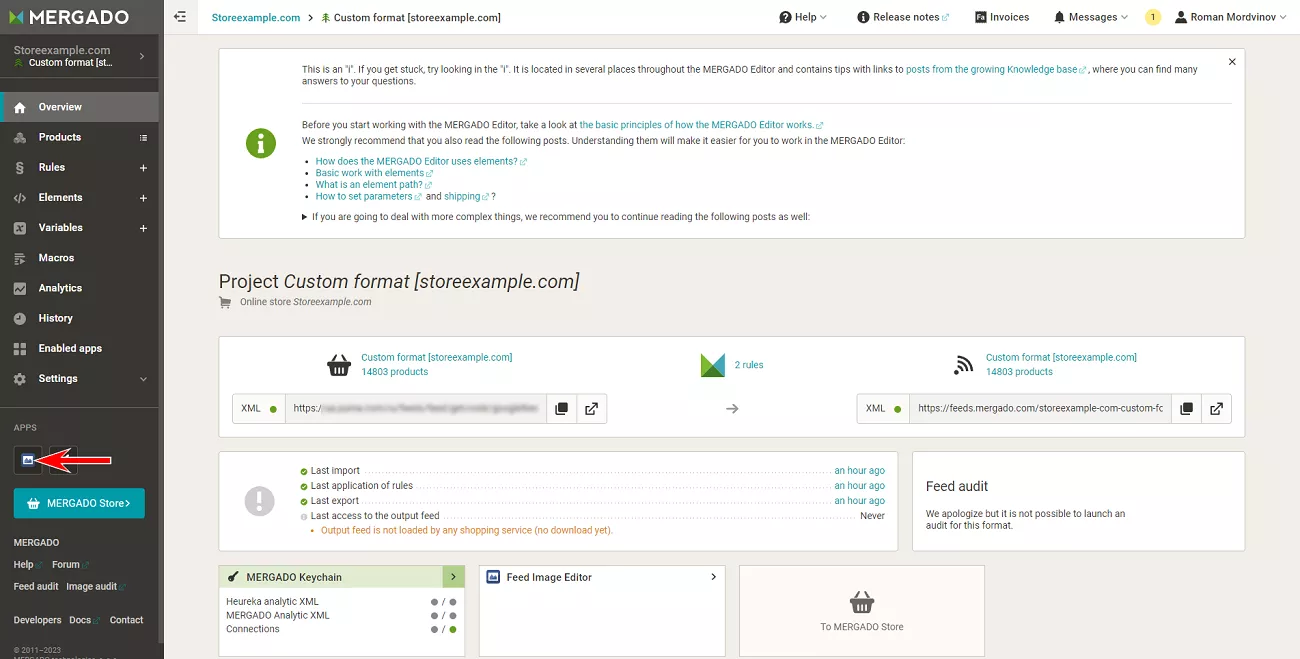
- This will open the application page with presets and template creations.
If you see a blank screen after clicking the icon, the problem is in your browser. Clear your cache or log in from another browser. Also, do note that the application sometimes does not work in incognito mode.
- Customize the app before creating a template. Go to the Settings tab in the top menu, open Project settings, and click Edit.
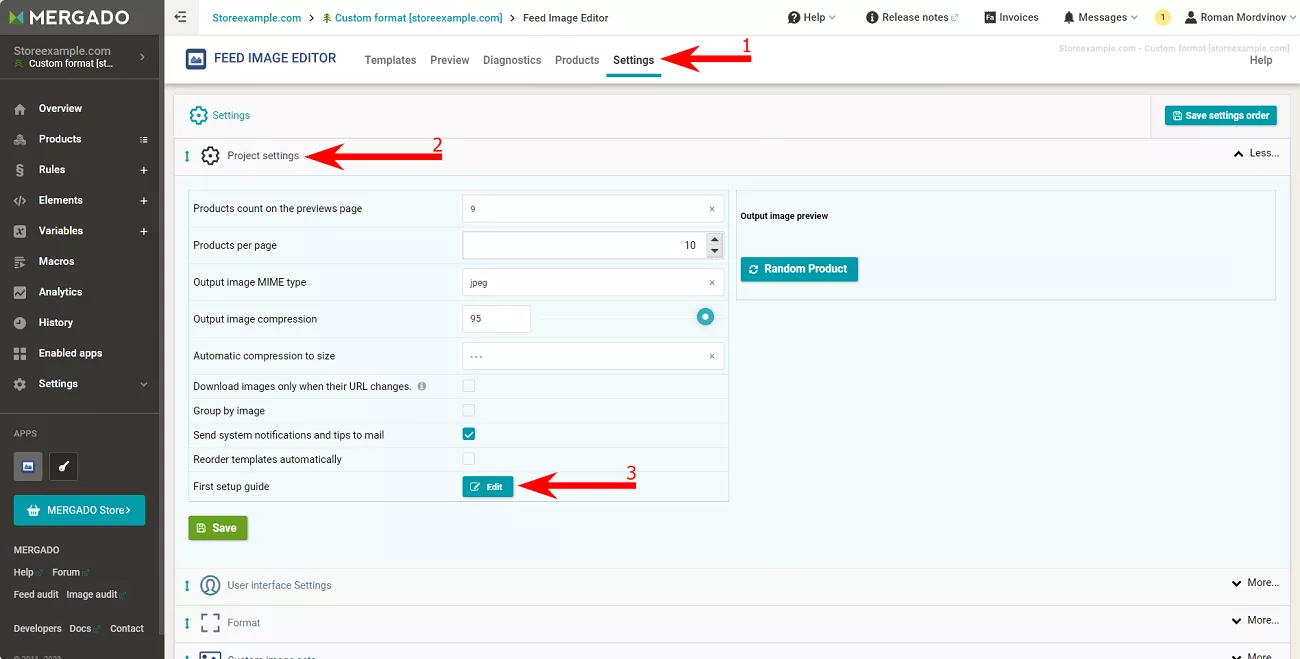
- In the new menu, fill in all the fields and press Done.
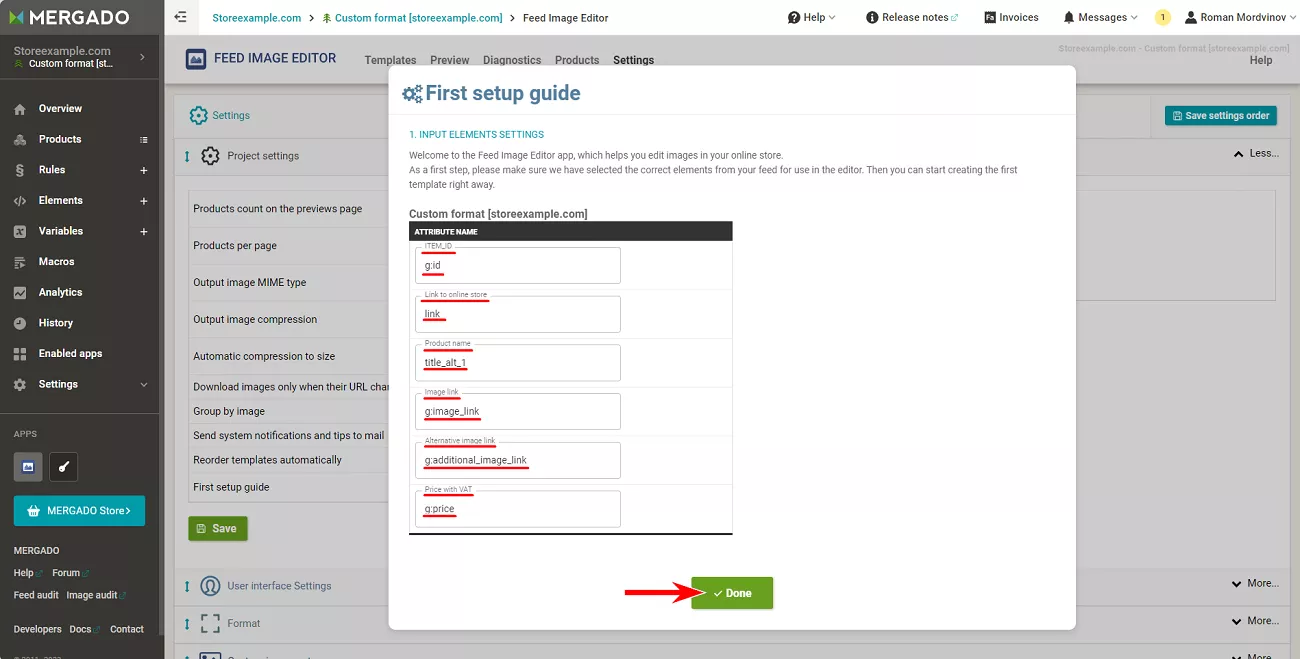
- If everything is set up correctly, a product image from the feed will appear in the Templates tab within the presets.
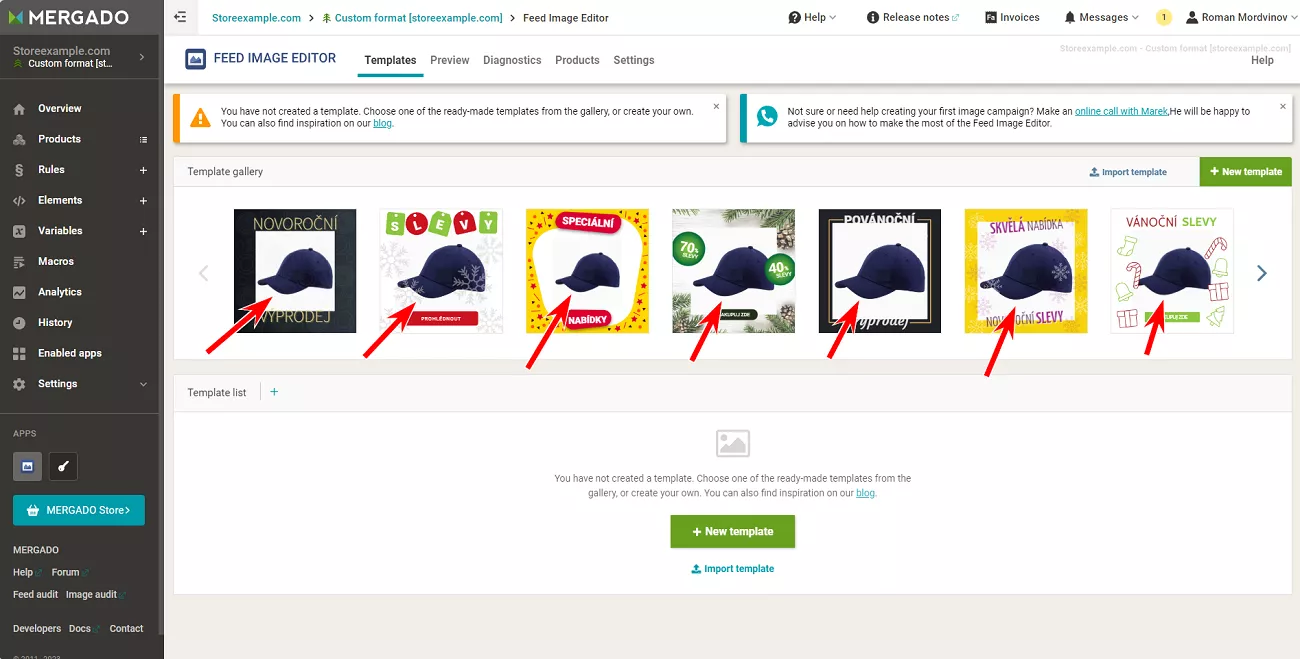
Step 3: Create a customization template.
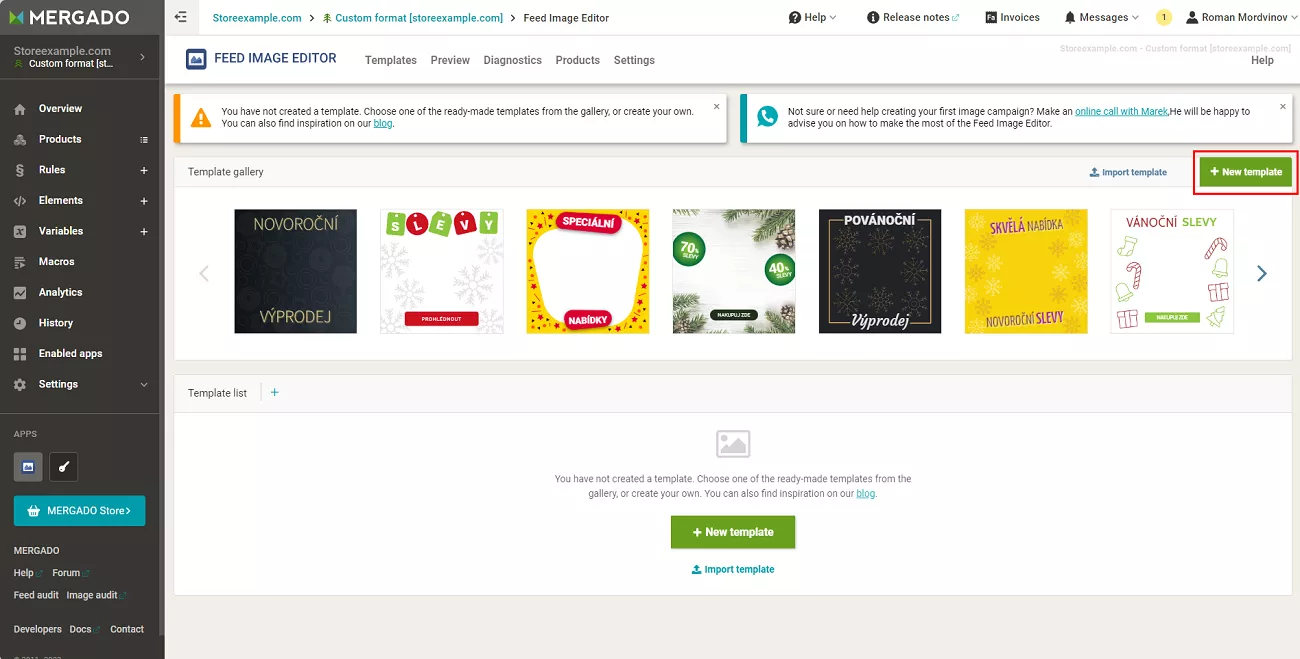
The FIE application offers both preset templates with editing features and the ability to create your own templates. Select the second option.
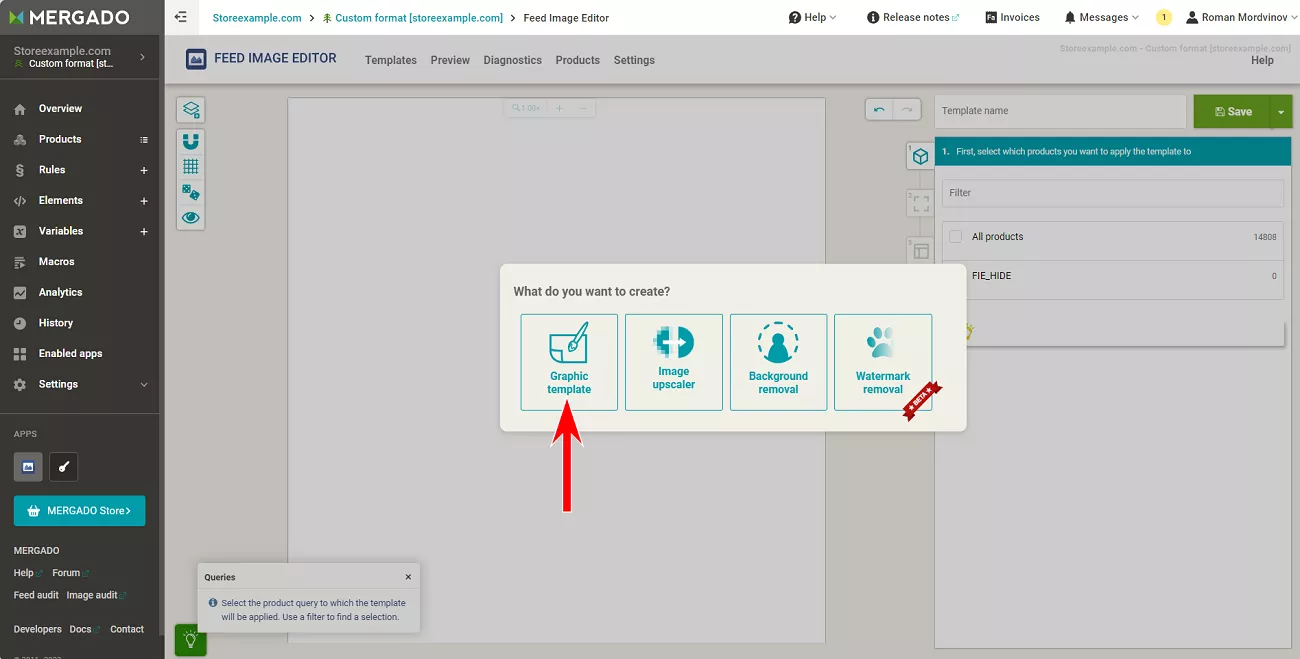
- Click New template to open the editor. It offers several options: create a graphic template, upscale the image, or remove the background and watermark. At this stage, the selection has no effect; these options can be applied to the image later.
- Select Graphic template.
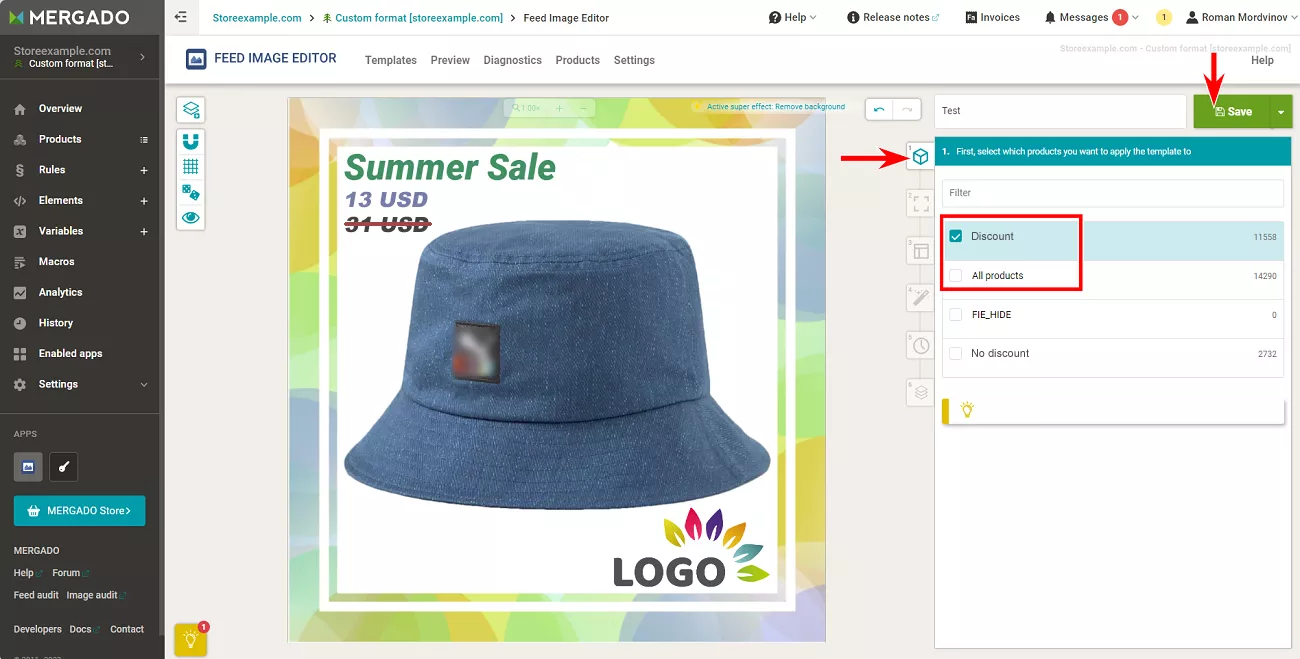
- Next, the editor opens with a lot of options. These are the tabs in the right menu from top to bottom.
- Selecting a group of products to which the template will be applied.
- Selecting the format to which the template will be applied. There are presets for different ad options, such as Facebook Dynamic Product Ads and Google Shopping. A custom option is also available.
- Selecting the template layout. You can display the main image or different combinations of main and additional images. They must be present in the imported feed and interpreted correctly in Mergado.
- Applying effects. To remove the background or watermark, increase resolution, etc.
- Template activity schedule. For example, to set the activity time of a special template for Black Friday.
- Layer manipulation. Customize images by adding prices, product names, logos, frames, etc. To create a new layer, click + New Layer.
- The green Save button on the top right saves the template.
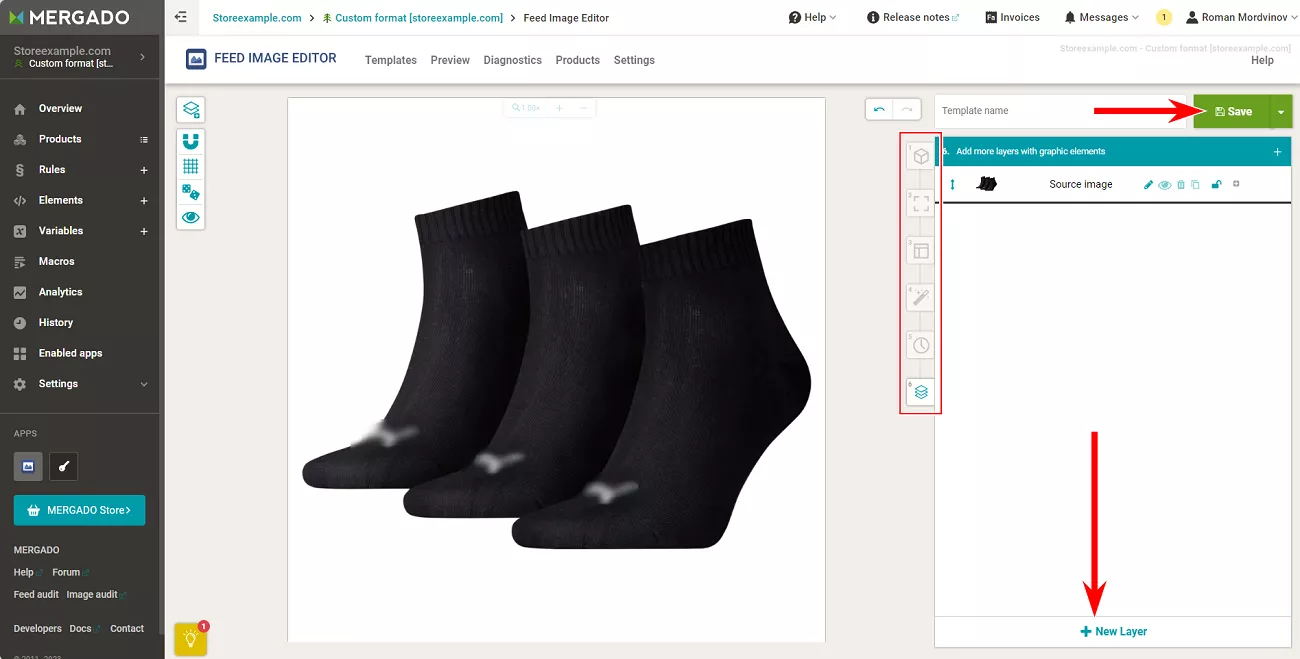
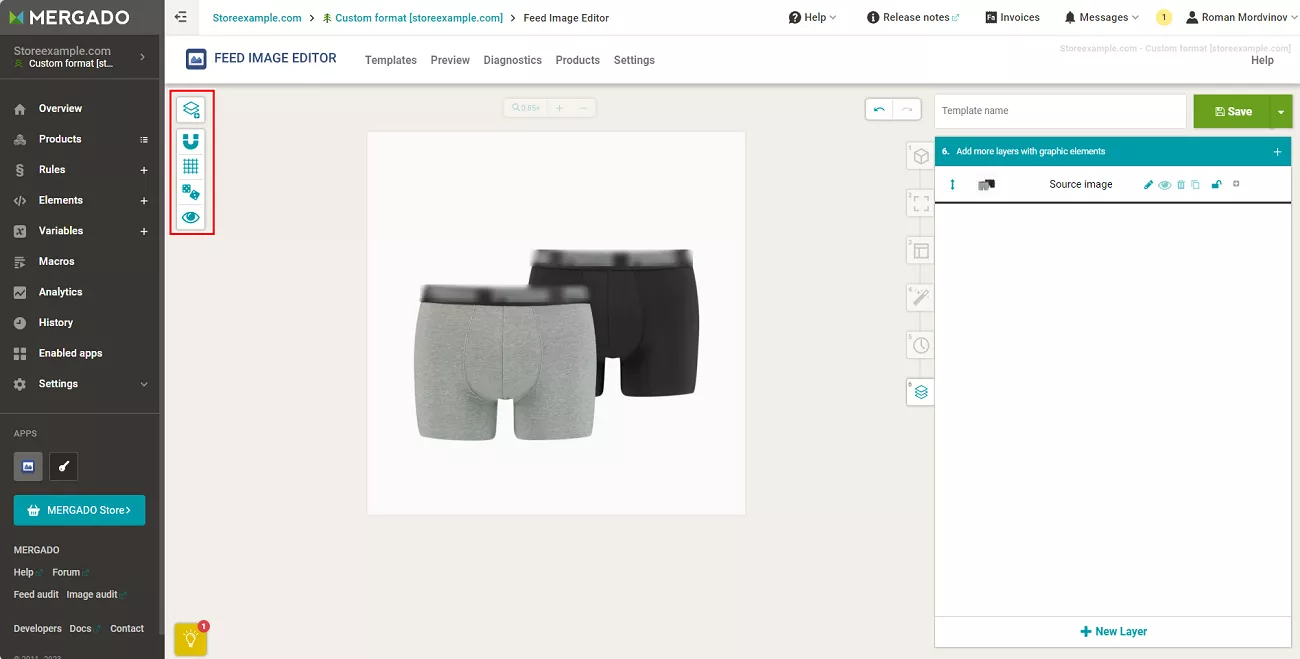
There is also a small menu to the left of the image.
- The magnet icon is used to activate the automatic attachment of elements to conditional boundaries.
- The grid icon adds a grid to the image to make it easier to place elements.
- The cube icon changes the elements in the image. Use it to see how the template will look with different products. However, the full option will only work after updating the feed in Mergado.
- The eye icon renders the final view of the image in the exported feed.
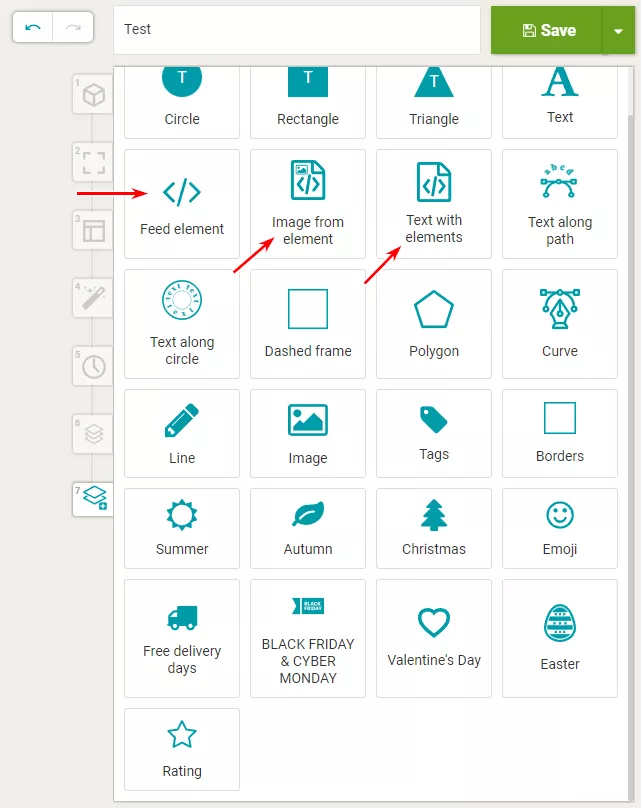
There are many layer options, and most of these are intuitive, such as borders, shapes, text, frames, decor, downloadable images, and so on. Some layers allow you to add feed elements to an image: product price, discounted price, title, additional images, and product name.
- Feed element adds a feed element in the form of text. For example, product category, material, size, or price.
- Image from element adds additional images from the feed. For example, images of the product from different angles.
- Text with elements is similar to feed element, but it allows you to add text to the right or left of the element and place a shape or image behind it.
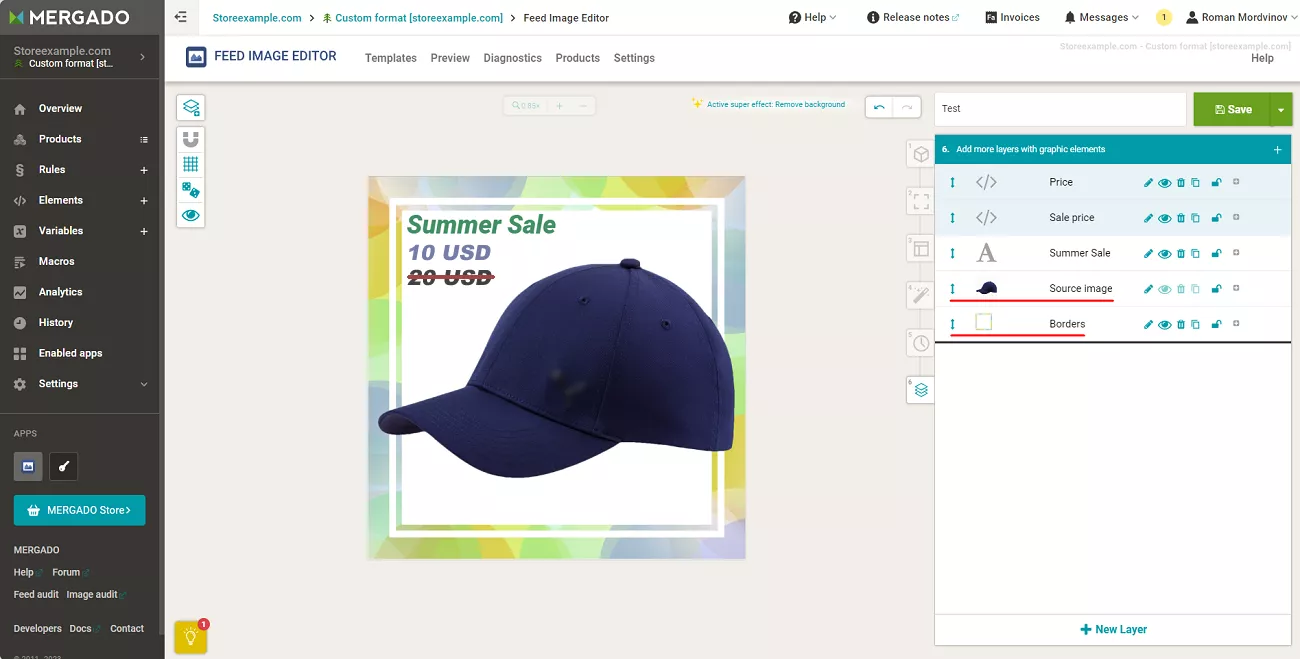
- After studying the features of the editor, start creating a template with a frame, text, discounted product price, and regular product price.
- Each product should have regular and discounted prices because they are loaded from the imported feed. Add them to the template using the Feed element layer.
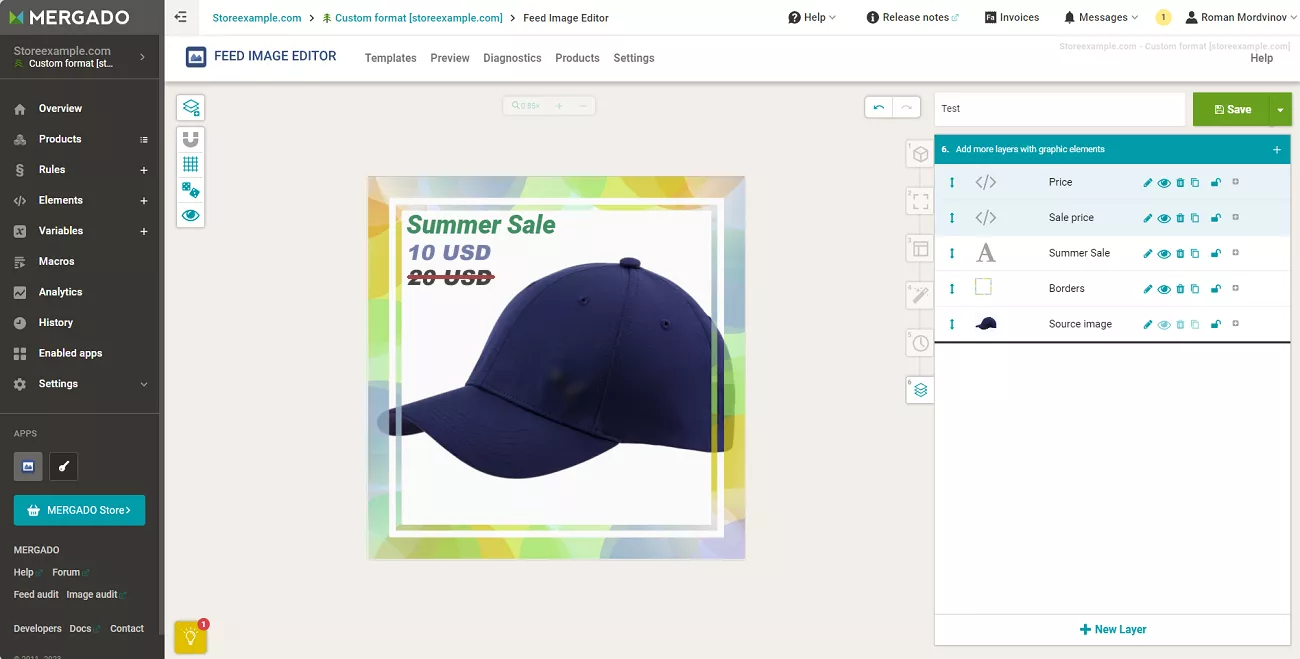
When placing a text item from a feed, remember that it is dynamic. The price of an item can fluctuate depending on the product. If it is near a bar or frame, ensure the price does not go outside the frame. Align it to the edge or leave enough space on both sides.
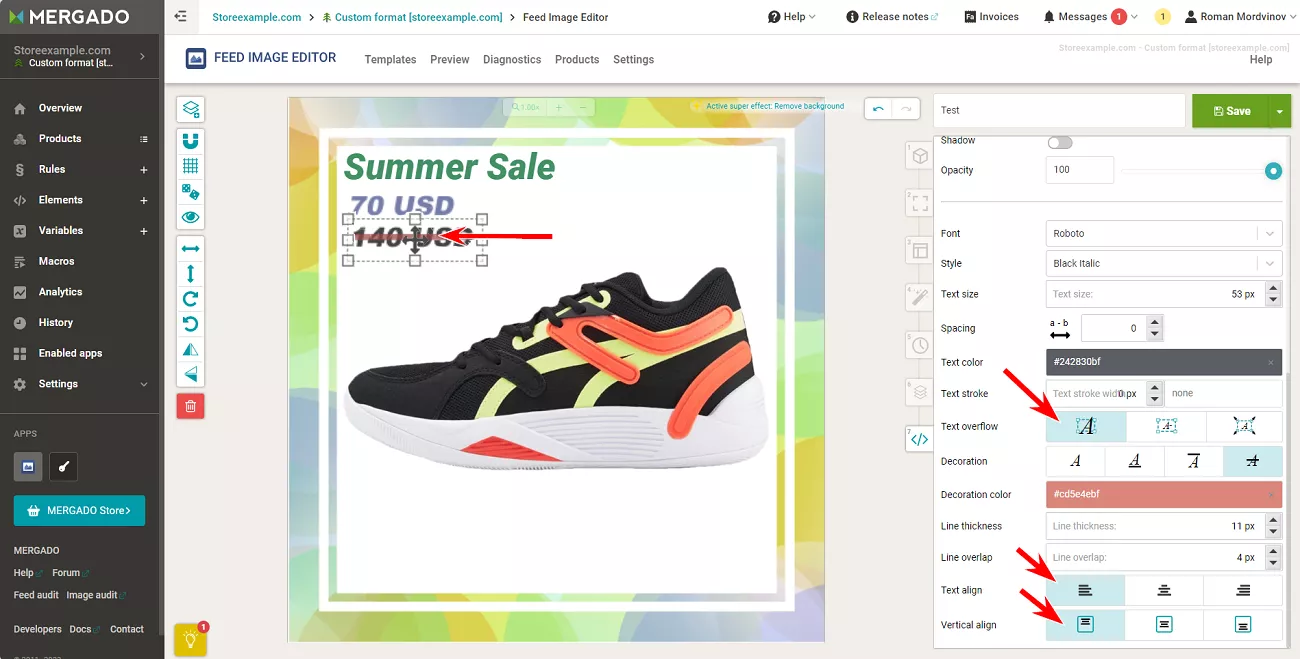
- It is important to maintain the order of layers and adjust them by dragging them using the arrows. First, remove the background (the third item in the right menu) from the main image and then move the frame under the product.
The background removal algorithm does not always work correctly. For example, if the products are white and on a white background, the algorithm may remove fragments of the products. So, use this option with caution.
- To add the logo, use the Image layer. You can upload images from your computer.
There is also an option to upload other images, which allows you to create the whole template outside the FIE Editor. For example, you can hire designers and give them details about the final image format, say 1080 x 1080 pixels. The designers will independently create a template with static elements and send it as PNG files. You can then add them as images, overlay all the elements from the feed, and apply the desired effects.
Layers with feed elements cannot be placed below normal layers. If you add a product price as a feed element, you cannot place it below a frame, bar, or image. Feed elements have to be placed on top.
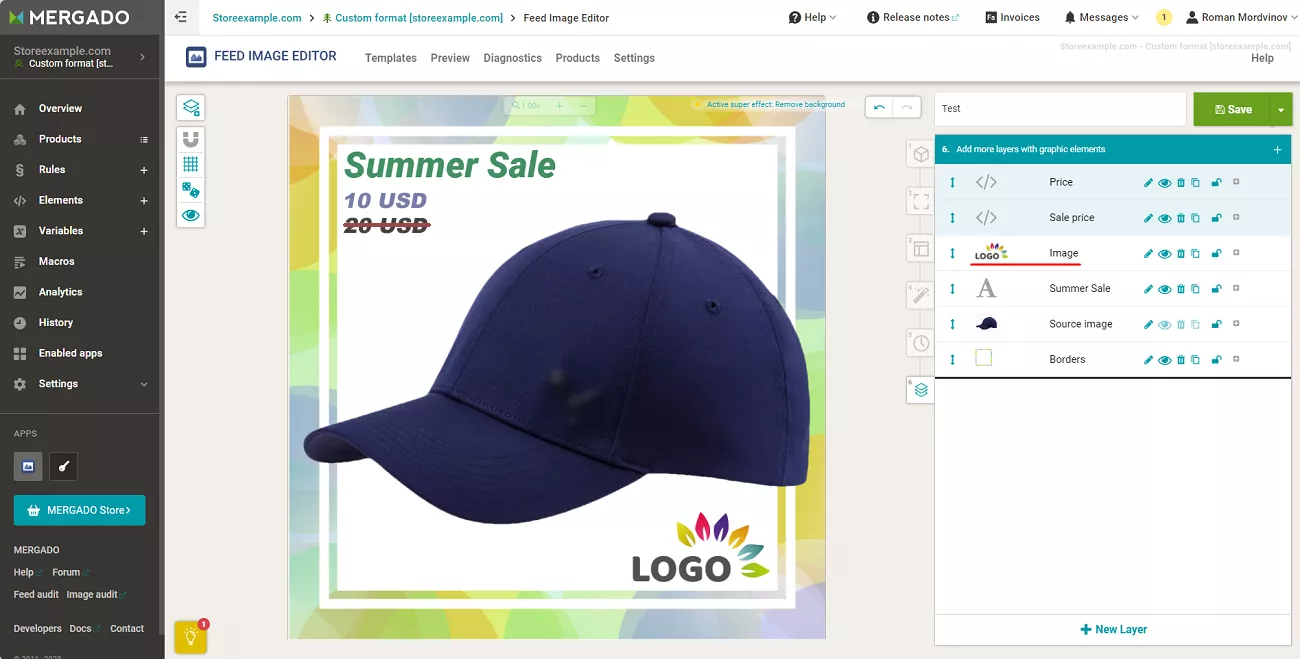
- Click Save.
- When you exit the editor, the system will warn you that the changes may not have been saved. This is a bug, and you can ignore it.
- After creating the first template and exiting the editor, you will notice that the template is applied to a limited number of products. This is because the system has not yet applied it to the exported feed.
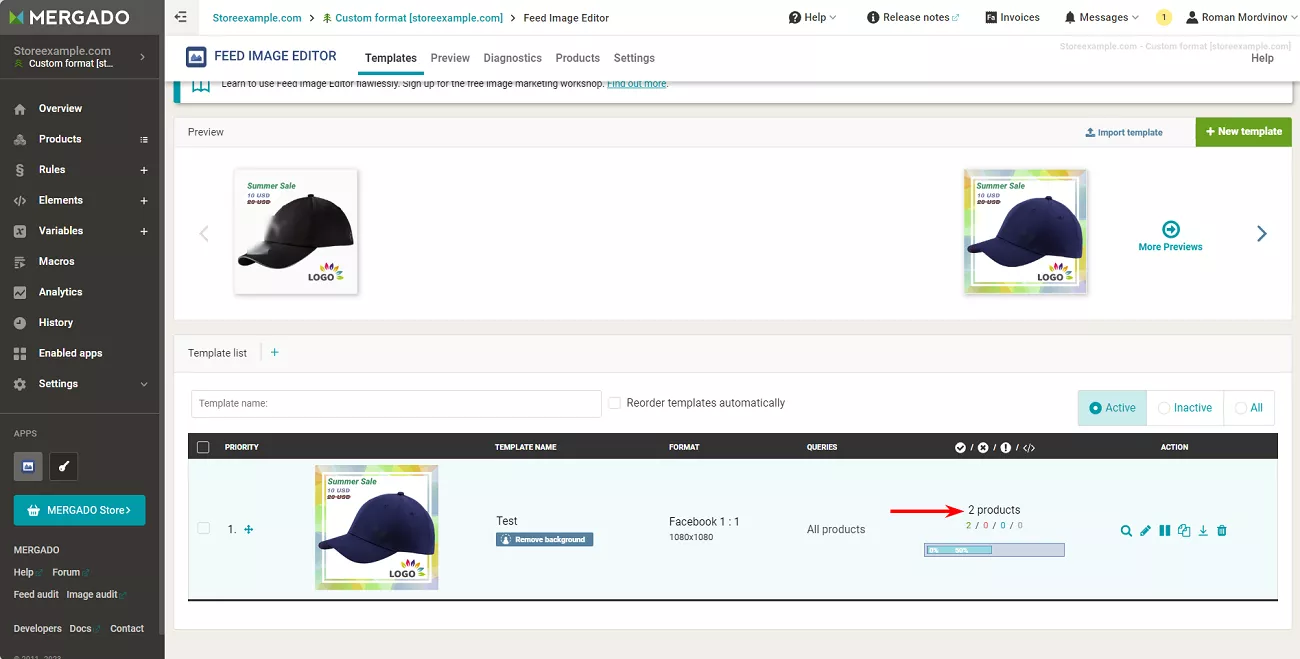
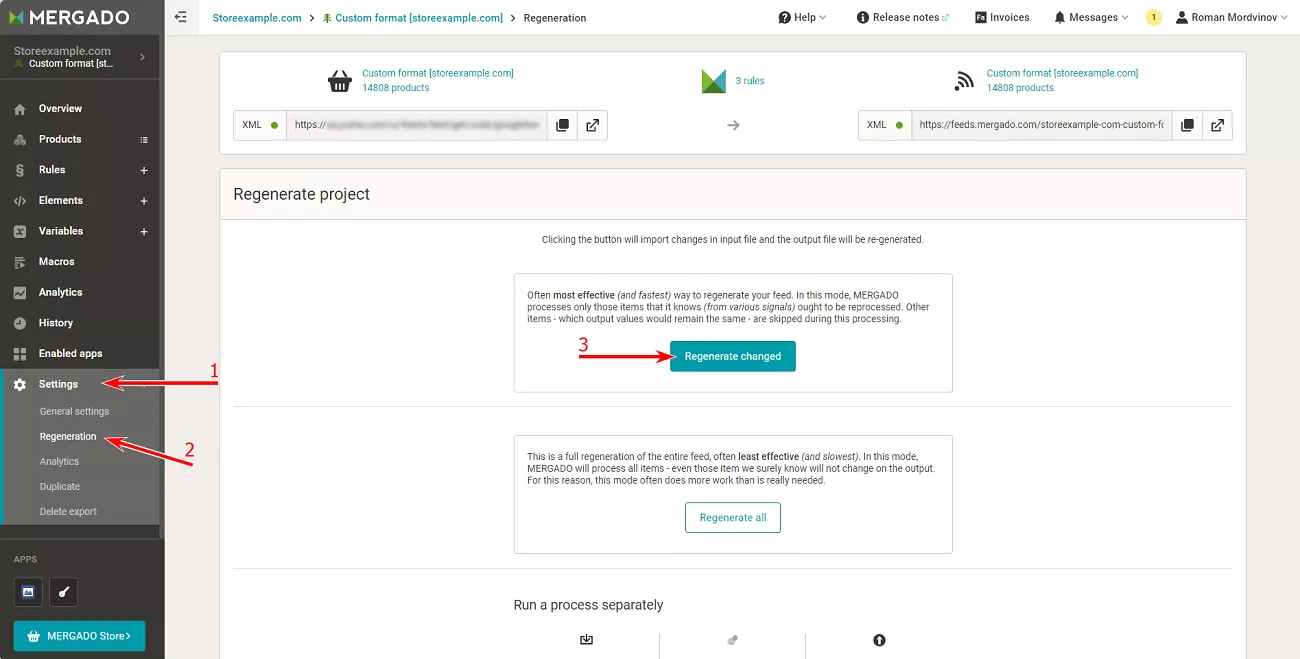
- To avoid waiting for a scheduled feed update, apply it manually. In the left menu, click Settings > Regenerate > Regenerate changed. This starts updating all changed data.
If necessary, perform a full regeneration (Regenerate all) or individual processes.
After that, the template will be applied to the usual number of items.
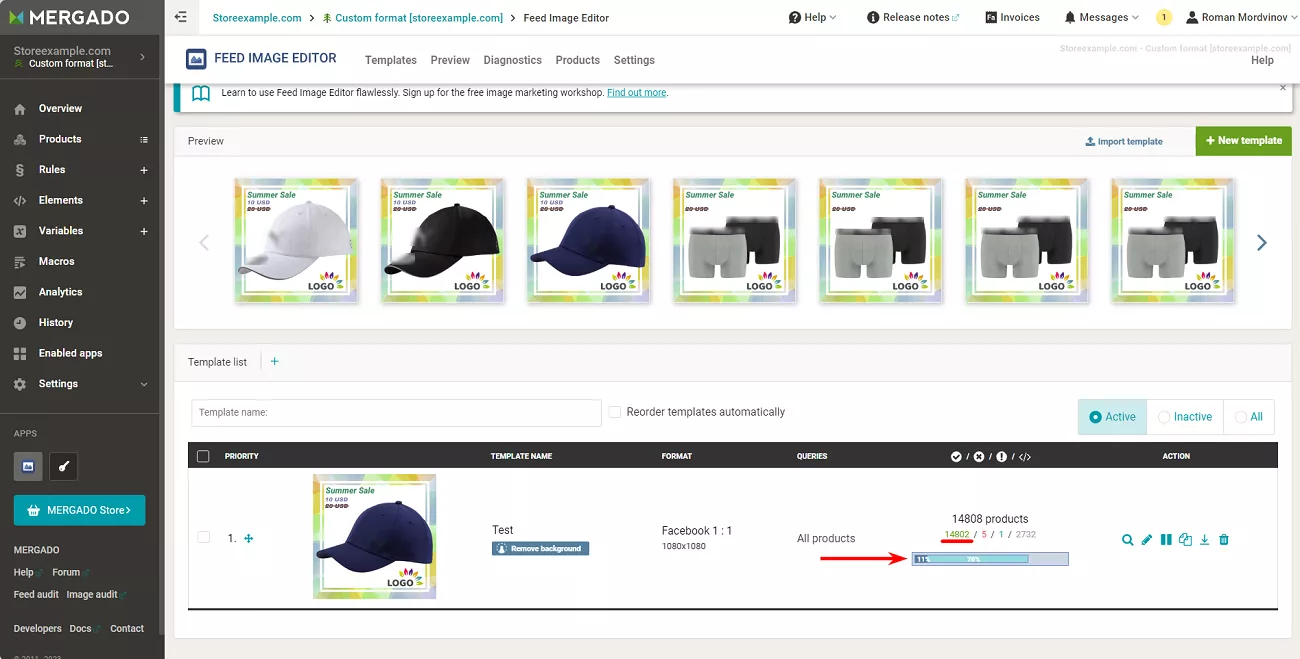
If the status bar below the number of elements is not showing 100%, the template changes are still not applied to all elements. At the same time, if a special effect, such as background removal, is applied in the template, a separate status bar will be added for it.
Step 4: Divide the products into groups.
Groups allow you to categorize products by various features.
By availability of a promotional price
If some products have a promotional price and the rest do not, it makes sense to create two templates and apply them to different groups of products.
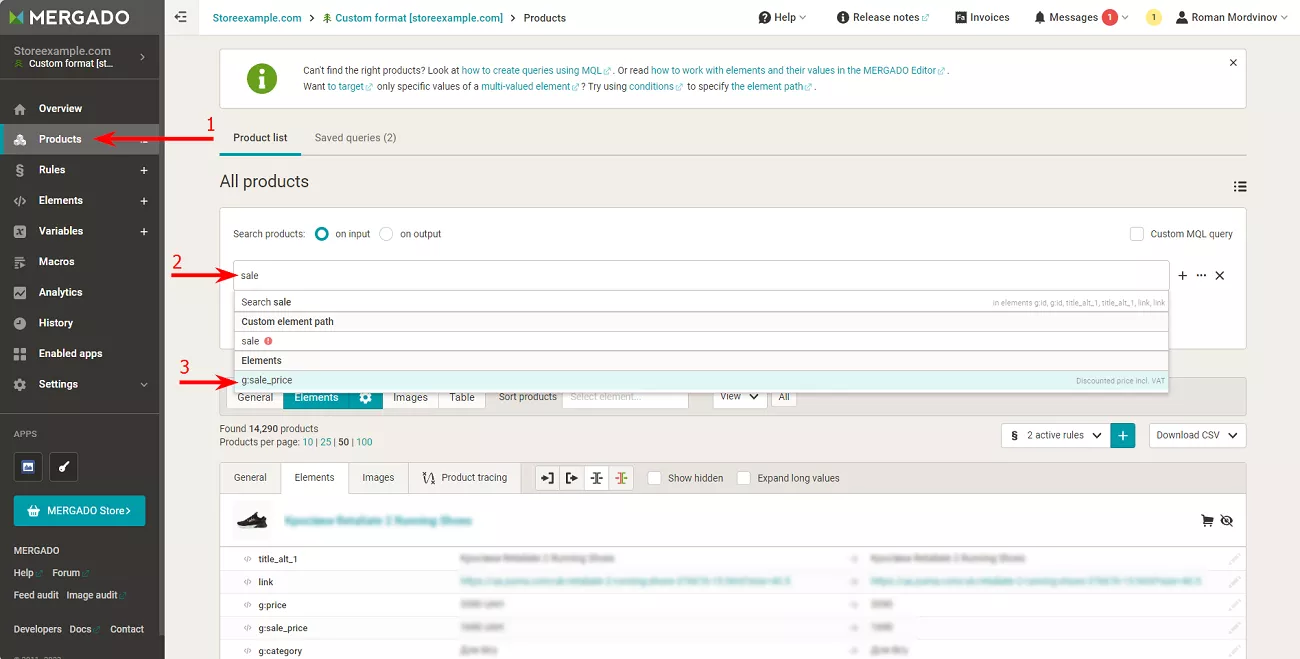
- Go to Products.
- In the search box, type the product name on which the division is based. To separate products with a promotional price from those without, select g:sale_price.
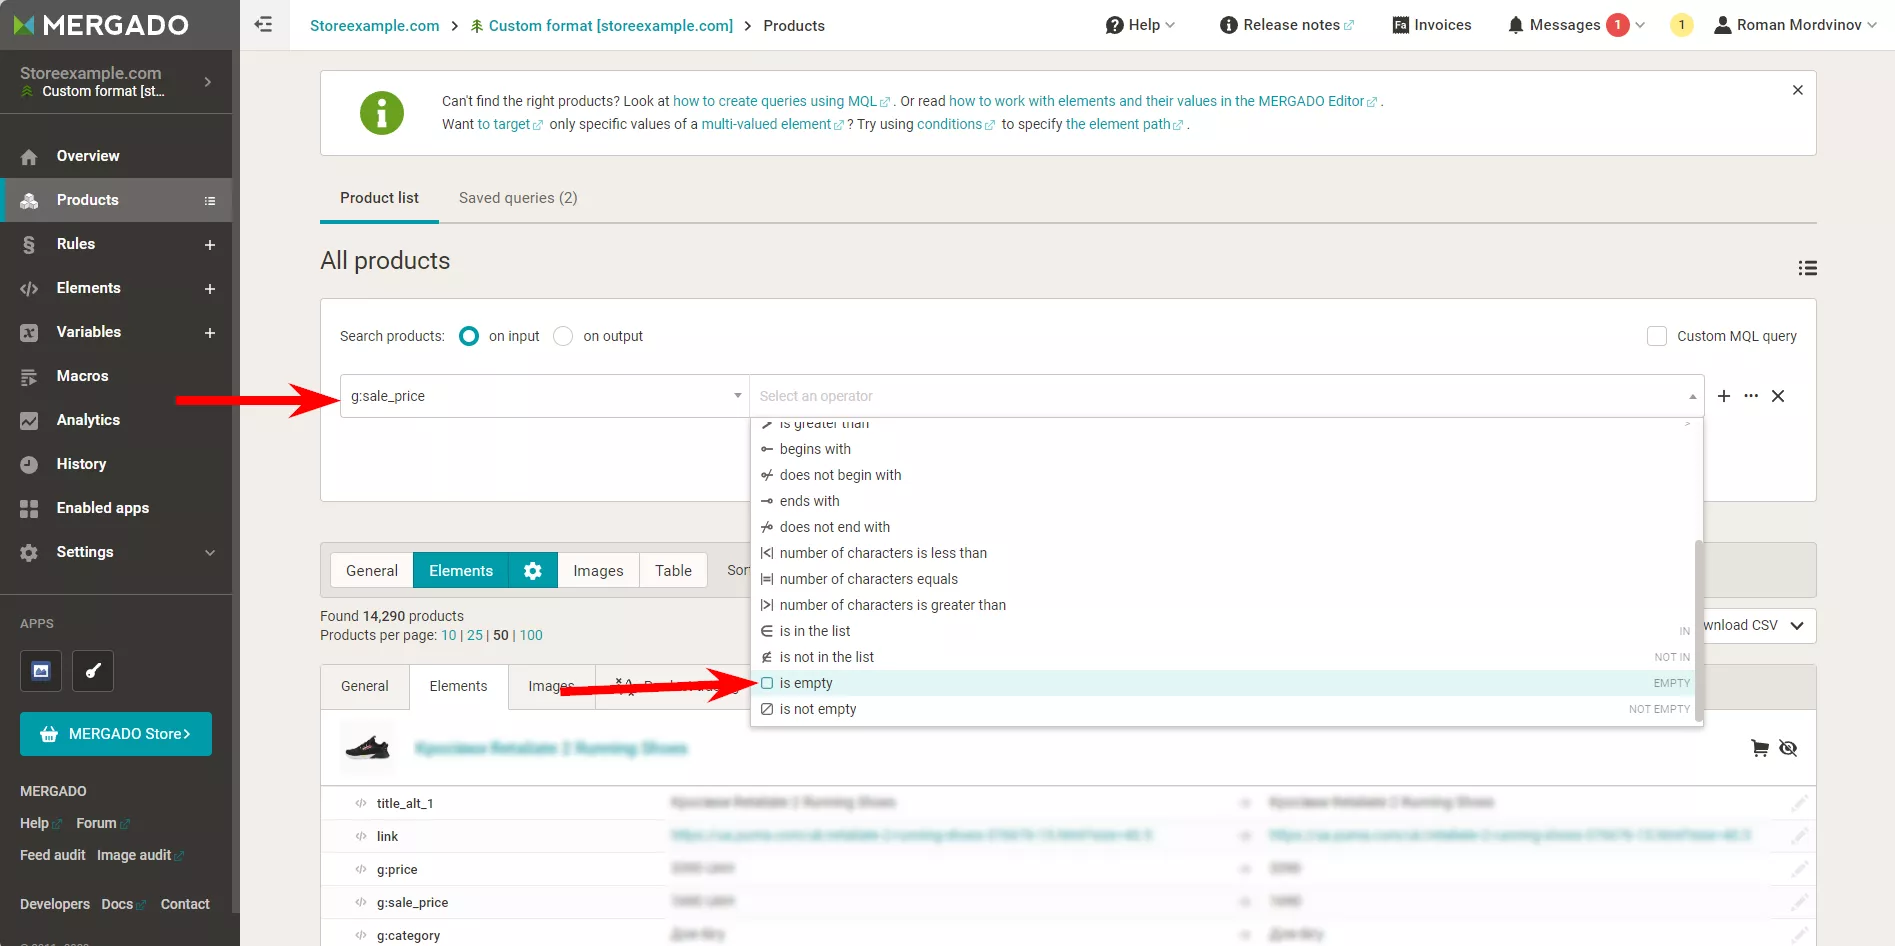
- Add the is the empty operator and click Search. The system will select products that do not contain the g:sale_price element, which are all products without a promotional price.
- To save this group for future use, type the name of the group in the box below the search and click Save.
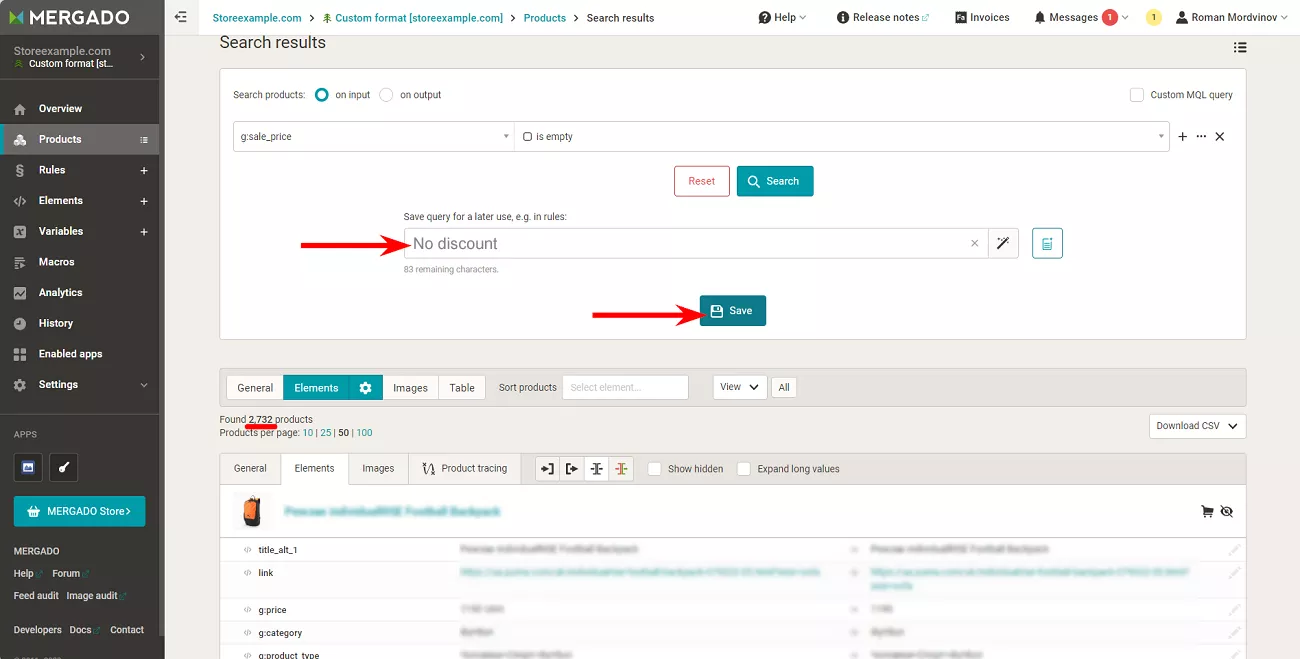
- To create a group of promotional products, select is not empty in the operator field. You will get two groups with different products, and each group can be bound to a separate template.
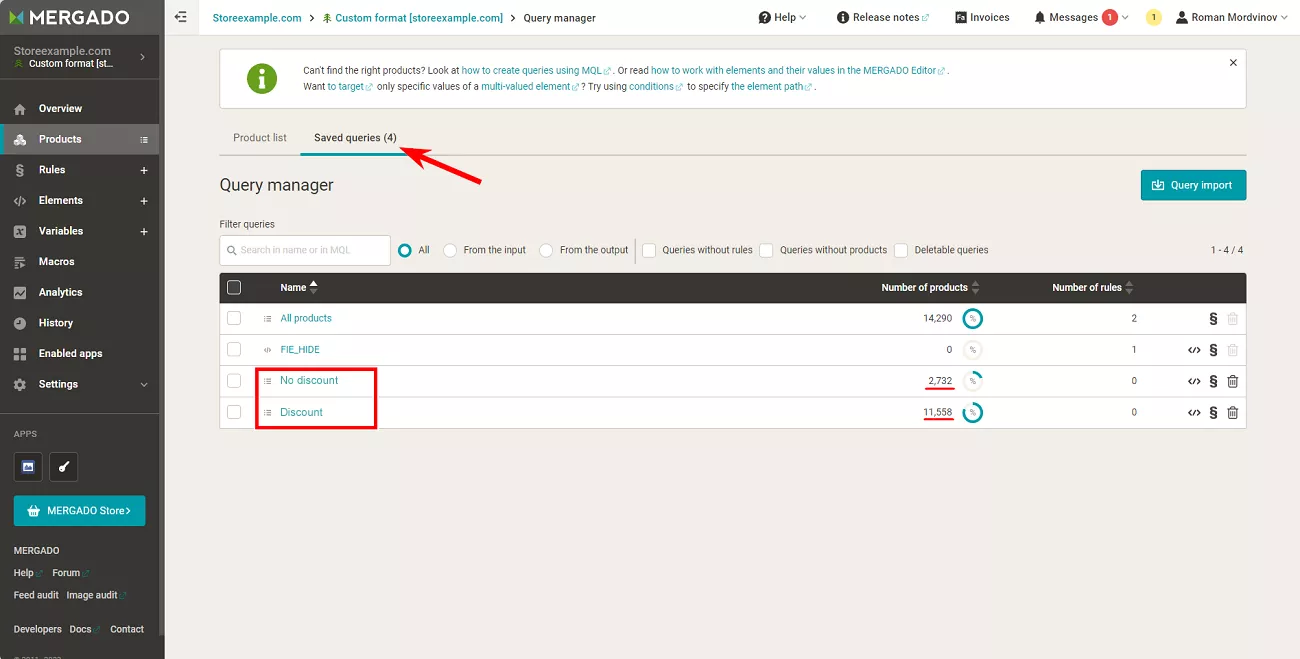
- To apply the template to a specific product group, go to its settings and select the appropriate group in the first menu item on the right. Then, uncheck the general product group box and click Save.
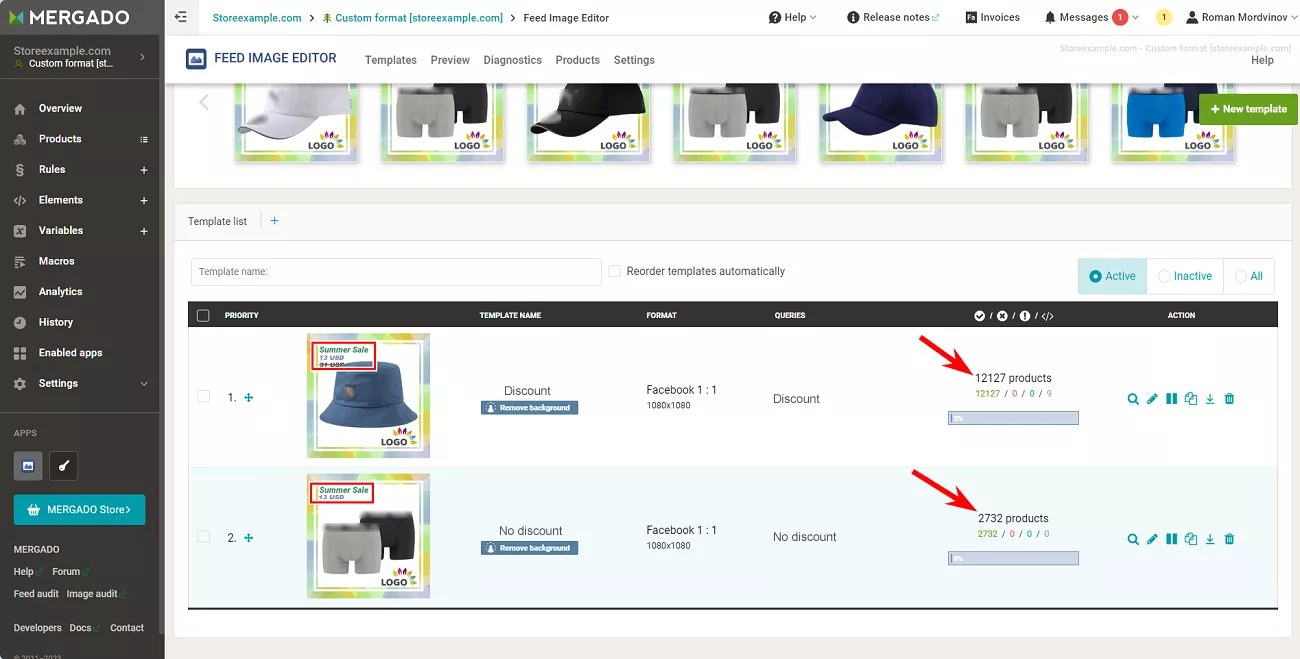
As a result, you'll have two templates that apply to different product groups. One shows the promotional price, and the other does not.
By special promotions
Grouping is also used for other purposes. For example, a store could have a limited promotion for a specific product line that is discounted up to 50% for one week.
- Select the ruler using the g:product_type element and the ~ contains operator, set the name of the ruler, and assign it to a separate group.
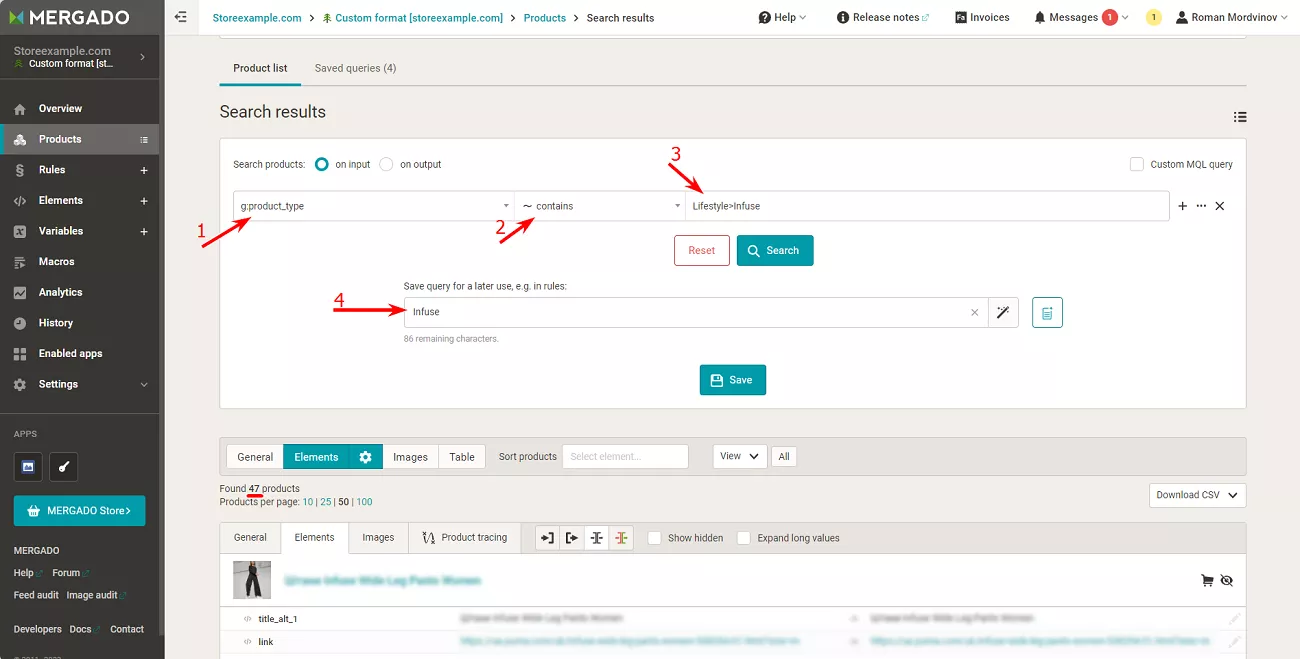
- Create a new template with a large discount. In the settings, add the time of the template activity and save it.
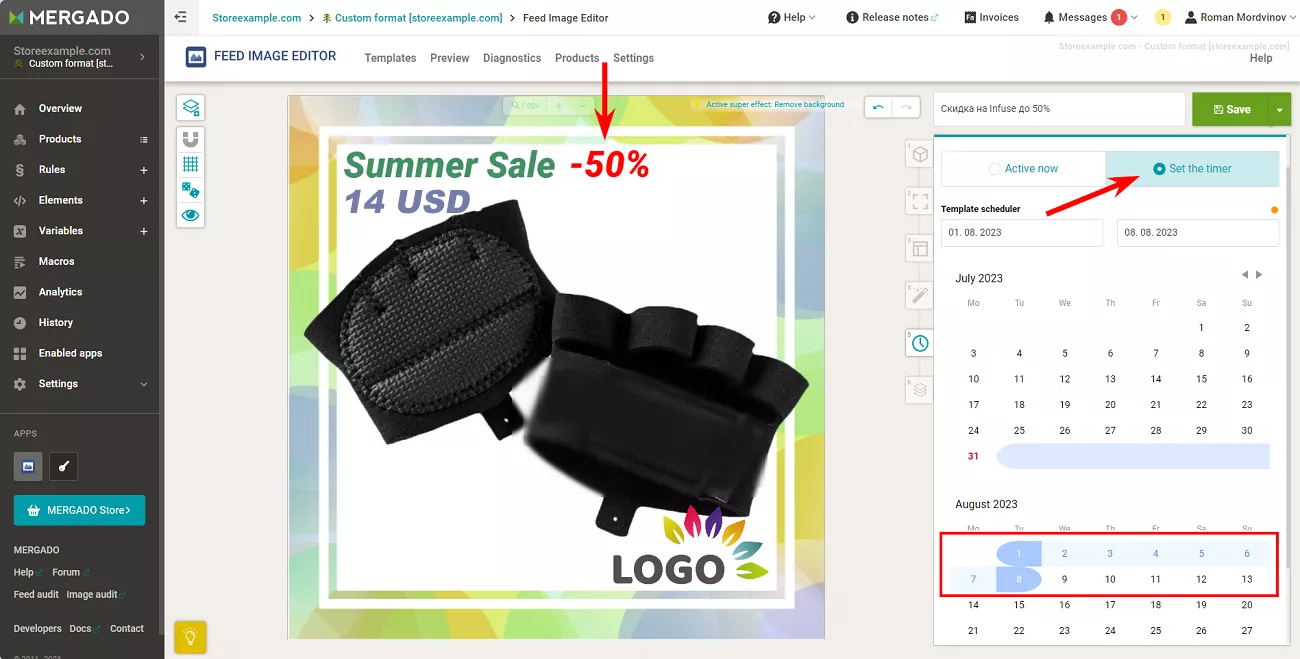
- Now you have a new inactive template that will be activated later according to the schedule.
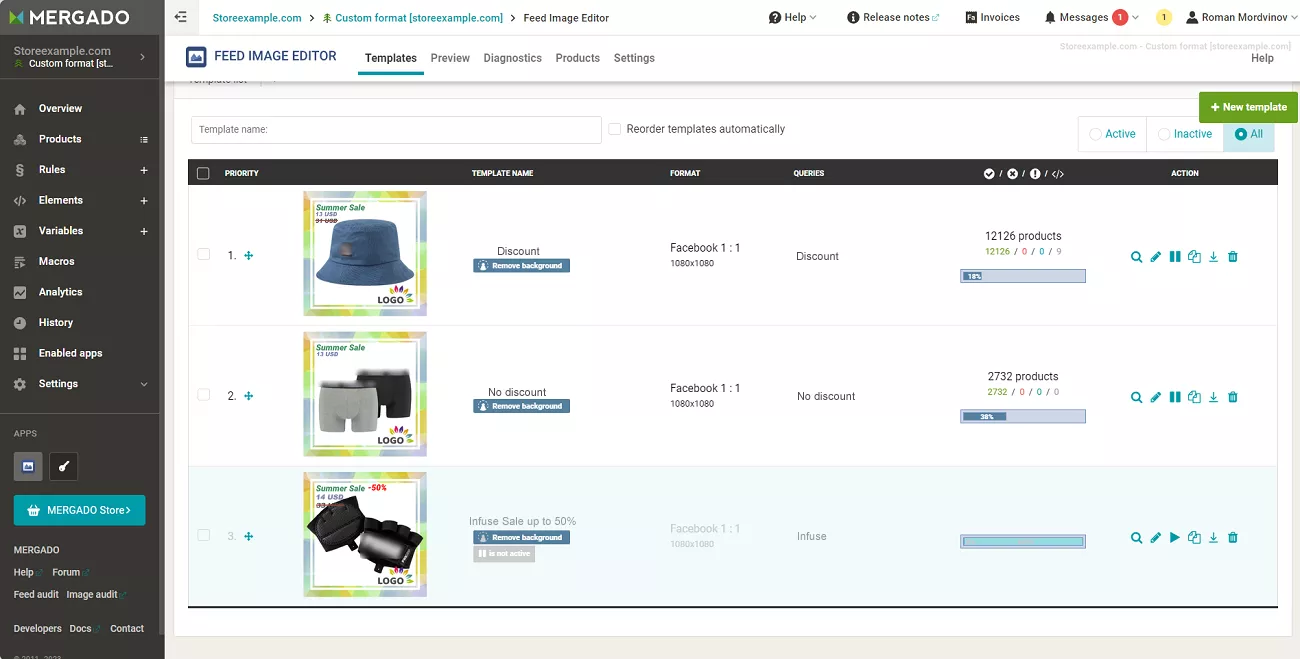
If two templates are bound to a product at the same time, the template with the highest priority will be applied to the product. If you leave everything as it is in the screenshot above, the promotion template will not be applied to the products. The reason is that the Discounted products template has a higher priority, and its product group also contains products from the Infuse discount up to 50% group.
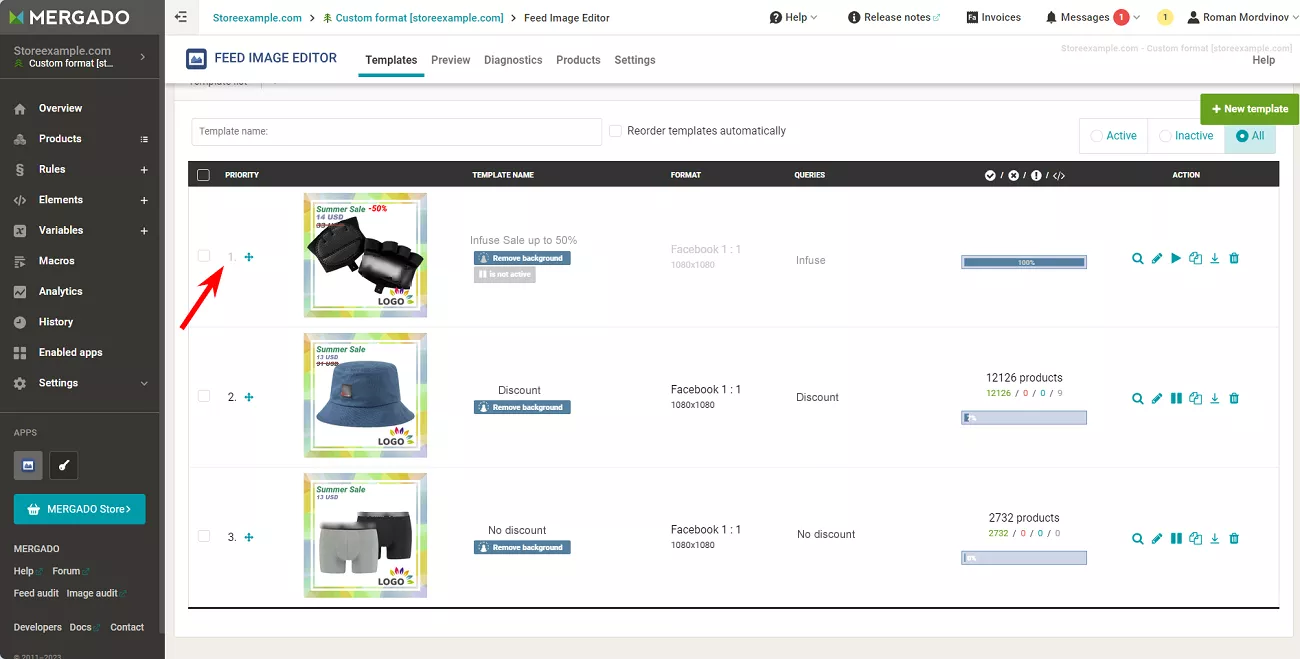
To fix this, move the promotion template to the top, it will be applied to the desired products when it is activated.
Step 5: Apply Mergado rules.
Rules are internal Mergado scripts that allow you to automatically perform mass actions on groups of products. You can use rules to replace the content of feed elements, add/reduce data, etc.
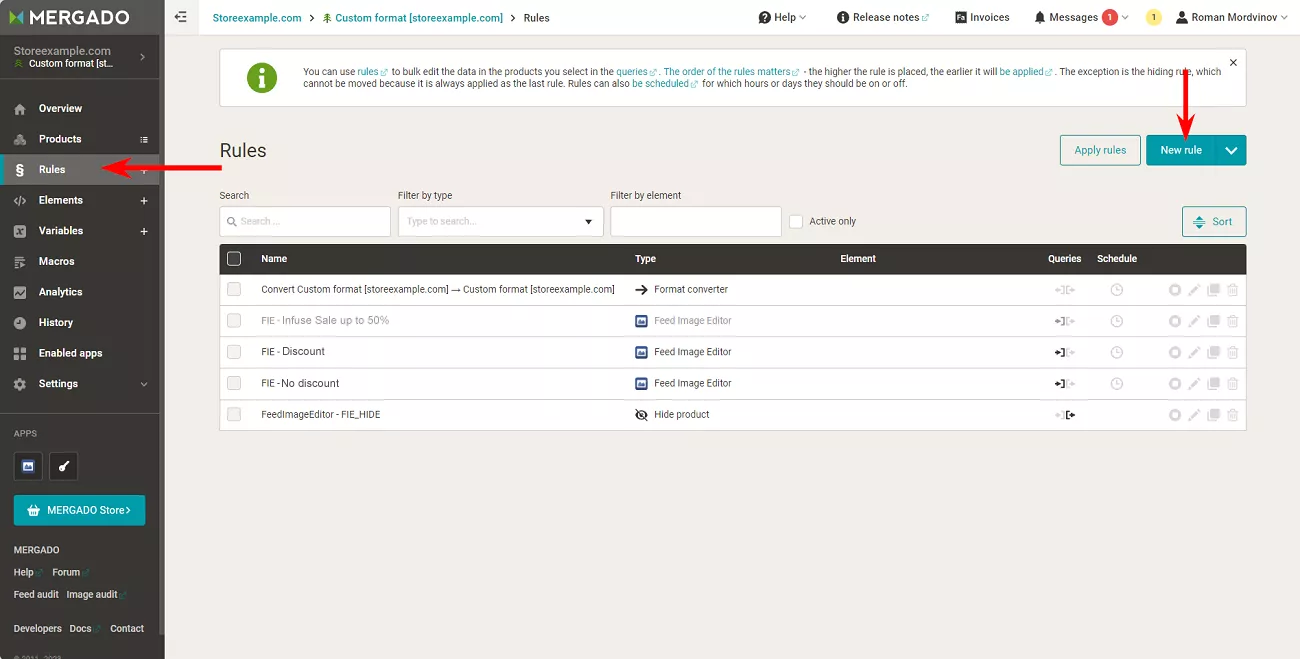
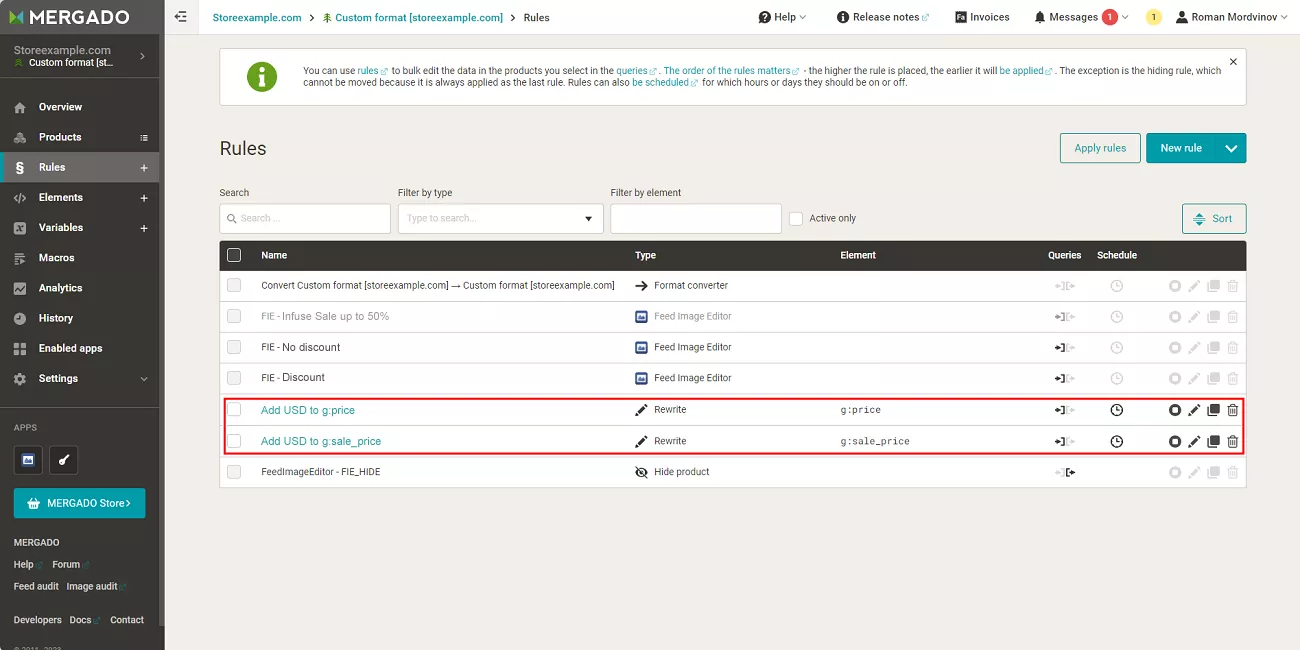
To create a new rule or to view the existing ones, go to Rules. On this page, you can see which rules are currently in effect. There are also options to disable, enable, delete, edit, and schedule them.
If a rule cannot be disabled or edited, it is a system rule, and no action is required.
Use rules to accomplish different tasks. For example, when creating a custom feed format, there is a problem with displaying currency in g:price and g:sale_price elements. This is because Mergado does not define currency without specifying a country.
Inside the FIE editor, the currency is displayed because the imported feed file guides it. But when you activate the final rendering in the template editor, you can see that it is not there.
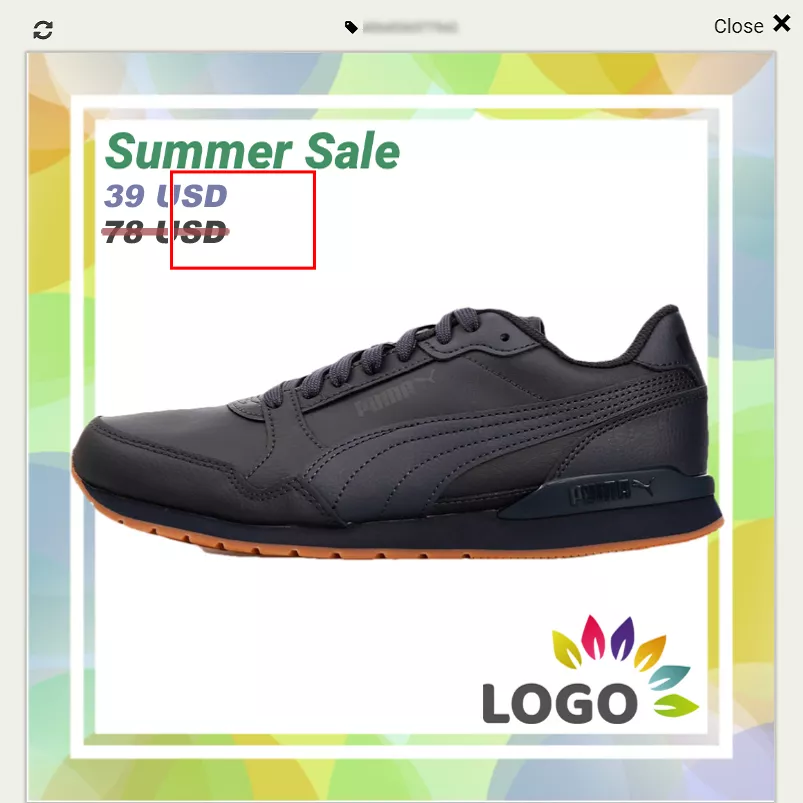
To solve this problem, write two rules. One will add UAH (ISO code for hryvnia) to g:price, and the second to g:sale_price. They will be identical but apply to different groups of products.
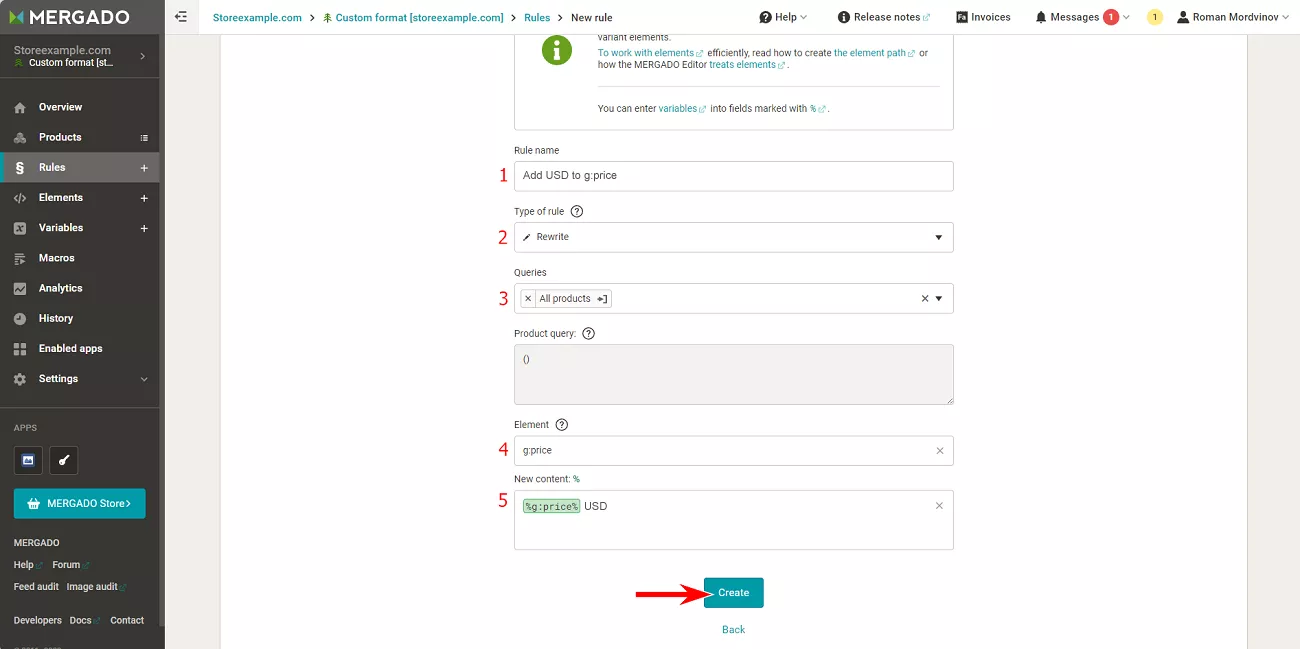
Click New rule to open a window and fill in the following fields:
- Rule name.
- Type of rule. In my case, it is Rewrite, which allows me to overwrite or add something to the data.
- Product group selection.
- Feed element.
- Content of the rule. In this case, I just need to add static text to the element, so I type %g:price% (elements should be enclosed in % symbols) and add UAH.
Then click Create, and do the same for the g:sale_price element.
Next, regenerate via Settings > Regeneration > Regenerate changed.
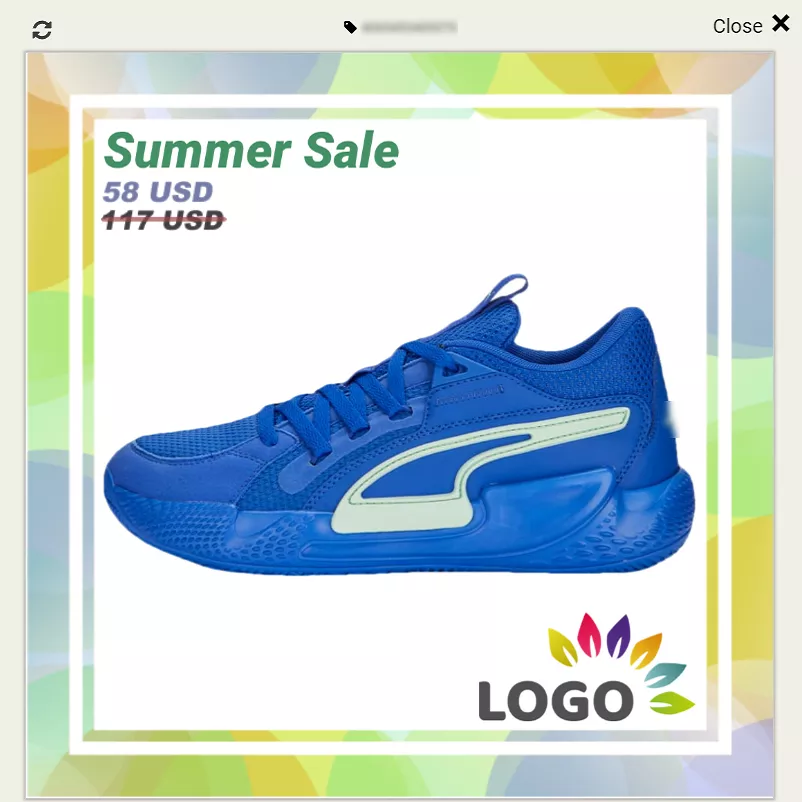
Changes in the application will not be immediately visible after regeneration. It takes time for the service to apply the rules to all products.
Finishing work with the feed
Now the exported feed is ready to be used. You can find a link to it on the overview page.
To use it, simply copy the link and paste it into the feed field of the advertising platform.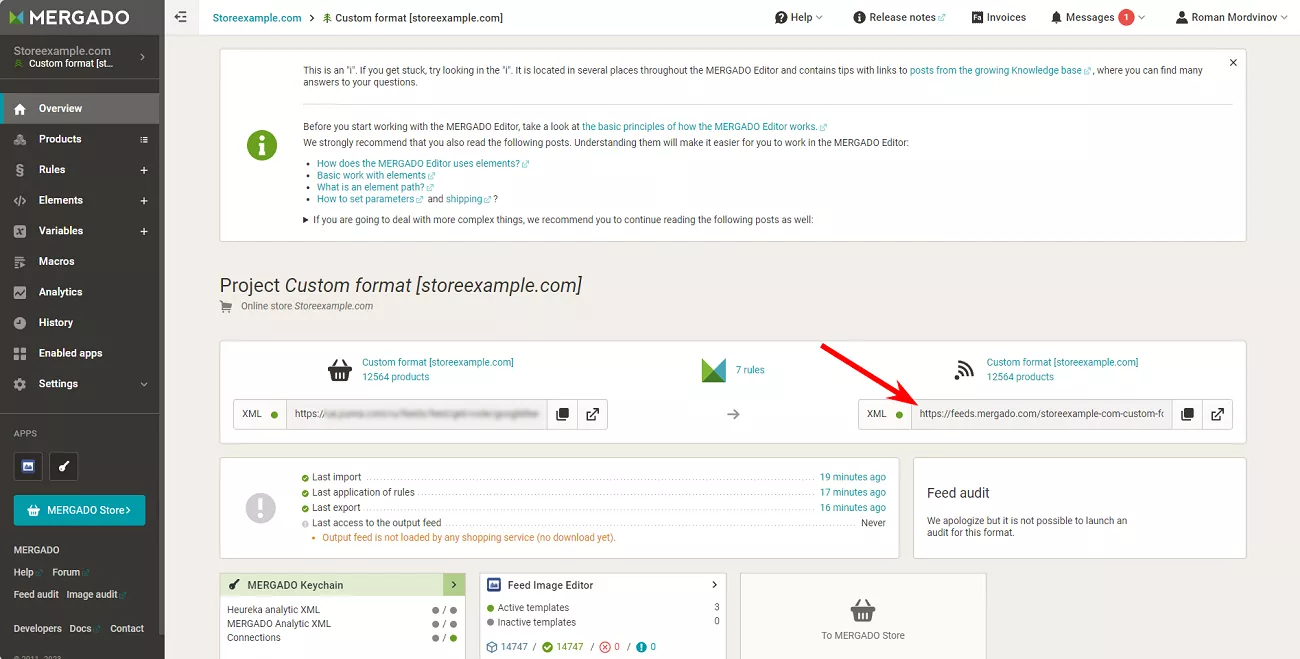
Cost of image customization
Mergado offers three plans with monthly fees:
- 14 USD/11 EUR for up to 10,000 products.
- 24 USD/22 EUR for up to 50,000 products.
- 59 USD/49 EUR for up to 200,000 products.
If the number of products exceeds 200,000, the service offers a special tariff.
This pricing applies to the products in the exported feeds. If you upload a feed with 200,000 products to the service, but with the help of rules and restrictions set up to upload only 49,900 products, you will pay tariff #2.
Do note that the rate is fixed. The service sets it based on the uploaded feed to avoid tariff jumps in case of constant small changes. If you find that the service has set the rate higher than necessary, please email Mergado’s support team at mergado@mergado.com.
The Feed Image Editor app is paid separately. Regardless of the number of articles, it has a fixed price of 59 USD/48 EUR per month.
Both Mergado and Feed Image Editor have a 30-day trial period for you to test the tools and see if you need a paid version.
Conclusions
Mergado and Feed Image Editor are useful tools for increasing the visibility of dynamic ads. There are five steps to customizing images using these tools.
- Create and customize a project.
- Add the Feed Image Editor app to it.
- Create an image customization template.
- Separate products into groups.
- Add rules to process these product groups.
Mergado can be used for more than just Facebook Dynamic Ads. Its potential can also be realized through other advertising latforms.

 14
14
 10
10
 4
4
Related Articles
What Is a Top-Level Domain?
You will receive a cheat sheet that will help you choose the right domain name and avoid making insidious mistakes. You will also learn where to buy valuable and well-known TLDs
Google Play ASO: Ultimate Guide on App Store Optimization for Android in 2024
RadASO presents the main methods of app promotion on Google Play and useful lifehacks to choose the best ASO strategy for an Android app.
How to Increase Organic Traffic by 27% in Six Months in a Competitive Women’s Clothing Niche: The Lace Case Study
What does it take to launch an email channel, which emails were most effective, and what results were achieved in four months of work?