How to Set Up Remarketing in Google Ads: A Step-by-Step Guide for Beginners
Re-engagement ads on Google Ads are an effective way to remind potential customers about your products or services. It allows you to show ads to audiences who have already interacted with your website, such as browsed products, added them to a cart, or inquired about services. With this tool, you can increase conversion rates, bring back interested users, and increase sales.
In this article, I'll explain how to set up standard remarketing. You will learn how to create a unique tag, collect an audience for targeting, and set up a remarketing campaign on the Display Network.
- Difference between dynamic and standard remarketing
- Setting up a remarketing tag
- Setting up remarketing audiences
- Setting up a Display campaign
Difference between dynamic and standard remarketing
Google remarketing is a tool that allows you to show ads to users who have already interacted with your website. There are two types of remarketing: standard and dynamic.
Standard remarketing targets visitors to specific sections of your site and displays banners or ads with a fixed appearance. These are called static ads. The tool provides additional interaction with the audience that visited the site but did not perform the targeted action (for example, making a purchase or sending an application).
Dynamic remarketing shows ads featuring the products or services a user viewed on your site.
For example, if a user browsed a specific style of jeans on your site, they may later see an ad for those same jeans when visiting Google's partner sites or checking their Gmail.
Read this article to learn how to set up dynamic remarketing with GTM.
Setting up a remarketing tag
To run a static remarketing campaign, you must install the appropriate tag on your website.
A remarketing tag, or Google tag, is a special piece of code added to website pages to track user actions. You can use it to create lists of audiences who have visited specific pages on your website or performed specific actions. As a result, you will get specific audiences to whom you can target your ads.
To set up a remarketing tag:
- Sign in to your Google Ads account.
- Go to Your data sources: Tools > Shared library > Audience manager > Your data sources.
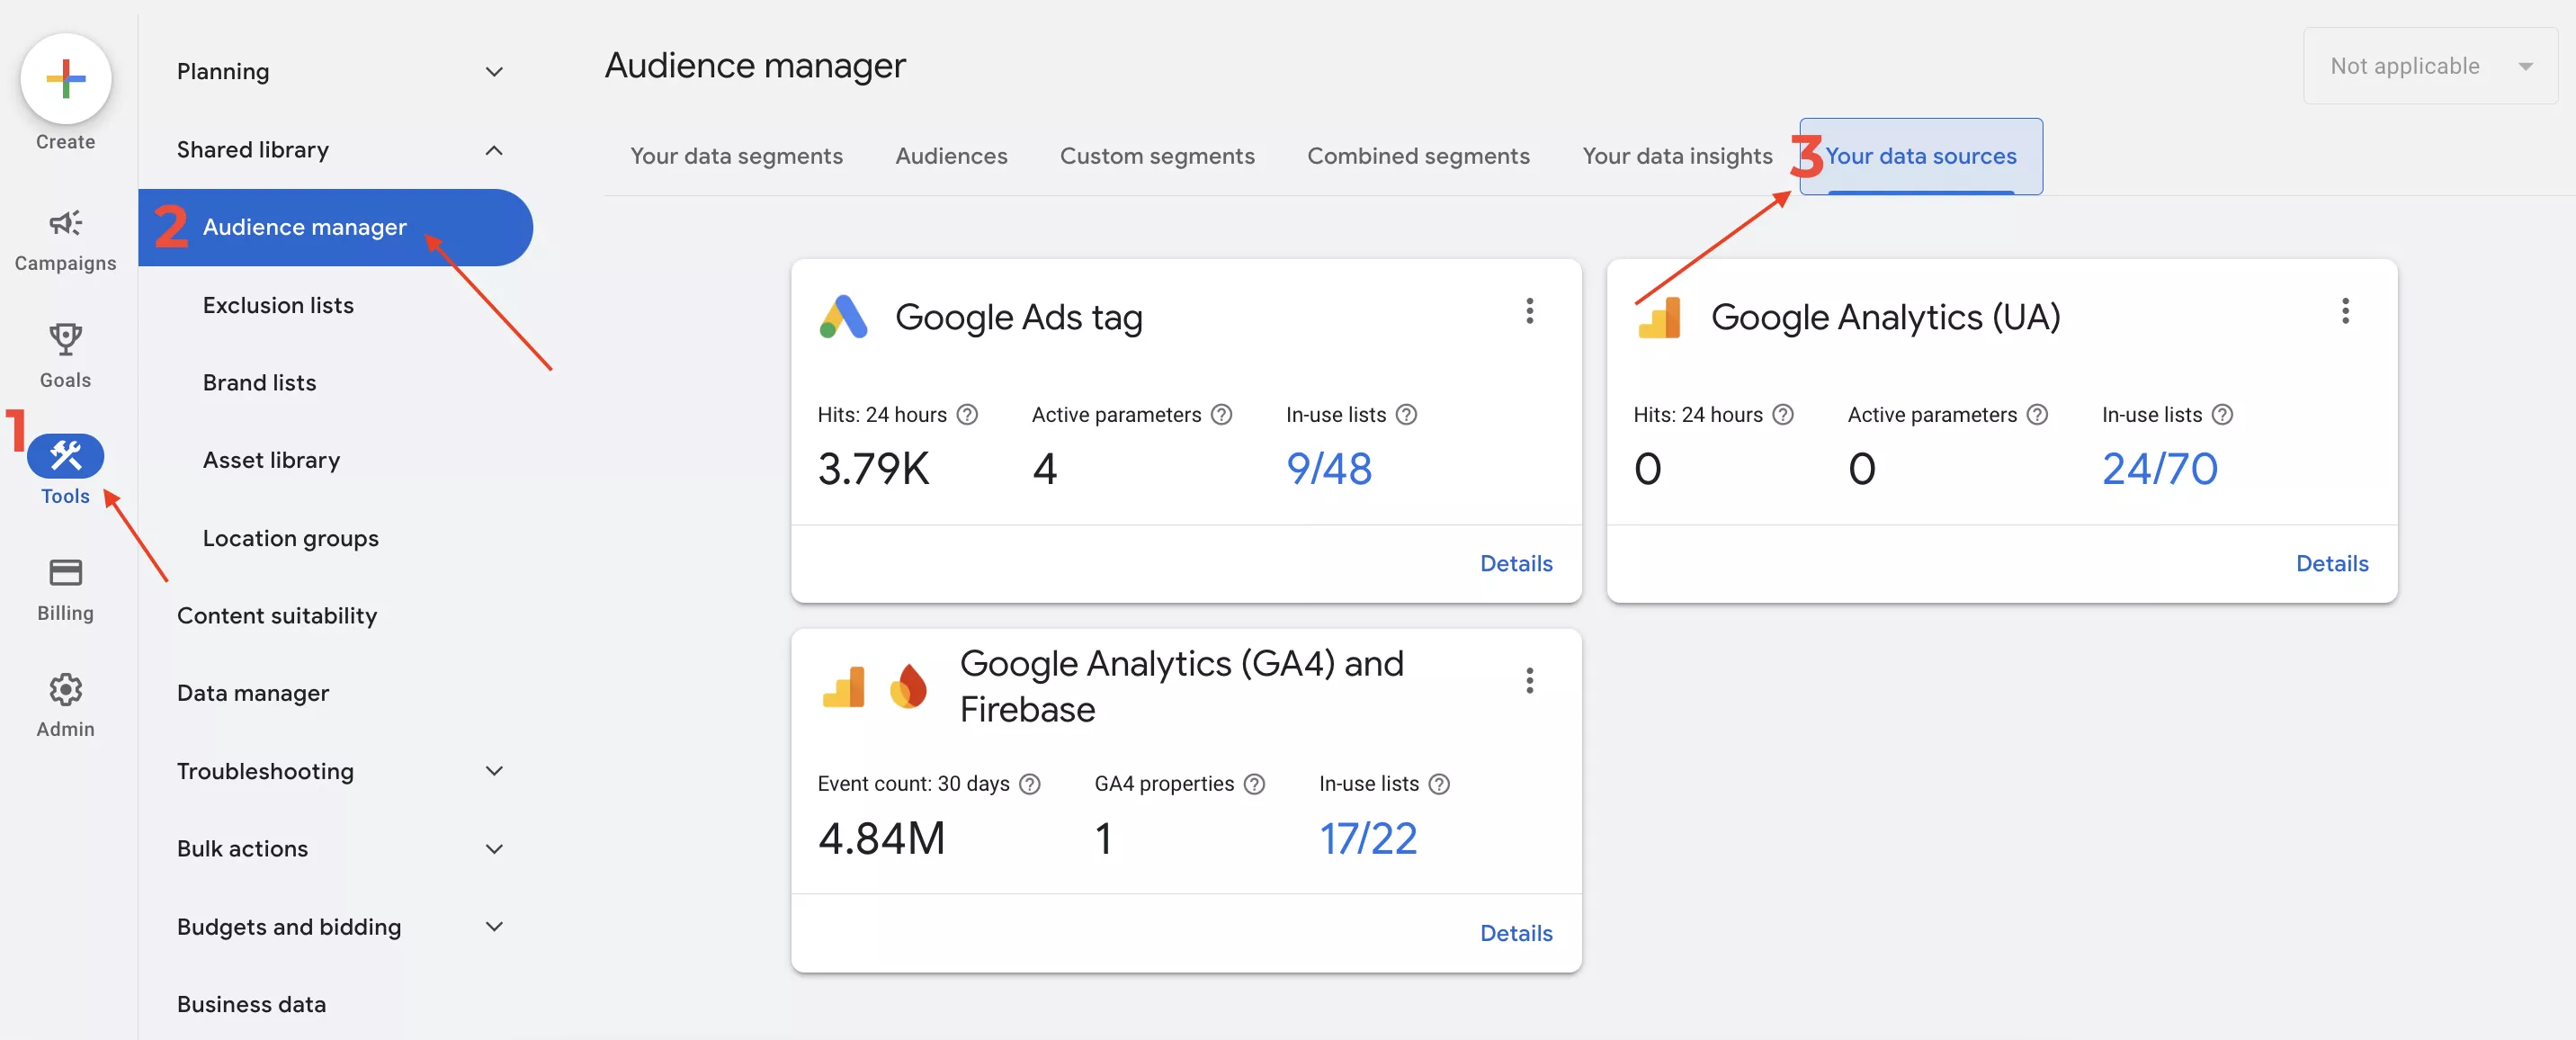
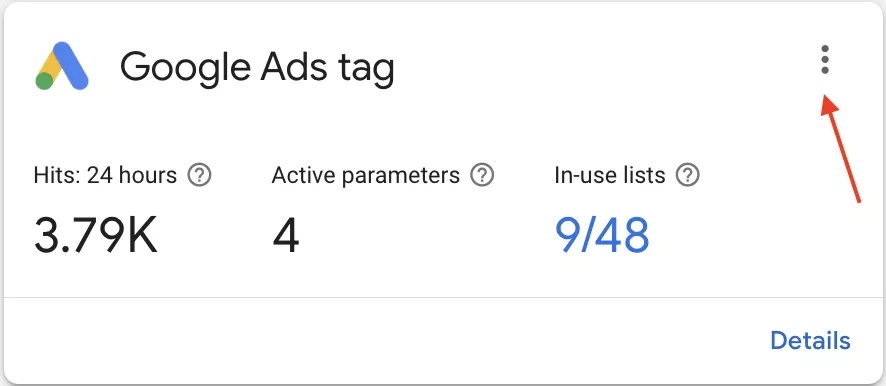
- Click the three-dot menu on the Google Ads tag card and select Edit data source.
This will display blocks of information that the tag should collect. For standard remarketing, it's enough to select the first one. If it's not an active option, as shown in the screenshot, leave the second one selected.
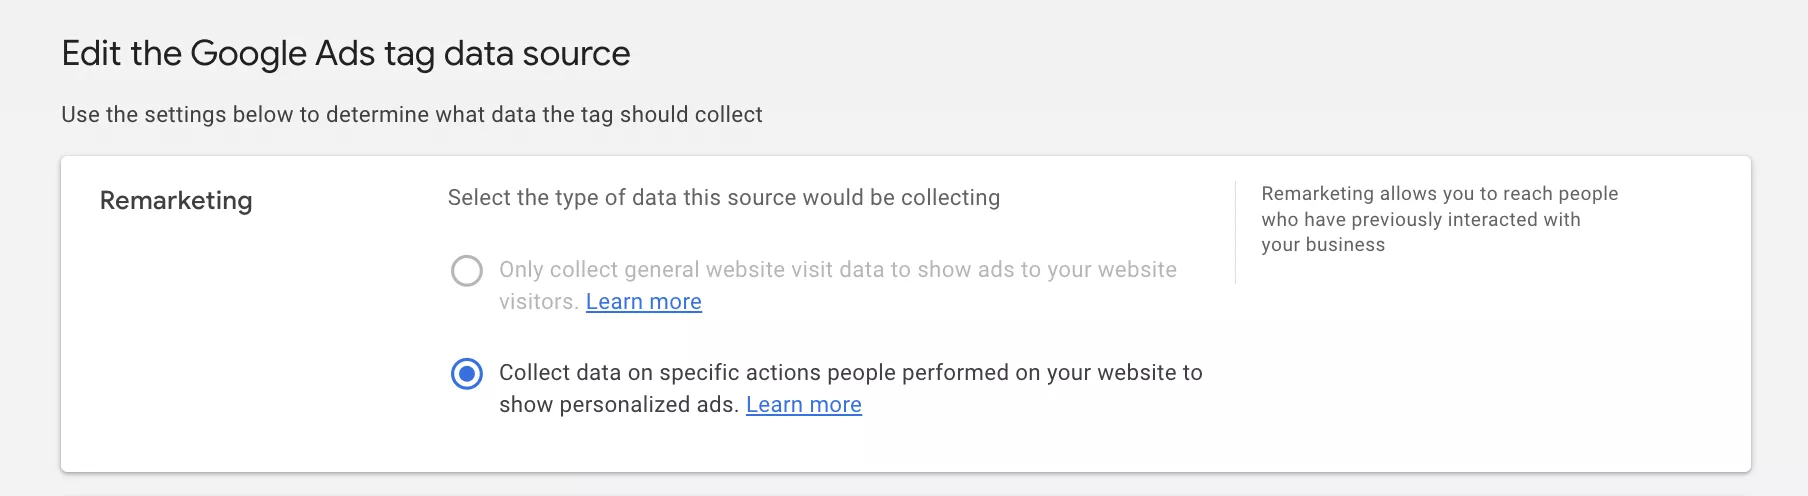
The User ID block is available if the ad account meets Google's requirements for working with email lists. Key requirements include:
- Compliance with the platform rules.
- Use of the advertiser account for more than 90 days.
- Total spend of $50,000 USD or more.
If this option applies to you, select it. Otherwise, skip it and click Save and continue.

This will take you to the Tag setup section, where you have three options for setting up the tag:
- Set the tag manually.
- Send the tag via email.
- Use Google Tag Manager (GTM).
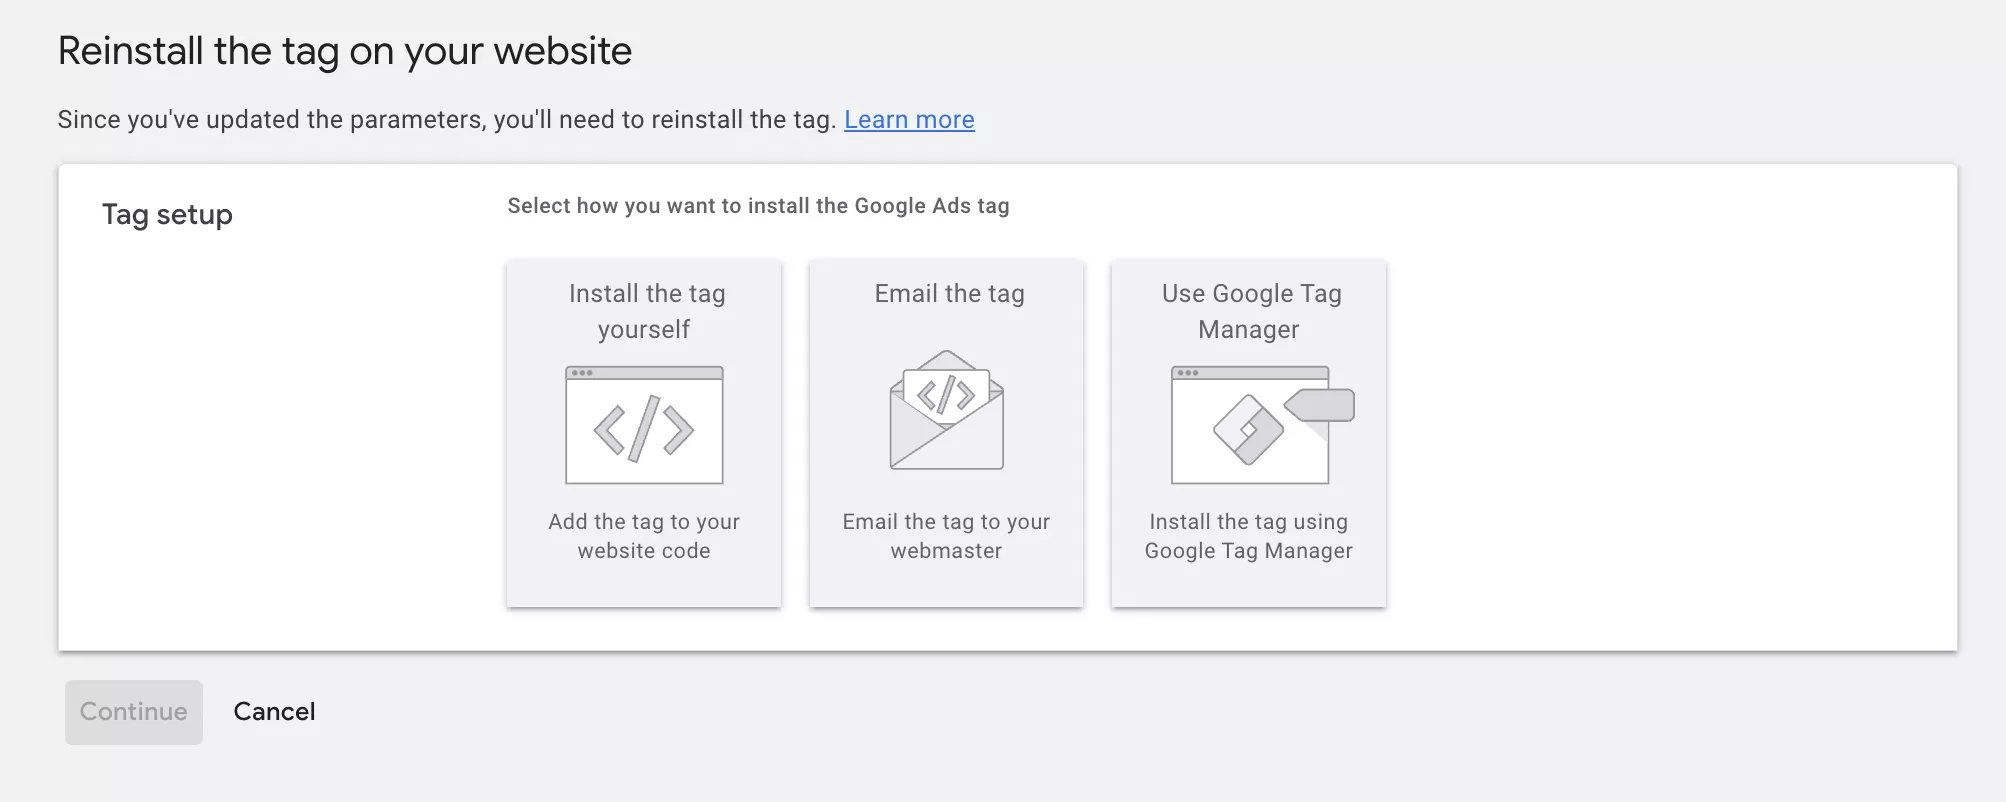
If you have the skills to work with website code, you can choose to set the tag manually.
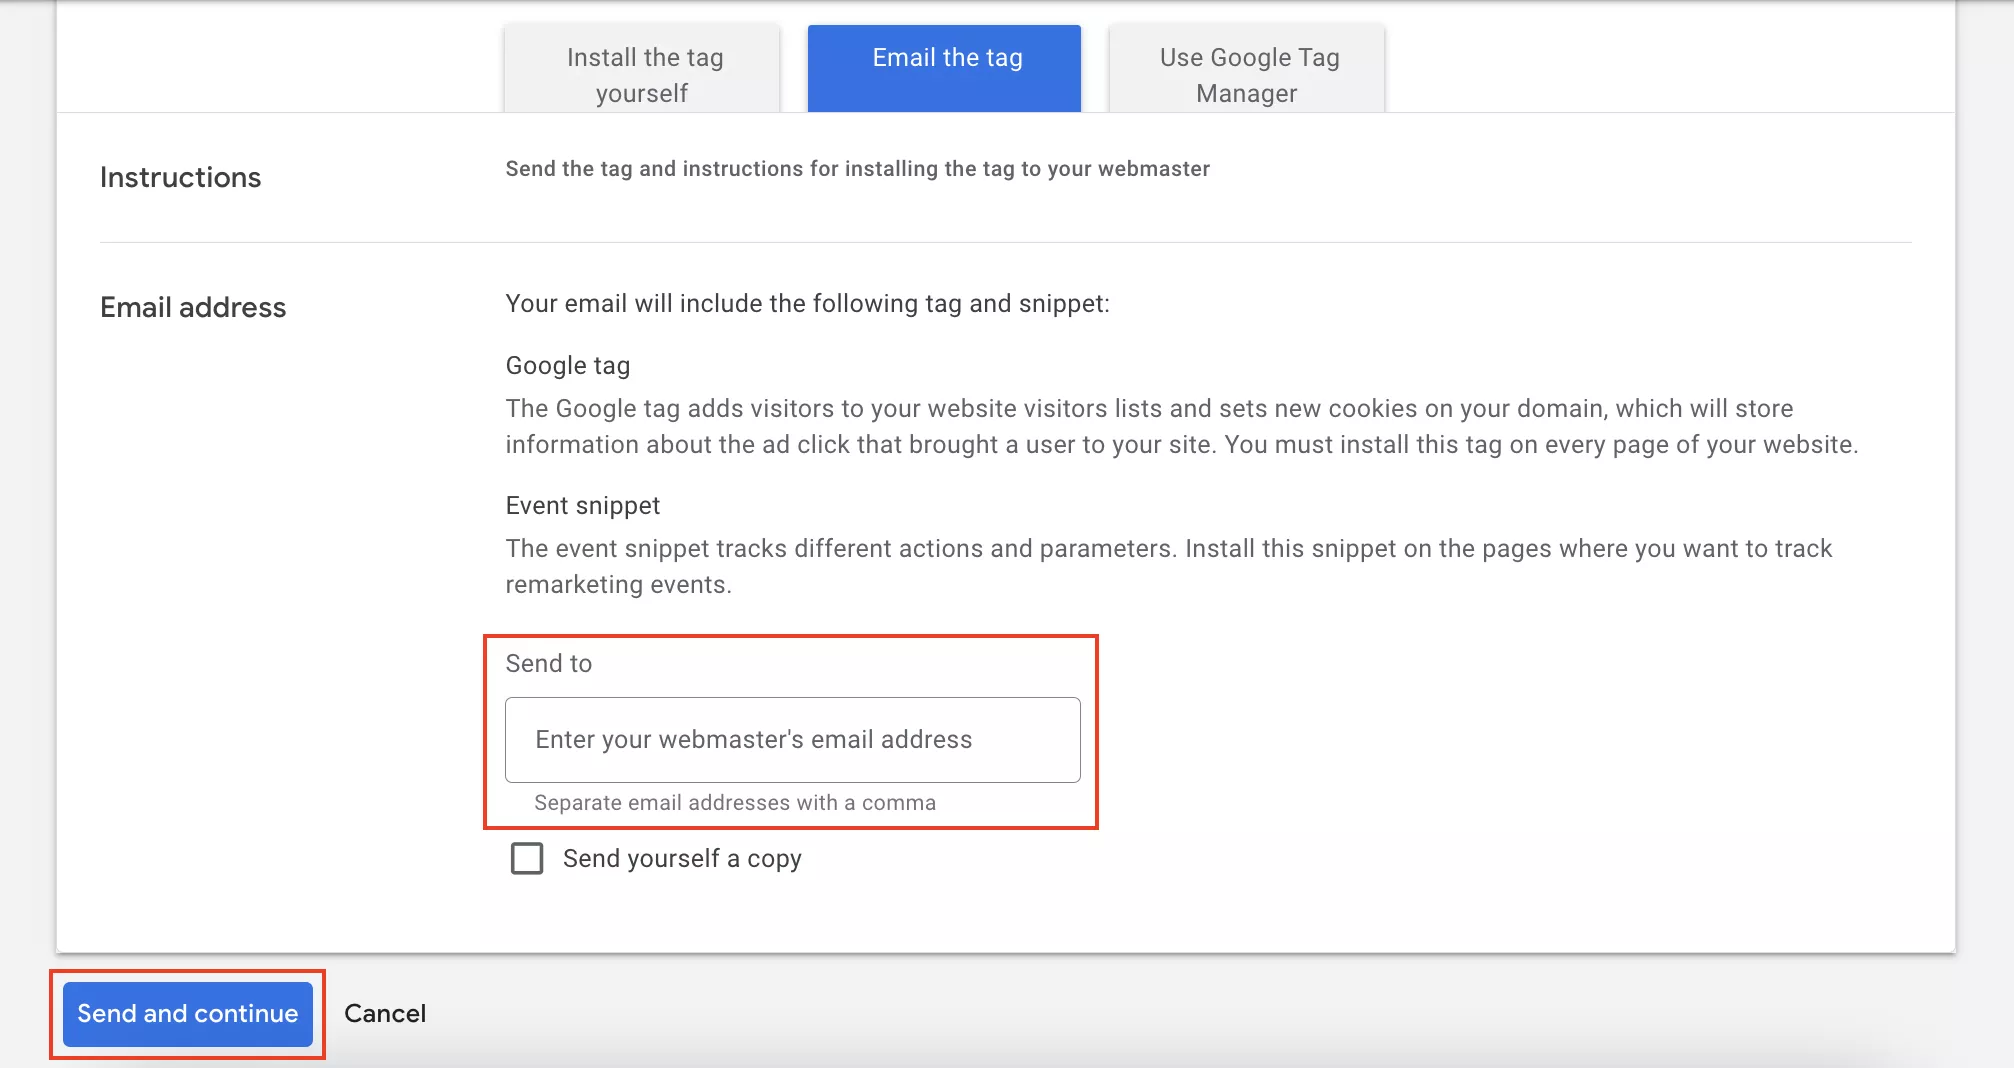
The Email the tag option is for those who work with a website developer. To send the tag to the specialist, enter their email address and click Save and continue.
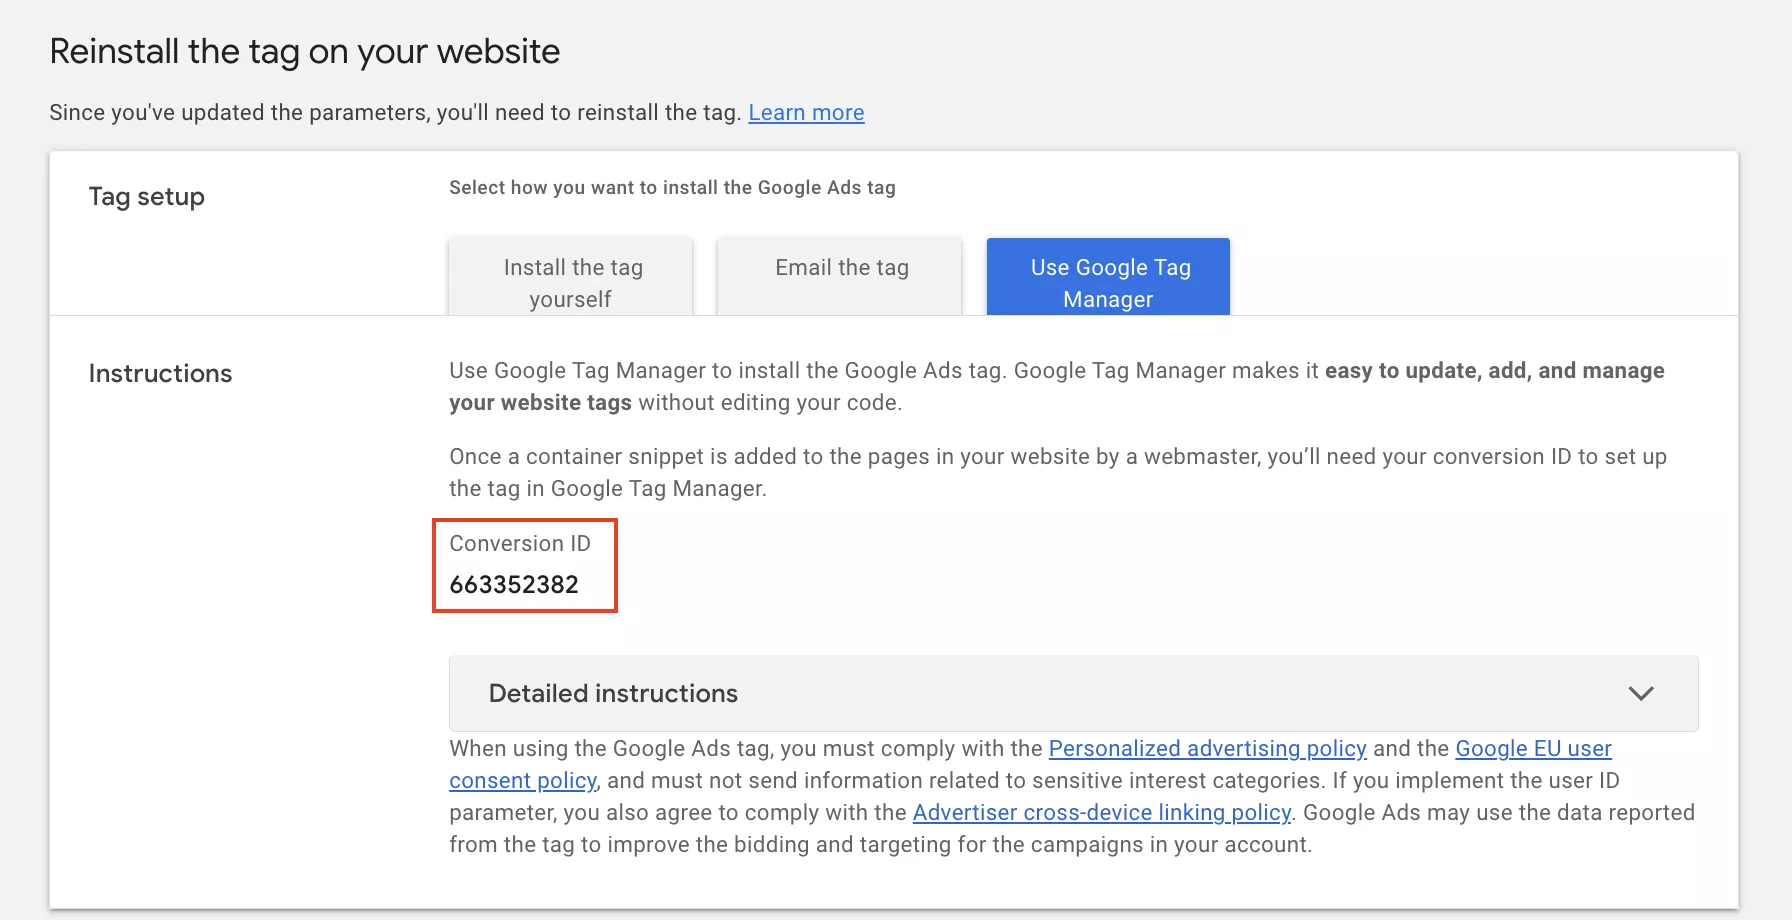
To set a remarketing tag using GTM, you need a conversion ID and detailed instructions on setting it up. These are displayed on the tab of the corresponding option.
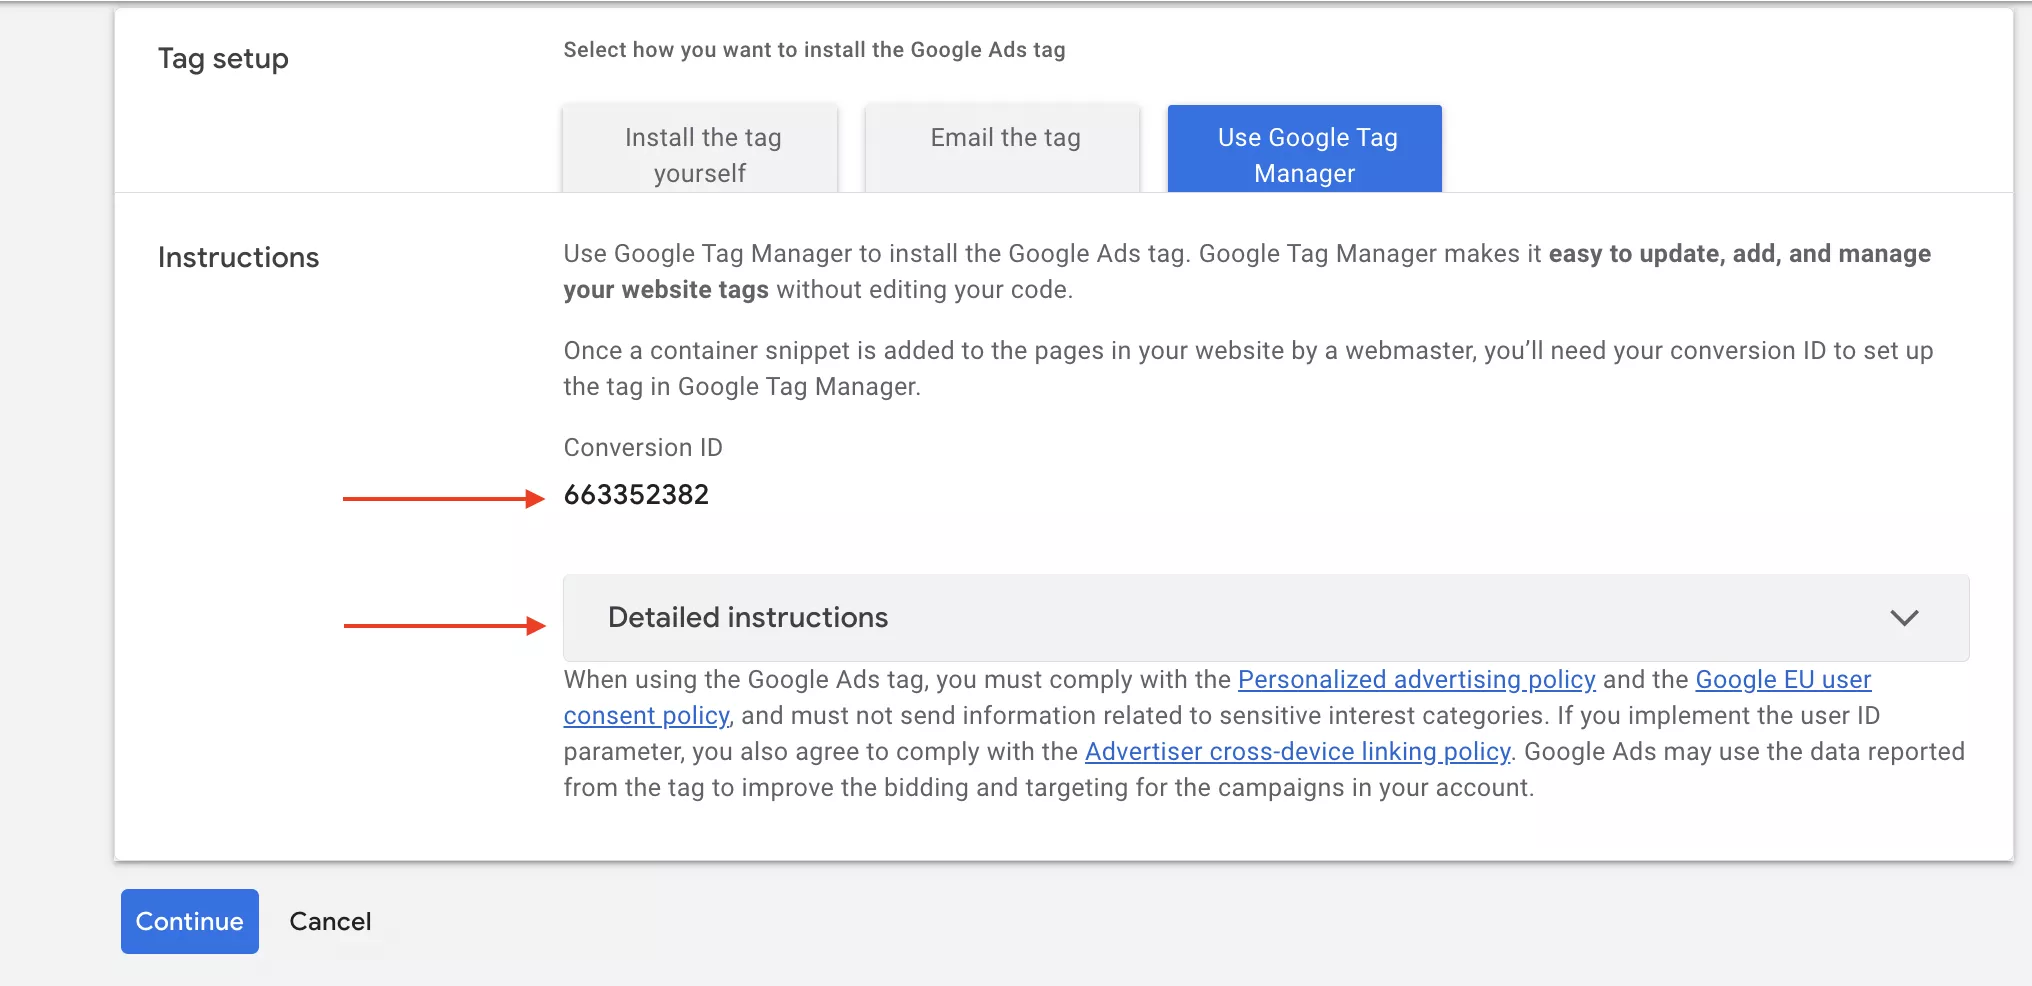
Keep this page open — you'll need it for the next steps.
How to add a remarketing tag with GTM
To install the tag on your website:
- Open the Google Tag Manager container connected to your site in the next tab.
If you don't have GTM, here's the Google support page on creating an account and a container.
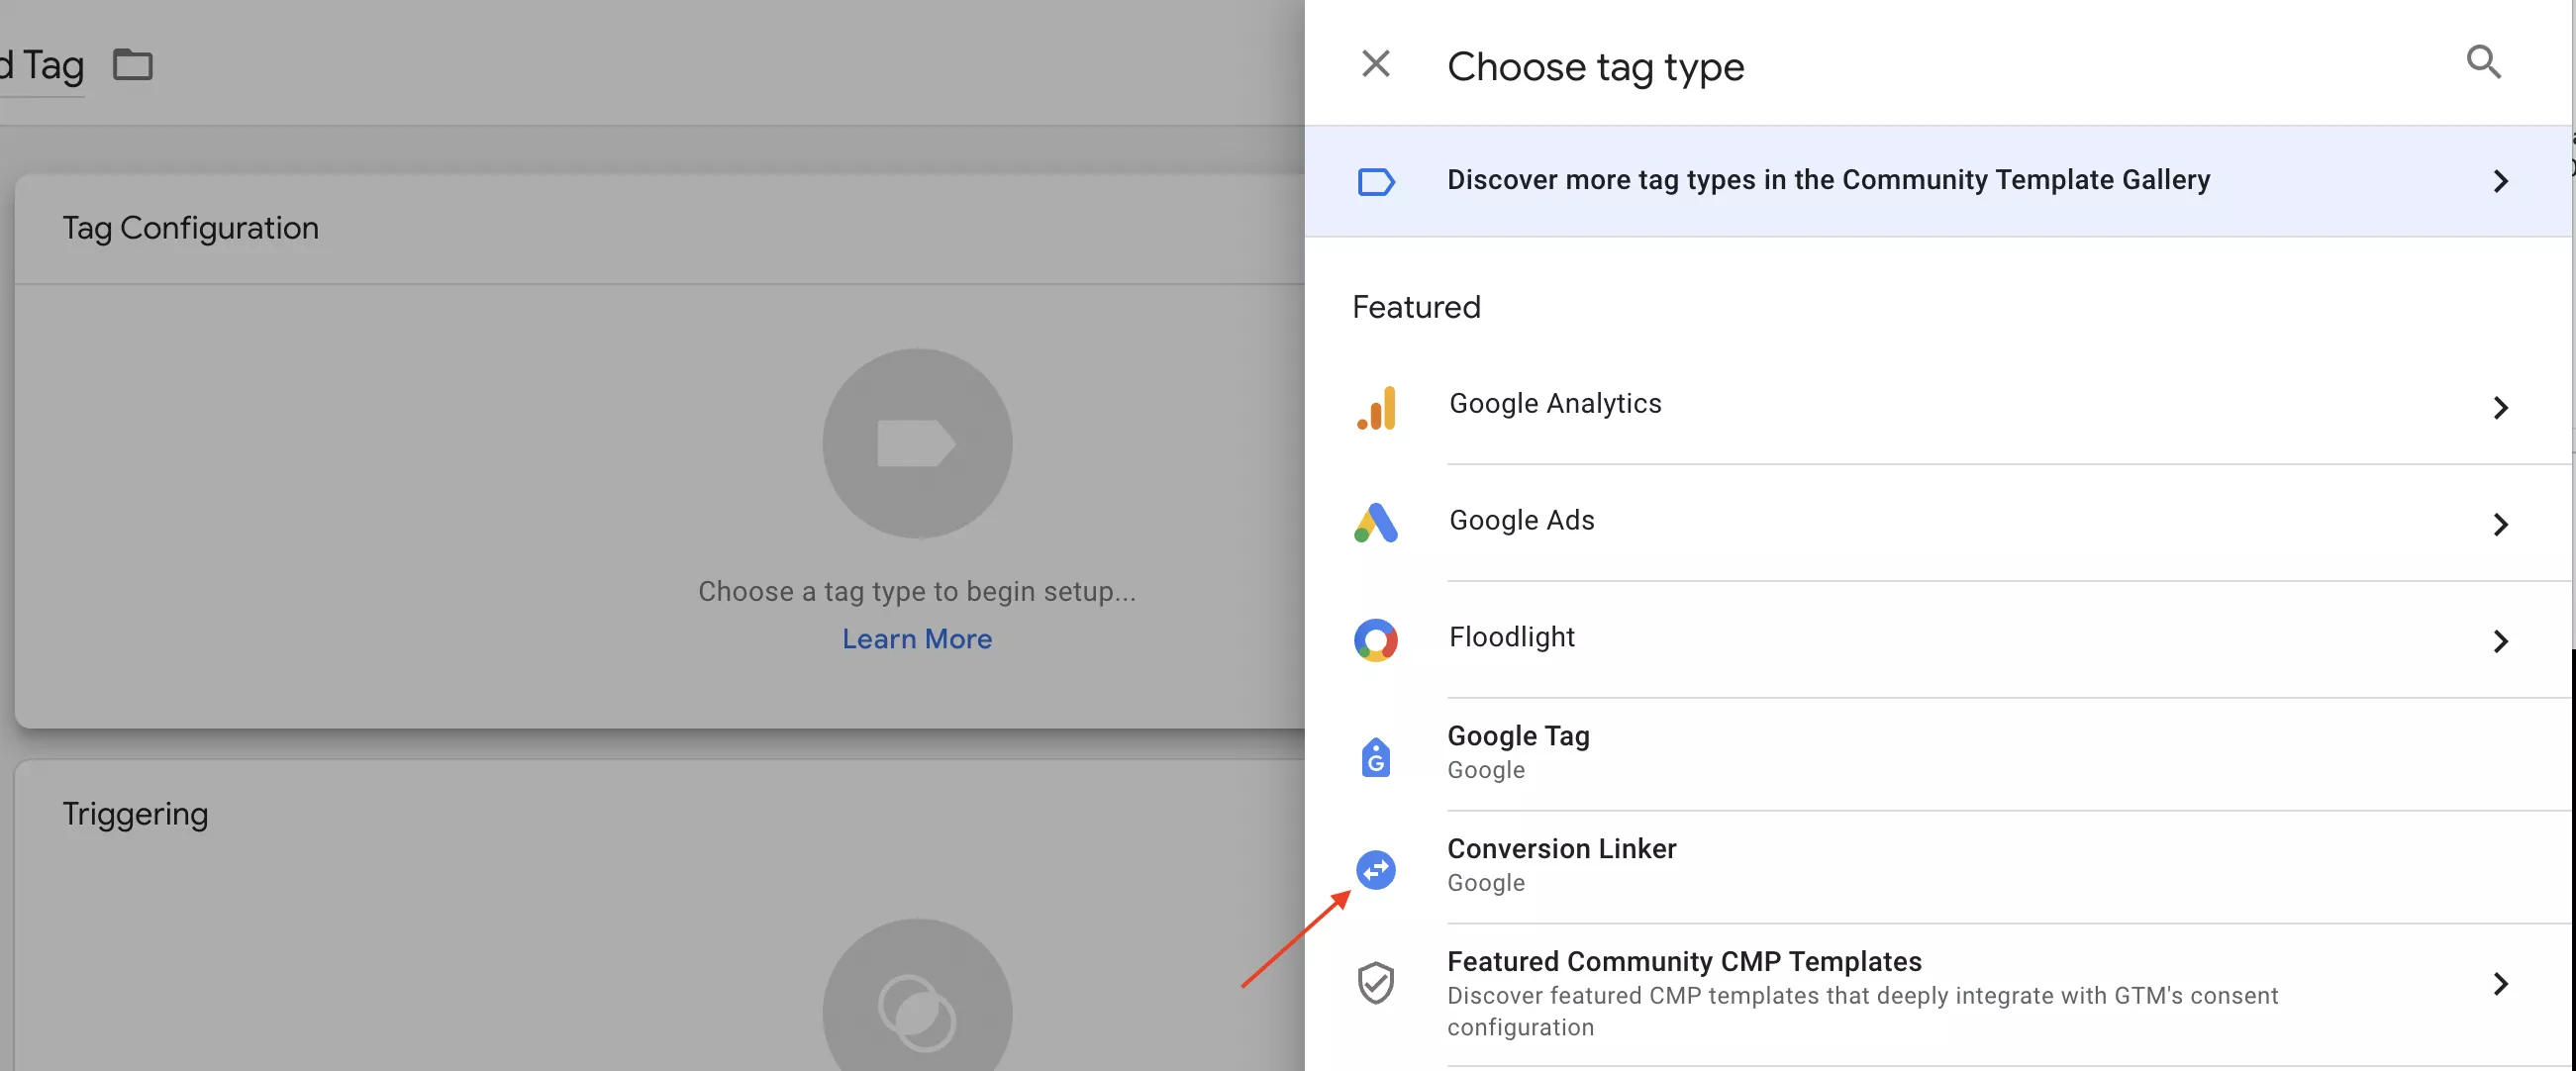
- Create the Conversion Linker tag. Go to Tags > Google Ads > Conversion Linker in the Google Tag Manager container to do this.
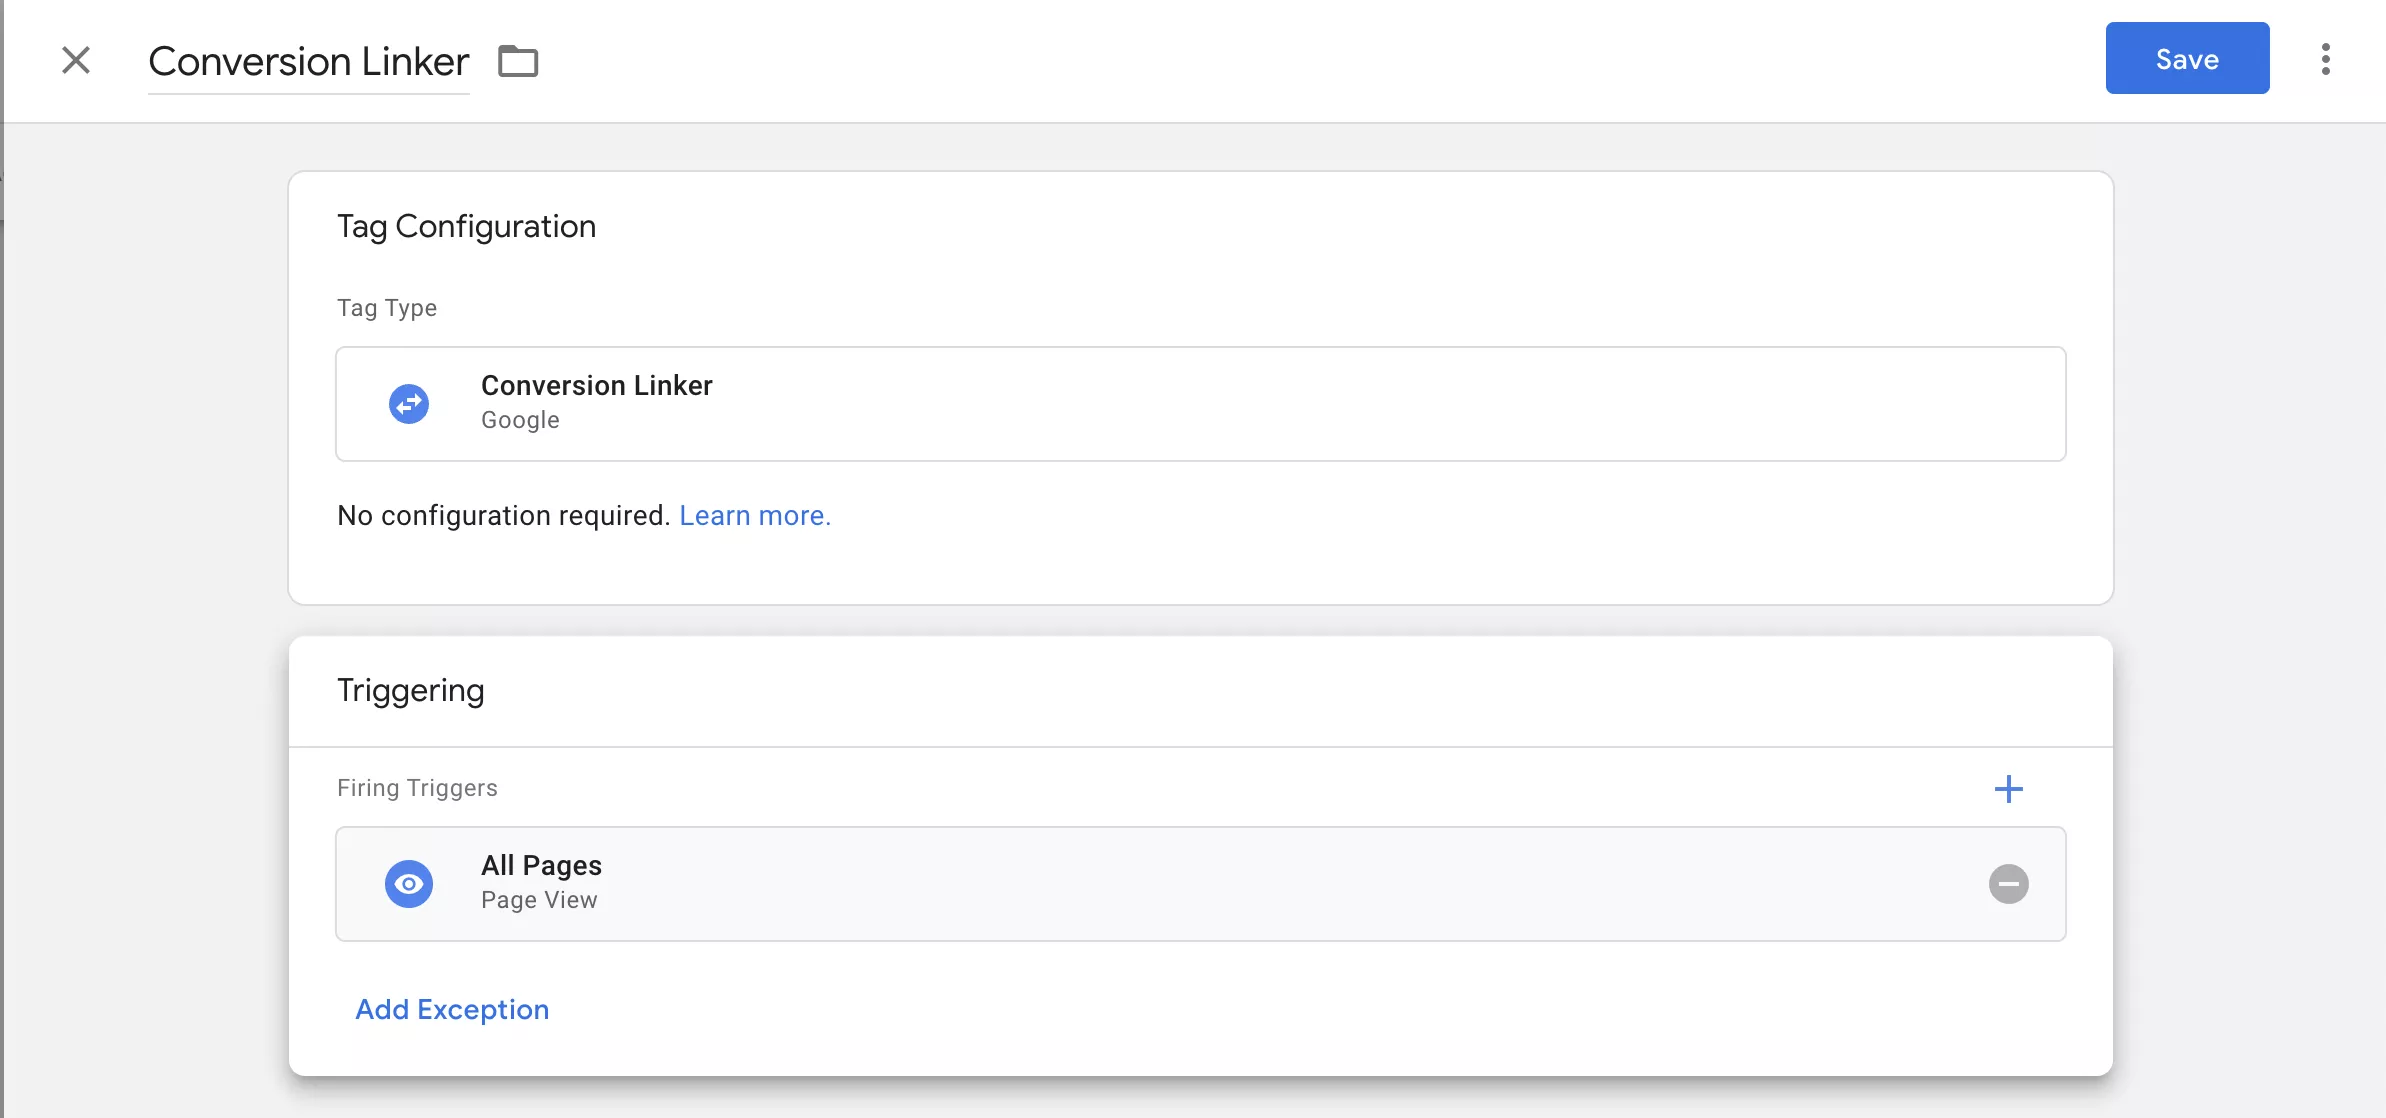
This tag requires no additional settings. Go to Triggering, select All Pages, and click Save.
You are now ready to create a remarketing tag.
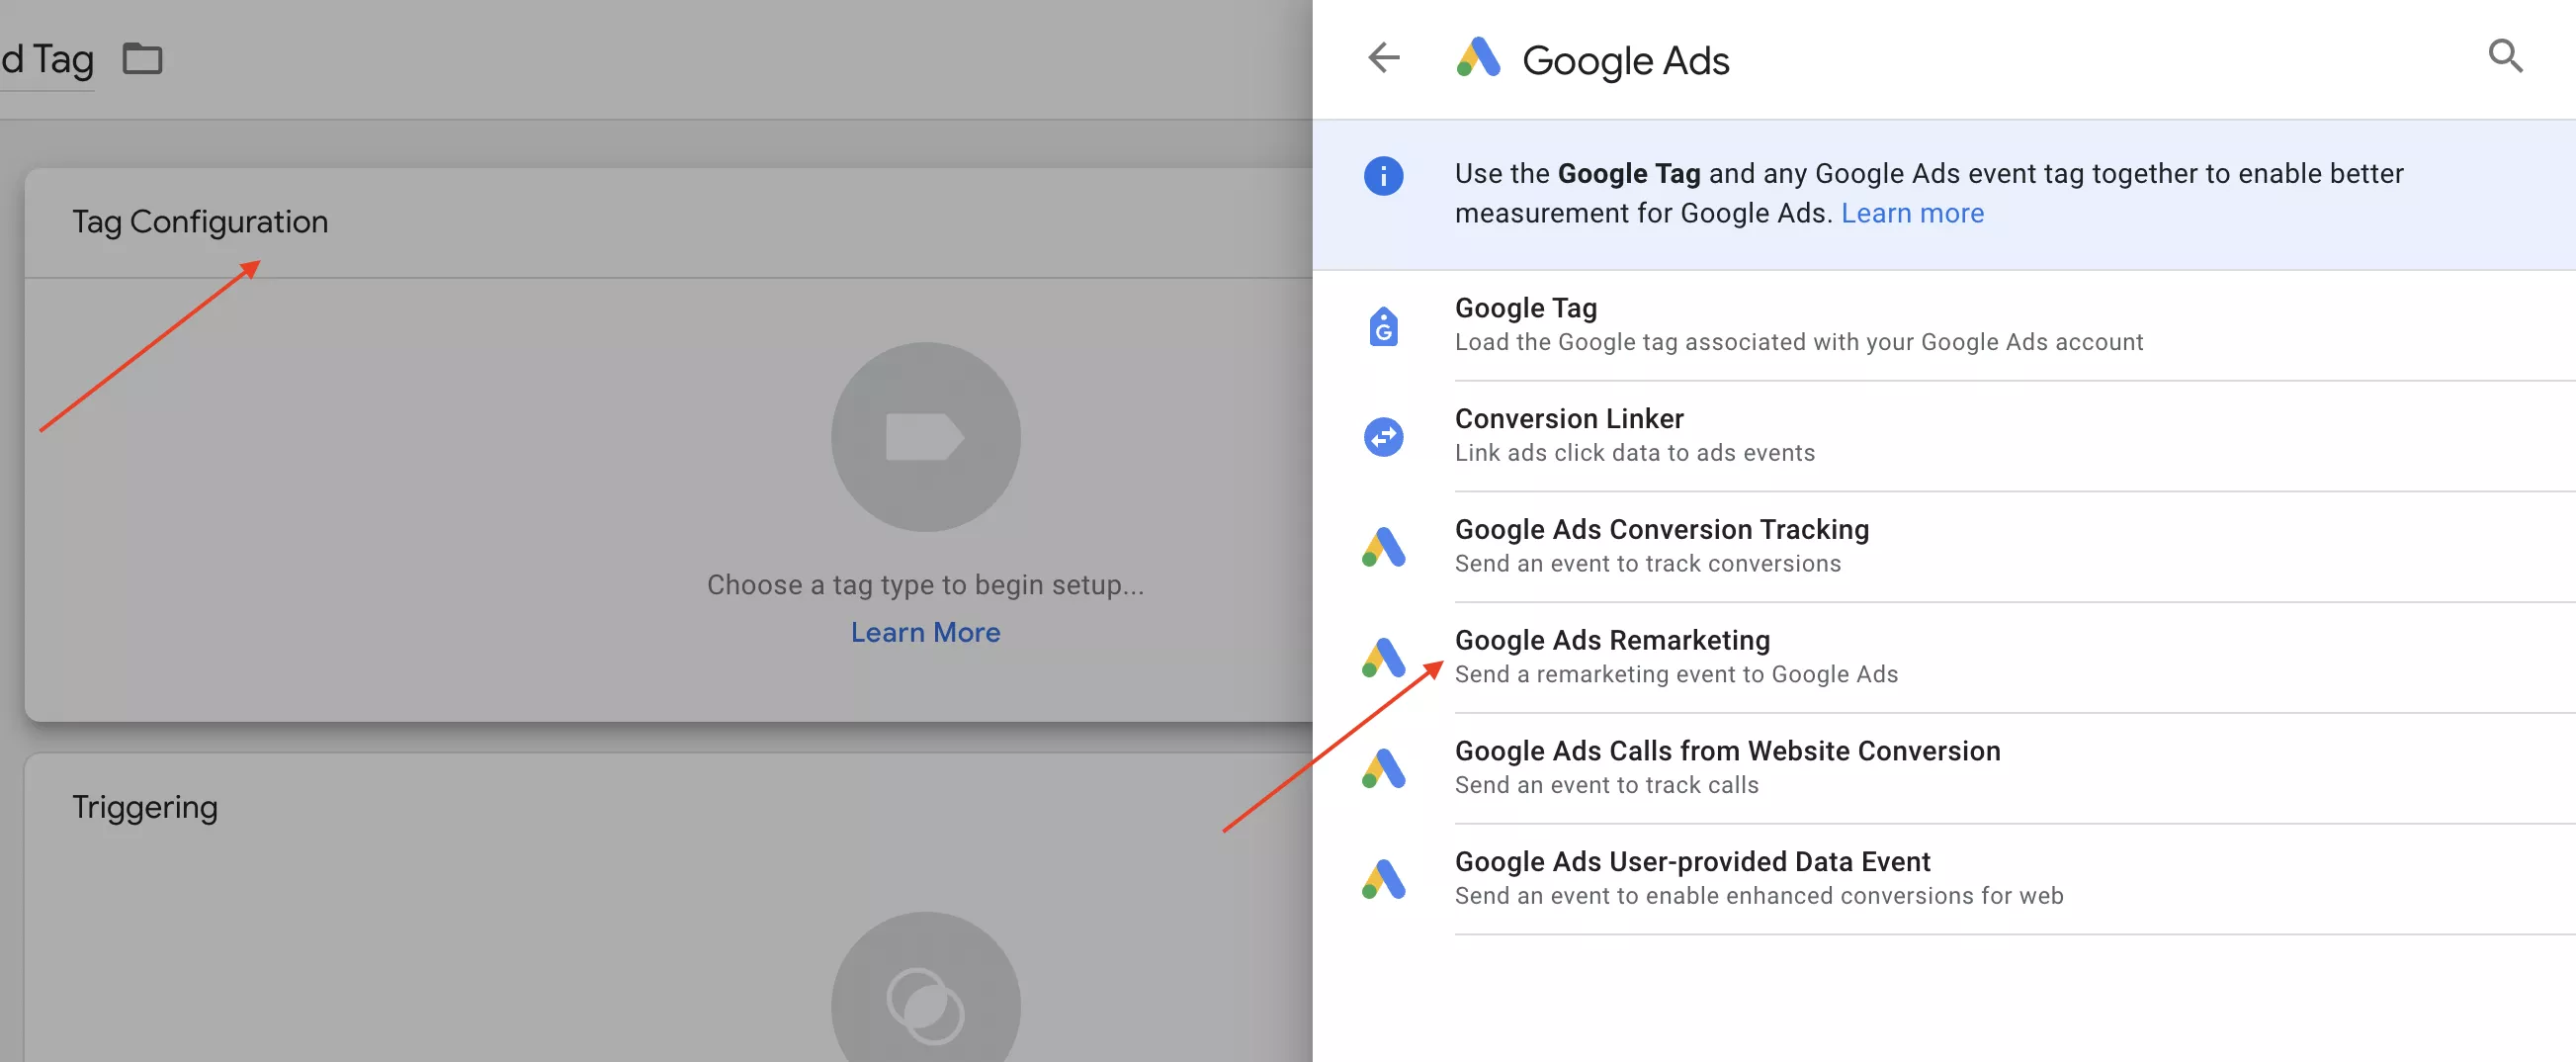
- Go to Tags.
- Click New in the right corner and select Google Ads and Google Ads Remarketing.
- Go back to your ad account and go to the tag setup page. Copy it and paste the conversion ID from your account.
- Change the tag name and add the All Pages trigger to track users regardless of which pages they visit.
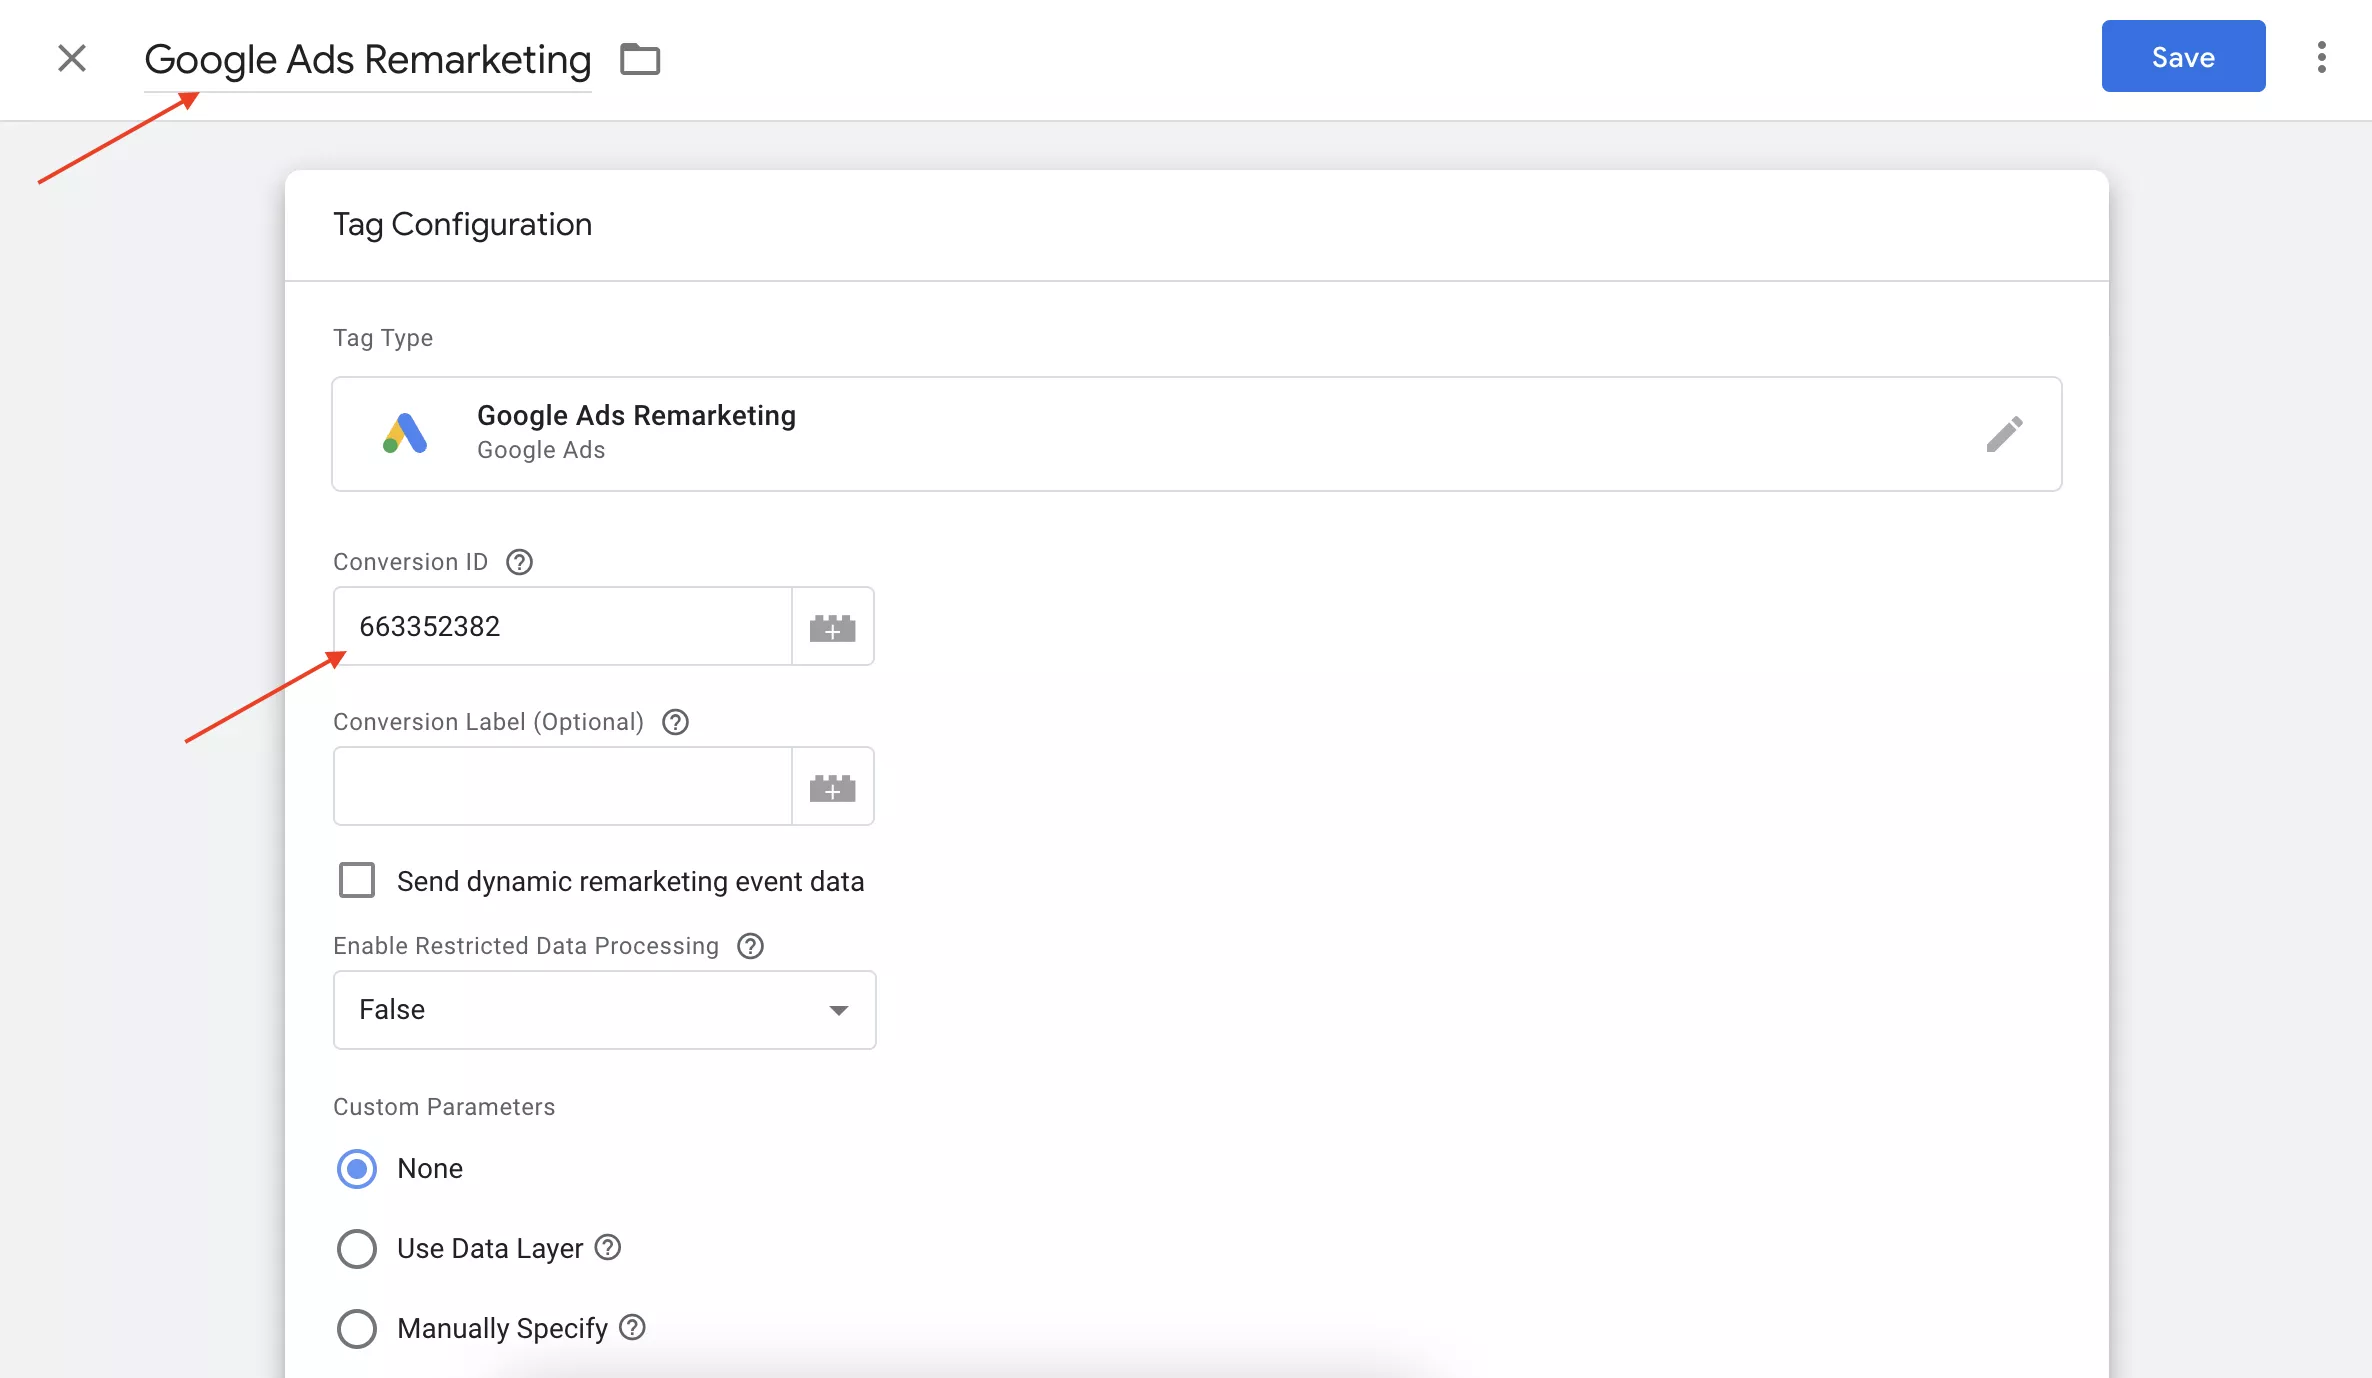
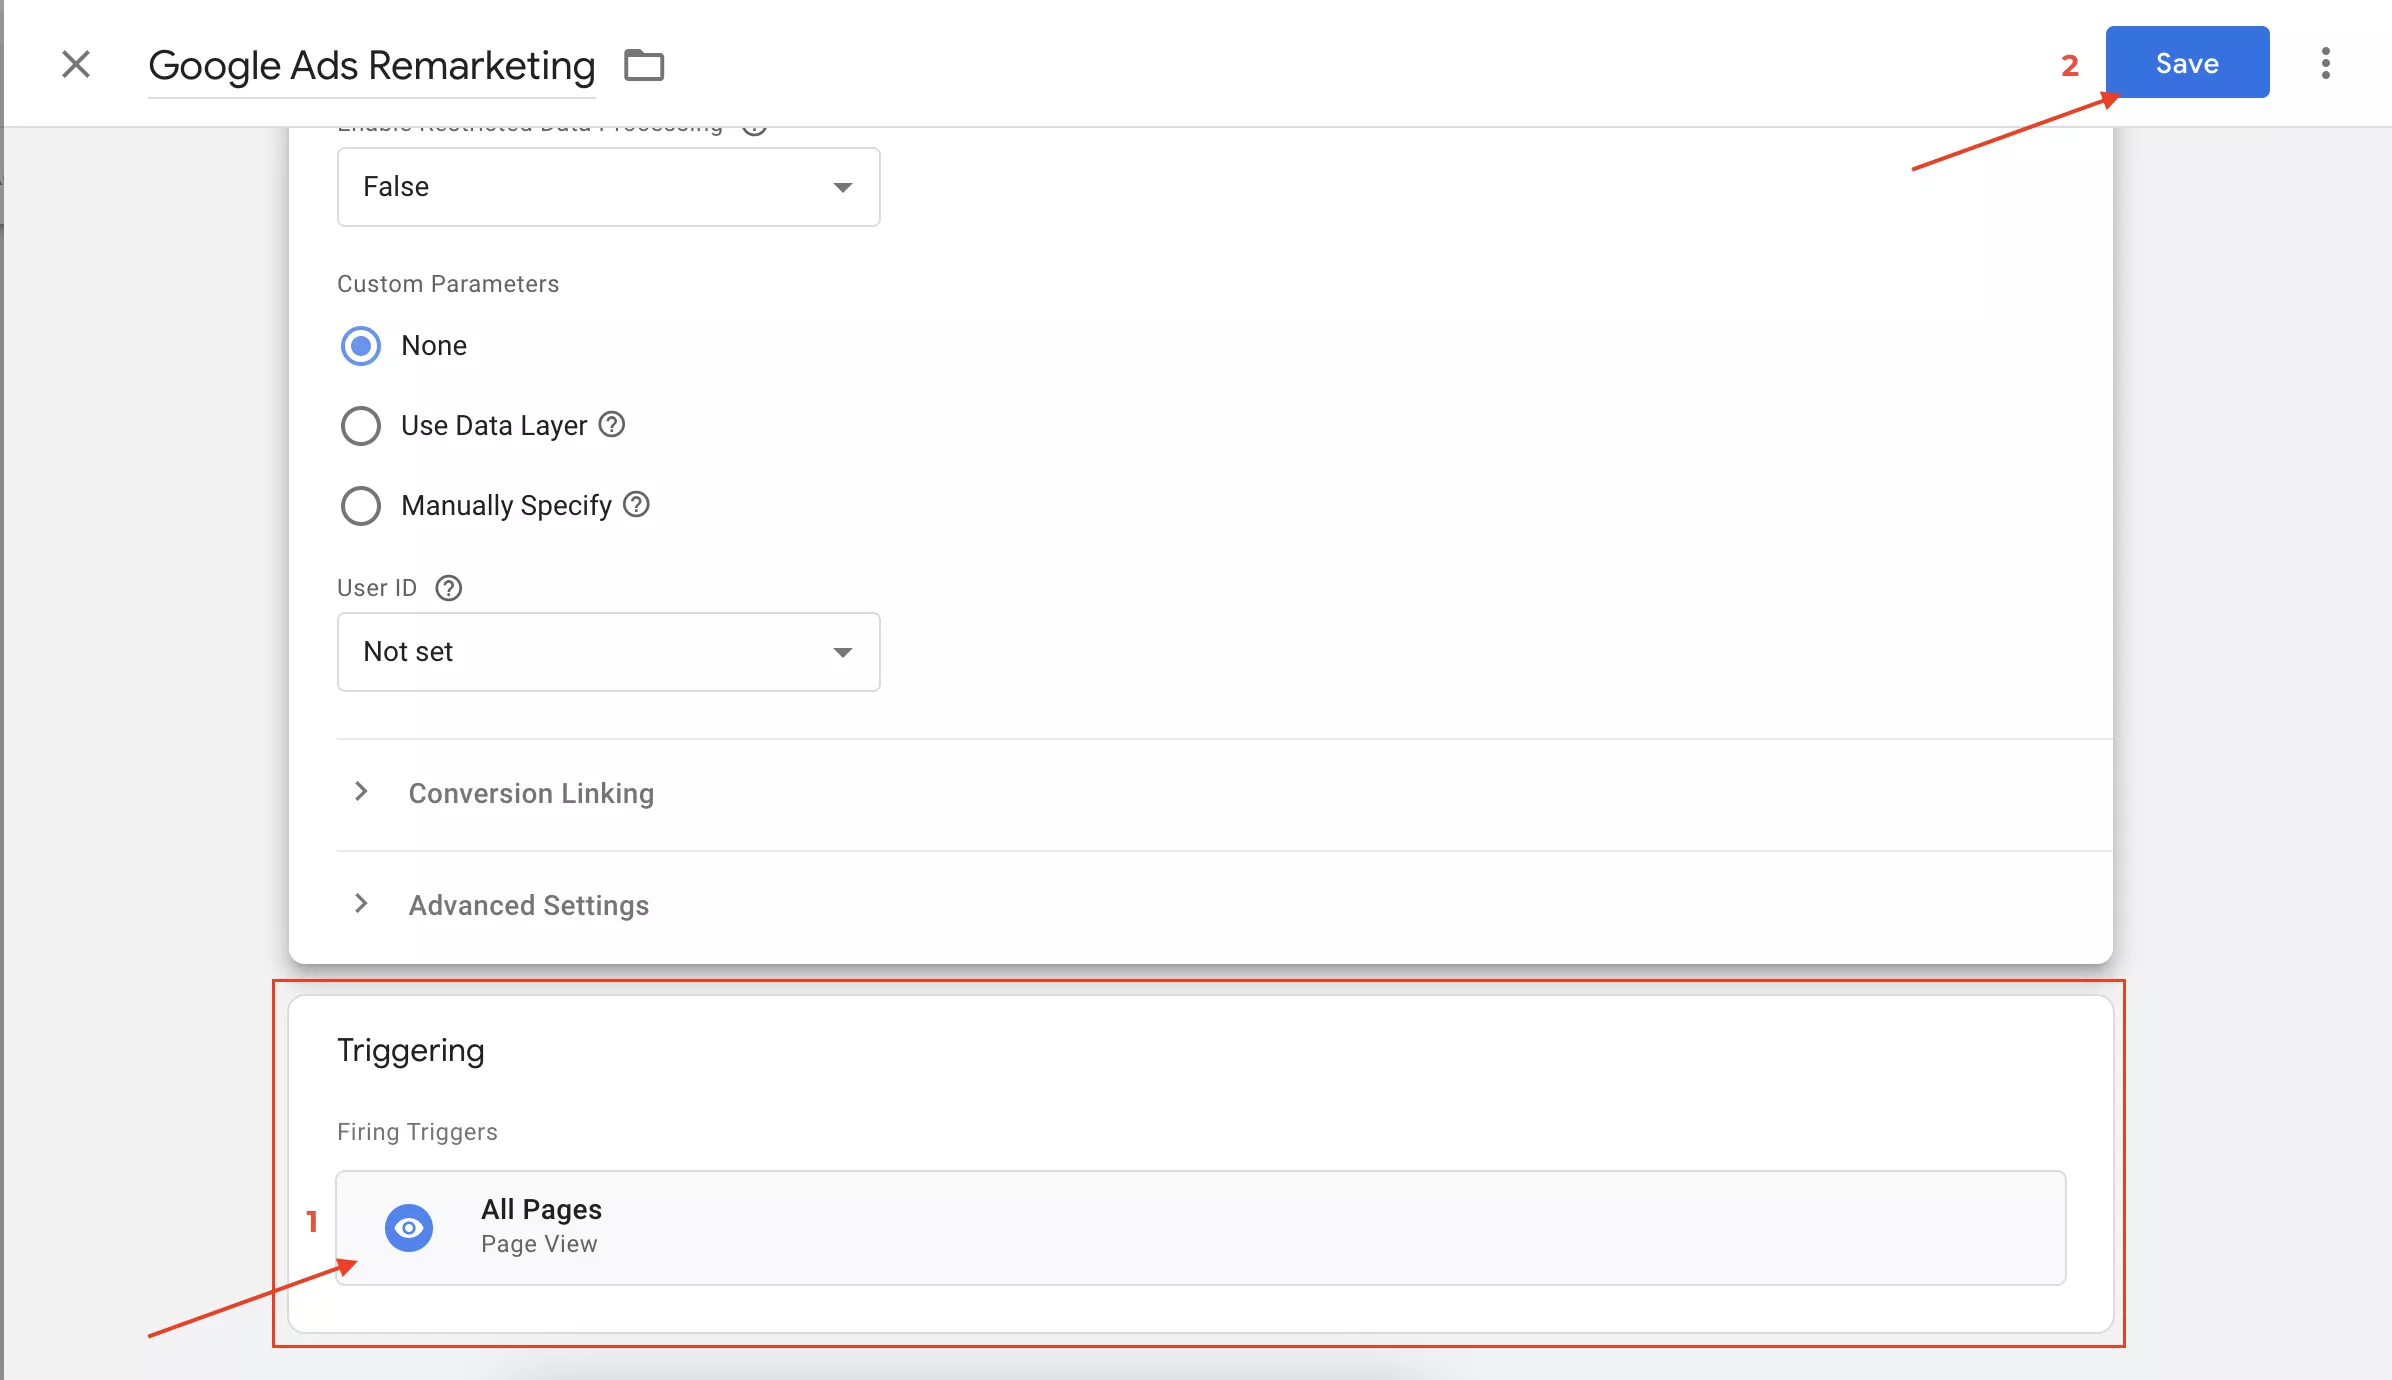
- Click Save.
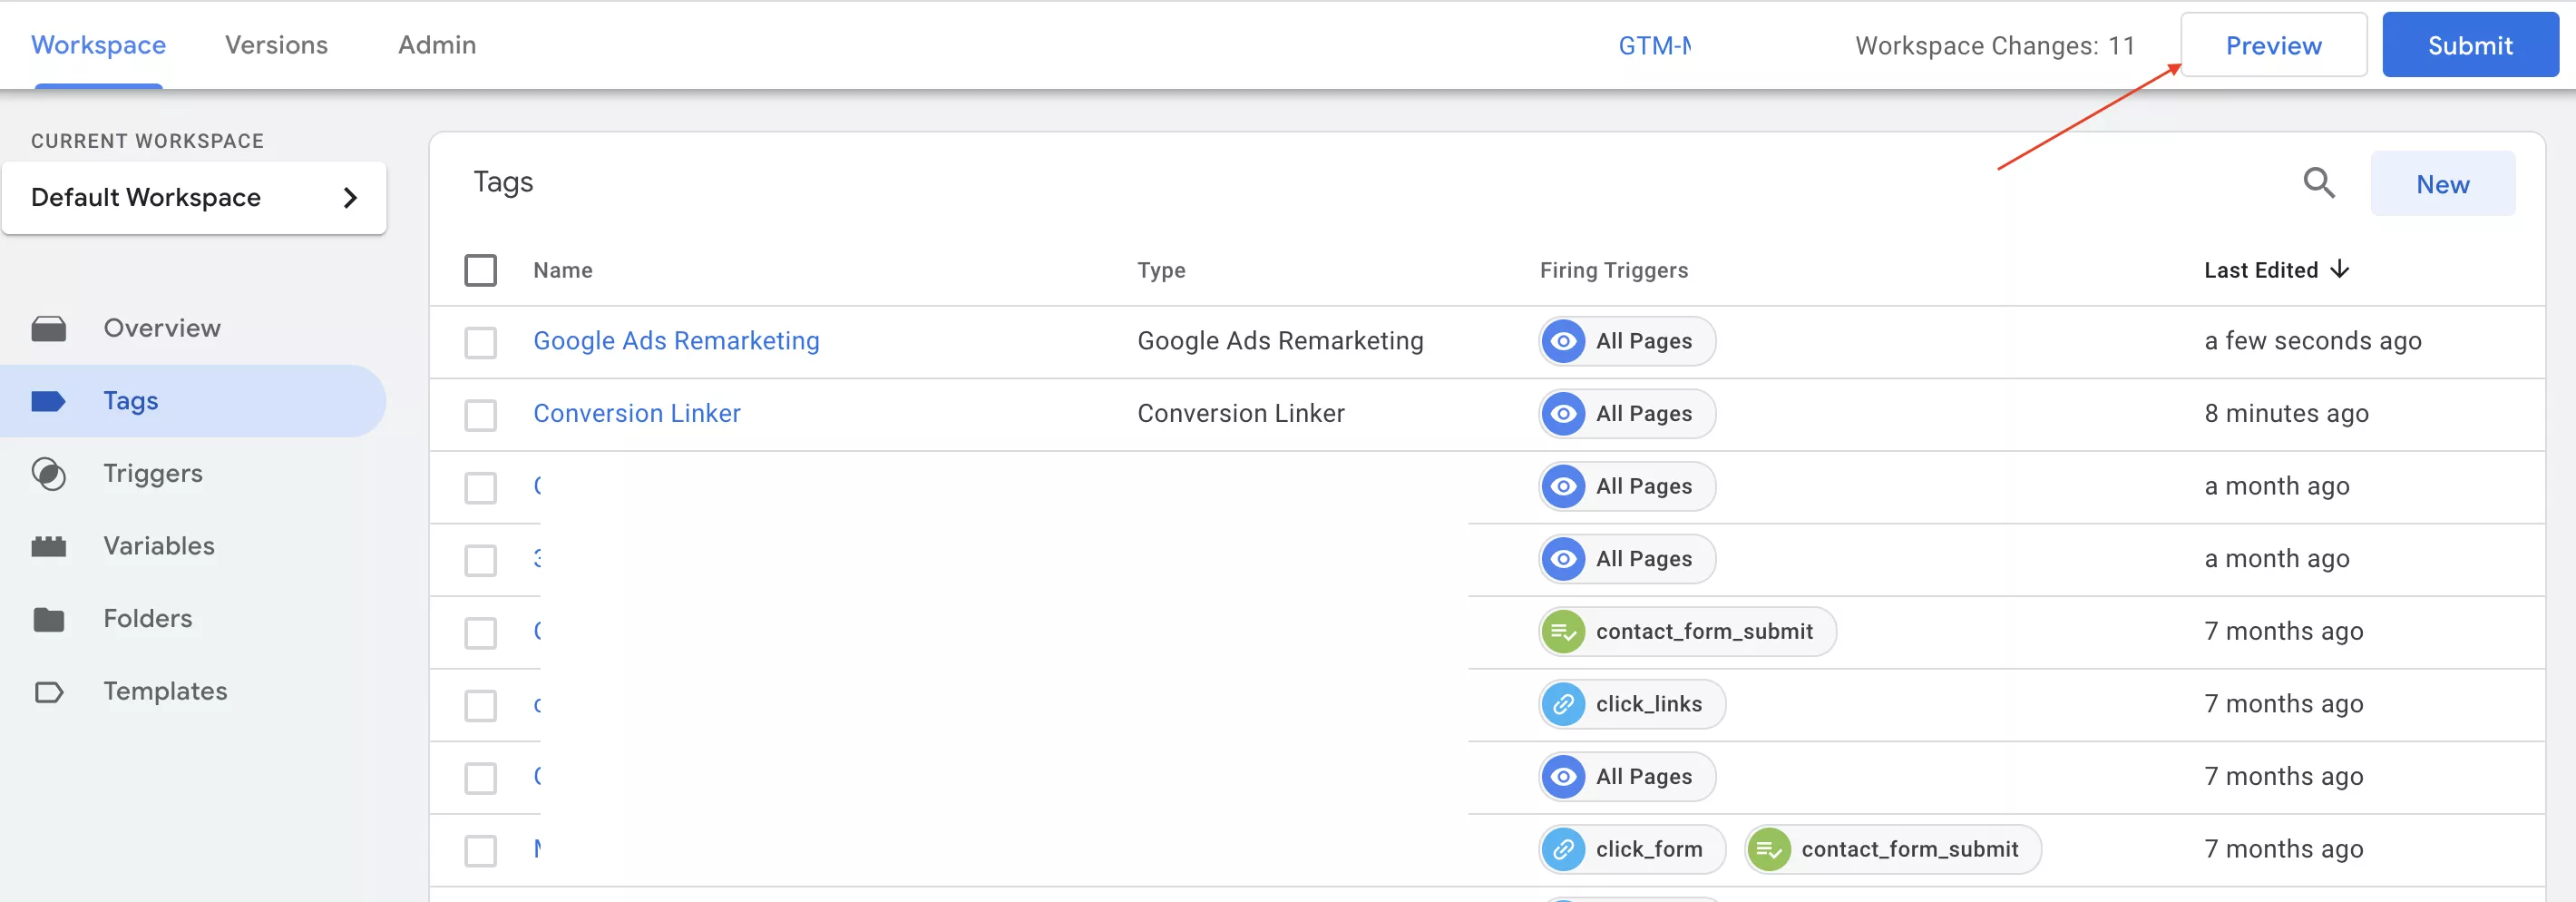
Use the preview to verify that the remarketing tag is set on all pages of the site. To do this:
- Go to the Tags menu and select Preview.
- Your site will automatically open in preview mode. Preview a few pages of your site and return to the Tag Assistant tab.
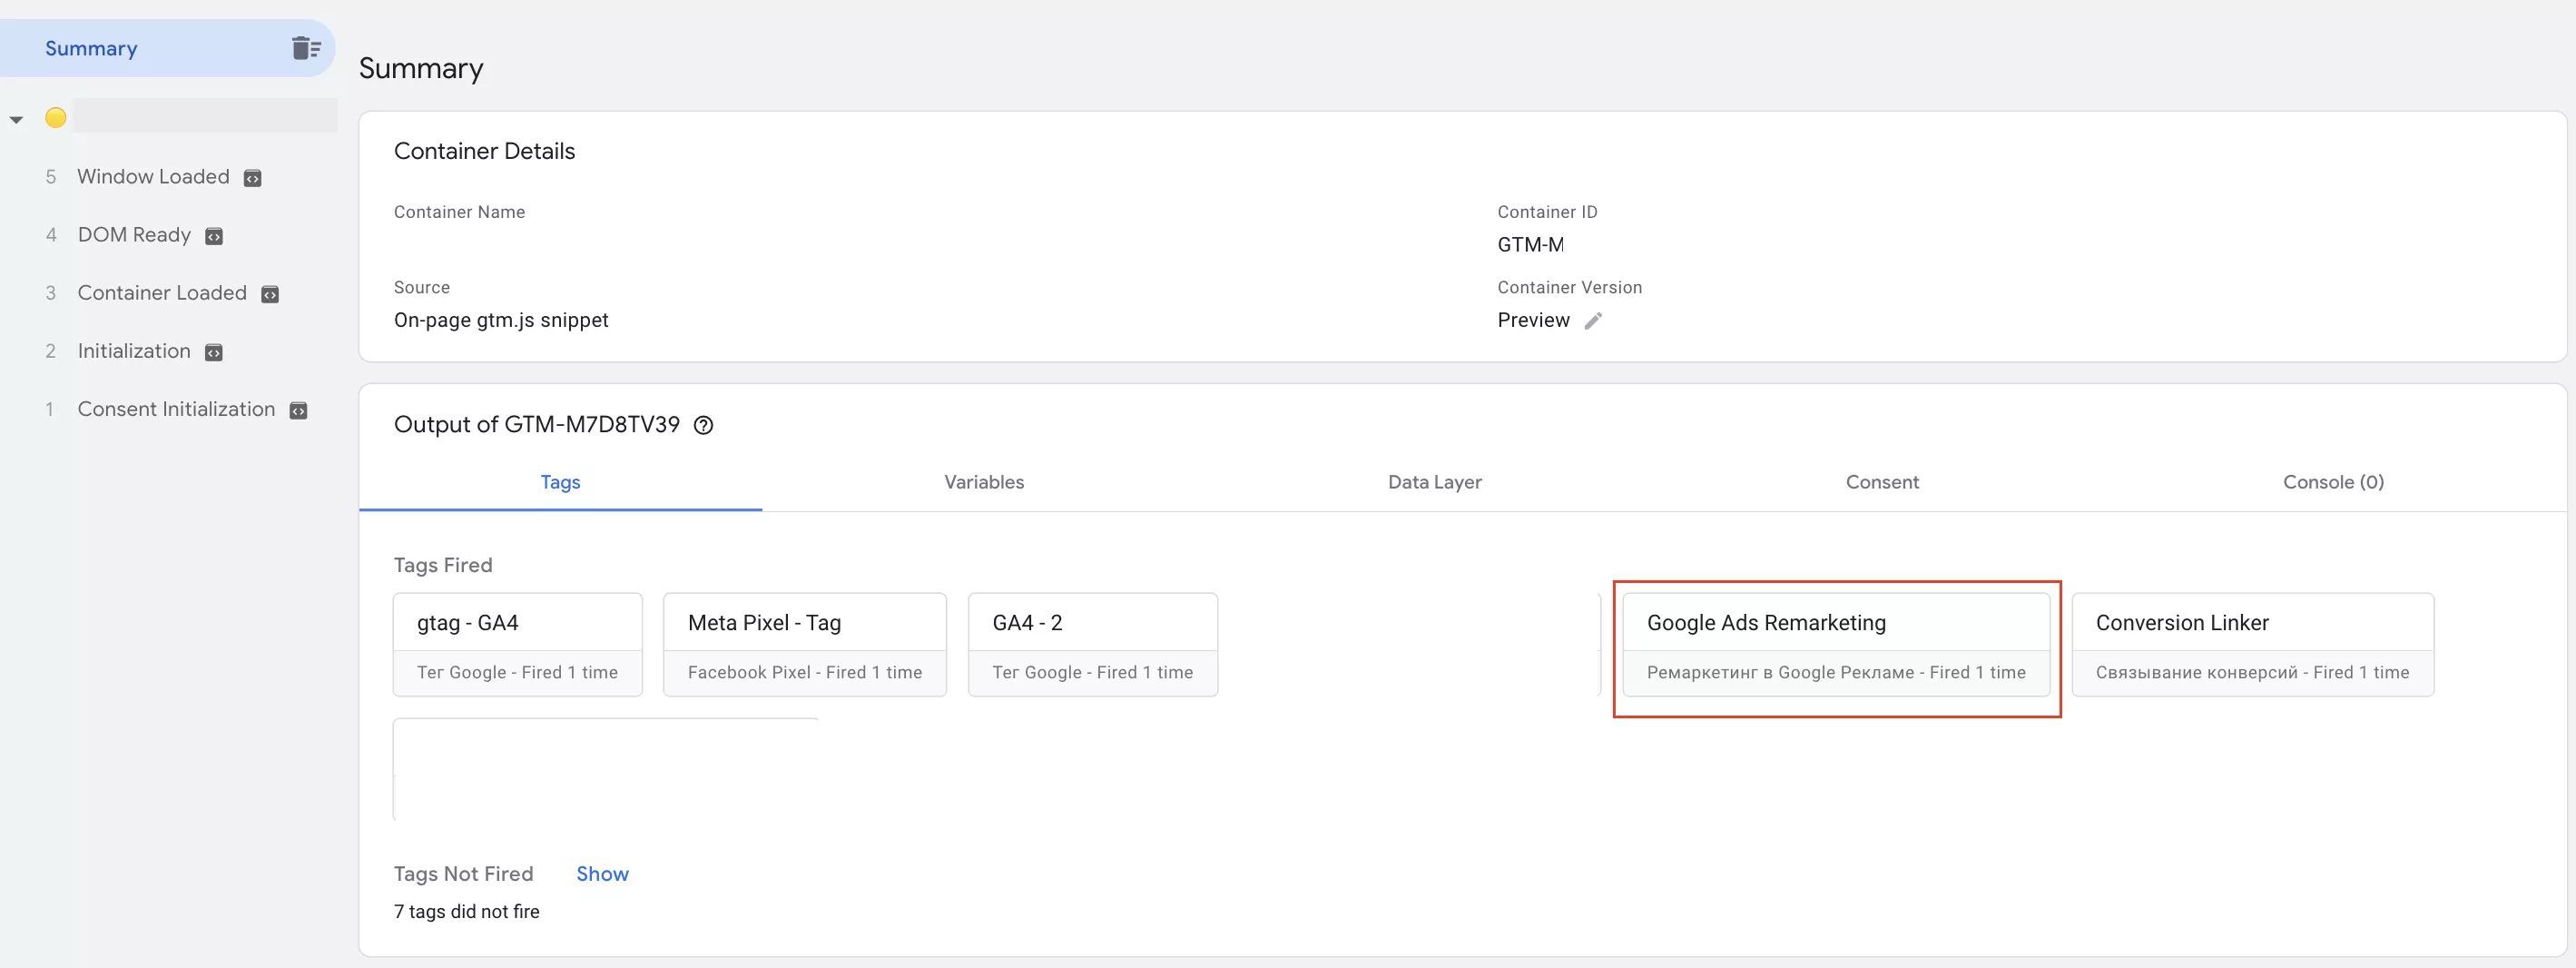
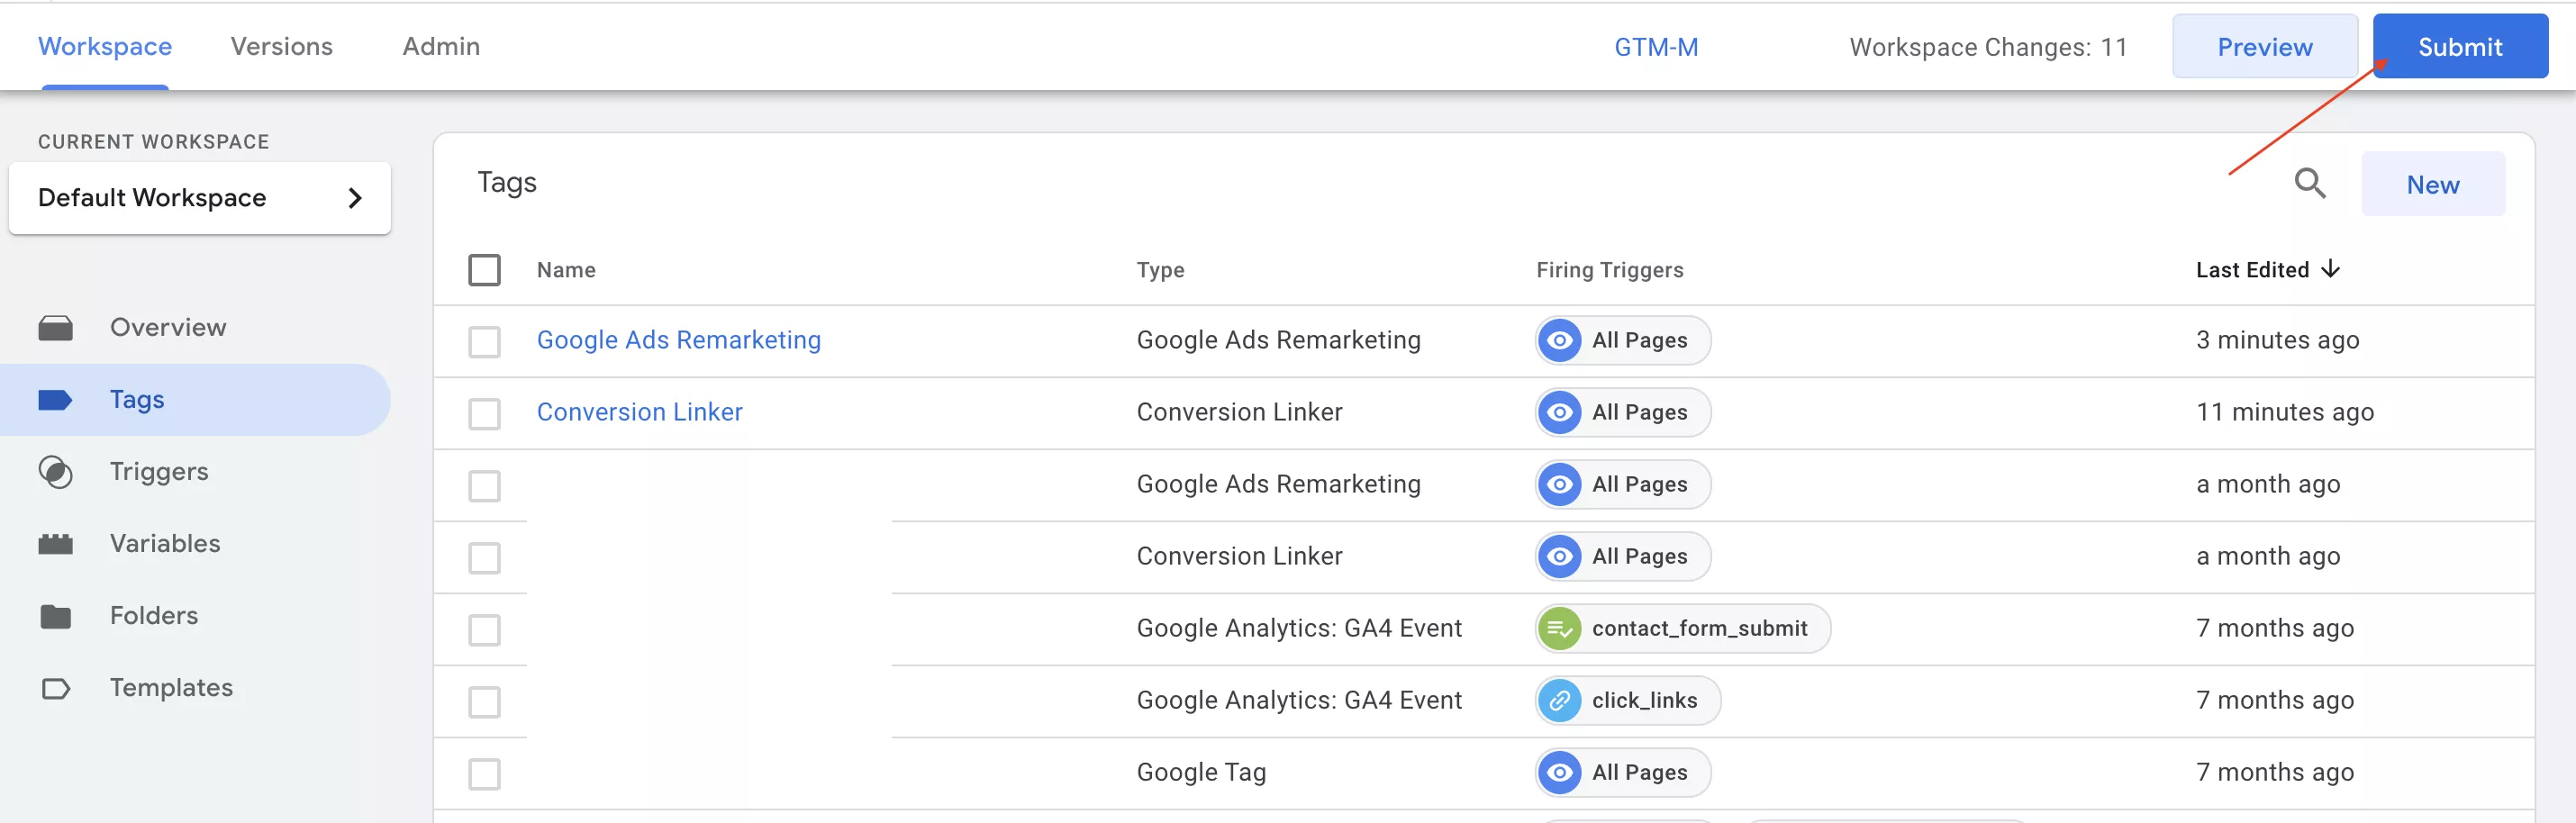
If the tag works, you have done everything correctly and can submit the container.
In the workspace, click Submit for all your settings to go through.
To finish setting the tag, go back to the Tag setup of your Ads account and click Continue.
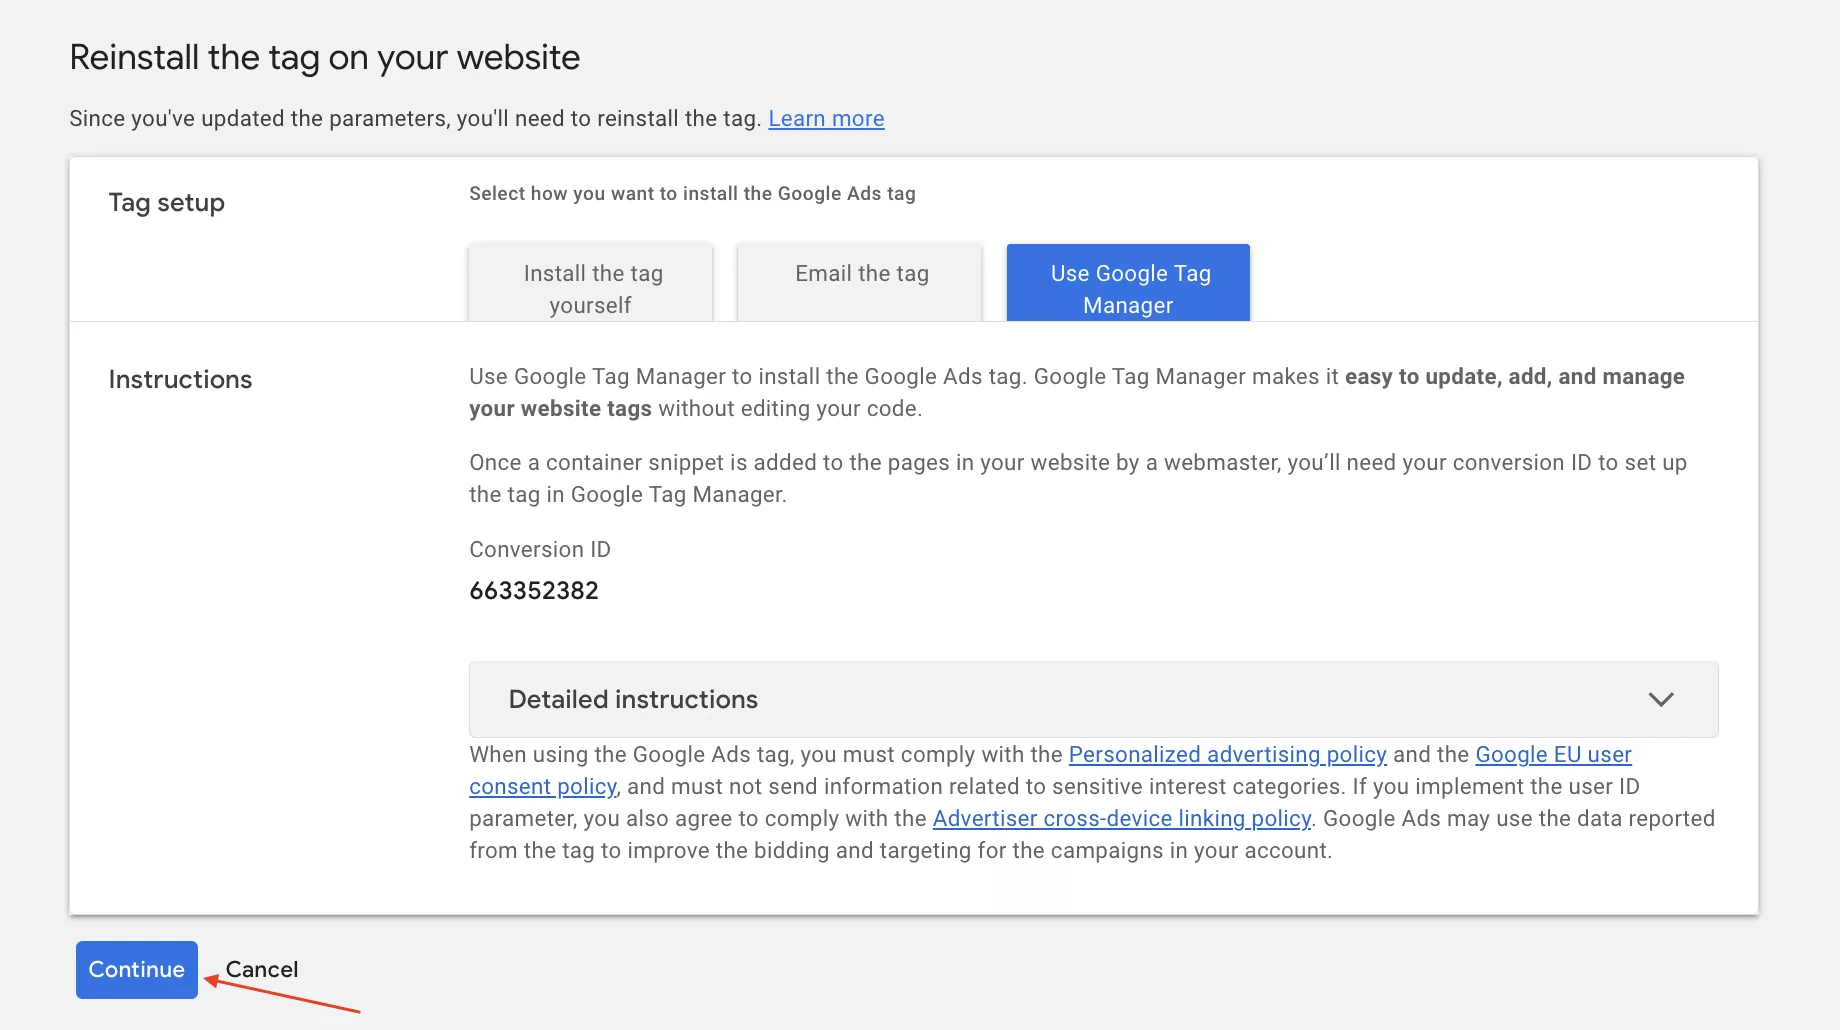
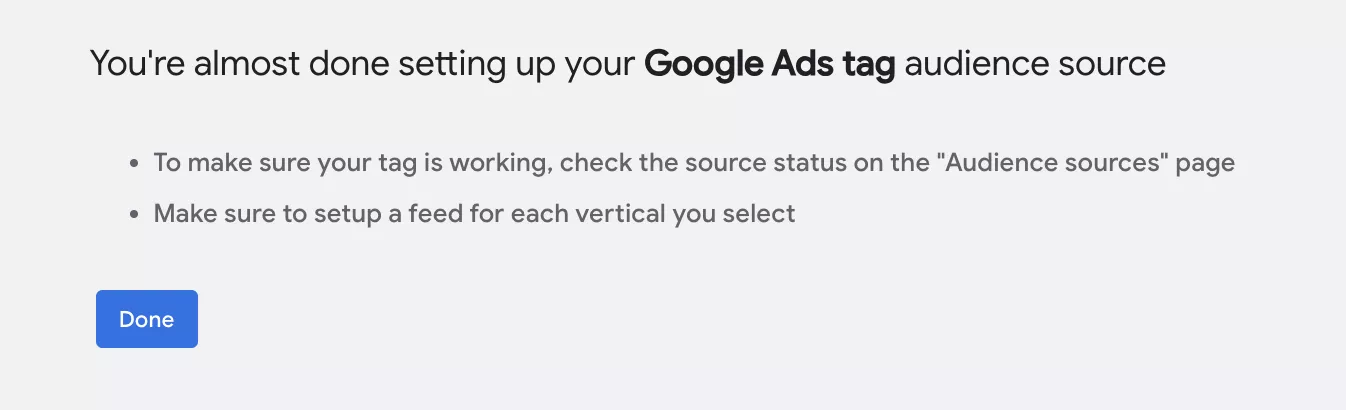
A message on the screen will ask you to verify that the tag is working correctly. Click Done.
Next, go to the page to review your preliminary settings: Tools > Shared Library > Audience Manager > Your data sources.
To check that the data is being transferred to your ad account:
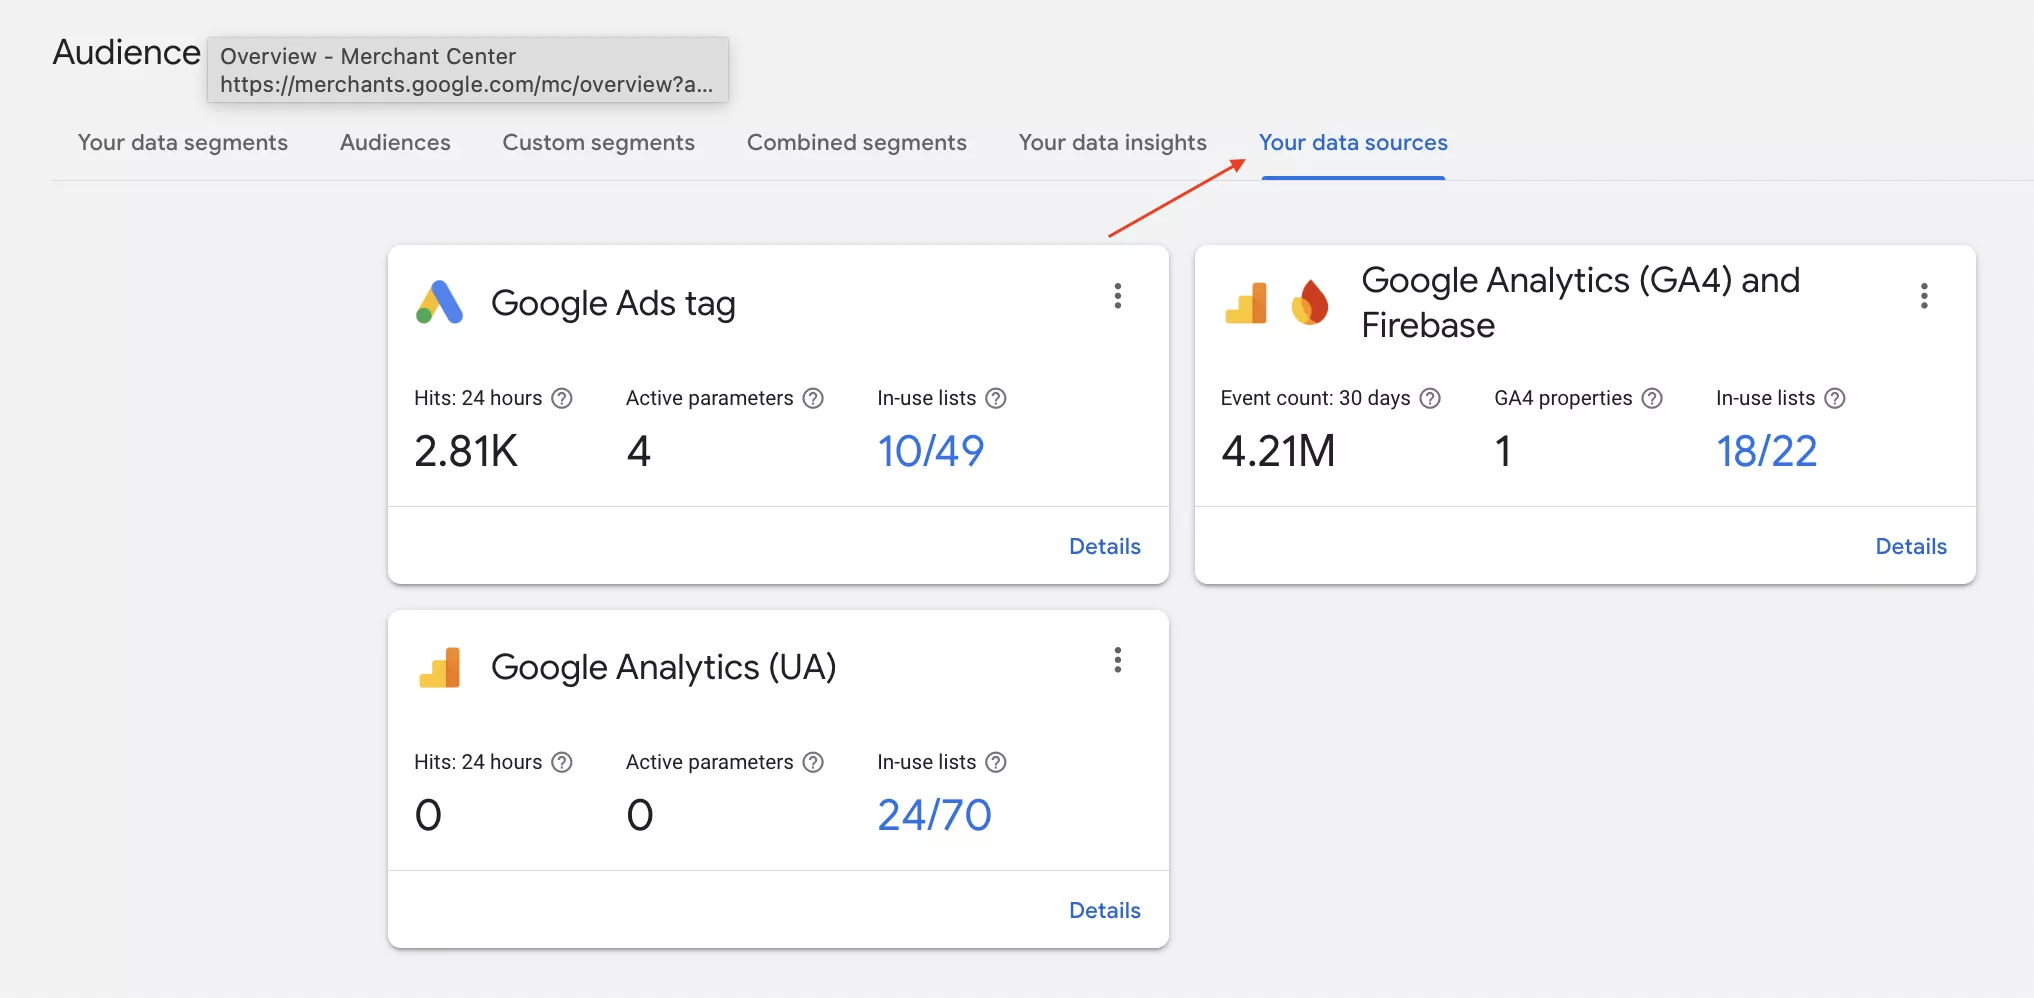
- Go to Audience manager > Your data sources.
- Go to Google Ads tag > click Details.
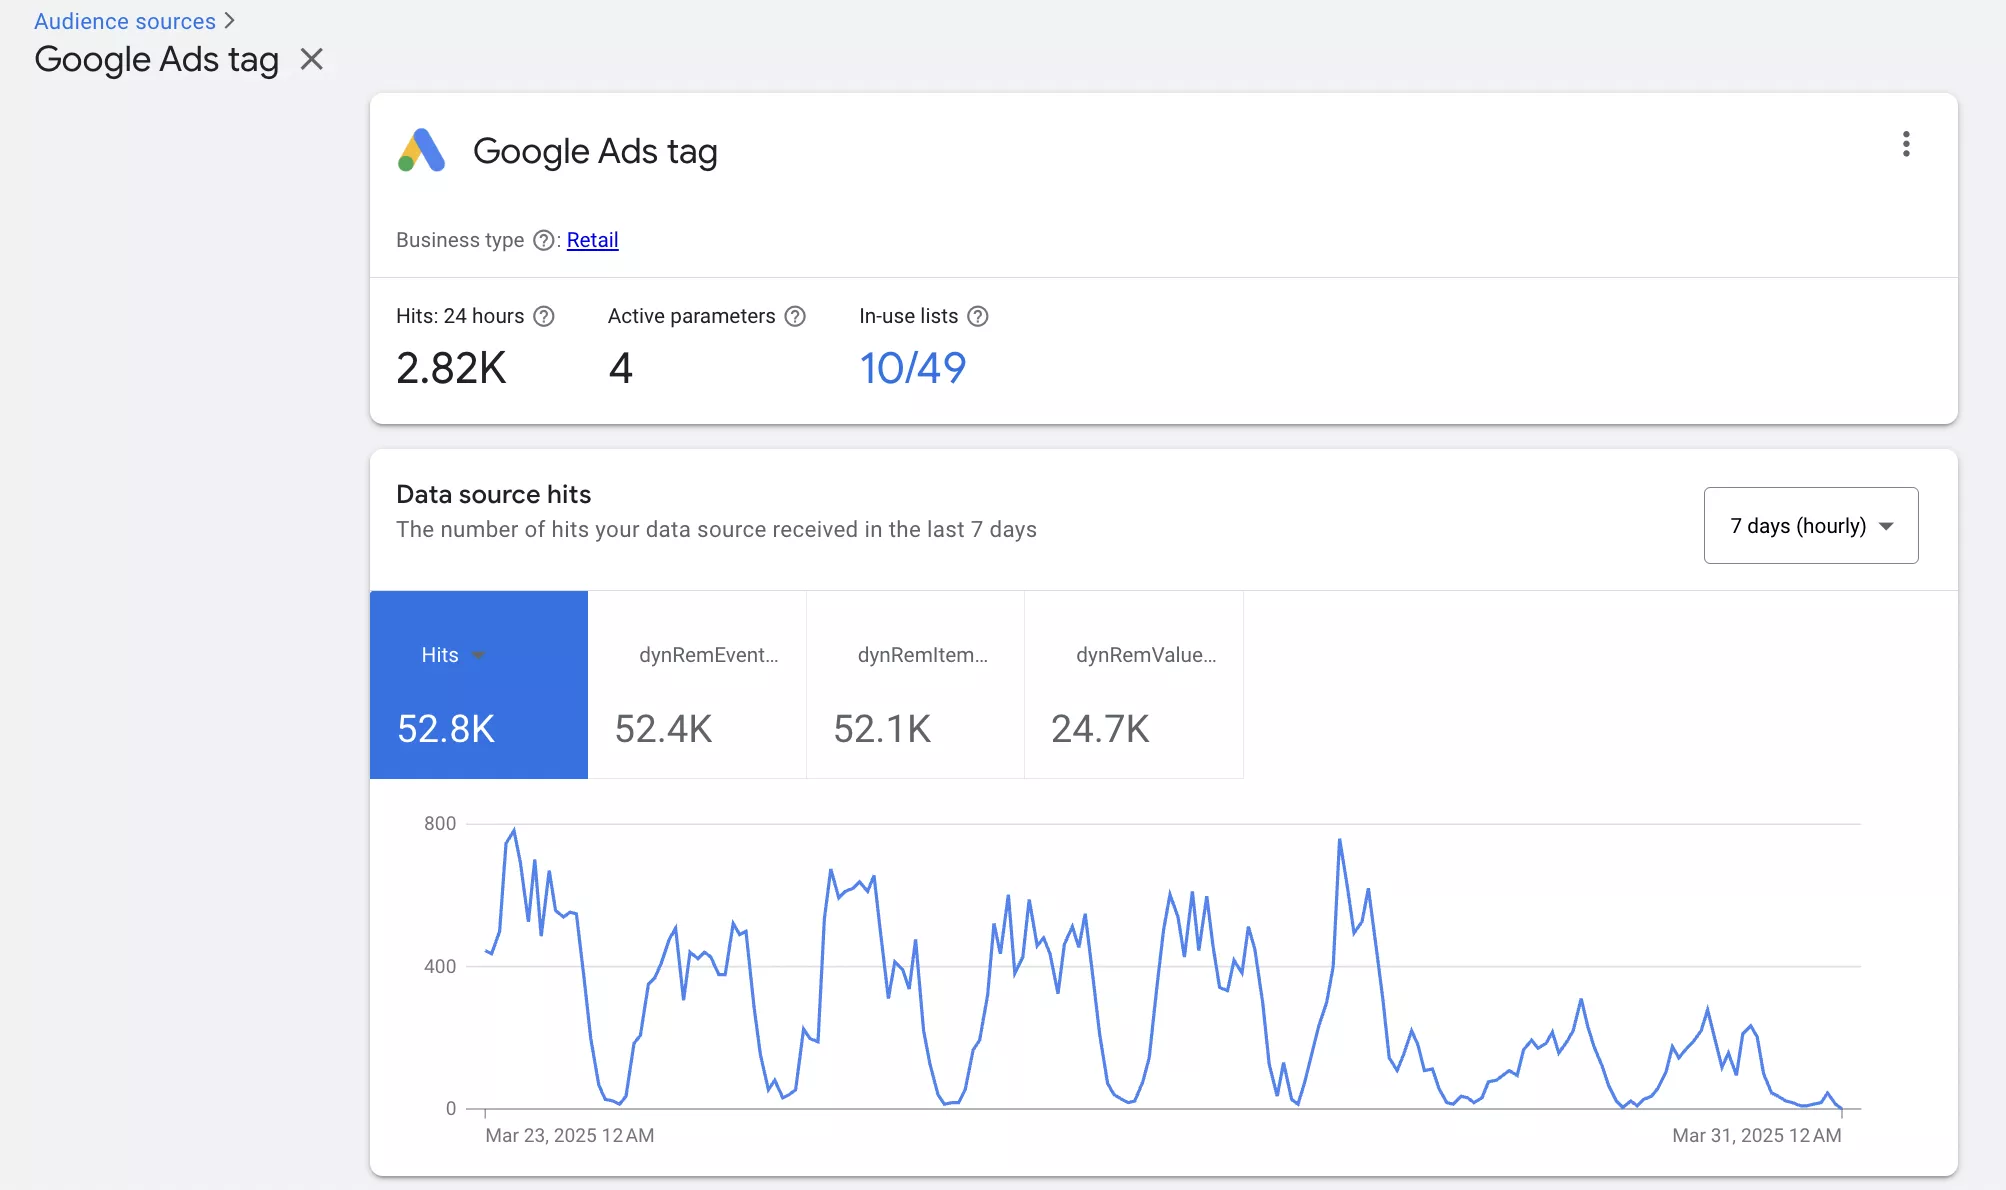
This section displays statistics for data source visits or traffic to the website. Select Data source hits to view the statistics.
Data source hits refer to the number of queries registered in the last 24 hours. However, queries for the last hour may not be displayed immediately, as they take some time to process.
I recommend checking this section the day after setup.
Setting up remarketing audiences
Now, you can move on to creating a list of remarketing audiences to target with your ads. To do this, you'll need to create an audience segment that includes visitors to a specific section of your website.
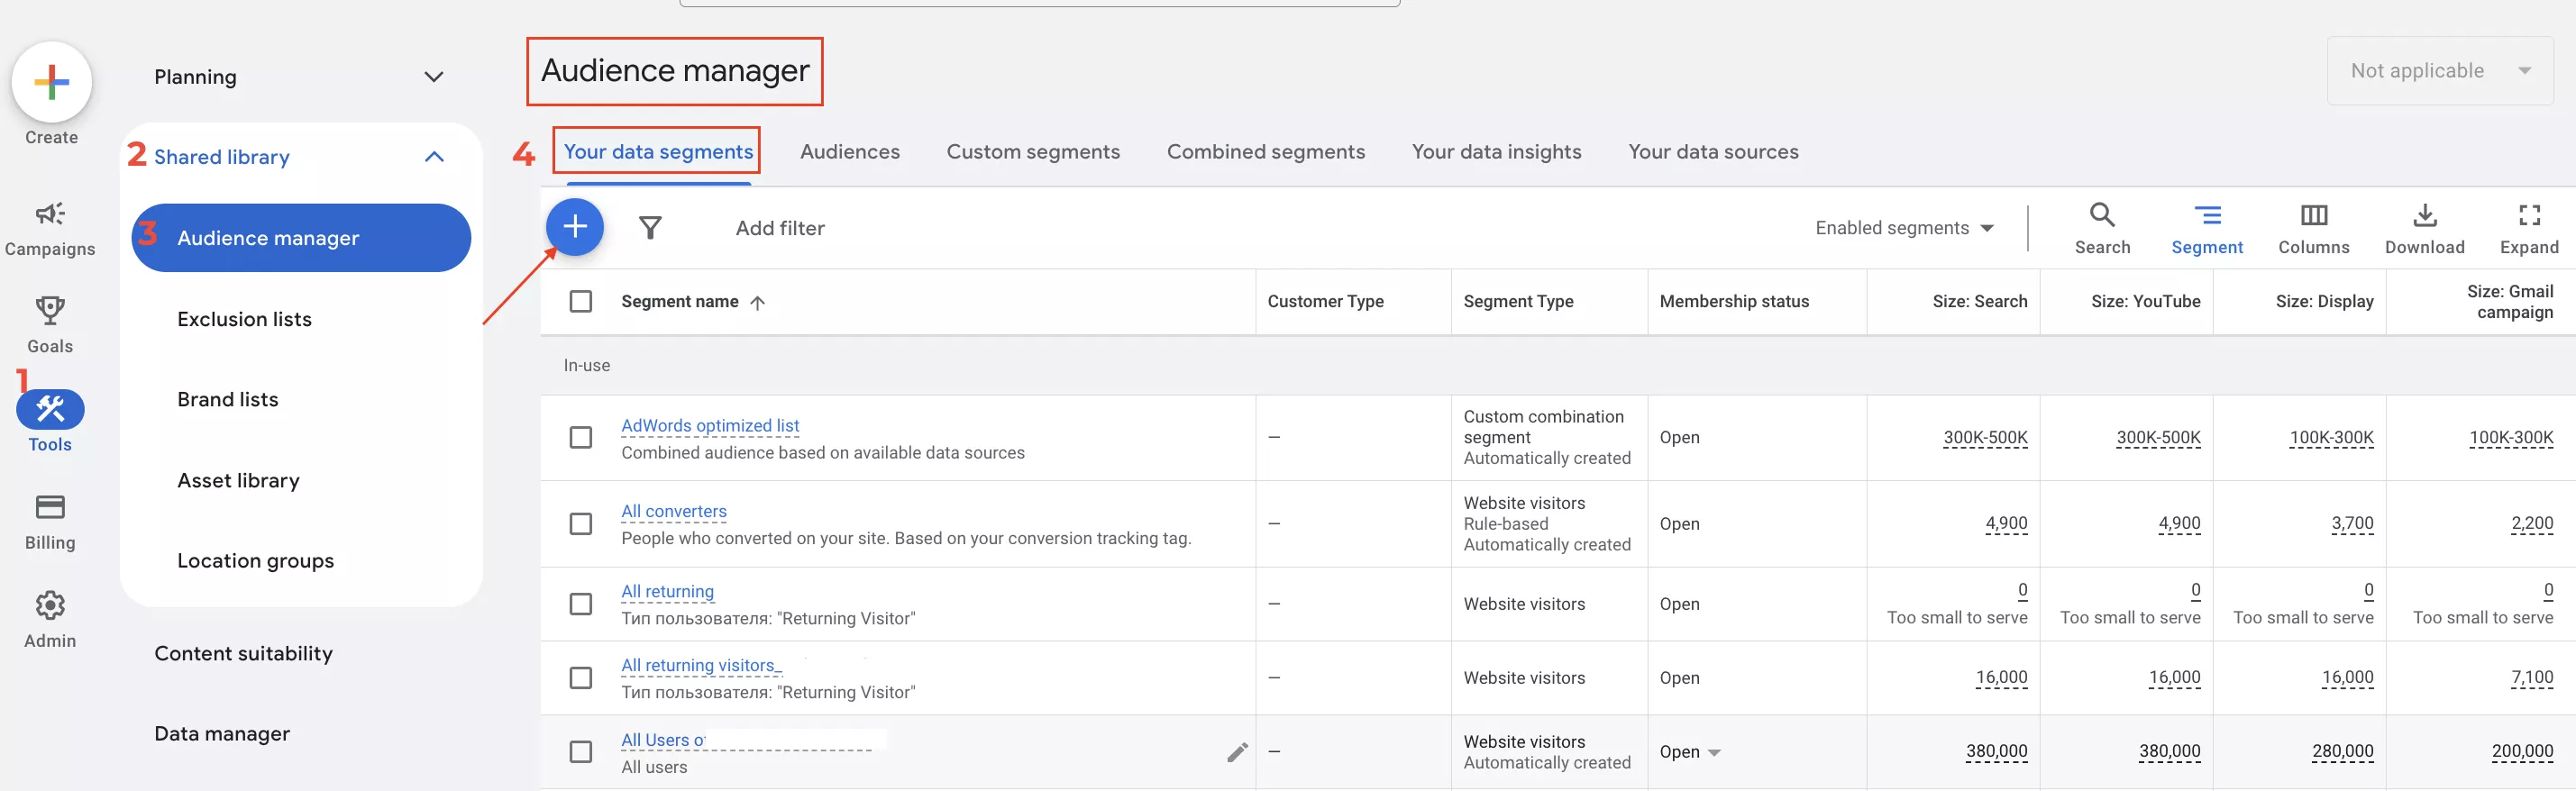
In your Google Ads account, go to Tools > Shared library > Audience manager > Your data segments.
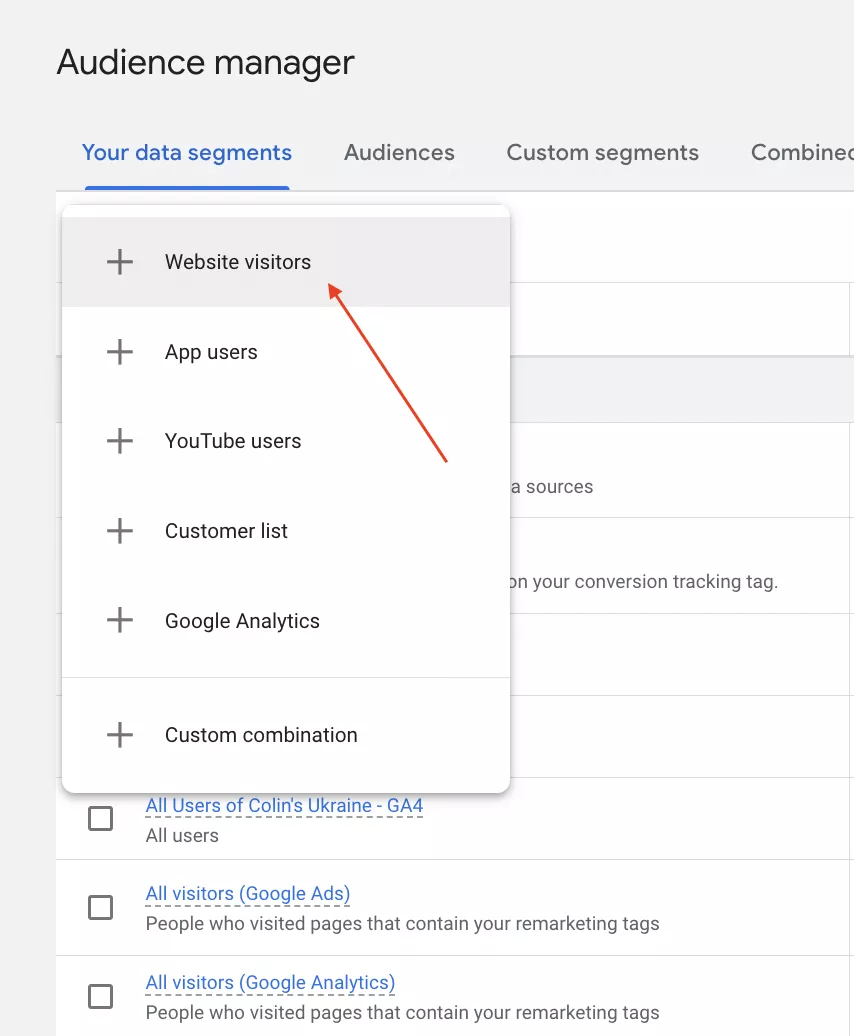
Click on the + sign to create a new audience.
Select Website visitors to create a remarketing audience based on users who visit your website.
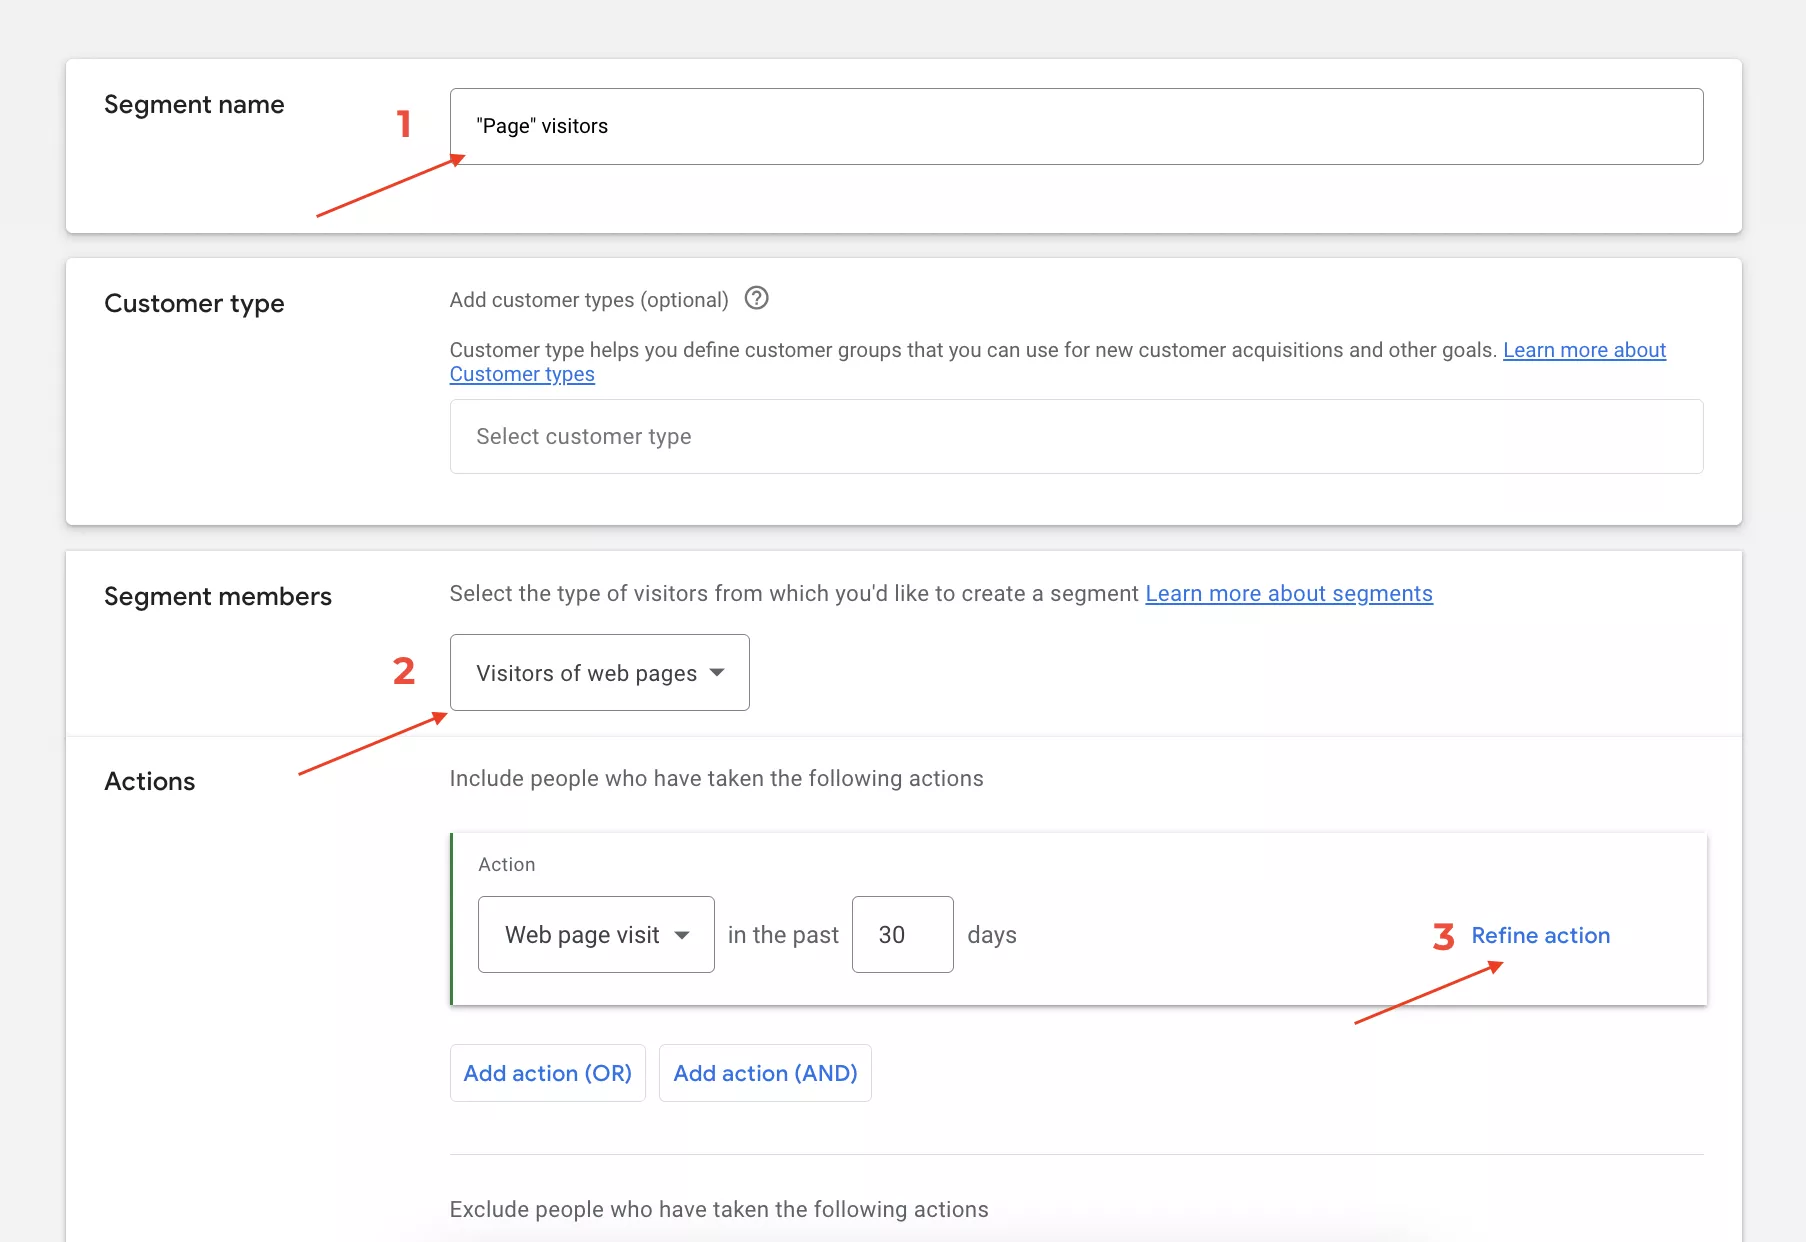
On the Segment setup page, follow these steps:
- Give the audience a name and specify the characteristics or conditions that the audience must meet. This can include visiting specific pages or other criteria.
- Set the membership duration, which determines how long the user remains in the audience after completing the specified actions.
- To specify which audience to include in this list, click Refine action and add a web page URL. This could be a page with a promotional offer, a specific product category, or information about an upcoming event.

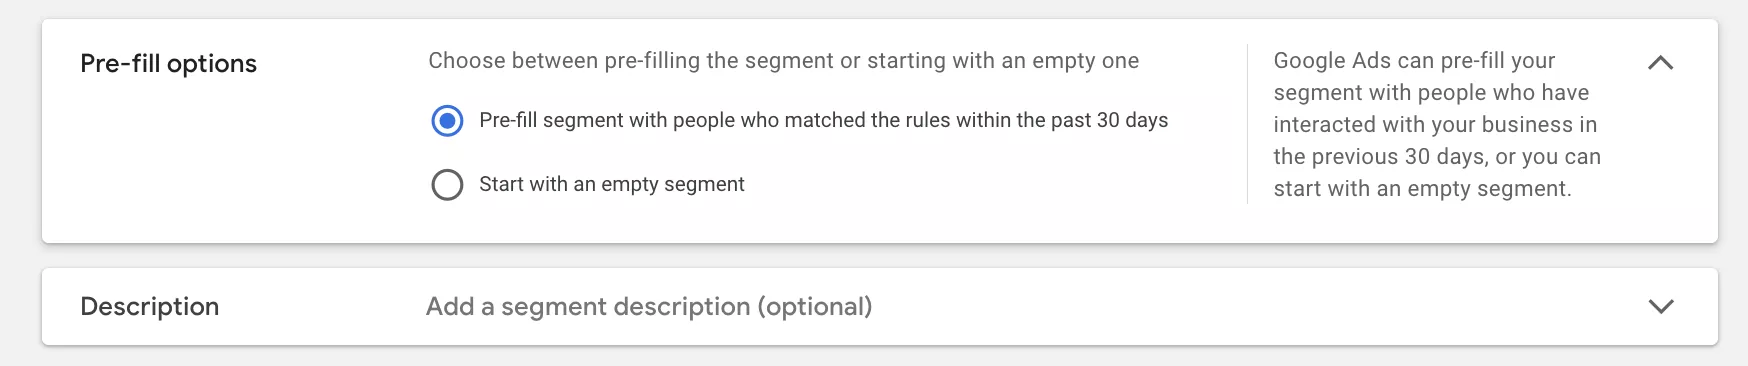
By default, you can add site visitors from the last 30 days, with a maximum of 540 days available.
If you want this list to include visitors to the specified page, select Pre-fill options.
And if you want to start from scratch, select Start with an empty segment.
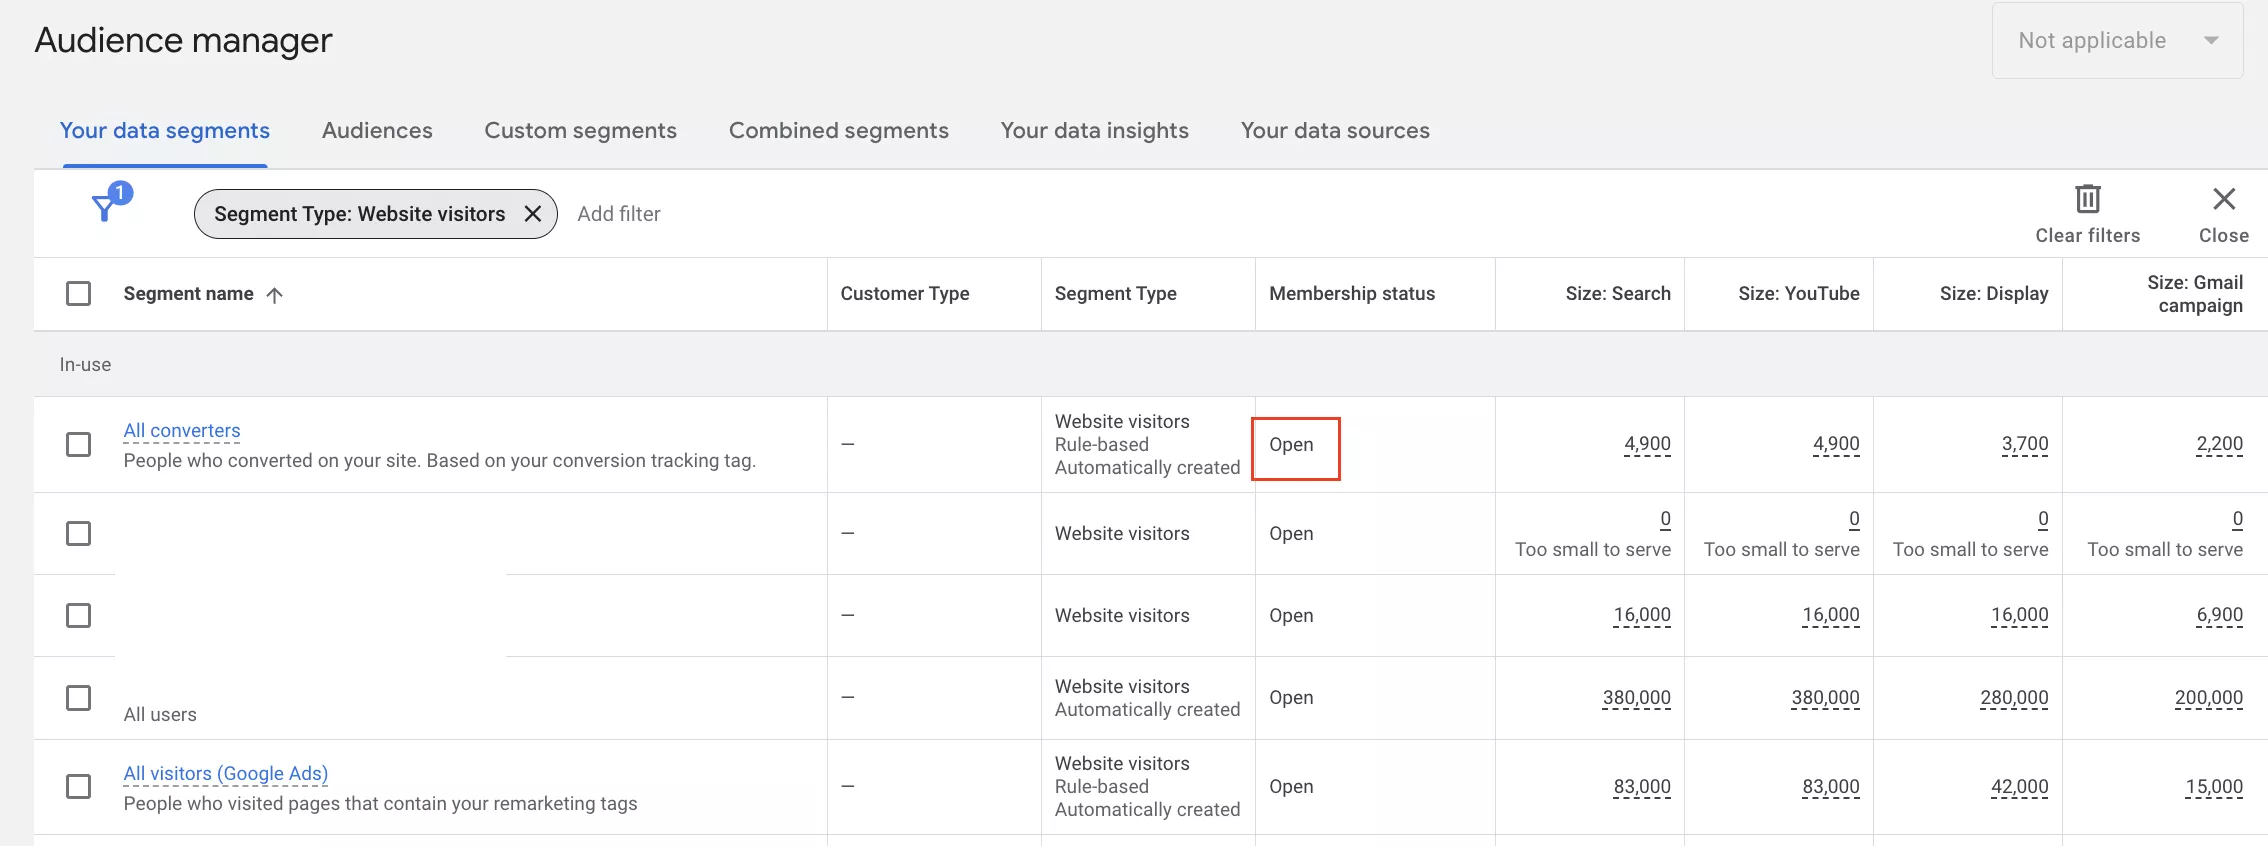
Click Create segment and complete the audience creation process.
If the list status is Open, the audience is being collected according to the configured criteria.
This audience list can be used in Demand Gen and video campaigns.
Next, I'll show you how to set up a standard display ad campaign for remarketing.
Setting up a classic display campaign for remarketing
Follow these steps to create a standard remarketing campaign:
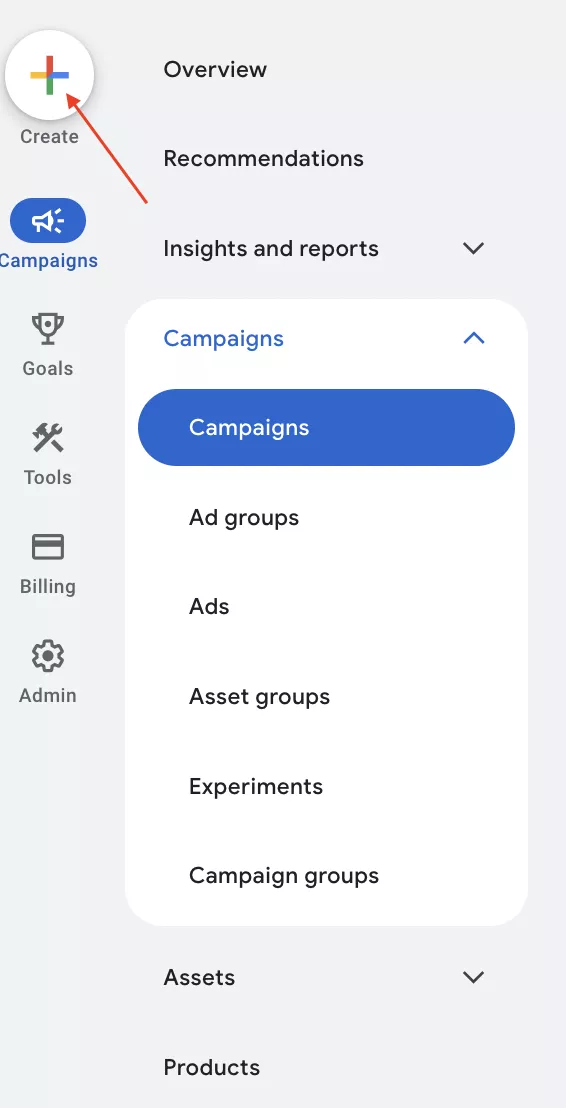
- Go to your Google Ads account and click the "+" sign in the upper left corner.
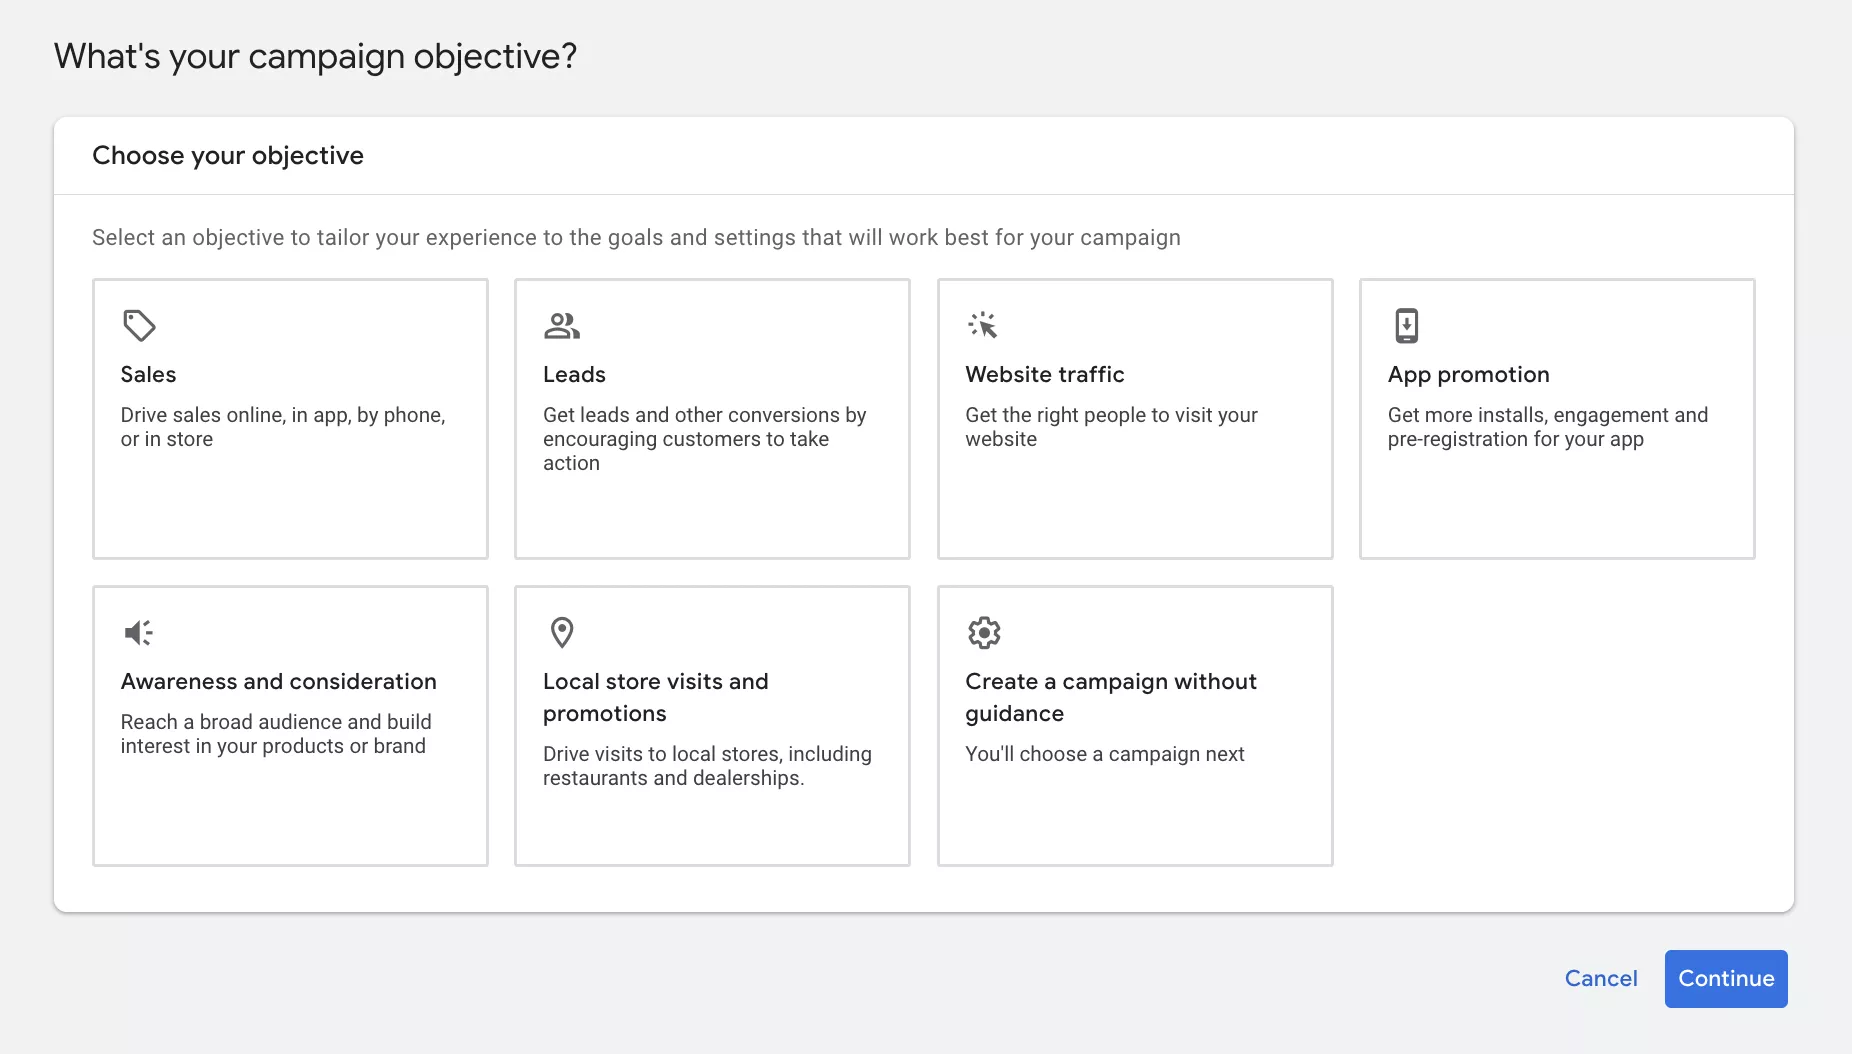
- Select the goal that best fits your ad campaign.
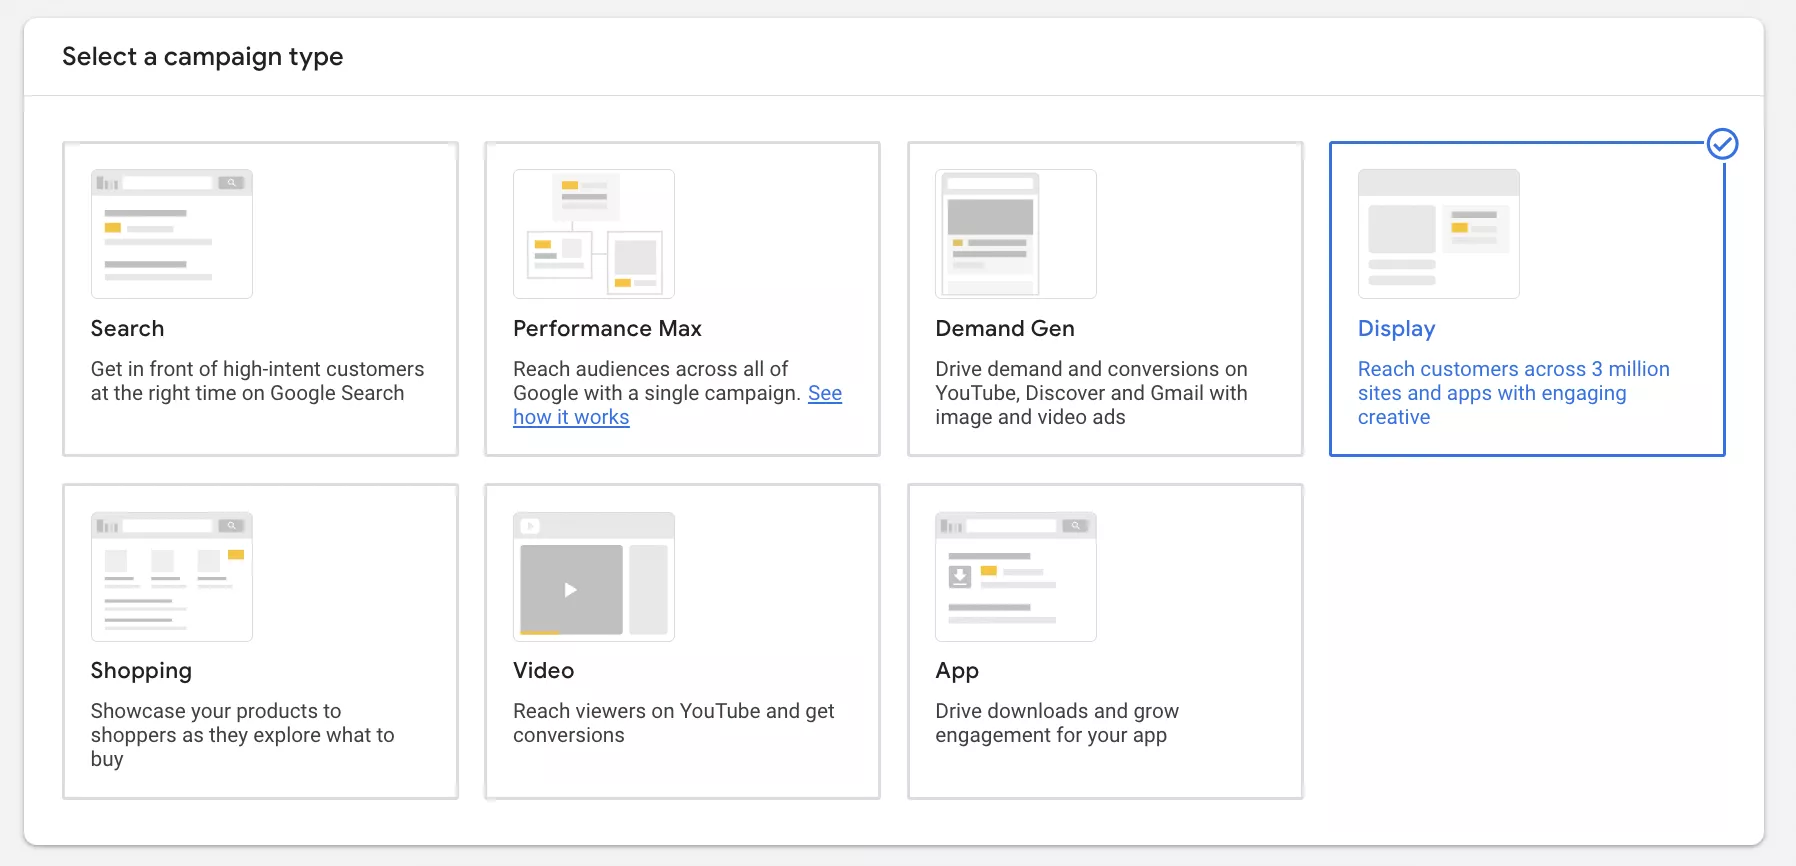
- Select Display as the campaign type.
- Select a conversion goal that matches the campaign's purpose. If the list of conversion goals includes any that do not match the purpose of the campaign, click the three-dot menu to the right of the conversion goal name and delete it.

- Enter the URL of the page you want the user to go to when they click your ad.

- Enter a name for the ad campaign and click Continue.

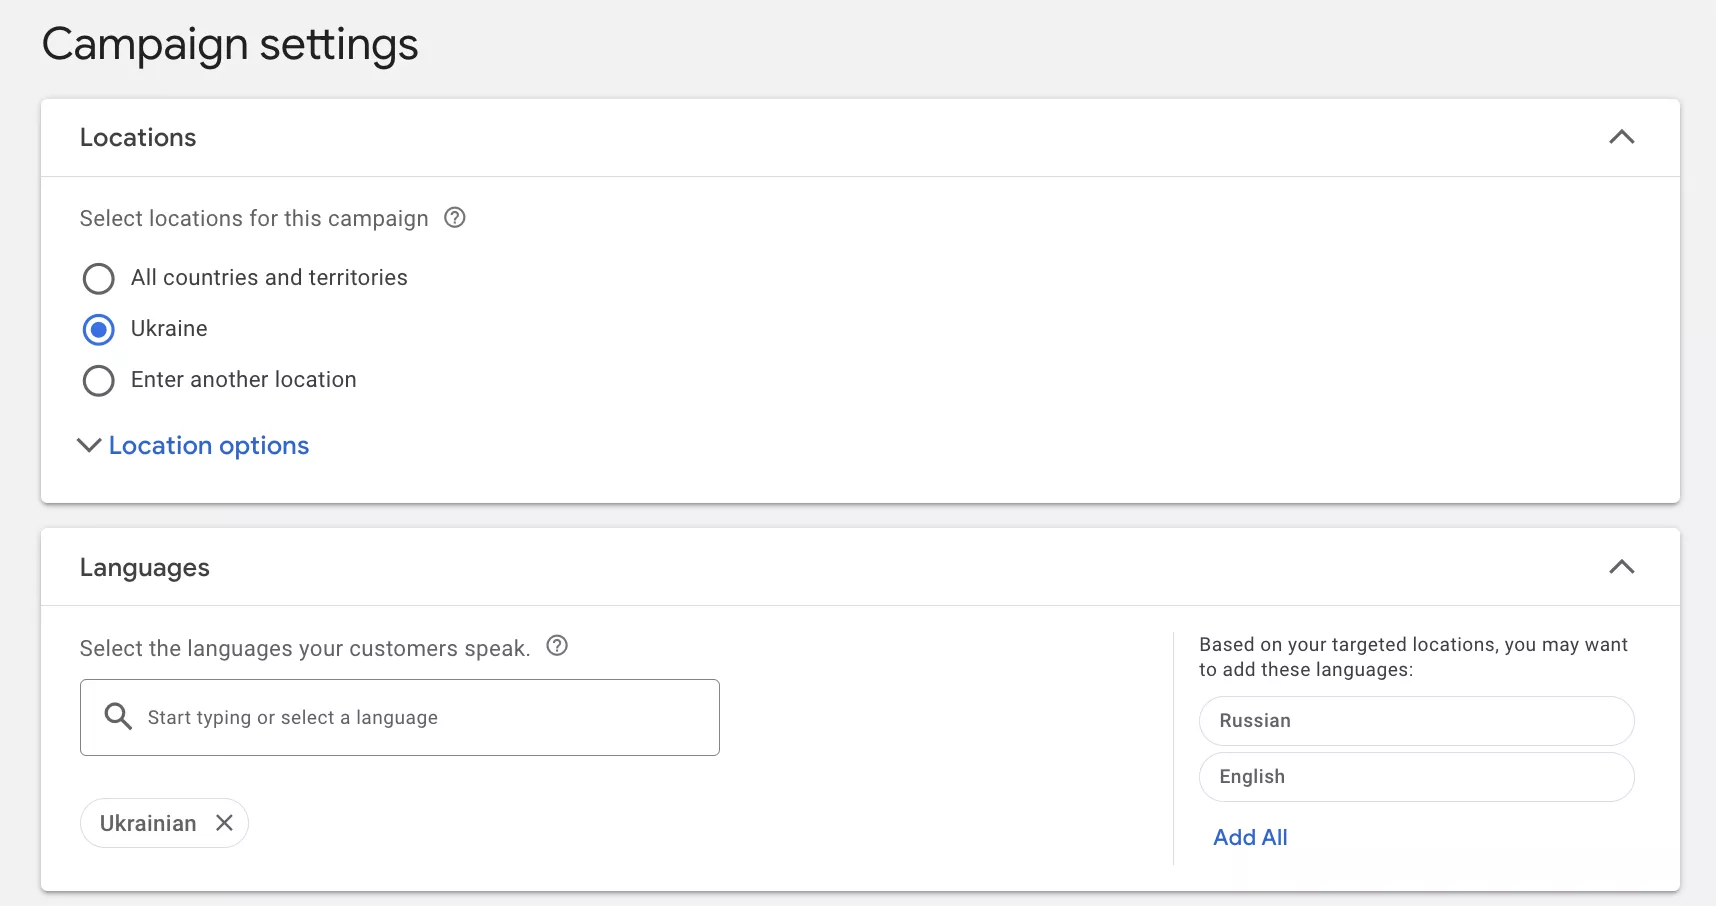
- Set up geotargeting and the browser language of your target audience.
- Select a bidding strategy and set a budget. The budget determines how often your ads are shown and how visible they are. The bidding strategy you choose decides how the campaign will spend the budget you set.
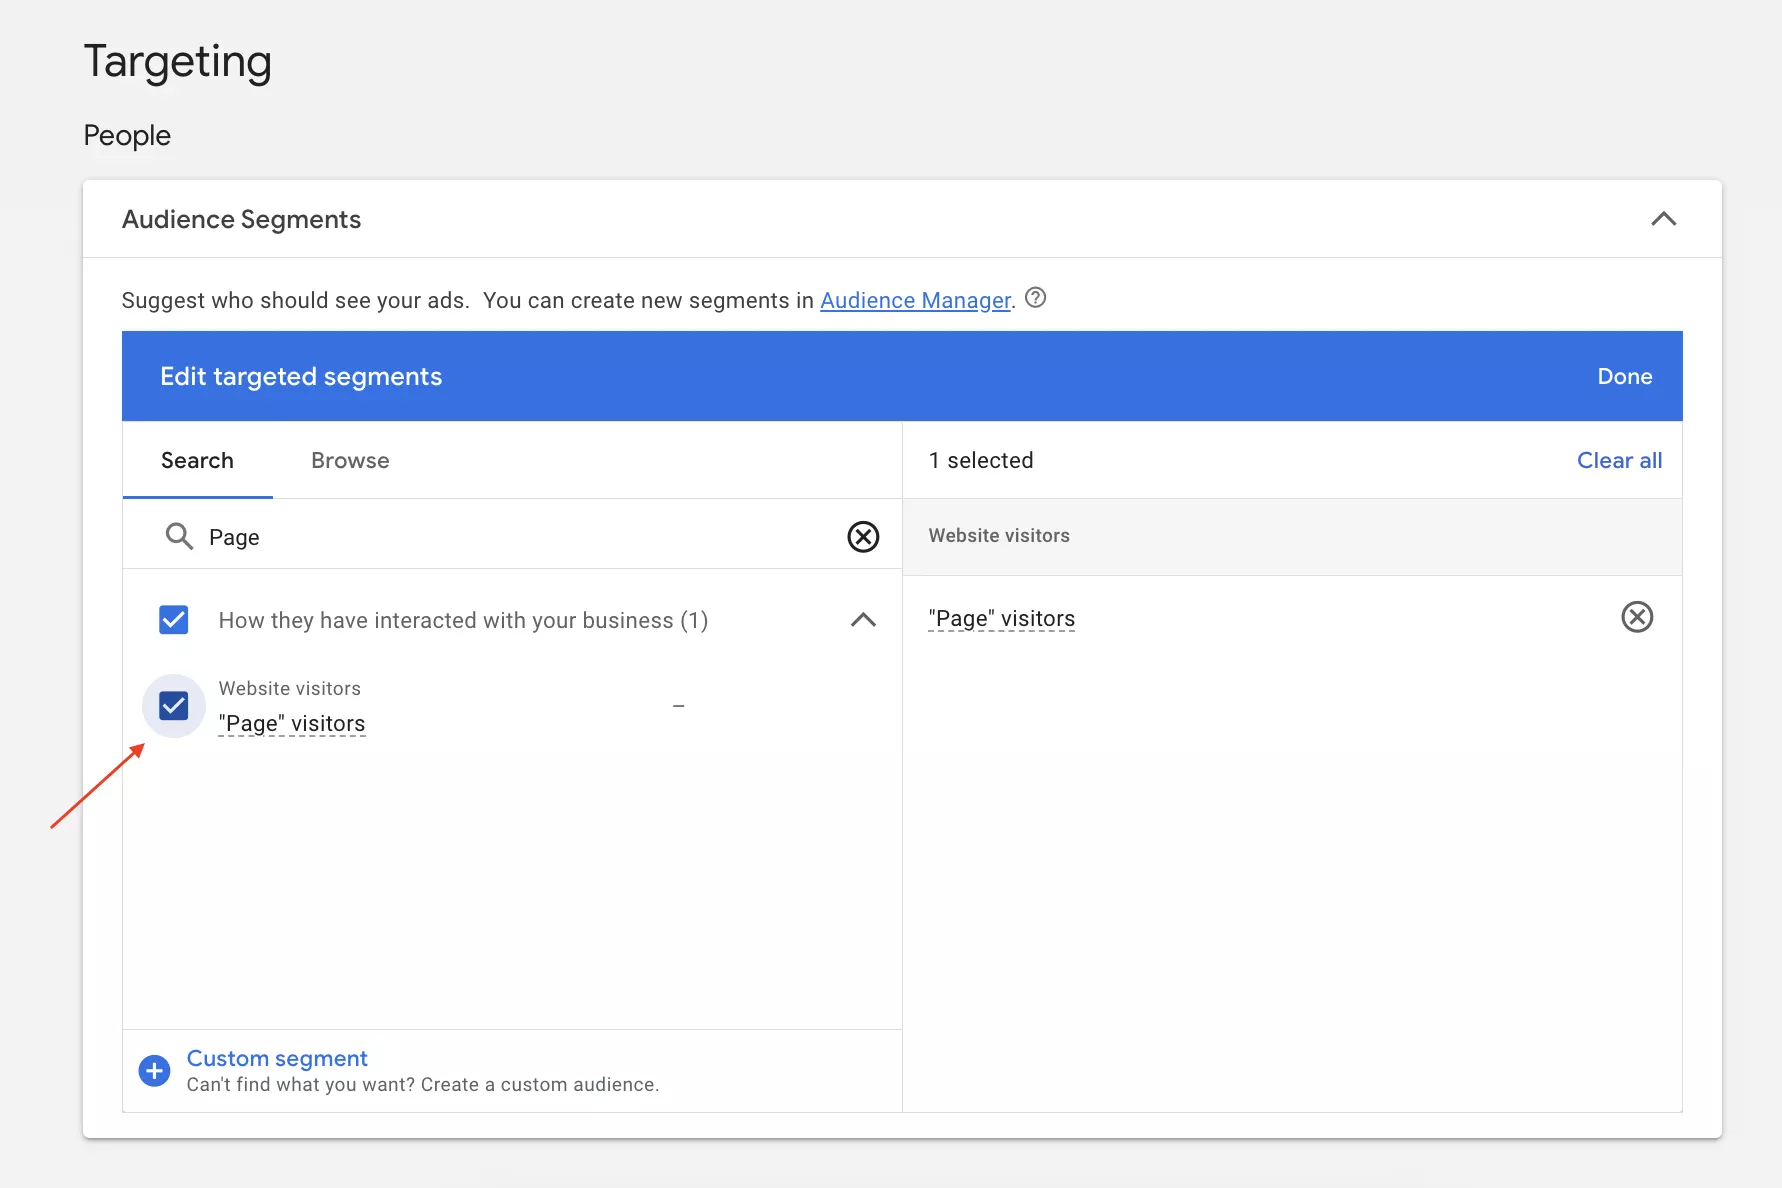
- In the Targeting section, type the name of the remarketing audience you want to use in the search box. Then select it. This way, the campaign will only target the user segment you specify.
- In the Ads step, add headlines, descriptions, and creatives to encourage users to return to your site and perform the desired action.
- In the Review step, review your campaign settings. If you need to change anything, click Edit.
- Click the Publish campaign button.
Conclusions
- Remarketing is a powerful tool for bringing back users who have not completed a targeted action on a website.
- To set up a remarketing tag, you can use the services of a developer or set it up yourself if you have basic knowledge of Google Tag Manager.
- Determine the criteria by which you will create audience lists. It could be visitors to a page with a special offer or users who added a product to their cart but didn't purchase it. It all depends on your marketing goals.
- Once you have your audience lists, you can create a display campaign. Be sure to add creatives that encourage users to return to your site and take the action you want them to take.
- When setting up the display campaign, you can specify the remarketing audience.

 1
1
 0
0
 1
1
Related Articles
Display Advertising Effectiveness Analysis: A Comprehensive Approach to Measuring Its Impact
In this article, I will explain why you shouldn’t underestimate display advertising and how to analyze its impact using Google Analytics 4
Generative Engine Optimization: What Businesses Get From Ranking in SearchGPT
Companies that master SearchGPT SEO and generative engine optimization will capture high-intent traffic from users seeking direct, authoritative answers
From Generic to Iconic: 100 Statistics on Amazon Marketing for Fashion Brands
While traditional fashion retailers were still figuring out e-commerce, one company quietly revolutionized how U.S. consumers shop for everything from workout gear to wedding dresses