Want to enrich your ad with pictures and description of your goods? Then you should definitely try Shopping campaigns. I’m going to tell you about settings required for shopping campaigns launch.
What is Google Shopping?
Advertisers resort to Shopping Ads to show goods requested by users in search results.
Key advantages of Shopping campaigns:
- a user sees a product name, price and image in the ad;
- data on product price and availability is continually updating to avoid excessive expenses on an ad and to increase customers loyalty level.
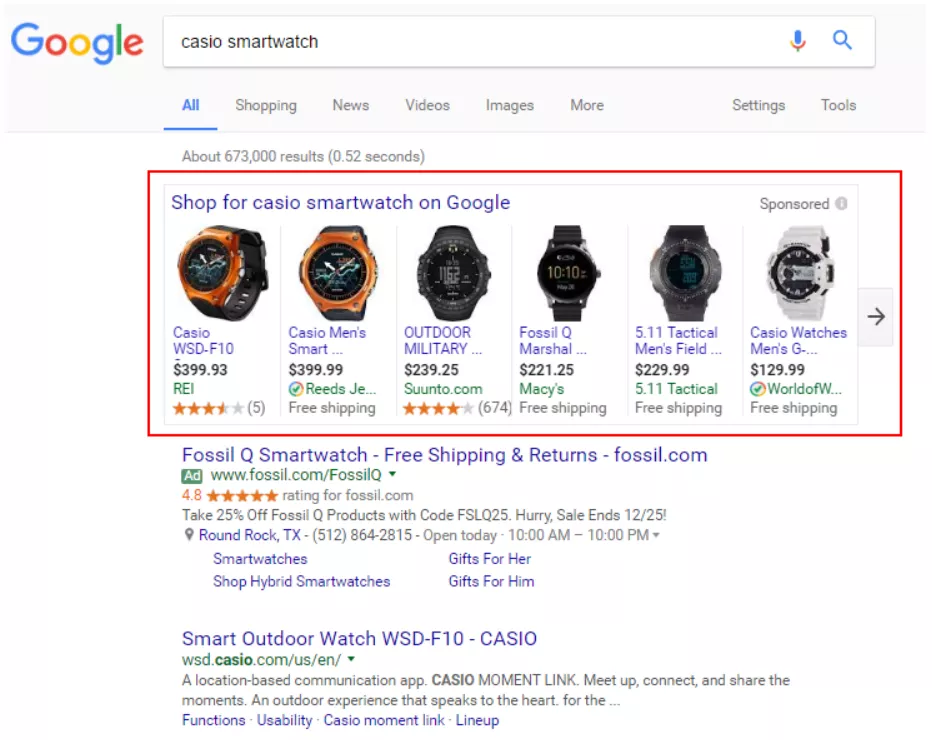
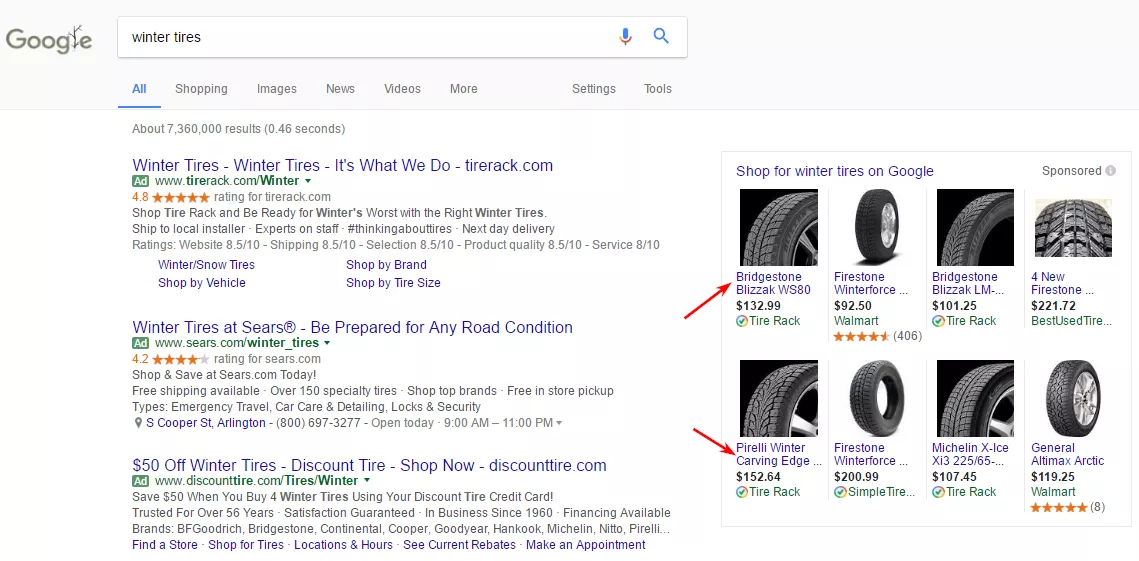
Google Shopping Ads may be shown:
- In the sidebar of the search results:
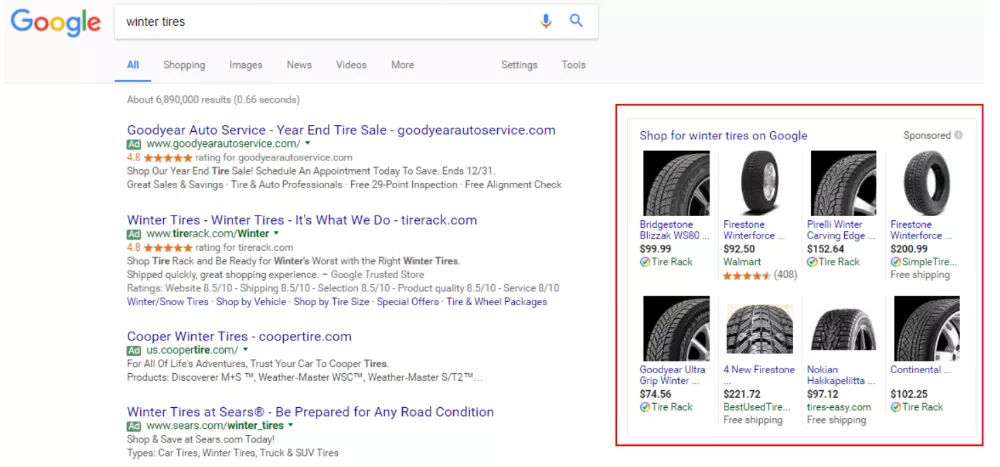
Only one product may be shown, but such format is less widespread.
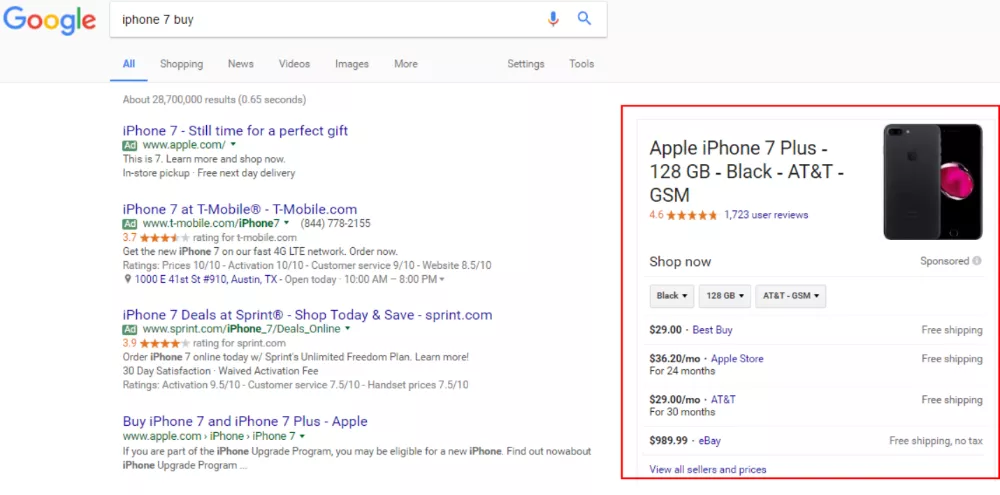
2. Above search results:
Set up advertising in Google Shopping
To start working, you need:
- Merchant Center account;
- Google account;
- Google Ads account;
- datafeed which contains all information on products.
Let’s assume that you have accounts in Google and Google Ads and proceed to registering an account in Merchant Center and creating data feed.
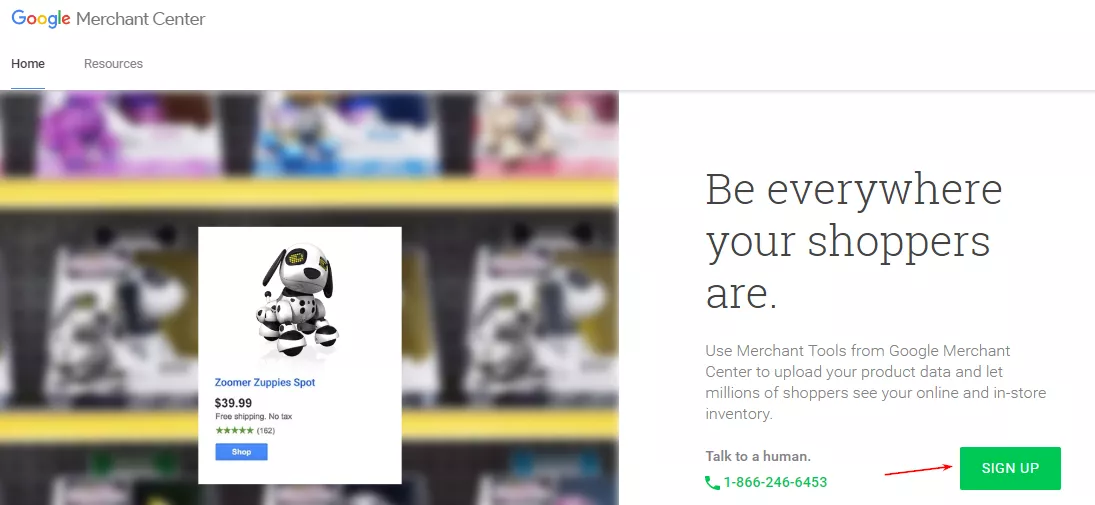
1. Create an account in Google Merchant Center
1.1. Before registration, carefully read the Merchant Center guidelines. Due to violations, a system may block either the impression of definite goods or the whole account. Pay special attention to «Secure checkout process» paragraph. Addresses of all pages which collect user personal data (shopping cart, purchase page) should start with https://. Otherwise, account will be blocked until the error is fixed.
Log in to your Google account and follow a link to sign up for Merchant Center.
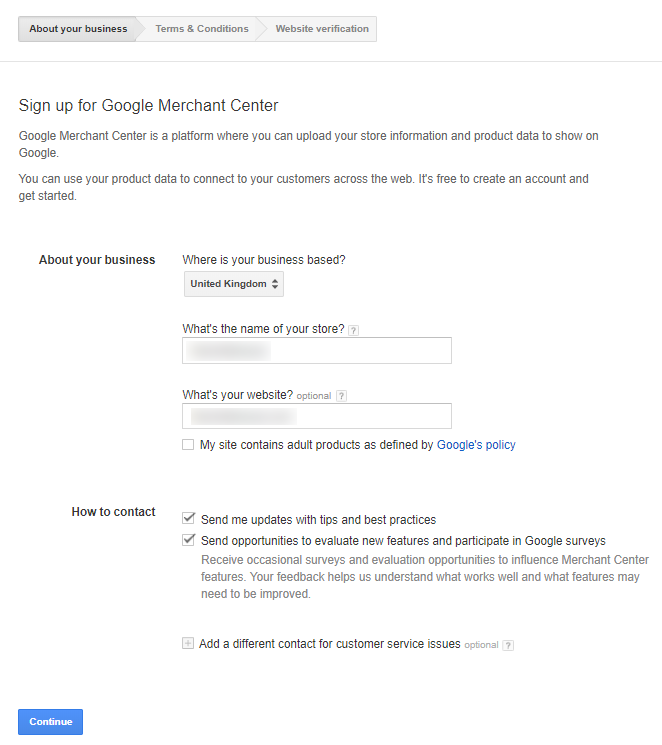
1.2. Specify main information on a store and a contact person.
Learn more on general information requirements in Google Merchant Center Help.
I’ll focus on three important points:
- when filling in a “Store name” field, specify not a legal name of your company but the store name known by customers - this data will be used in your ad.
- if you sell adult products, tick the checkbox “This site contains adult products”. If Google specialists detect that you have hidden this information, your account will be blocked.
- all data specified in Merchant Center interface can be edited later.
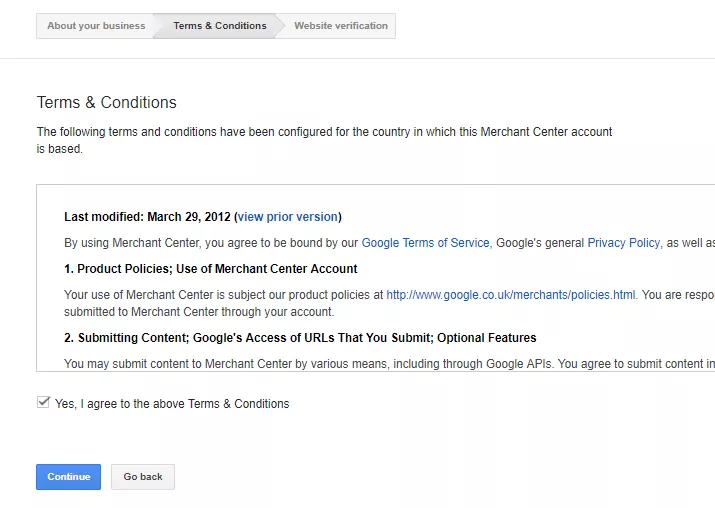
1.3. Accept Terms & Conditions.
1.4. Verify ownership of your website. But you may skip this step and specify required information after creating a Merchant Center account.
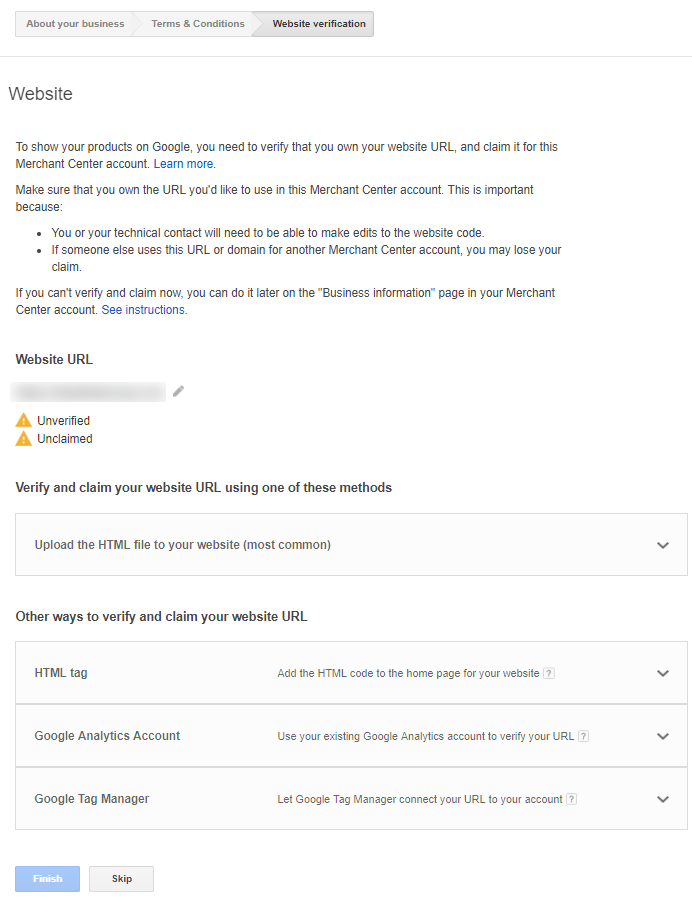
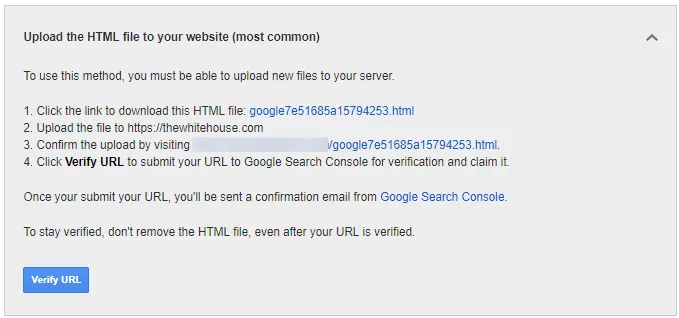
1.4.1. If you have access to the site code, just download a special HTML file and upload it to the root directory - this is how you can verify the ownership.
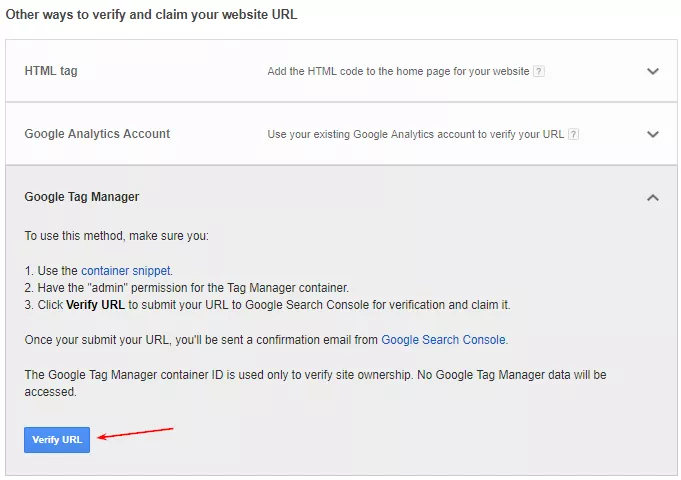
1.4.2. The second way is more appropriate for an agency specialist. If you can’t upload the code to the root directory, use Google Tag Manager.
1.5. Go to Merchant Center and learn more about an account structure.
2. Link Google Ads and Merchant Center
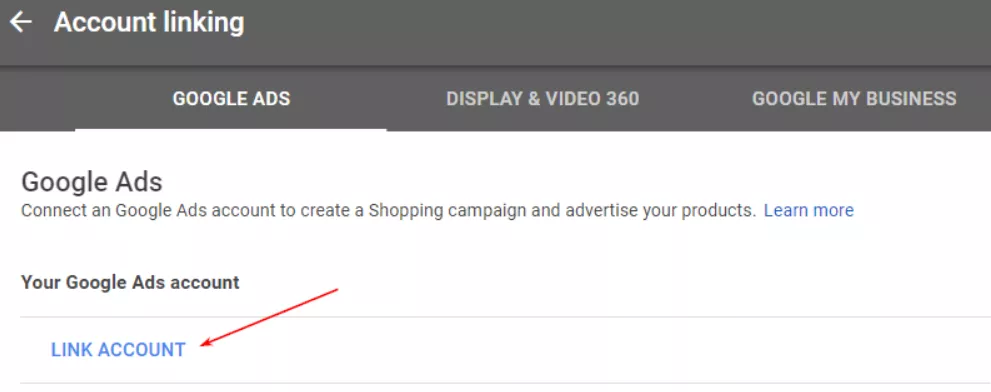
2.1. To link accounts, go to the top right corner, open a pop-up window and select «Account linking» field.

2.2. Click on «+» blue button.
Specify your Google Ads account id and click on «Send link request».
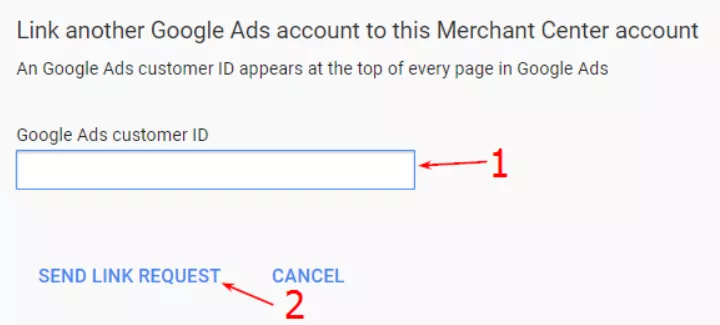
If you signed up for Merchant Center and Google Ads with the same email address, accounts will be linked automatically. Otherwise, you’ll have to verify account linking in Google Ads interface.
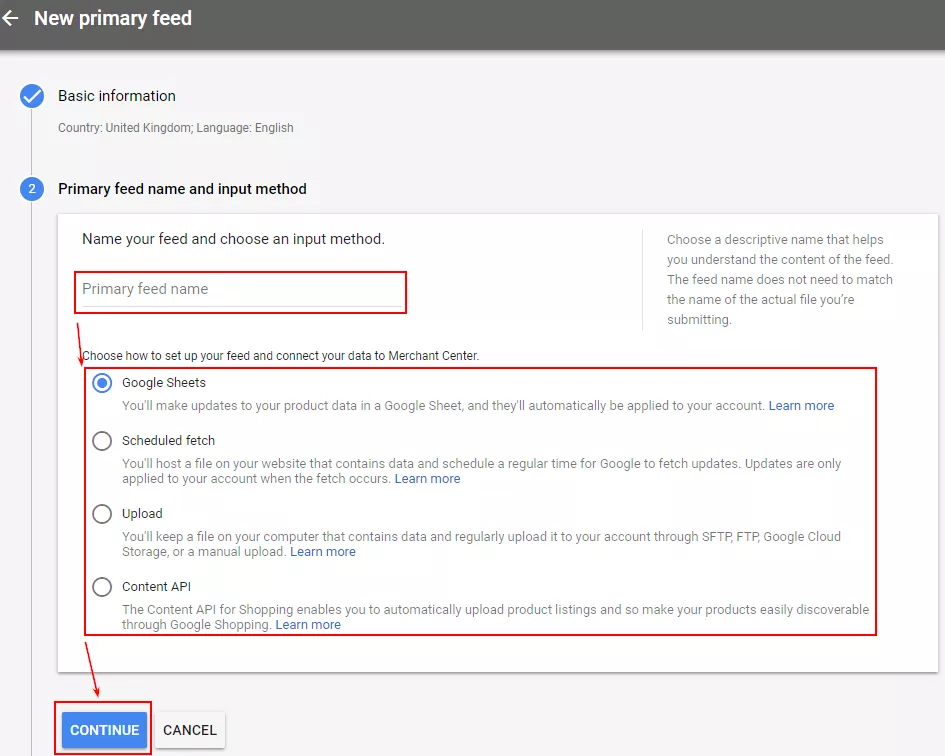
3. Create data feed
Data feed is a file which defines every product you have in a unique way. Information in this file is represented by attributes. For instance, product name is specified in title attribute, product description - in description attribute, product cost - in price attribute.
Suggested file formats for Shopping campaigns feed:
- TXT — text format;
- XML — text document with .xml extension;
- GZ — Gnu zip, compressed text or XML;
- ZIP — Zip, compressed text or XML;
- BZ2 — Bzip2, compressed text or XML.
I would like to describe some key attributes of a product catalog (full list is available here).
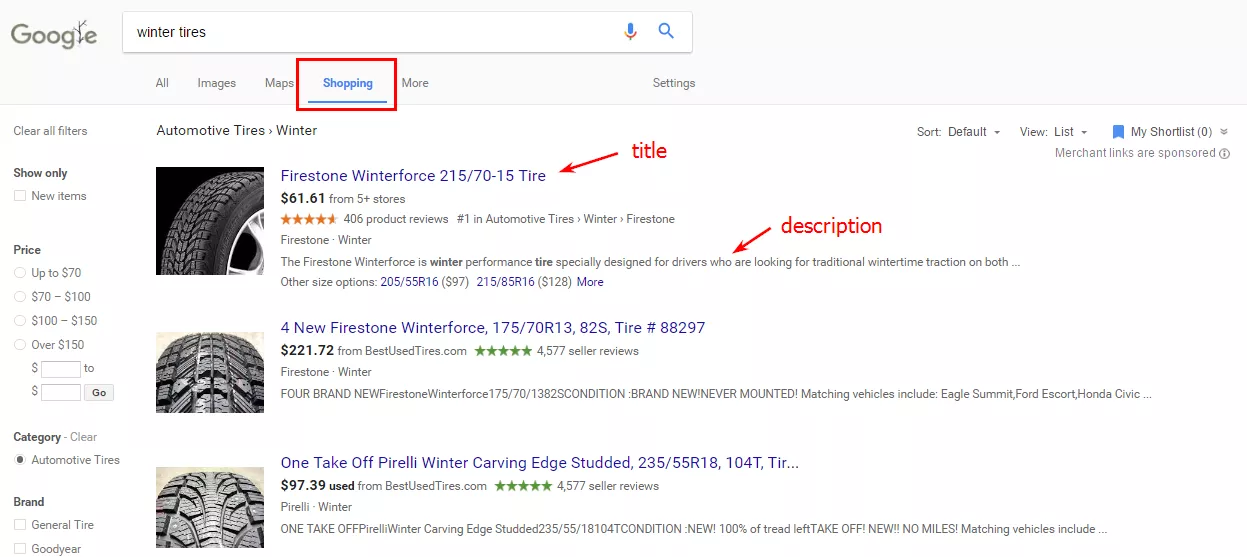
3.1. Title is a header of your ad. Specify the product’s name you want a user to see.
3.2. Description is an overview of a product, which a user will see when he clicks on your ad.
Google searches for matches with the title and description content. Therefore, the more information you provide in the description of these fields, the more impressions and clicks you may get.
For instance, you advertise tyres. Instead of writing just “Winter tyres for cars”, you may enrich your description: “Winter tyres for cars with Runflat technology and hydroplaning prevention technology, approved for Mercedes cars. New tread patterns simplify driving on snow-covered roads.” The second description will provide more impressions since it’s relevant to queries like “runflat tyres”, “tyres for mercedes”, etc.
3.3. Google_product_category — content of this attribute lets a search engine understand what products you promote and, as a result, show ads more relevantly (take attribute value from Google classification).
3.4. Product_type attribute is used to classify a product in a feed. This simplifies work with a Shopping campaign and allows to structure it at your discretion.
3.5. Custom_label_0–4 is another way to classify products in a feed. You may add up to five various tags (custom_label_0, custom_label_1 and so on). Remember that custom_label attribute may have no more than 1000 unique values. Otherwise, products won’t be added to the product groups.
3.6. Tax is a tax attribute (required for USA only).
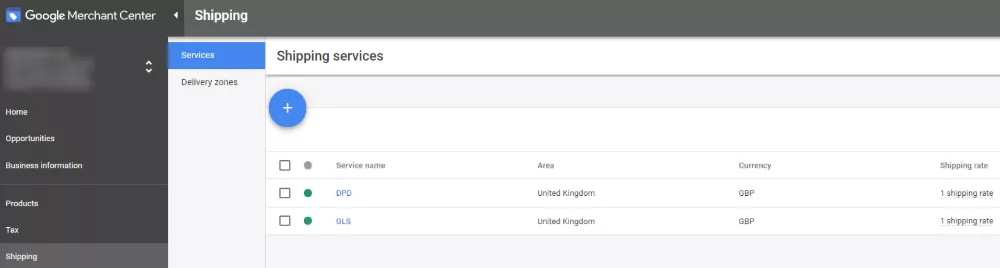
3.7. Shipping attribute provides data on products delivery. I recommend you not to use this attribute in data feed. Specify delivery services and cost in “Delivery” section of a Merchant Center account instead.
If prices on your website are frequently changeable or you often add new products, create online product inventory update feeds. Such feeds contain only five attributes:
- product id;
- price;
- product availability;
- discount price;
- discount expiry date.
This may be useful if data on price, discounts and products availability are frequently changed and you have to update just some of them. This will help to reduce the number of products disapprovals due to price mismatch between submitted price attribute and landing page. That’s crucial: account with a lot of disapproved products may be blocked.
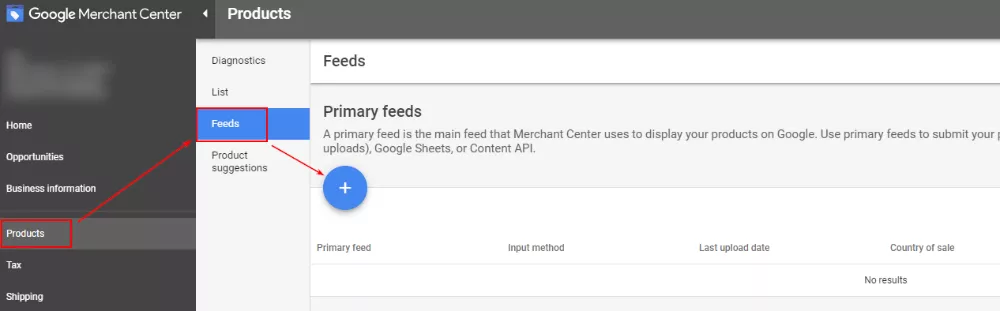
4. Upload data feed
4.1. To upload data feed, go to Merchant Center -> “Products” section -> “Feeds” tab.
4.2. Specify a country of sale, language of content in your feed and services you want to use to promote your products. If you’re going to use feed for Shopping campaigns only, disable “Display” checkbox to eliminate a possibility to use this feed for dynamic remarketing in Display Network.
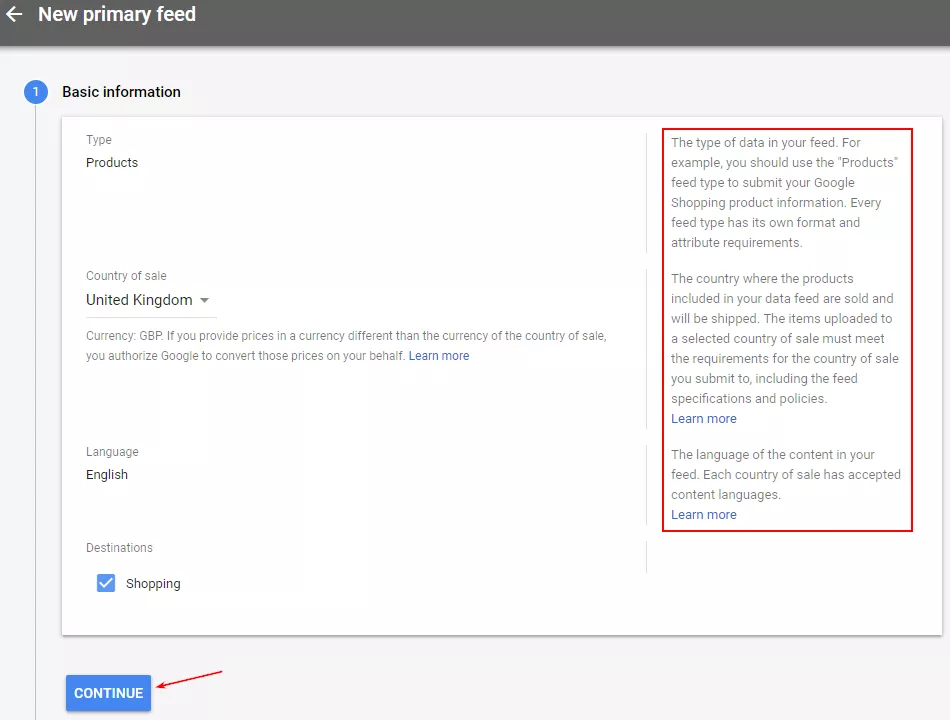
4.3. Select the source from which data will be uploaded to Merchant Center and click on “Continue”.
4.4. Set a time of feed update. Mind the time at which the information on your website is updated, so that Merchant Center can get relevant data.
Example: product information on a website is updated once a day at 4 a.m. Then feed update time in Merchant Center should be 5 a.m. (so that feed information has enough time for update).
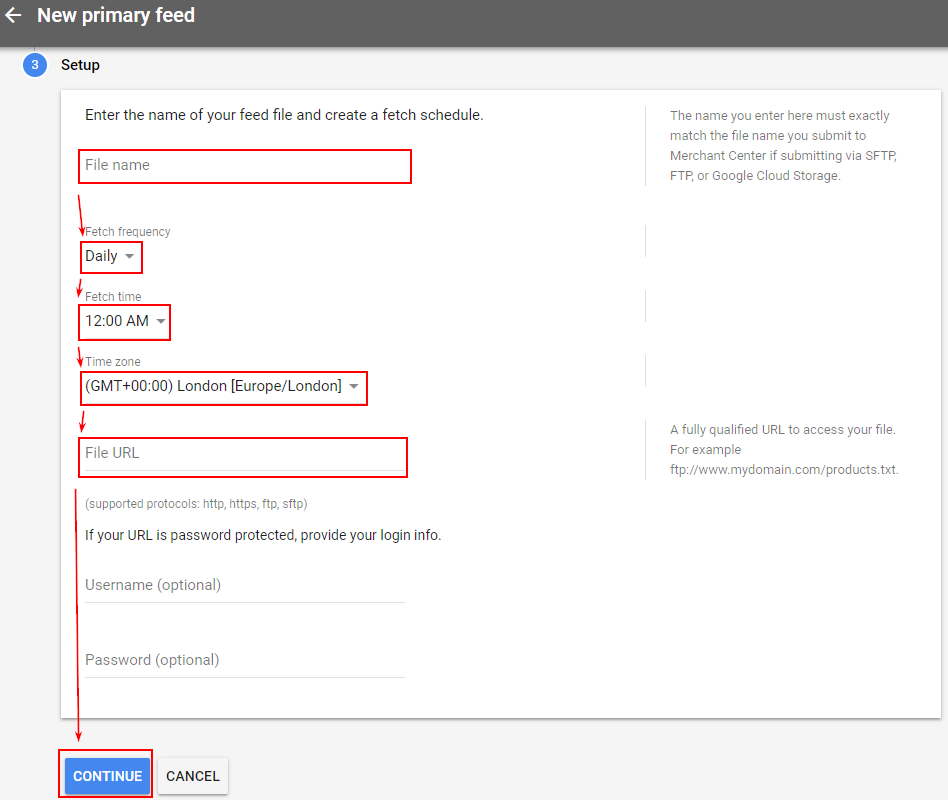
Feed processing usually takes 5-15 minutes depending on a number of products. To view feed details after upload, click on its name.
4.5. If errors occur while adding and processing a feed, they will be displayed on the “Diagnostics” tab.
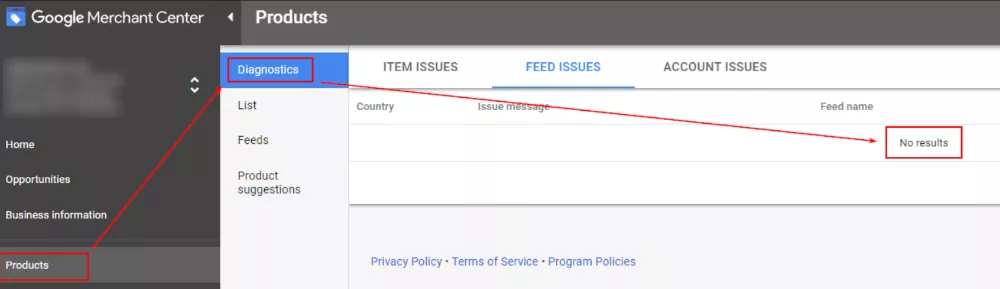
So, data feed has been updated and verified — everything is ready for creation and setup of your first Shopping campaign.
Read our article A Step-by-Step Guide to Creating a Demand Gen Campaign to learn more about advertising.
Conclusions
To launch Shopping campaigns:
- Sign up for Google Merchant Center account, link it with Google Ads and verify your ownership.
- Create data feed with a detailed information on your products.
- Upload a feed to Merchant Center and make sure that it has been successfully verified.
Using Google Shopping, you’ll be able to efficiently advertise your goods spending minimum amount of time on updating information on their price and availability.

 9
9
 3
3
 6
6
Related Articles
Banner Ads: Definition and Information
Banners on website pages and more. Let's understand display advertising and where it can be launched
What Is a Top-Level Domain?
You will receive a cheat sheet that will help you choose the right domain name and avoid making insidious mistakes. You will also learn where to buy valuable and well-known TLDs
Google Play ASO: Ultimate Guide on App Store Optimization for Android in 2024
RadASO presents the main methods of app promotion on Google Play and useful lifehacks to choose the best ASO strategy for an Android app.